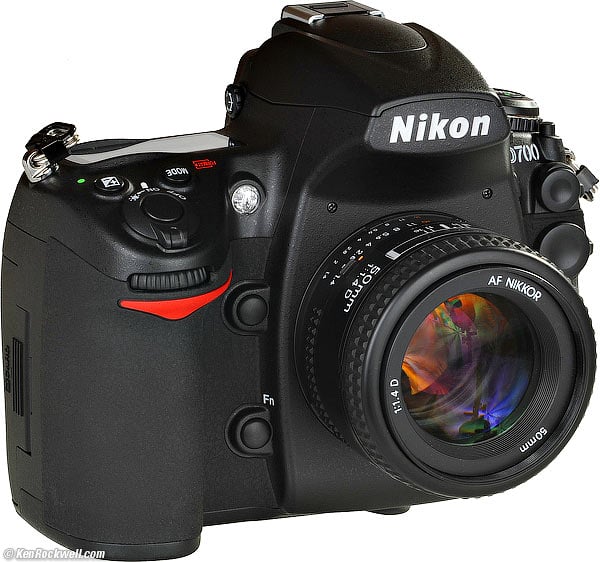
Nikon
D700 User's Guide:
Setup Menu (wrench)
© 2008 KenRockwell.com. All rights reserved.

August 2008 Top of D700 Users Guide D700 Review More Nikon Reviews
NEW: Nikon D700 User's Guide for iPhone and iPod. 12 December 2009
Want free live phone support? In the USA, call (800) NIKON-UX, 24 hours a day, 365 days a year.
How to Get Here
Select the Set Up Menu by pressing MENU, moving to the left and then up or down to select the wrench icon. You'll then see SET UP MENU on the color LCD.
What it Sets
This sets the usual housekeeping like rotation, the clock and file numbering.
What I Change
This menu contains the secret message mode I use to encode my © and contact information into every file shot with my D700.
I also read the Battery Info often. You can't change it, just read it.
Format memory card top
This duplicates the function of the two red FORMAT buttons.
I format my card every time I put it in my D700, and every time I go out shooting.
It's always best to be using a freshly formatted card.
To be safe, always reformat the card in the D700 after the D700 has been connected to any computer.
Of course formatting completely wipes any photos off your card. Be sure to have these photos transferred and backed up to at least two locations before formatting. See my Field Workflow page for more.
LCD Brightness top
This changes the midtones on the LCD. It doesn't appear to change the intensity of the backlight. It seems to be a gamma (contrast) control.
For the adjustment to take effect you must remember to hit OK after making a selection.
I leave mine at 0.
Clean image sensor top
This setting runs the self-cleaning function.
it also allows you to set it to run every time the D700 is turned off or on, just like Canon. I wouldn't do this, since it wastes a lot of time.
Lock mirror up for cleaning top
This setting is for mechanical cleaning. Don't ever touch the sensor with sensor swabs or any of that crap!
I clean my cameras with a vacuum, and send them in to Nikon after a few years if the dirt gets really bad.
Video Mode top
This sets the format of the analog video output.
Use NTSC (525 lines, 59.94Hz) in the Americas and Japan, and PAL (625 lines, 50Hz) in Europe.
This output will always look much worse on a TV or projector than images do on a computer or projected through a computer. Read Why Images Look Awful from the Video Output for more.
HDMI top
This sets the format of the HDMI digital TV output. I leave it on Auto, and unlike the crappy analog video output, it looks fantastic on a big HDTV.
World Time top
This is where you set the date and time.
There is a nice map for finding time zones. You can swap among time zones without having to reset the seconds, a boon for me who keeps his D700 set to the exact second.
Language top
This sets English or other languages.
Set yours to Swedish and see if you can navigate back to English. Fun!
Unfortunately Nikon figured this out, and if you do, the Language option, which before was only listed as Språk in Swedish, also is listed as (Language) in every language mode, even Korean.
Image Comment top
This lets you add a secret text message into every file. Mine is set to (c) KenRockwell.com with my phone number! You see this text looking at the EXIF data in software on a computer. Sadly Nikon provides no real © symbol.
You set this by going to MENU > Set Up Menu > Image Comment > Input Comment > (add your message like you did on 1970s video games) > Enter. You must hit ENTER or it will forget everything you just did!
To edit or remove a character, select it in the Input Comment screen by holding the checkerboard button and clicking the big thumb selector. Select a new character with the same selector and press the center of the selector to add it. Press the Trash button to delete a character.
When you get your text message spelled out, go to Attach Comment and hit SET so a small checkmark shows. Now go to and select DONE. If you forget to check Attach it won't attach, and if you forget to hit DONE it will also forget everything you just did. Sorry, I don't write the firmware.
It's great having everything you shoot have your contact info embedded. It also allows you to prove ownership in a third-world country when catching a thief with your camera. Help the cop go through the menus and read your personal ID information.
See also Copyright information below.
Auto Image Rotation top
This sets a flag in vertical images which keys most software to display the image vertically.
It does not actually rotate the images; it just sets a flag. Someday the camera's firmware will work properly and rotate the image itself, but no camera does this yet.
I rotate the images later in iView.
Dust Off Ref Photo top
This is used to take a picture of the dust on your sensor. If you pay Nikon another $100 for Nikon Capture software you can use this to erase the dust more easily from your images shot in raw. You people know who you are. I don't do this!
I've made 40,000 shots on my D3 and have little problem with dust. Thankfully the D700 sensor has a filter far enough removed from the imaging surface to throw dust sufficiently out of focus.
Battery Info top
I use this all the time.
Bat. Meter reads the battery charge to the nearest one percent. This is the same battery data shown on the top LCD display, but the top gauge only has 5 bars to read to the nearest 20%.
Pic. Meter shows how many images have been shot on this charge.
Charging life shows the battery's health. A new one reads 0 and an almost dead one reads 4.
I've made 24,000 shots on my D200 by alternating between two batteries, and they both still show "new." The trick is not to run them all the way down before charging. Read Getting Great Battery Life to see how I do it.
Wireless transmitter top
This is for people using the corny Nikon WT-4 data transmitter.
Image Authentication top
This is for people using Nikon's $500 Image Authentication software. to try to prove that resulting image files haven't been twiddled with. It slows things down, so don't use this unless you're using the D700 for evidence.
Copyright information top
This, like Image comment, lets you add even more information in the EXIF data.
I use this feature to add my website, email and second phone number to each file.
Even though everything shot by an American photographer is © the moment it's created, you can't really get into a courthouse to do anything about it unless you've also formally registered it. This article and entire website are formally registered with the US Copyright Office, as I suggest you do for all your work as well.
When your work is registered, you will receive a formal written Certificate of Registration with your copyright registration number. Without that, good luck in court. Infringers know few photographers bother.
Save/load settings top
This lets you save almost all your D700 settings to your CF card.
One there, you can save to your Mac, and put them back on a card later, and restore yourself into another D700, or your own D700 after lent to a friend.
GPS top
This lets you make the meter stay on all the time if you wish.
Virtual Horizon top
Not as handy as doing it in the finder with the FUNC button, this lets you call it up on the rear LCD.
It's only a part of a real virtual horizon. Nikon still has no pitch (up/down) information. It only shows roll (left/right tilt).
Non-CPU (Manual Focus) Lens Data top
This is how you get color Matrix metering, automatic exposure and EXIF data compatibility with old AI manual focus lenses.
You enter the focal length and f/stop via this menu. You also get aperture data in the finder and can use manual and Aperture priority exposure.
Trick: You can set the FUNCTION button to select among different lenses without needing a menu as explained here.
AF fine tune top
If you can't figure this out on your own and have to read directions for this over the Internet, do not try this at home. You will probably make things worse.
Older AF systems often had offsets with some samples of lenses. Offsets meant a constant focus error, often called "front focus" or "back focus" by laypeople.
The D700 rarely has any problems with this, unlike earlier cameras which may have needed this adjustment, but didn't have it.
If your pictures aren't sharp, 99 times out of 100 its because you, not the camera, are doing something wrong. For instance, most sports shots are out of focus because people don't know how to set the AF system properly.
before you stat screwing with this, which should not have been made a user adjustment, read How to Fix Unsharp Images in its entirety.
If you still see a consistent offset (10 shots out of 10, not just one shot here and there), then feel free to adjust this. Its obvious to those with the skill required to use it properly.
Because of this, I'm not going to explain it. Keep your cotton-picking fingers off of this unless you really know what you're doing.
If you do know what you're doing, you need to look at the results on a big computer screen at 100%. The D700 is excellent, but can't show enough of the image big enough to let any of us see enough with enough precision to see the results of this adjustment.
If you do know what you're doing, it's sad to report that this adjustment isn't smart enough to be able to adjust lenses at different distances (like adjust at infinity, 30 feet, 10 feet and three feet) or at different zoom settings. Lenses need different adjustments as these two variable change.
If you attempt this tweak, you must make and compare at least ten shots at a time. The D700 AF system isn't repeatable in the precision at which you'll be looking, so you need to make multiple shots at each setting and average what you see. Simply taking a few shots and seeing what happens will undoubtedly lead you to making the wrong adjustments, or more fun, lead you to early insanity because you'll be attempting to quantify variations which are random shot-to-shot variation.
For instance, I did borrow a 28-70mm f/2.8 which needed adjustment at the long end, but not the short end. I adjusted it at 70mm, and it wasn't quite as good at 28mm anymore because it was fine at 28mm to begin with.
Firmware Version top
This lets you confirm if your camera is up-to-date with Nikons' free firmware updates.
As of August 2008, the D700 sitting in front of me reads A 1.00 and B 1.00.
My D700 User's Guide continues below.
I support my growing family through this website.
This guide is free to read online, but copyrighted and formally registered. If you haven't helped yet and would like to save or make a printed copy of this article for your camera bag, please send me $5.00 for each complete or partial copy that you print or save, for personal use only. Others charge $29.99 for crappier information, and with your honesty I can continue to offer these guides online for less.
If you bought your D700 by clicking through my links, then you've saved money and also helped me write this guide. Thank you and please enjoy it. It's great people like you, and those who help me otherwise, who allow me to keep adding to this site for everyone's benefit.
The biggest help is to use these links to Adorama, Amazon, B&H, Ritz and J&R when you get your goodies. It saves you money and is a huge help to me. These places have the best prices and service, which is why I've used them since before this website existed. I recommend them all personally.
Thanks for reading!
Ken
Back to Top of D700 User's Guide or Top of Nikon D700 Review
KNOBS and BUTTONS
MENUS
RETOUCH MENU < < NEXT