Home Donate New Search Gallery Reviews How-To Books Links Workshops About Contact
Canon
6D Users Guide
© 2013 KenRockwell.com. All rights reserved.


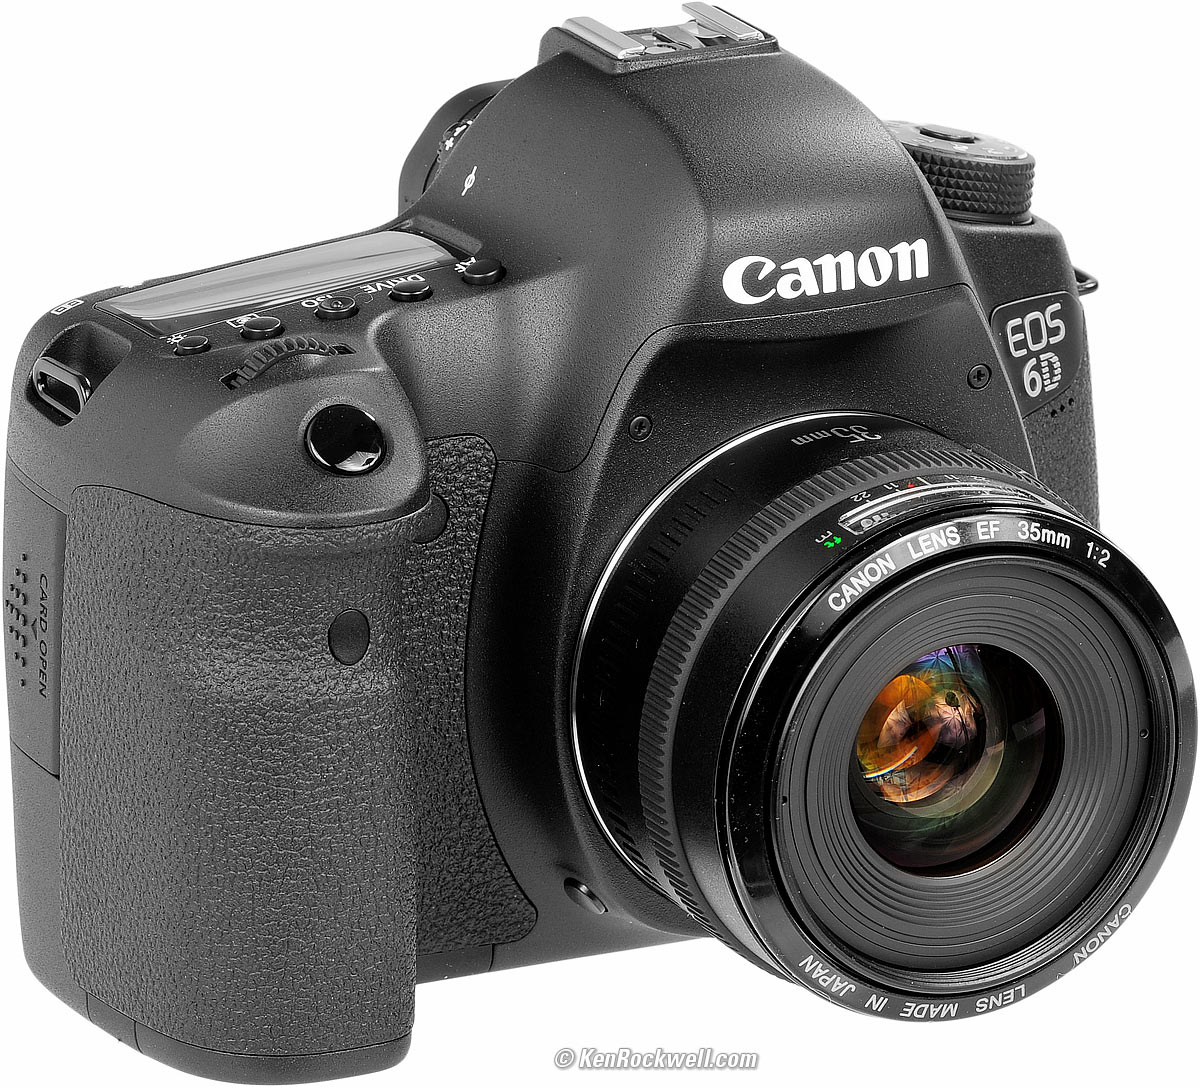
Canon 6D (33.5 oz./950g, about $2,000) and Canon EF 35mm f/2. enlarge. My biggest source of support is when you use any of these links, especially this link directly to it at Adorama (or kit with lens) or directly to it at Amazon (or kit with lens) when you get anything, regardless of the country in which you live. Thank you! Ken.
March 2013 Canon 6D Review Canon Reviews Other reviews
Canon 6D Lens Recommendations (same as for 5D Mark III)
Front controls Top controls Rear controls
Help me help you top

|
I support my growing family through this free website, as crazy as it might seem.
The biggest help is when you use any of these links when you get anything, regardless of the country in which you live. It costs you nothing, and is this site's, and thus my family's, biggest source of support. These places have the best prices and service, which is why I've used them long before this website ever existed. I recommend them all personally.
If you find this page as helpful as a book you might have had to buy or a workshop you may have had to take, feel free to help me continue helping everyone.
If you've gotten your gear through one of my links or helped otherwise, you're family. It's great people like you who allow me to keep adding to this site full-time. Thanks!
If you haven't helped yet, please do, and consider helping me with a gift of $5.00.
As this page is copyrighted and formally registered, it is unlawful to make copies, especially in the form of printouts for personal use. If you wish to make a printout for personal use here from your browser, you are granted one-time permission only if you PayPal me $5.00 per printout or part thereof.
Thank you for reading!
Mr. & Mrs. Ken Rockwell, Ryan and Katie.
Introduction top
Want free live phone support? In the USA, call (800) OK-CANON.
Looking for a specific control? Use my Search page. Be sure to mention the 6D in your search.
This is a simple, plain-English guide to how I use my 6D. If you want all the excruciating details, refer also to Canon's 6D user's manual.
This lengthy article will teach you to be an expert on the Canon 6D's controls and menus. It also includes a lot of tips, tricks, and the settings I prefer to use.
To get great photos you still need to get yourself to the right place at the right time and point the camera in the right direction, which is a lot harder than mastering the 6D. Right out of the box at default settings, the 6D does a great job all by itself. Making a great photo involves timing, FARTing, knowing the critical basics of what makes a great photo and a whole lot more. I cover this more important stuff here.
If you really want to take great pictures, this guide won't help you — it just will teach you how to operate a camera. Just as I can write an article to teach you how to play a piano (it's just pressing the right keys and pedals), your ability actually to play a piano is an entirely different subject.
For great pictures, just like playing the piano, you need to master the art underlying all this. To learn the art behind great photos, the best book ever written is Bruce Barnbaum's "The Art of Photography." If you read it, understand it and learn from it, you'll be able to take great pictures with any camera, but if you don't understand the critical art required, you'll only get good photos occasionally by chance.
This guide, if you read it all, will make you a whiz at the Canon 6D so you'll be able to concentrate on your pictures, instead of worrying about your camera, which is the biggest step forward you can take to making better pictures.
If you don't have time to read everything now, here are links to some of my favorite tricks and hidden features:
Using the incredible C1 and C2 camera memories
Setting resolution and file type
Setting all the knobs and buttons to do what you want
Adding your personal and copyright information into every file
Setting manual ISO in full stops
Preventing annoying white AF-assist preflashes, but letting infra-red AF assist beams work
Using the flash's AF beam without firing the flash
Calling up the electronic level (press INFO twice)
Seeing everything about the battery's charge
Checking and update your firmware
There is no built-in flash.
For people shots, I usually use a Canon 220EX for fill-flash.
Front Controls top
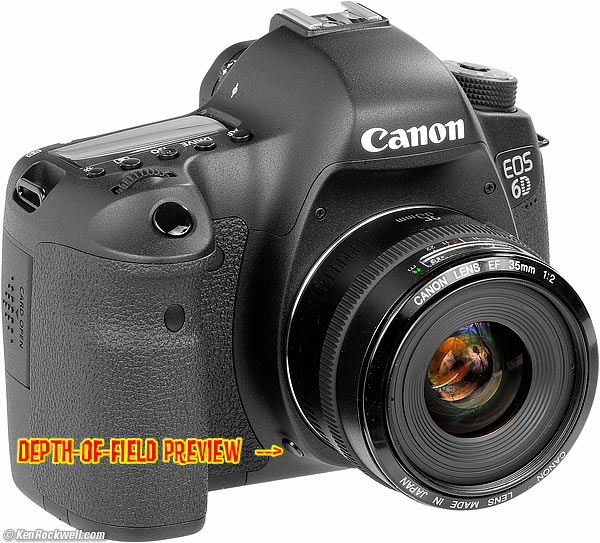
Canon 6D depth-of-field preview button. enlarge.
Press this button to preview what will actually be in focus. The viewfinder will probably get much darker when you do.
You can program this button to do other things in the C.Fn. menu.
Lens release button
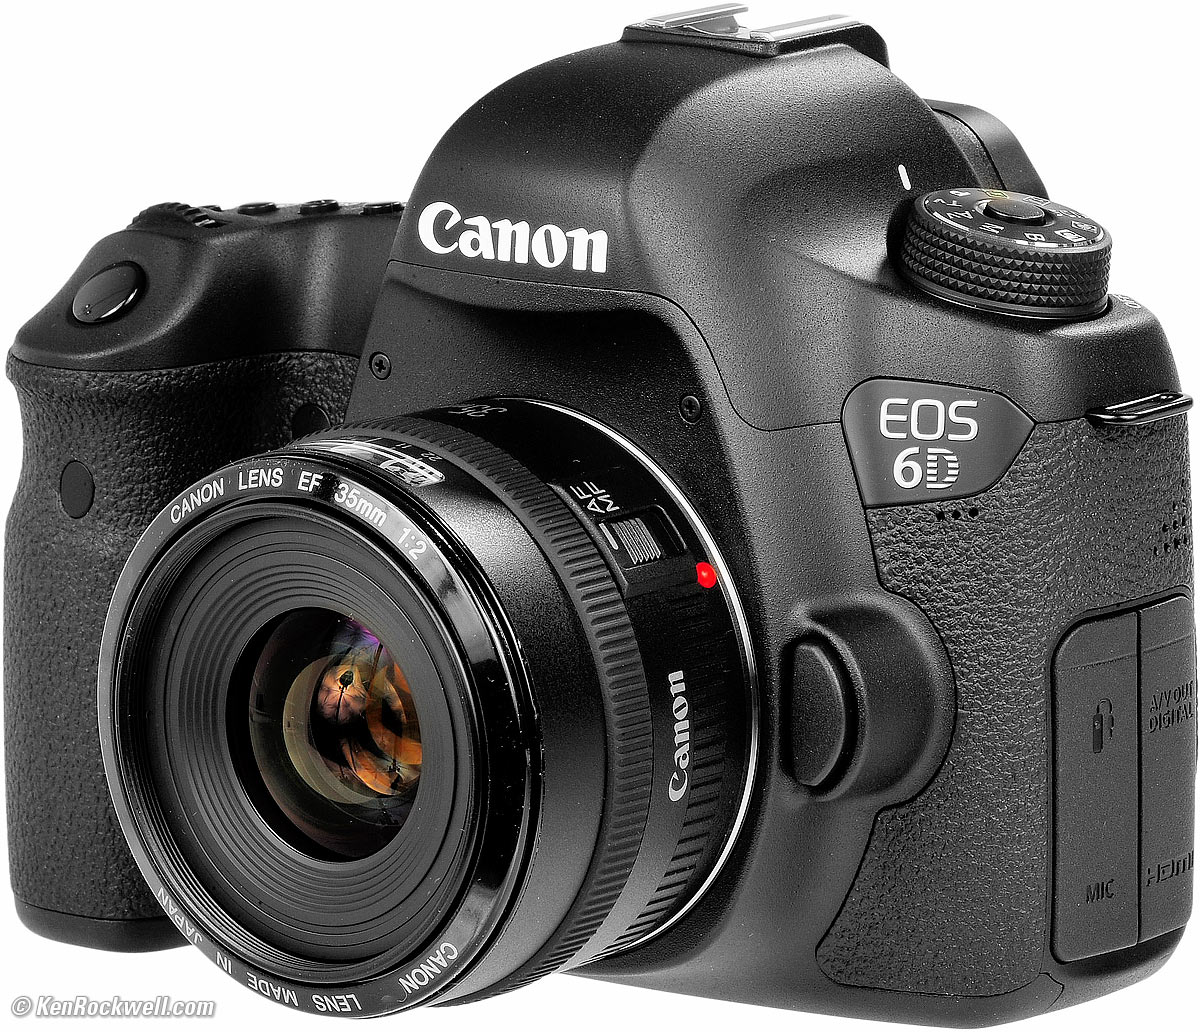
Canon 6D lens release button. enlarge.
To remove a lens, press the lens release button and twist the body of the lens until the red dot is on top. Now pull the lens straight out.
To attach a lens, line-up the lens' red dot to the red dot on the front of the top of the lens mount, push it straight in, and twist so the red dot is as shown above. You'll hear a click, and your lens is locked-in.
Top Controls top
Most of these adjustments can also be made with even more detail in the MENUs or with the QUICK [ Q ] CONTROL SCREEN.
Here is how I set up my 6D:

Top, Canon 6D and Canon EF 35mm f/2. enlarge
The power switch is on top, a new place not familiar to old-time Canon shooters.
I always leave mine on. Even wehen left on for a month, the batteries are not drained.
THe only time I turn mine to OFF it when I put it in a bag where the shutter or other buttons might get knocked and turn it on by accident. I look at the power switch more like a rifle's safety than a power saver.
If you use the GPS (I don't), try it and see if the GPS will run down your battery if left at ON. It just might if the GPS continues to take readings, or you have it set to log a track. With the GPS off, there is no more drain between the ON and OFF positions so long as you don't hit anything.
Exposure Mode (Top left knob) top
Top, Canon 6D and Canon EF 35mm f/2. enlarge.
Canon 6D exposure mode dial. enlarge.
I shoot with the top mode dial in P as shown, Program Exposure mode.
In this mode, the 6D picks the perfect combination of aperture and shutter speed all by itself, and if you want to change them, all you need to do is move the front dial, and the 6D magically selects different combinations that still give the same exposure.
In Program, also called Professional, mode, there's no need for other modes since turning the top front dial gets you right to whatever other aperture or shutter speed you might want with a minimum of fuss. Done.
Some of the menu options explained throughout this guide are deactivated in anything other than the P, Tv and Av modes.
I never use the AUTO, [CA], EFFECTS, SCN, or other fluff modes. I usually only use P mode, and rarely the Av (you pick the aperture manually) or Tv (you pick the shutter speed manually) or M (manual settings) modes.
Actually, I set it up as shown in the P mode, and then program these into the C1 and C2 memory recall settings. I rarely use the Tv, Av or M modes; I use the P mode and then program that into the C1 and C2 memories as explained later in the menus. Therefore my dial is almost always as C1 or C2, but you'll have to make the settings as shown below first before you can program them into the C1 or C2 positions.
Canon 6D and Canon EF 35mm f/2. enlarge
The top, or front, dial sets many things.
While shooting, it alters the exposure program (in P) or the aperture (Av mode), or the shutter speed (M or Tv modes).
While playing, it usually jumps ahead or behind by 10 frames. You can set this in the playback menu.
While zoomed in playback, it changes the zoom magnification.
AF MODE top
AF Mode Button. enlarge
I cover all the autofocus settings at Canon 6D Autofocus Settings.
DRIVE top
AF Mode Button. enlarge
DRIVE sets whether the 6D shoots continuously or not, and sets the self timer and remote control options.
Press DRIVE and move the top dial. The settings are:
Rectangle
One shot at a time.
This is best for careful still shots.
Bearded Rectangle
Shoots continuously as long as the shutter is held down.
This is best for sports and action.
Rectangle S
Silent mode, one shot at a time.
This is great for shooting where you want to be quiet, it really does quiet the 6D with very little speed penalty.
Bearded Rectangle S
Silent mode, shoots continuously as long as the shutter is held down.
Remote and Clock
This sets the 10 second self timer.
It's also the mode to make your 6D responsive to a wireless remote.
Remote and Clock 2
This sets the 2 second self timer.
It also makes your 6D responsive to a wireless remote.
ISO (sensitivity to light) top
ISO Button. enlarge.
ISO, pronounced "eye ess oh," sets the 6D's sensitivity to light. 100 is normal, and 6,400 or higher is much more sensitive for very low light.
To adjust these, press ISO and turn the top dial.
I use Auto ISO (A), which lets the 6D set itself perfectly in any light.
AUTO ISO can be set in much more detail in the menus. The only thing we set with this button is if we're using AUTO ISO or setting a fixed ISO value.
Metering top
Metering Mode Button. enlarge.
I leave this alone.
The choices are:
Rectangle with dot and circle
Leave it here, in EVALUATIVE metering.
In Evaluative metering, the 6D does all it can to give the best exposures it can. It looks all over the frame, tries to figure out what is your subject, and makes its best evaluation of what the exposure should be.
I never take my cameras off Evaluative. The modes below remain mostly for historical reasons, and because some people are more comfortable with them.
Rectangle with circle only
This is the older PARTIAL metering mode from the 1970s.
In Partial, the meter measures mostly from the central area of the finder.
Rectangle with dot only
This is SPOT mode from the 1980s.
In Spot mode, the meter only measures from the selected AF spot.
Spot metering is very difficult to use properly.
Rectangle only
This is the AVERAGE mode from the 1960s.
In Average mode, the meter takes the entire frame into consideration, without applying any of the clever intelligence it does in EVALUATIVE.
LCD Dial Light top
Metering Mode Button. enlarge.
This one's easy: tap it and the 6D lights up the top LCD in amber so you can see what you're doing.
Rear Controls top
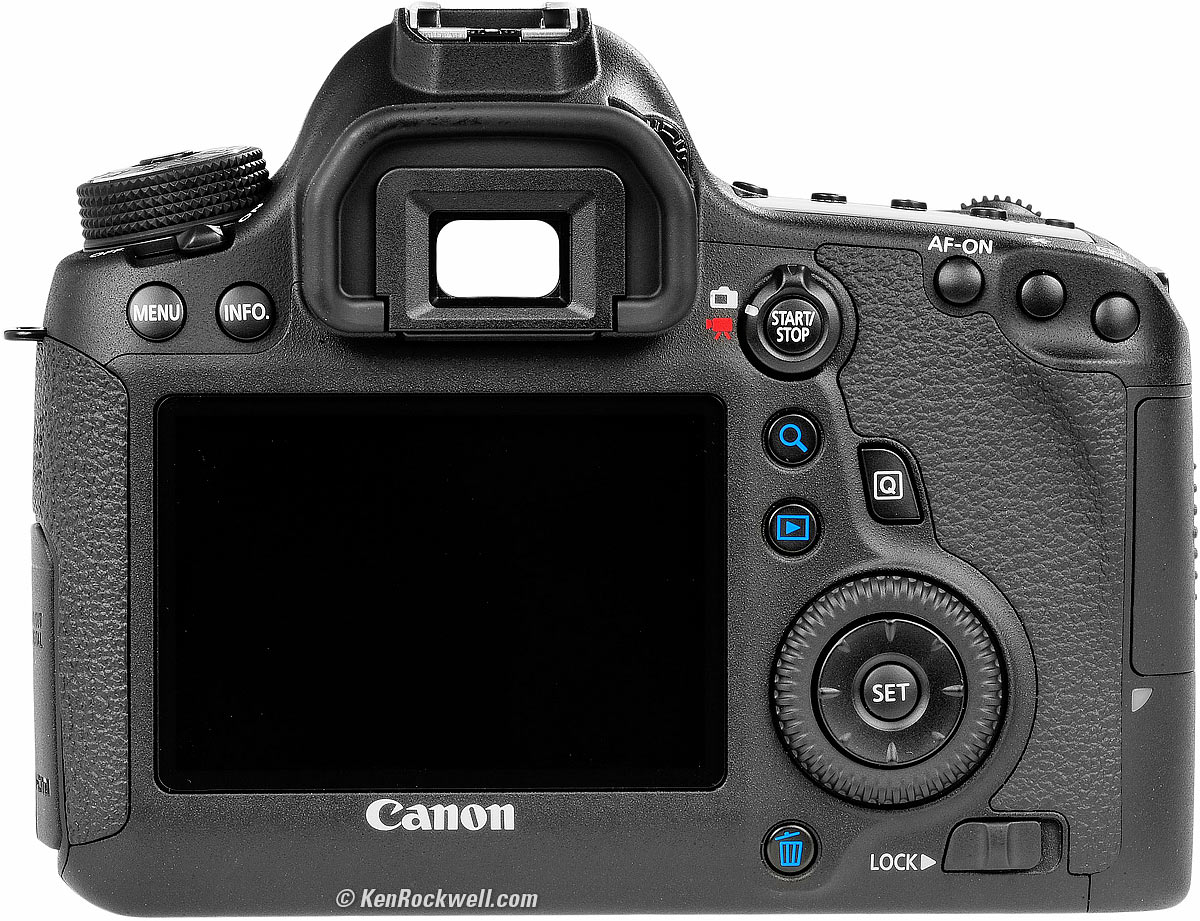
Back, Canon 6D. enlarge.
MENU Button
The MENU button (top left rear) is the key to most of the detailed settings I'll cover later.
INFO Button
Press the INFO button (next to the MENU button) with the 6D idle (tap the shutter to wake it from sleep to idle) and you'll see:
Data Screen (blue and white text)
Here you'll see a big list of random facts and figures. The most useful is telling you the date and time, and how much card memory you have left.
If you call up this screen with the INFO button, it doesn't go away. To make this data screen go away, you have to press INFO again.
Artificial Horizon (two presses)
This helps you level the 6D.
Graphical Info Screen
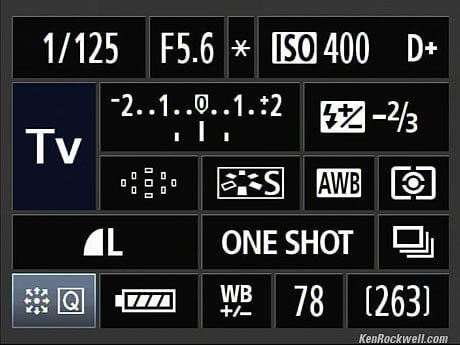
Canon 5D Mark II INFO Screen (6D is similar).
This is a collection of icons very similar to the QUICK SETTINGS screen to show you your shooting status.
This display differs from the QUICK SETTINGS screen in that you can't set anything from here! This sometimes frustrates me if I try to make changes on this screen, because I can't do it.
If this big screen of settings won't go away as you're trying to shoot, press the INFO button again.
You can disable any or all of these in the Wrench menu.
Diopter Control
Canon 6D. enlarge.
This is the little wheel above the rubber eyepiece.
Turn it until the finder displays become sharp.
It can get knocked as you use the 6D, so if your finder gets blurry, readjust it.
Movies and Live View top
Canon 6D. enlarge.
Live View
For Live View (seeing the picture on the rear LCD screen before you take it), turn the lever as shown to the silver camera-rear (Live View) icon. Press START/STOP to start and stop the rear display.
Live View uses a lot of battery power, so I never use it. It's mostly a feature for people used to point-and-shoot cameras or iPhones.
Movies
To shoot movies, turn the lever down to the movie camera icon, and the rear screen lights up with your live image. Press START/STOP to start and stop the recording of your movie.
For movies, you have to see the image on the rear screen to see what you're doing; you can't shoot them while looking through the optical finder.
Turn the lever back to the silver camera icon to stop the rear screen display and return to still shots.
You set the resolution and a host of more things in the MOVIE menu, which only appears when this lever is set to MOVIES.
AF-ON Button top
Canon 6D. enlarge.
The AF-ON button can do different things, as programmed in the menus.
See Canon AF Settings for more.
Exposure-Lock (AEL or *) Button top
Canon 6D. enlarge.
The AE Lock button, curiously only marked as an asterisk (*), locks exposure.
Once pressed, you'll also see an asterisk in your finder to let you know you've locked exposure.
Hitting it again won't unlock the exposure; it simply relocks it again to a new value.
There's no easy way to unlock this other than by taking the picture, changing the exposure mode, or letting the camera go to sleep.
AF-Area Mode Button top
The AF-Area mode button, marked as [-|-], lets us select which of the 6D's 9 AF sensors are used, or set the 6D to use them all automatically.
Canon 6D. enlarge.
See Canon AF Settings for more.
Magnification Button top
Canon 6D. enlarge.
The magnification button, marked as a blue magnifying glass, lets you magnify or reduce the image(s) seen on the rear LCD screen.
During playback, press the button and use the top dial to control how far you zoom in. Turned the other way, the top dial also lets you see many smaller images on the screen at once.
It also works during Live View and Movie shooting. during Live View and Movie shooting, press the button a few times to cycle among the various magnifications.
Play Button top
Canon 6D. enlarge.
You know what the play button does. It also brings an image back to full-screen if it's been zoomed-in.
The Quick Control [Q] Button top
Canon 6D. enlarge.
The Quick Control [Q] button is one of the most useful buttons on the 6D, besides the shutter button.
Press the [Q] and a screen loaded with settings appears.
To change these settings once you get this screen, use the Master Controls to drive around, and the dial to change the setting. If you need more details about what you're setting, press the SET button again.
There's no need to press OK or DONE or EXIT. The instant you've changed something, it's done.
You can read and set apertures and shutter speeds on this screen, but in manual exposure mode, there is no indication for the correct exposure. For manual exposure, look at the bar graph in the finder or on the old top LCD.
If you tap the INFO button, you'll call up the very similar INFO screen, which does drive the bar graph to let you set read manual exposure, but you'll have to set the shutter and aperture with the dials, not from the screen.
Master Controls top
Canon 6D. enlarge.
These master controls (as I call them here) are what we use to juggle all the other settings.
The SET button can be programmed in the menus, and makes the 6D do whatever you just set it to do. It also selects the center or all AF points when you're setting the AF-area modes.
Around the SET button is a directional control ring. It works in four directions when playing in the menus, and during zoomed playback, lets you scroll around in eight directions.
Around the directional controller is the big rear dial. It can be used to control many things.
During shooting, the big rear dial is very important as it changes exposure compensation.
During menus and playback the big rear dial also does a lot; try it and see. During manual exposure, it also sets the aperture.
Canon 6D. enlarge.
The LOCK switch only prevents the rear dial from changing the exposure compensation (or aperture in manual exposure). It doesn't lock anything else, or any other functions (like menu or playback control) of the rear dial.
We can change what the LOCK switch does in the C.Fn. menu.
Delete Button top
Canon 6D. enlarge.
This is for deleting pictures.
Press it, and use the master controls above to select ERASE and then press SET to delete the picture you're playing.
C1 and C1 Camera Memories top
Canon 6D exposure mode dial. Note the C1 and C2 settings. enlarge.
Set these before you go out, and everything you'll need will be right at your fingertips all day or forever.
Each time you turn the dial to C1 or C2, everything is reset to what was stored in that position.
Feel free to change any settings as you shoot in C1 or C2. You won't erase what you saved. These changes will stay until the camera times-out, usually one minute (you can change that duration in the menus), and the next time you go to shoot, even if you had changed something, you're back at your saved settings.
If you want to return to the saved settings more quickly, just move the dial to any other position and return.
To Save a Suite of Settings
To save a complete camera-state setting of your 6D:
1.) Set the camera as you like below. Everything is saved, from exposure mode, autofocus settings, custom settings, LCD brightness, Picture Controls, white balance fine-tuning and everything.
2.) Press:
MENU > WRENCH •••• > Custom shooting mode (C1, C2) > SET > Register settings > SET > choose the C1 or C2 position > OK > SET.
To Make a Permanent Change to a Stored Setting
To change a stored setting:
1.) Set the dial to that setting, C1 or C2. This recalls the setting.
2.) Change something.
3.) Save the camera's current state back into that dial position:
MENU > WRENCH •••• > Custom shooting mode(C1, C2) > SET > Register settings > SET > carefully select the C1 or C2 position > OK > SET.
If you select the wrong C1 or C2, you will have overwritten the settings at that position.
To Make a Temporary Change to a Stored Setting
Just change something as you would anywhere else.
As soon as you select or re-select a C setting, or as soon as the camera goes to sleep and wakes up again, your originally saved C setting is recalled.
The C settings are not altered unless you deliberately save something else into them as described above.
To Make a Longer Change to a Stored Setting
Let's not forget the usual P, Tv, Av and M positions.
When you change one of them, they stay that way forever.
The four of them together (P, Tv, Av and M ) are sort of like an unlocked C setting: every time you come back to them, they are as you left them, but if you change something while in them, they stay that way.
If dealing with some weird light that requires odd White Balance settings, you may want to use the P, Tv, Av or M positions, and then if a different opportunity presents itself, flip into one of your C modes, and as soon as you click back into any of P, Tv, Av or M positions, you're where you left off.
Brilliant!
To have these settings update automatically
Each of these settings remains unchanged until you save a different set of settings to that dial position.
New on the 6D is that you can choose to have these settings automatically update as you change the settings, as Nikons do in their settings banks. Set this way (MENU > WRENCH •••• > Custom shooting mode (C1, C2) > SET > Auto update set. > SET > Enable), when you leave one setting, it will be as you left it when you return. This is handy for when you first get the camera as your preferences finalize, but I'd set it back to its default of fixed after you get comfortable.
If you enable auto-updating, you'll hate yourself when you twist around all your settings for a one-of shot sometime, and just changed your favorite long-term setting.
If you save the same thing to two locations and set "auto update," they both update until you change something in just one of them.
My personal C1 and C2 settings top
Of course everything about the camera is saved into each of these memories. This is what I saved that changes for me from setting to setting.
C1 |
C2 |
|
| Used for | Places and Things |
People and Family |
| Exposure Mode | Pro (P) |
Pro (P) |
| Resolution & Quality | L normal (stair icon-L) |
S normal (stair icon-S) |
| Picture Style: | STANDARD |
STANDARD |
| Sharpening | 6 |
6 |
| Contrast | 0 |
-2 |
| Saturation | +3 or +4 |
0 |
| White balance | AWB (Auto) |
AWB (Auto) |
| WB Shift | A2 |
0 |
| ISO | Auto |
Auto |
| Max. Auto ISO ISO | 12,800 |
25,600 |
| Minimum Auto ISO Shutter Speed | AUTO |
1/125 |
| External Flash | disabled * |
enabled |
| AF Mode | ONE SHOT |
AI FOCUS |
| AF Sensors | Center only |
Auto (all) |
| Advance mode** | Silent continuous |
Continuous |
* When set to disable, the external flash's AF illuminator works, but the flash doesn't fire. Of course this fires by default; to disable it, use the second r
** I use Silent Continuous to lessen my conspicuity while in public. The shutter is very slightly slower, so I often use regular Continuous when snapping fast-moving people, but always Silent if needed. ed camera menu > External Speedlite Control > Flash firing > (enable or disable).
Menus and Autofocus top
These were the basics. You've got 99% of what you need; go shoot and have fun!
Keep reading for explicit details:
AUTOFOCUS settings <— Next
Home Donate New Search Gallery Reviews How-To Books Links Workshops About Contact