Home Search Gallery How-To Books Links Workshops About Contact
|
How
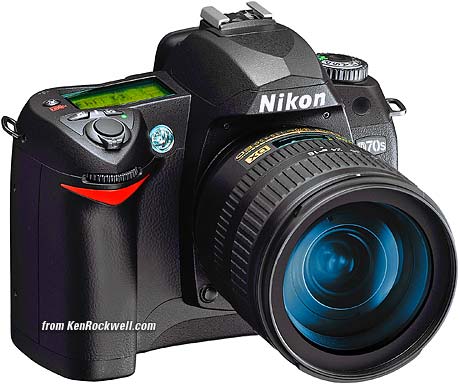
to Use the Nikon D70s and D70
Nikon D70s. I'd get it here in any configuration. I'd also get it here or here (body only), here or here with 18 - 70 lens and here or here with both 18 - 70 and 55 - 200 lenses. CONTROLS and SETTINGS: BACK of CAMERA back to top of D70 Users' Guide back to index of D70 Users' Guide Pages From left to right: BKT: I don't use bracketing. This control sets bracketing. Hold it and spin the two control rings on the right of the camera while looking at the top LCD. Rectangles (also doubles as one of the two FORMAT buttons): This controls the frame advance mode. You hold this and spin the rear control dial. When you see [S] on the top LCD you have the normal mode I use, which gives one shot each time you press the shutter. Hold and spin to show rectangles on the top LCD and you're in Continuous mode. In Continuous mode the camera keeps taking pictures for as long as you hold down the shutter button. Pro cameras label the rectangles as C, for Continuous. Spin it some more and you'll see a clock. This is the self timer, in which mode the camera goes off a few seconds after you press the shutter. The mode that shows a narrow black rectangle sets the D70s to respond to the EN-L3 remote control. AE-L AF-L (Top center): Hold this to lock settings while shooting. You can alter what this button does in the custom menus. I get into more details under custom settings for this button. Play [>] Button: Press it to see your pictures. ISO/Checkerboard, WB/?, and QUAL/ENTER/Magnifying Glass Buttons: these do different things depending on whether the camera is taking a picture or showing one. If the camera is idle, or you tap the shutter, the camera is in the taking mode and the buttons do what the silver letters say: ISO, WB and QUAL. If the camera is displaying an image the buttons do what they say in yellow: checkerboard, ? and ENTER. I'll explain each of these as if they are seven different buttons below. Often the camera is in playback mode from the last shot. I need to tap the shutter to put the camera back into taking mode for the ISO, WB and QUAL functions to work. I make it a habit to tap the shutter button first before using those buttons just in case. ISO: I use 200 as explained of the first page. If you just took a picture be sure to tap the shutter button to return the camera to the taking mode. If you don't and are viewing a photo you just made the button will swap among the various multi-image playback modes! WB (White Balance): I use AUTO -3 (A -3) and use an 81A glass warming filter as explained on the first page. See my White Balance page for more details about what this adjustment does and why you care. To choose different settings, press and hold the WB button and turn the rear knob. Look at the top LCD and you'll see the little sun and cloud etc. icons cycle as you turn the knob. To set the D70 to give accurate color under any arbitrary weird combination of lighting you can use a manual white balance mode called PRE(set). It's shown as the PRE icon on the far right of the top LCD, just past the Shade icon. Spin the knob while holding WB until you get to PRE. Release the button. Press and hold the WB button again for several seconds until it makes PRE blink. Point the camera at something white or gray that's in the same light as the subject and press the shutter. If "Gd" flashes you're good. If "nG" (no good) flashes, try again. You can cheat (I do) and point the camera at a broad light source, like a fluorescent fixture, and get great results without having to carry or find a gray or white card. The PREset mode is used to tell the camera what's supposed to be neutral. Once you've set this the camera corrects all the colors to keep neutral grays and whites as neutral grays and whites. This usually gives great colors for everything else in the same light. QUAL: I use NORM - L, or NORMal compression, Large (3,008 x 2,000) JPEG, as explained of the first page. Checkerboard: this lets you see one, four or nine images on the screen during playback. Press the button to switch among these modes. ? / Key: In playback it protects (locks) the image from erasure. Warning 1.): it marks the file so well that it won't empty out of my trash on my computer unless I go in and remark the file on my computer first. Warning 2.): these images are erased from your memory card when you format anyway. I don't use this lock feature. When setting menus the "?" will give more information about your settings. Magnifying Glass: Press to zoom in on image. When you do this you can zoom in more by pressing the checkerboard button and spinning the rear dial. You can use the thumb switch to scroll around the image. ENTER: Used while playing with the menus. Lock Switch: This is the L - dot (lock - unlock) switch below the four-way thumb switch. The dot (unlocked) position lets you move the AF area with the rocker button. The L (locked) position prevents moving the selected AF area. It doesn't lock your ability to navigate the menus, which is a huge advantage over the older professional D1X! I usually leave it in dot to allow me to select different AF areas. Trash Can: Press once, then press again to confirm and delete an image during playback. If you find this as helpful as a book you might have had to buy, feel free to help me write more with a donation. Thanks! Ken. CONTROLS (every button and knob) MENUS (every menu item in detail) PLAYBACK < < NEXT |