Home Search Gallery How-To Books Links Workshops About Contact
|
How
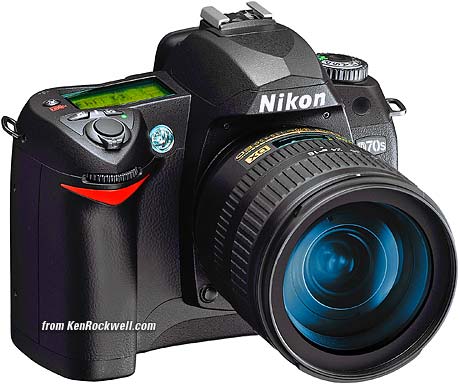
to Use the Nikon D70s and D70
Nikon D70s. I'd get it here in any configuration. I'd also get it here or here (body only), here or here with 18 - 70 lens and here or here with both 18 - 70 and 55 - 200 lenses. CUSTOM (CSM) MENU (pencil icon) back to top of D70 Users' Guide back to index of D70 Users' Guide Pages Press MENU and select the pencil icon to get to the Custom Settings Menu. First select the "Detailed" mode under Menu > Setup (wrench) Menu > CSM menu, otherwise you'll only to get the first few items! [R] Menu Reset: This returns everything below to factory default. Play with everything below to your heart's content, since if you do screw anything up this reset will fix it. 01: Beep. For God's sake, turn this to OFF. Beeping cameras annoy everyone and scream "RUDE AMATEUR!" If you insist, set this to ON only in private. 02: Autofocus: Use AF-S (default) for still subjects, and set AF-C (continuous) to track moving subjects, like sports. More at my Sports page. 03: AF Area Mode: Set Single area (the default) for still subjects. Set Dynamic area for moving subjects. Dynamic Area lets the camera select the AF areas by magic as the subject moves. This really works and is perfect for birds and sports. Use Closest Subject when you hand your camera to a non-photographer. It uses all the AF sensors and guesses that the closest one is your subject. This prevents the common problem with people shots where the camera focuses in the middle, on the wall behind them! 04: AF Assist: This is the little light that helps the camera focus in the dark. Default is ON. Set it to OFF if you're spying on people in the dark and don't want to be noticed. 05: ISO AUTO: This lets the camera increase the ISO automatically as the light fades. I would use it all the time, except that a firmware flaw leaves this active even in manual exposure mode. If you set it to ON you have the option to select the lowest shutter speed the camera will use before it starts to increase the ISO. 06: NO CF Card?: Leave this to LOCK. if you turn it off it will let you take pictures with no card! You accidentally could shoot a wedding and not realize you have no card. When set to ON it locks the camera if you have no card. 07: Image Review: This shows the photo you just took on the monitor after you take it. I set mine to ON, unless I don't plan to look at the monitor after each shot. When you use this remember that the functions of the ISO, WB and QUAL buttons will do things you don't expect after you take a photo, since the camera goes into playback mode for a few seconds after each shot. Because of this I make a habit of tapping the shutter button to return to shooting mode before I make any ISO, WB or QUAL adjustments. Otherwise I often would change something related to playback by accident! 08: Grid Display: These are fine horizontal and vertical lines in the finder. I leave these ON to help me keep my horizons straight. Default is off. 09: EV Step: Your choice of 1/3 or 1/2 stop increments. I prefer the default of 1/3. 10: Exposure Compensation: I leave this in default OFF. This means you have to hold the +/- button at the same time as turning the command dial to alter the exposure compensation. If you turn it ON then any turning of the command dial will alter your exposure. 11: Center Weighted: This controls the diameter, in millimeters, of the area of the center weighted meter. I leave mine alone at 8mm, since I never use the center weighted meter anyway. This control allows you to make your center weighted meter see a bigger area to make it more like an averaging meter, or make it smaller to be more like a spot. This setting doesn't have any effect on the spot meter. The spot meter is independent of the center weighted meter. 12: BKT Set: This controls what's changed when the camera brackets. You can change it to alter the white balance, or the exposure, or just the flash or ambient light exposure. I don't use bracketing, so I don't use this. 13: BKT Order: This controls the order of the shots made with bracketing. "Normal" first uses the metered exposure and then the altered versions. You may select instead for it to make the underexposed shots first. I don't use this. 14: Command Dial: You may choose to swap which dial does what when setting manual exposure. I leave it in default OFF/NO. 15: AE-L/AF-L: This sets what the AE-L AF-L button locks when held, and how. I leave mine in AE lock only, since in AF-S the AF locks when I press the shutter half way. I use this lock in strong backlight. I point the camera down at something as dark as my subject, press and hold the AE-L button, point the camera at the subject, press and hold the shutter to lock focus, move the camera again to compose, then release the shutter. This gyration of three camera positions saves me from having to use manual exposure and manual focus. The AE-L button locks exposure and the shutter locks the focus. Slick! TRICK: Hidden in a screen below the first five options under CSM 15 is a sixth very special option: Flash Exposure lock. This is critical for people and pet shots. Nikon keeps this even more secret by calling it "FV Lock." Scroll down past the bottom of the other five options to see it. Select FV Lock and the AE-L AF-L button becomes the Flash Exposure Lock button. Select this and when you press the AE-L AF-L button the flash goes off to measure and preset the exposure. Now every shot fires the flash at the previously measured level without any preflashes. This 1.) eliminates any shutter release delay and 2.) eliminates any potential for subjects eyes blinking. 16: AE Lock: more of the same. I leave this OFF. If you turn it on it locks the exposure when you hold the shutter halfway. This would mimic cheaper point-and-shoot cameras, but is silly since 1.) the camera has a dedicated AE-L button and 2.) one usually wants to lock exposure and focus on different things. If your subject is conducive to locking everything at the same place you probably don't need locks at all. 17: Focus Area Wrap: I leave this off. If I keep pressing the AF selector in one direction the selected AF area goes to the end and stops. To go from far right to far left I have to go left and pass the center. If you turn this to ON (wrap) you can cheat and get to the left sensor by clicking one more time to the right from the far right sensor! This is too confusing for me, so I leave it OFF (no wrap). 18: AF Area Illumination: This lights up the AF areas in the finder. I leave it at AUTO, in which it turns it on in the dark. OFF never turns it on, which is silly, and ON leaves them on even in bright light, which is stupid. 19: Flash Mode: I leave it in TTL, which lets the built in flash expose properly and automatically. Manual sets the power manually. Commander mode lets you control an SB-600 or SB-800 by magic. I have a page on using the Wireless Flash Modes. If you forget to set it back to TTL the flash goes off, but has no effect on the exposure! Be sure to check this before thinking your camera is defective if your flash doesn't come out in your picture.. 20: Flash Sign: Leave this ON. Turning it off extinguishes the bolt in the viewfinder if you need flash. This is more than an idiot light: the matrix meter analyzes the subject's lighting ratio and turns on the bolt when the ratio exceeds the camera's (or aesthetics') dynamic range. This is why you'll see the flash bolt come on even in direct sunlight if you have deep shadows. 21: Slowest Shutter Speed: This sets the slowest shutter speed the camera will use in low light in the P and A modes, in normal flash sync. I set this to 1/8 indoors if people hold still. Default is 1/30. I usually leave it at 1/15. Set this slower to let the ambient light have more effect indoors with flash, and set it faster to stop your kids from leaving weird blurry ghosts behind them. Use a higher ISO to get faster speeds and have the backgrounds fill in with ambient light. 22: Monitor Off Time Delay: This sets how long the rear LCD stays lit each time. I leave it at 10 seconds. Set it longer if you want the screen to stay lit longer without having to hit any keys. Luckily the camera has such great battery life there's no reason not to set it for as long as you like. 23; Meter Off: This sets how long the meter stays on each time you tap the shutter. I leave it at 6 seconds. Set it longer if you like; I've never had any battery life issues with this camera. 24: Self Timer Delay: I leave it at 2 seconds, since I use the self timer to replace a cable release. Set it to 10 seconds (default) for enough time to run to get into a picture. You can set it to 2, 5, 10 or 20 seconds. 25: Remote: This sets how long the camera stays awake ready to release as controlled by the remote infra-red shutter release. If you set this too short the camera may go to sleep and ignore the wonderful little release before you get to pressing it. Set it longer and the battery may run down faster, but I've never had a problem. I set this to 5 minutes. After 5 minutes I'll have to use the rectangles button to set the camera back to remote release mode again. If you find this as helpful as a book you might have had to buy, feel free to help me write more with a donation. Thanks! Ken. CONTROLS (every button and knob) MENUS (every menu item in detail) SETUP < < NEXT |