Home Donate New Search Gallery Reviews How-To Books Links Workshops About Contact
Nikon
D7000 User's Guide
© 2011 KenRockwell.com. All rights reserved.


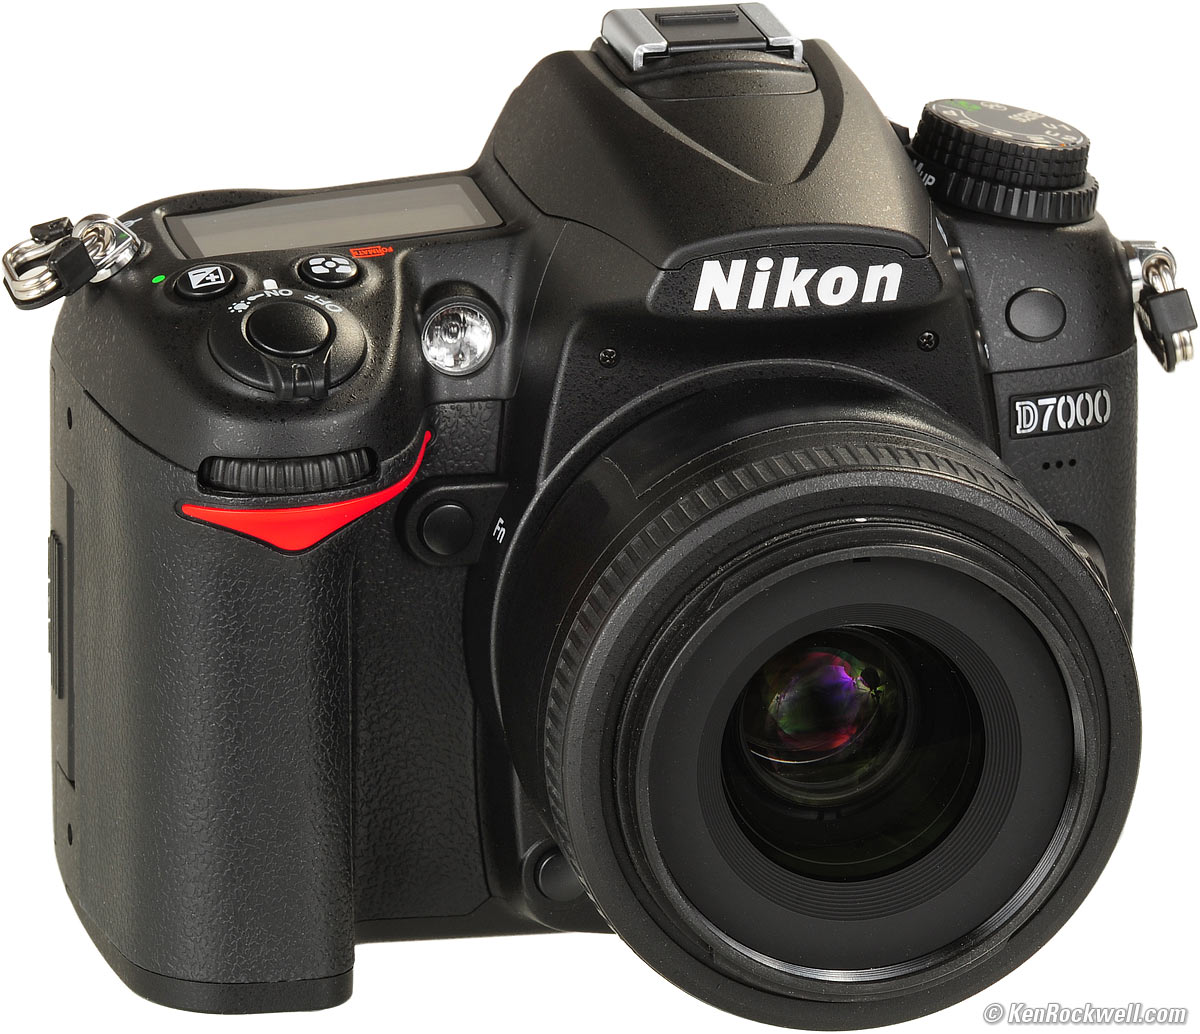
Nikon D7000 and 35mm f/1.8 DX. enlarge. The biggest source of support for this free website is when you use these links, especially these directly to the D7000 at Adorama (either body-only or with 18-105mm lens), the D7000 at Amazon (body-only or with 18-105mm lens), or Ritz (body-only or with 18-105mm lens) when you get yours. Thank you! Ken.
December 2011 D7000 Review Nikon Reviews Nikon Lenses All Reviews
NEW: Nikon D7000 User's Guide App 10 December 2011
Nikon D7000 Autofocus Settings Guide 28 January 2011
Page Index, D7000 User's Guide
Nikon D7000 Firmware v1.02. Download here (or download here if you haven't upgraded yet from windows).
iPad and iPod app is under development, watch this space.
Help me help you top
I support my growing family through this free website, as crazy as it might seem.
The biggest help is when you use any of these links to Adorama, Amazon, eBay, B&H, Ritz, Calumet, J&R and ScanCafe when you get anything, regardless of the country in which you live. It costs you nothing, and is this site's, and thus my family's, biggest source of support. These places have the best prices and service, which is why I've used them since before this website existed. I recommend them all personally.
If you find this page as helpful as a book you might have had to buy or a workshop you may have had to take, feel free to help me continue helping everyone.
If you've gotten your gear through one of my links or helped otherwise, you're family. It's great people like you who allow me to keep adding to this site full-time. Thanks!
If you haven't helped yet, please do, and consider helping me with a gift of $5.00.
As this page is copyrighted and formally registered, it is unlawful to make copies, especially in the form of printouts for personal use. If you wish to make a printout for personal use, you are granted one-time permission only if you PayPal me $5.00 per printout or part thereof. Thank you!
Thanks for reading!
Mr. & Mrs. Ken Rockwell, Ryan and Katie.
Introduction top
I use Adorama, Amazon, Ritz, B&H, Calumet, J&R and ScanCafe. I can't vouch for ads below.
|


Want free live phone support? In the USA, call (800) NIKON-UX, 24 hours a day, 365 days a year.
Looking for a specific control? Use my Search page. Be sure to mention the D7000 in your search.
This lengthy article will make you an expert Nikon D7000 operator. It also includes a lot of tips, tricks, and the settings I prefer to use. If you like the photos I make, this could be as simple as setting your U1 and U2 modes as I set mine, and snapping away.
Being an expert camera operator has very little to do with making great pictures. Yes, you need to know how to use your camera as I'll cover in these pages, but that's only a tiny part of what's involved. Your artistic vision is by far the most important part of a picture, and not the subject of this guide.
To get great photos, you need to get yourself to the right place at the right time and point the camera in the right direction, which is a lot harder than just learning how to operate a D7000. Making a great photo involves locations, timing, patience and a whole lot more. I cover this here, while Bruce Barnbaum's "The Art of Photography" is the best book for someone seriously interested in learning to create great photos deliberately. Operating a camera is trivial compared to knowing how to create a powerful photograph. Unless you're already an accomplished artist, I consider reading and understanding The Art of Photography as mandatory for everyone genuinely interested in making great pictures consistently. Any gearhead gets a good picture now and then by chance, and developing your eye will let you get great pictures all the time. Simply knowing all the details about a D7000 as I'll cover is only the most basic first step towards great pictures.
Organization top
On this page are the basics of operating the Nikon D7000.
Explicit details about everything follow in later pages linked at the bottom.
Many other tricks are in the detail pages at the bottom, like inserting your copyright and contact info automatically into every file, how to make the D7000 much quieter than a LEICA, how to show RGB Histograms, how to make the dials work while playing back images, how to control every menu setting using just one hand and how to have ISO set itself.
I'll start by sharing my own personal settings, then explain how to adjust some of these basic settings should you want to use different ones, and then explain each and every possible control and menu in too much detail in the following pages.
My emphasis is how to set your D7000 and take pictures. I'll explain it as I would to a friend who comes over with a new camera. I'll share what I use and why, and share these from my own perspective. I'll be explaining a lot, but can't possibly explain every possible combination of settings for things I consider as fluff features. That would take forever to do well.
My Settings top
Here is my settings file which you can download and use to set your D7000 exactly as I set mine.
To use this file, download it to your computer, copy it to an SD card, pop it in your D7000, hit MENU > SET UP > Save/load settings > Load settings, and Bingo!, your D7000 is a carbon-copy of mine.
Notes:
1.) This file doesn't run or do anything on your computer. Don't expect anything to happen if you click this link, other than an NCSETUP7.BIN file downloading to your computer.
2.) You need to attach a card reader, and then copy this file to the root directory of your card. The "root directory" means the very top of the card's folder scheme. Presuming you've formatted the card in your D7000, this means the "NIKON D7000" directory; the same directory in which the DCIM folder lies. Don't put it in the DCIM folder.
3.) The Save/load settings menu item is near the bottom of the SET UP menu, and completely unrelated to Save User Settings at the top of the SET UP menu. Nikon never makes these clear.
4.) My camera is set to mark every file with my ©, name, address and phone number, so be sure to reset your camera to your name and information.
5.) I only own one D7000, so I have no virginal, unprogrammed D7000 into which to load this file. Therefore I don't know if my settings for the U1 and U2 positions will copy-over to your D7000 when using my settings file. It doesn't work for some people, so if it doesn't work for you, try again with your D7000's mode dial set to a different mode.
U1 and U2 Instant Recall Modes top
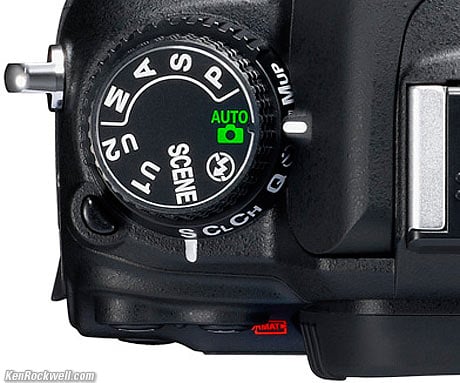
U1 and U2 positions are on the D7000's mode dial.
The D7000's U1 and U2 positions let us save and recall complete banks of camera settings instantly as shooting conditions change. We'll cover exactly how, where and why to set all these details later; this section covers the fact that the D7000 is the world's first Nikon that allows us easily to save and recall complete groups of settings simply by turning the knob.
Each U1 and U2 mode saves and recalls everything, including color and contrast settings, autofocus modes, exposure settings, and, well, everything about the camera that takes us so long to set manually.
My white balance and trims, exposure compensations, exposure modes, AUTO ISO minimum speed settings, flash modes and everything else I want in each setting follow along, and instantly recall as I set either on the dial.
The U1 and U2 modes are easy to set. Simply set your D7000 as you desire (we'll cover that later or use my settings above), and then press:
MENU > SETUP > Save user settings > (select U1 or U2) > Save settings,
and the camera's current settings are burnt into that spot on your dial until you save something else there.
If you make any changes while shooting in the U1 or U2 modes, those changes remain even if the D7000 is turned off, but only if you don't rotate the mode dial.
If you move the dial away from U1 or U2, any changes you've made evaporate instantly if you didn't save them from within the menu system. The next time you select either U1 or U2, it is recalled exactly as it was last saved.
If you want to make a permanent change to your U1 or U2 setting, simply make changes while in the U1 or U2 position, and then MENU > SETUP > Save user settings > (select U1 or U2) again and you're done.
I set U1 for my landscape shots, and I set U2 for snaps of my family. You might want one for sports and one for landscapes, or who knows. The key is that it saves us having to fiddle with all the settings every time we photograph something different.
Here's how I set mine, in case my settings file doesn't program these for you. I'll explain how and why we set these later in great detail:
For all modes:
AUTO ADR (Adaptive D-Lighting, in the SHOOTING menu)
Focus: AF-A, AUTO AF Area Select ("AFA Auto" as seen in finder when pressing AF mode button on front).
JPG: Optimum Quality. (set in the SHOOTING menu)
AUTO ISO: Max ISO: 6,400 (the default).
Picture Control: Auto Contrast.
Then for U1: Scenics and Things
Picture Control: VIVID, +3 Saturation, 6 sharpening.
AUTO ISO: 1/30 minimum speed.
And for U2: Family and People
-0.7 exposure compensation.
Picture Control: STANDARD, +2 saturation, 6 sharpening.
Auto ISO: 1/125 minimum speed.
Settings in Detail top
I leave most settings at their defaults.
I set my U1 mode on the top left dial to my preferred settings for photos of everything except people, and set my U2 position for people photos.
I shoot with the top mode dial in P, Program Exposure mode.
Many of these menu options are often deactivated in anything except the P, S, A and M modes.
My standard operating setting is only a few clicks different from the defaults.
Here is how I set up my own D7000:
Autofocus Settings top
I leave my D7000 in it's auto AF-area select mode (Auto) and its auto AF-mode mode (AF-A) most of the time.
See Nikon D7000 AF Settings for all the details. Here are some basics:
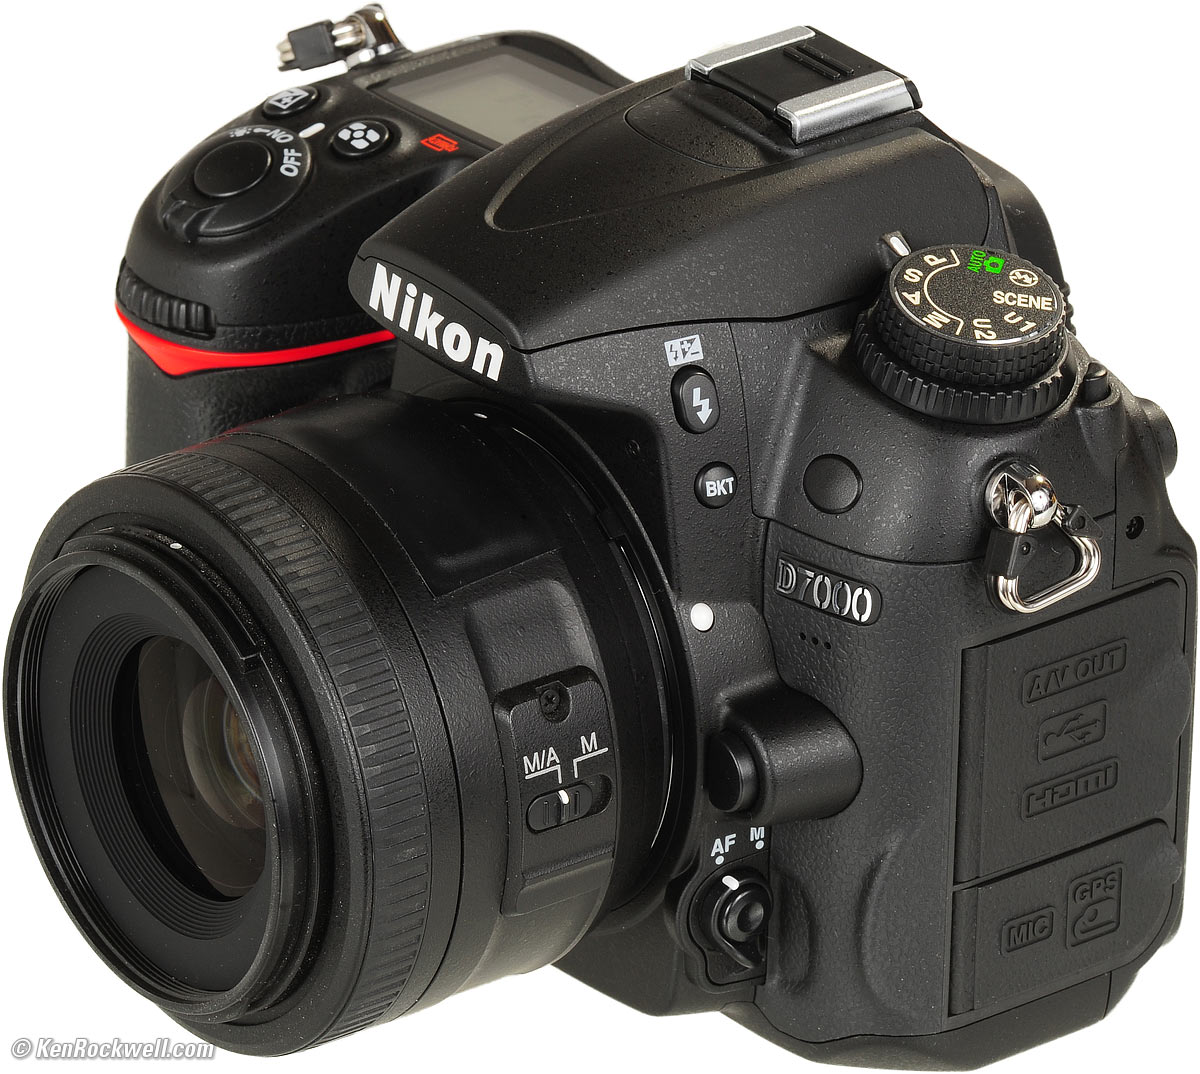
Nikon D7000 AF Controls. bigger.
The D7000's AF-point selection mode (all, some, 3D, etc.) and AF-S, AF-C and AF-A modes are selected with an unmarked button. This button is concentric with the simple AF-MF lever.
Press the AF/M button, and now the front dial controls AF-point selection modes (all, some, 3D, etc.), and the rear dial selects AF-S, AF-C and AF-A modes.
The viewfinder displays what you're doing as you set it, so you can see all of this without taking your eye from the finder.
I use AUTO select most of the time, and change to 3D and select one point if my D7000 isn't selecting what I need automatically. In this 3D mode, once you assign an AF point to a target, it tracks and moves around the finder automatically as the target moves.
In 3D mode, you don't even need to move the AF point. You may find it easier to use the center point, point the camera so the center point is on the target, and then move the camera and let it move the AF point for you, instead of selecting a different point with the thumb control.
These modes are also saved in the U1 and U2 positions.
Read lots more at Nikon D7000 AF Settings.
Format top
I format cards every time I put one in my D7000. It completely erases the memory card and formats it for perfect compatibility.
If you've connected the card to a computer and don't reformat, there is always the tiny but real possibility that there may have been something altered on your card.
Formatting completely erases your card, so be sure you have all your pictures. Formatting isn't mandatory, but it ensures that data and compatibility problems will only happen to other people, not to you.
To format, simply:
1.) Hold down the two [FORMAT>] buttons at the same time for a few seconds.
2.) The top LCD blinks "for," and the icon for the card about to be formatted blinks
3.) (If you want to format the other card, move the dial until it blinks)
4.) Release both buttons, and immediately,
5.) Hold both down again.
Image Quality top
I use BASIC.
To set this, use the QUAL button and rear dial while looking at the top LCD.
It also can be set in the SHOOTING Menu.
The default of JPEG Normal makes files that are bigger than they need to be. The pictures look the same, but take up more space on your memory card and in your computer.
If you're skeptical, do as I did and make the same shot with various settings and see if you can see a difference. You can't; the D7000's quality settings can't be set to make a bad image.
Even though my familiarity with JPG DCTs and quantization matrices lets me know how and where to see JPG image defects, even if I could see a slight variation on a monitor at 200%, the results between BASIC, NORMAL, FINE and NEF/raw are indistinguishable even in 30x40" prints. Try it yourself as I did and see; it will save you a load of memory.
You can see examples from a D200 at D200 Quality Setting Examples.
Image Size top
I use LARGE for landscapes, and SMALL for family photos.
Large is the default, but unless you want to print everything twenty feet (6m) wide, the small setting also lets you make prints of any size (20x30" or 50x75cm is easy) and saves even more room on your computer and memory cards.
I'm serious: even at the Small setting you've got 4 very sharp megapixels, which is more than enough to print any size if your photo is in focus in the first place.
At Small, the D7000 still has far more resolution than Nikon's first D1 and D1H professional cameras whose images were often printed on two-page spreads in news magazines.
Set this with the front dial while holding QUAL button and looking at the top LCD.
It also can be set in the SHOOTING Menu.
JPG Compression top
Here's part of the trick that makes BASIC JPG look great: set JPG Compression to OPTIMAL QUALITY. This lets the file size grow automatically depending on the actual subject if, and only if, it's needed.
White Balance top
I use AUTO 1 NORMAL with an A2 (amber) shift.
I prefer a slightly warmer (more orange) image, so I set A2 (amber 2) by pressing:
MENU > SHOOTING (camera icon) > White balance > Auto 1 > press OK or click to the right to get to a screen with a colorful square > click two clicks to the right to A2 > OK.
You can set any color offset you like. Simply move the controller around the colored square for any combination of amber/blue and green/magenta fine-tuning.
I explain all the White Balance settings under the SHOOTING Menu. See How to Set White Balance and White Balance Examples to learn when and why you'd want to use these settings.
The basic WB setting and amber-blue bias also be set with the WB button and dials while looking at the top LCD.
More explicit details at the SHOOTING Menu.
Picture Control top
This is where you set the look of your images. Do you want more or less color, or more or less contrast, or black-and-white? This is where to set it.
The D7000 has the same look with any given setting of the Picture Controls as every other Nikon since the D300, thank goodness. What looks good on one Nikon will look the same on other Nikons: these are all interchangeable.
For People
I use STANDARD with
Sharpening set to 6 and
Saturation set to +2.
For Places and Things
I use VIVID with
Sharpening set to 6 and
Saturation set to +3.
Play around and see what you prefer. I'm always changing my preferences depending on the subject and the look I want. This is how I get award-winning images right out of my camera.
To set these, press:
MENU > SHOOTING (camera icon) > Set Picture Control.
Click it and you'll see a menu of Standard, Neutral, Vivid, etc.
You can alter any one of these starting points by selecting them, and then clicking to the right. Now you can click up and down to select different parameters and left and right to change them. Be sure to click OK to save the setting.
You can save and recall these as well.
More at Picture Controls.
ISO top
I use Auto ISO, which lets the D7000 set itself perfectly in any light.
ISO, pronounced "eye ess oh," sets the D7000's sensitivity to light. 100 is normal, and 6,400 is much more sensitive for very low light.
Unlike film, the D7000 can be set to adjust itself to the light conditions all by itself.
Auto ISO increases the ISO automatically as it gets darker so I don't have to stop and set it myself. It shoots at ISO 100 in good light, and at 1/15 of a second (or any speed you choose) it starts ramping up the ISO to a maximum of 6,400 (or any ISO you choose) as it gets darker. Only if it gets much darker will it let the shutter speed go below 1/15 at ISO 6,400, exactly as I'd do manually.
To set this, press:
MENU > SHOOTING (camera icon) > ISO sensitivity settings > ISO sensitivity > 100 (This also can be set from the ISO button and rear dial while looking at the top LCD.)
and
MENU > CAMERA icon > ISO sensitivity settings > Auto ISO sensitivity control > ON
In this same place, set Maximum sensitivity and Minimum shutter speed to taste. I set ISO 6,400 as the maximum because the D7000 still looks great at ISO 6,400. If you set a lower speed, the D7000 will start shooting at slower speeds when it could have kept the speed up at a higher (and still clean) ISO.
I set the Minimum shutter speed depending on my lens and subject.
For family, people, action and kids, I set 1/125. For sports you might want to set 1/250 or 1/500. This is the speed the D7000 will try to hold by increasing the ISO, and below which the D7000 will shoot at the highest ISO you set above.
For shots of still subjects, I set this to the slowest speed at which I can hand-hold sharply. For me, that's 1/8 with VR wide-angle lenses, and 1/30 for VR telephotos.
Set this all in the SHOOTING Menu.
ADR genuinely makes pictures look better. It really does improve details in both shadows and highlights, all at the same time.
It is off by default. I always shoot with it in AUTO.
Set it by:
MENU > SHOOTING (camera icon) > Active D-Lighting > AUTO.
Slot empty release lock top
Be sure to set CUSTOM SETTING f8 Slot empty release lock to LOCK, otherwise as shipped, the D7000 will cheerfully shoot all day with no card! You wouldn't realize you were shooting blanks until you hit the Play button and found nothing there.
Details back to top
These are the basics. You've got 99% of what you need; go shoot and have fun!
Keep reading for explicit details.
KNOBS, BUTTONS and CONTROLS < NEXT
MENUS
Home Donate New Search Gallery Reviews How-To Books Links Workshops About Contact