Home Search Gallery How-To Books Links Workshops About Contact
|
How
to Use the Nikon D50
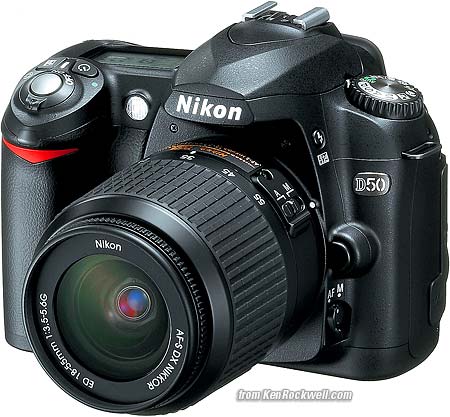
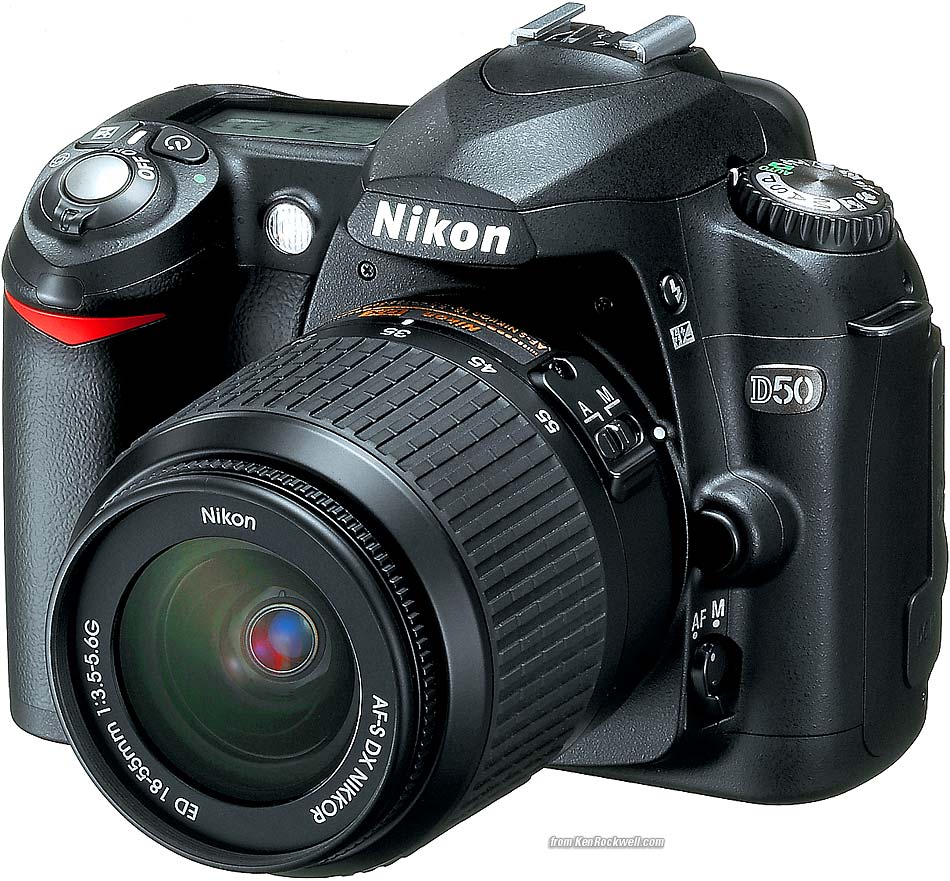
D50 with 18 - 55 mm. I'd get it here or here. enlarge CUSTOM (CSM) MENU (pencil icon) back to top Press MENU and select the pencil icon to get to the Custom Settings Menu. First select the "Detailed" mode under Menu > Setup (wrench) Menu > CSM menu, otherwise you'll only to get the first few items! [R] Menu Reset: This returns everything below to factory default. Play with everything below to your heart's content, since if you do screw anything up this reset will fix it. 01: Beep. For God's sake, turn this to OFF. Beeping cameras annoy everyone and scream "RUDE AMATEUR!" If you insist, set this to ON only in private. 02: Autofocus: Use AF-S (still or single) for still subjects, and set AF-C (continuous) to track moving subjects, like sports. Default is AF-A, for Auto Autofocus Mode, which chooses between two previous modes automatically depending on if the subject is moving. AF-A mode works great, I'd use it. More at my Sports page. 03: AF Area Mode: Set Single area (the default) for still subjects. Set Dynamic area for moving subjects. Dynamic Area lets the camera select the AF areas by magic as the subject moves. This really works and is perfect for birds and sports. Use Closest Subject when you hand your camera to a non-photographer. It uses all the AF sensors and guesses that the closest one is your subject. This prevents the common problem with people shots where the camera focuses in the middle, on the wall behind them! I see no magic mode to select among these automatically. 04: NO CF Card?: Leave this to LOCK. if you turn it off it will let you take pictures with no card! You accidentally could shoot a wedding and not realize you have no card. When set to ON it locks the camera if you have no card. 05: Image Review: This shows the photo you just took on the monitor after you take it. I set mine to ON, unless I don't plan to look at the monitor after each shot. When you use this remember that the functions of the ISO, WB and QUAL buttons will do things you don't expect after you take a photo, since the camera goes into playback mode for a few seconds after each shot. Because of this I make a habit of tapping the shutter button to return to shooting mode before I make any ISO, WB or QUAL adjustments. Otherwise I often would change something related to playback by accident! 06: Flash Level: This is the hard way to set flash exposure compensation. I prefer using the buttons on the top and front of the camera as I described earlier. 07: AF Assist: This is the annoying little light that helps the camera focus in the dark. Default is ON. Set it to OFF if you're spying on people and don't want to be noticed. 08: AF Area Illumination: This lights up the AF areas in the finder. I leave it at AUTO, in which it turns it on in the dark. OFF never turns it on, which is silly, and ON leaves them on even in bright light, which is stupid. 09: ISO Control: This can stump the advanced user. It is only available in the menu if you've chosen one of the preset scene modes. It goes away in P, S, A or M exposure modes. In preset scene modes ISO Control: ON lets the camera set the best ISO depending on the scene chosen with the knob on the top left of the D50. I'd leave this ON. If turned OFF it lets you drive and set the ISO in the scene modes. If you're using the scene modes you may as well let Nikon drive. 10: ISO AUTO: This lets the camera increase the ISO automatically as the light fades. I would use it all the time, except that a firmware flaw leaves this active even in manual exposure mode. If you set it to ON you have the option to select the lowest shutter speed the camera will use before it starts to increase the ISO. 11: EV Step: Your choice of 1/3 or 1/2 stop increments when adjusting exposure. . I prefer the default of 1/3. 12: BKT Set: This controls bracketing, which are multiple shots made at different guesses of exposure or white balance. This is also called exposure guessing and was popular in film days. Today I use Modern Exposure Techniques and don't need to bracket. You may select bracketing to alter the exposure or the white balance. Bracketing is never simple with Nikon; you wind up having to count how many shots you made in each bracket sequence. I find it easier to set the exposure correctly in the first place. The only potential use I see is this is the only way to make slight adjustments to the white balance in the D50. Every other Nikon SLR lets you trim the WB without having to bracket. The D50 is aimed at people who have no idea what I'm talking about here, which is why they dropped the adjustment from the D50. See also my page about White Balance. 13 Metering: I always use the default of Matrix, which is shown by an icon with four corners. Center weighted (a circle) only meters from the middle of the image. Spot (a dot) only meters from the selected focus area. 14: AE-L/AF-L: This sets what the AE-L AF-L button locks when held, and how. I leave mine in AE lock only, since in AF-S the AF locks when I press the shutter half way. I use this lock in strong backlight. I point the camera down at something as dark as my subject, press and hold the AE-L button, point the camera at the subject, press and hold the shutter to lock focus, move the camera again to compose, then release the shutter. This gyration of three camera positions saves me from having to use manual exposure and manual focus. The AE-L button locks exposure and the shutter locks the focus. Slick! Flash Tip for the AE-L/AF-L Button:
To lock the flash exposure and stop the preflashes which make people and pets blink, set custom function 14 to FV lock. Now tap the AE-L/AF-L button and the flash pops once to meter flash exposure, and uses that measurement instead of needing a preflash for each consecutive shot. Be sure to tap it again to turn it off when you change distance. 15: AE Lock: more of the same. I leave this OFF. If you turn it on it locks the exposure when you hold the shutter halfway. This would mimic cheaper point-and-shoot cameras, but is silly since 1.) the camera has a dedicated AE-L button and 2.) one usually wants to lock exposure and focus on different things. If your subject is conducive to locking everything at the same place you probably don't need locks at all. 16: Flash Mode: I leave it in TTL, which lets the built in flash expose properly and automatically. Manual sets the power manually. 17: Monitor Off: This sets how long the rear LCD stays lit each time. I leave it at 10 seconds. Set it longer if you want the screen to stay lit longer without having to hit any keys. Luckily the camera has such great battery life there's no reason not to set it for as long as you like. 18: Meter Off: This sets how long the meter stays on each time you tap the shutter. I leave it at 6 seconds. Set it longer if you like; I've never had any battery life issues with this camera. 19: Self Timer: I leave it at 2 seconds, since I use the self timer to replace a cable release. Set it to 10 seconds (default) for enough time to run to get into a picture. You can set it to 2, 5, 10 or 20 seconds. 20: Remote: This sets how long the camera stays awake ready to release as controlled by the remote infra-red shutter release. If you set this too short the camera may go to sleep and ignore the wonderful little wireless release before you get to pressing it. Set it longer and the battery may run down faster, but I've never had a problem. I set this to 5 minutes. After 5 minutes I'll have to use the rectangles button to set the camera back to remote release mode again. If you find this as helpful as a book you might have had to buy, feel free to help me write more with a donation. Thanks! Ken. CONTROLS (every button and knob) MENUS (every menu item in detail) SETUP < < NEXT |


