Yosemite & The Eastern Sierra
14 15 16 17 18 19 October 2021
Join us on this year's tour 17-20 October 2024: Fall Color in the Eastern Sierra
Introduction
I made these photos as part of a workshop I helped lead along with my friend Dave Wyman as a fund-raiser for the Yosemite Conservancy.
We had no weather and no clouds, so we did our best.
Dave and I headed over the hill to the Eastern Sierra to see what we could see after the Yosemite trip as we usually do each year, except that we didn't make a formal outing out of it or have anyone else with us as we usually do.
Shooting
I traveled light; bringing just my Canon EOS R5 and RF 24-240mm IS USM.
I also brought my RF 14-35mm f/4L IS USM and EF 100-400mm IS L II on my EF to RF adapter.
The fantastic stabilization of each of these lenses let me hand-hold them, even in dim light at 1/8 of a second, so I could shoot at low ISOs for cleaner, sharper images in just about any light.
I shot my EOS R5 in STANDARD Picture Style with 7, 5, 5 Sharpening and +4 Saturation unless otherwise noted. Turns out that my latest lenses are so sharp that 7,5,5 Sharpening made many of these images too sharp and harsh, oh well. My EOS R5 was running firmware version 1.3.1.
I shot everything as NORMAL (stairstep) LARGE JPG files, not FINE (quarter circle) and certainly not in raw. I get everything I need with JPG and can edit everything about my JPG files if I need to, no need to suffer the inconveniences of raw files.
Of course I also brought my Apple iPhone 13 Pro Max. I shot it in its native Camera app. I read the EXIF exposure data later in my JPG files; I most certainly didn't fiddle with manual exposure.
I didn't bother carrying a tripod, except for shots minutes long under moonlight. My iPhone 13 Pro Max didn't need a tripod, even under moonlight. Amazing!
Editing
When I got home I copied the JPG files from my R5's SD card into my Mac Pro (late 2013) with a card reader. My RitzGear CFexpress card only was used as a backup in my R5's other slot. I imported from my Apple iPhone 13 Pro Max with a Lightning dock and my Mac's native Image Capture app directly as JPGs.
I sorted and picked the winners with Photo Mechanic.
Each pick received significant artistic input in Photoshop CS6 (from 2010) and the Perfectly Clear and/or Skylum Aurora HDR plugins until each completed work looked as I originally imagined it.
I also used the Skylum Luminar AI (updated as Luminar Neo for 2023) plug-in to add clouds to otherwise cloudless skies in a few cases. This is nothing new; back in the 1800s when film was only sensitive to blue light photographers would use a second cloud negative to burn-in clouds on the blank areas of a print. Some things never change.
Many of the iPhone shots were optimized in the free Snapseed app on my iPhone first, otherwise it was all sorted and edited and published on my hot-rod Mac Pro (late 2013) or base-model 2017 13″ MacBook Pro.
Like all art, it first exists in my mind, and I do whatever it takes until the final result matches my vision. For instance, I often add deliberate cropping, edge-burning (darkening or vignetting), perspective corrections and/or split-toning. Photography is a creative art, not an application of rules; you have to know what the picture is going to say and how you want it to look before you take it. See also my articles at How to Take Great Pictures.
The funny reality is that I had never tried Skylum Aurora HDR until I was about halfway through my editing, and I love it so much I had to go back and redo half my images with Skylum Aurora HDR! While Perfectly Clear is great for taking images and making them better faster, Skylum Aurora HDR lets me go from plain to INSANE!!! in no time flat. If you imagination is as vivid as mine, Skylum Aurora HDR is a must-have. Skylum Aurora HDR is amazing for adding even more WOW! to my images. While it's called "HDR" and is intended for merging multiple bracketed frames into one image, the secret is that it works great with just my single JPG shots, bringing out loads of detail from dark shadows and bright highlights and letting me make them blast your eyeballs when I want to. Aurora HDR is magical!
While I started this project on my Mac Pro (late 2013) with a eight cores and 32GB of RAM, I adopted a used base-model 2017 13″ MacBook Pro with a dual core and 8GB of RAM, and both worked just great running all the same software.
I built and published these pages in my 2010 copy of Dreamweaver CS5.
Viewing
These are the highest-resolution images legally permitted on a web page. They are 2,400 pixels wide. The original images are of course much higher resolution, but only a few of those original files are shared here.
These images will fill your screen horizontally, up to 2,400 pixels wide (or 4,800 pixels wide on Mac retina displays). The vertical size will vary with each image.
Half of you are looking at these on your iPhone held vertically or your iPad held either way, and the other half of you are using computers with squinty 16:9 monitors masked on top and bottom by browser window controls, so there's no way I can make every image fit all your screens perfectly.
On iPhone and iPad, everything changes size when you rotate between vertical and horizontal.
Click or tap any image to make it fit your computer screen, or use command ⌘ and + or - on Mac Safari to make the page (or image) larger or smaller. Command ⌘ and 0 brings it back to normal, at least on Mac Safari.
Turn up your screen brightness for best results.
Good luck and enjoy!
14 October 2021, Thursday top
I left my house at 5 AM and met my friend Dave Wyman in Los Angeles at 7:42 AM.
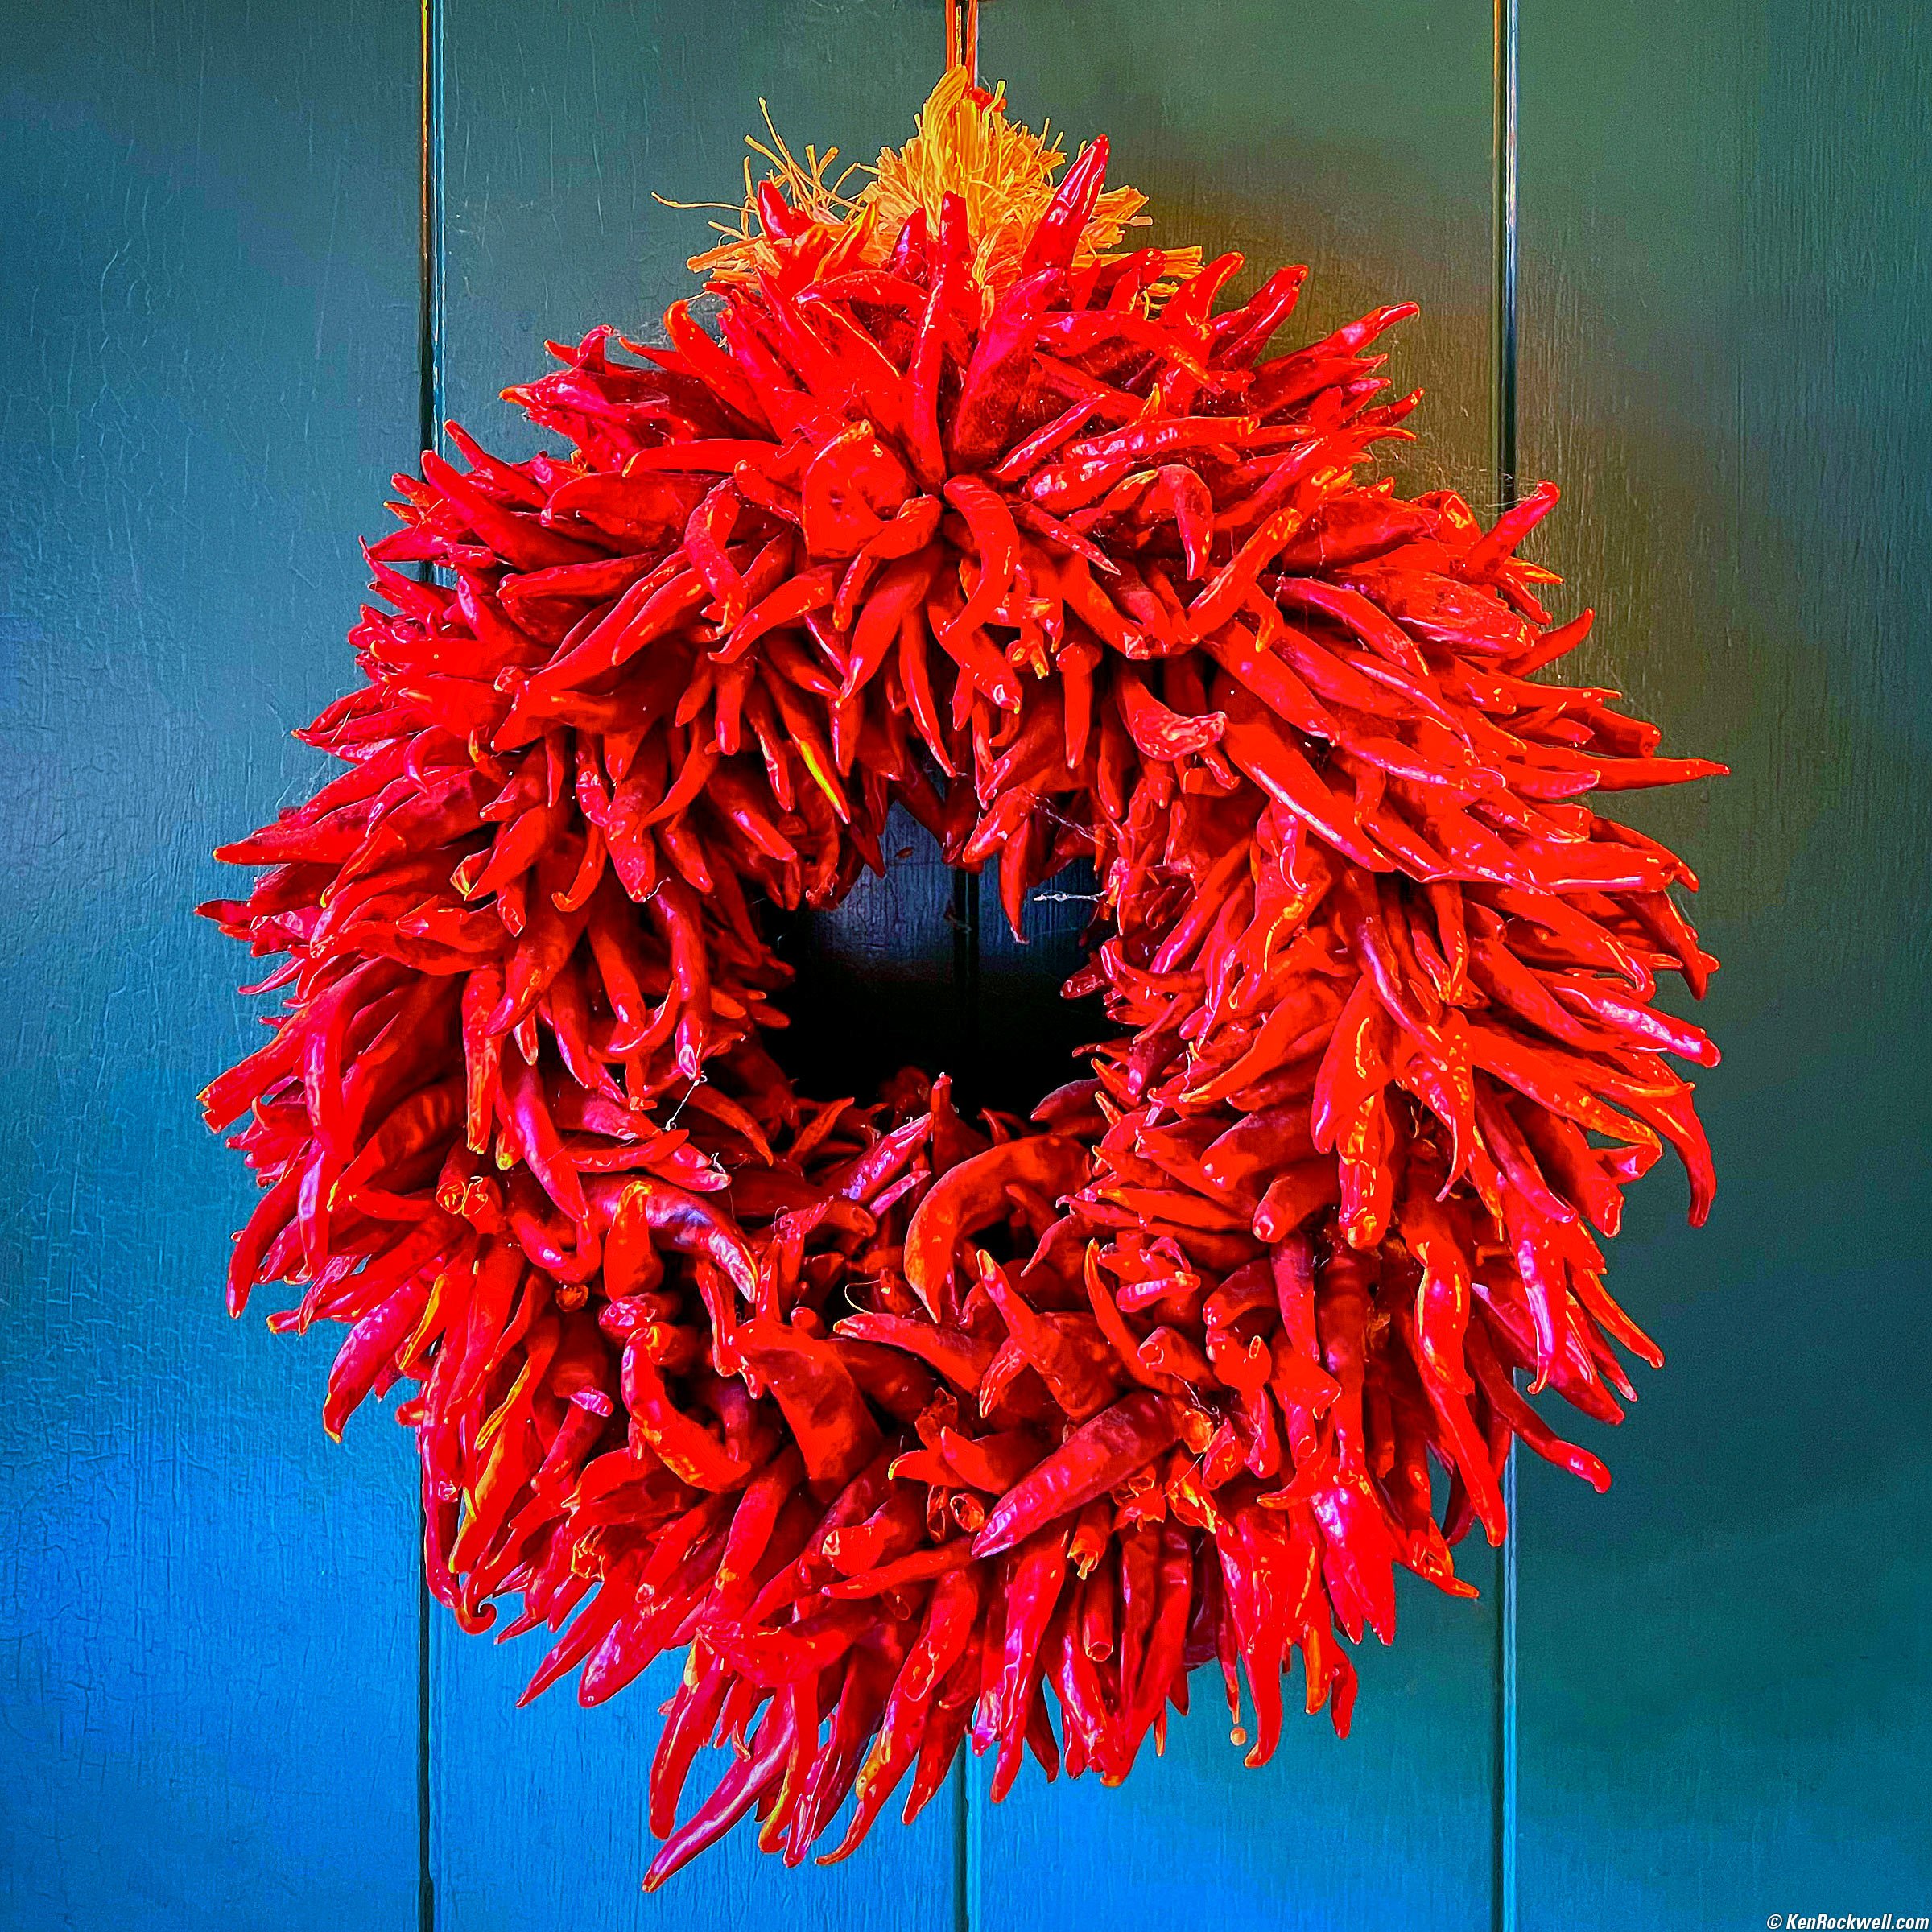
Chile Ristra, Los Angeles, California, 7:59 A.M. Apple iPhone 13 Pro Max 5.7mm (26mm eq.) camera at f/1.5 at 1/40 at Auto ISO 500 (LV 4.2), square crop (60mm eq. on HASSELBLAD 6×6 cm), Snapseed and then Skylum Aurora HDR from my one JPG image. bigger or fit-to-screen.
We put Dave's gear in my car and headed north at about 9 AM. We stopped for fuel in Mariposa at 2:22 PM and arrived at the Yosemite Lodge at 3:53 PM.
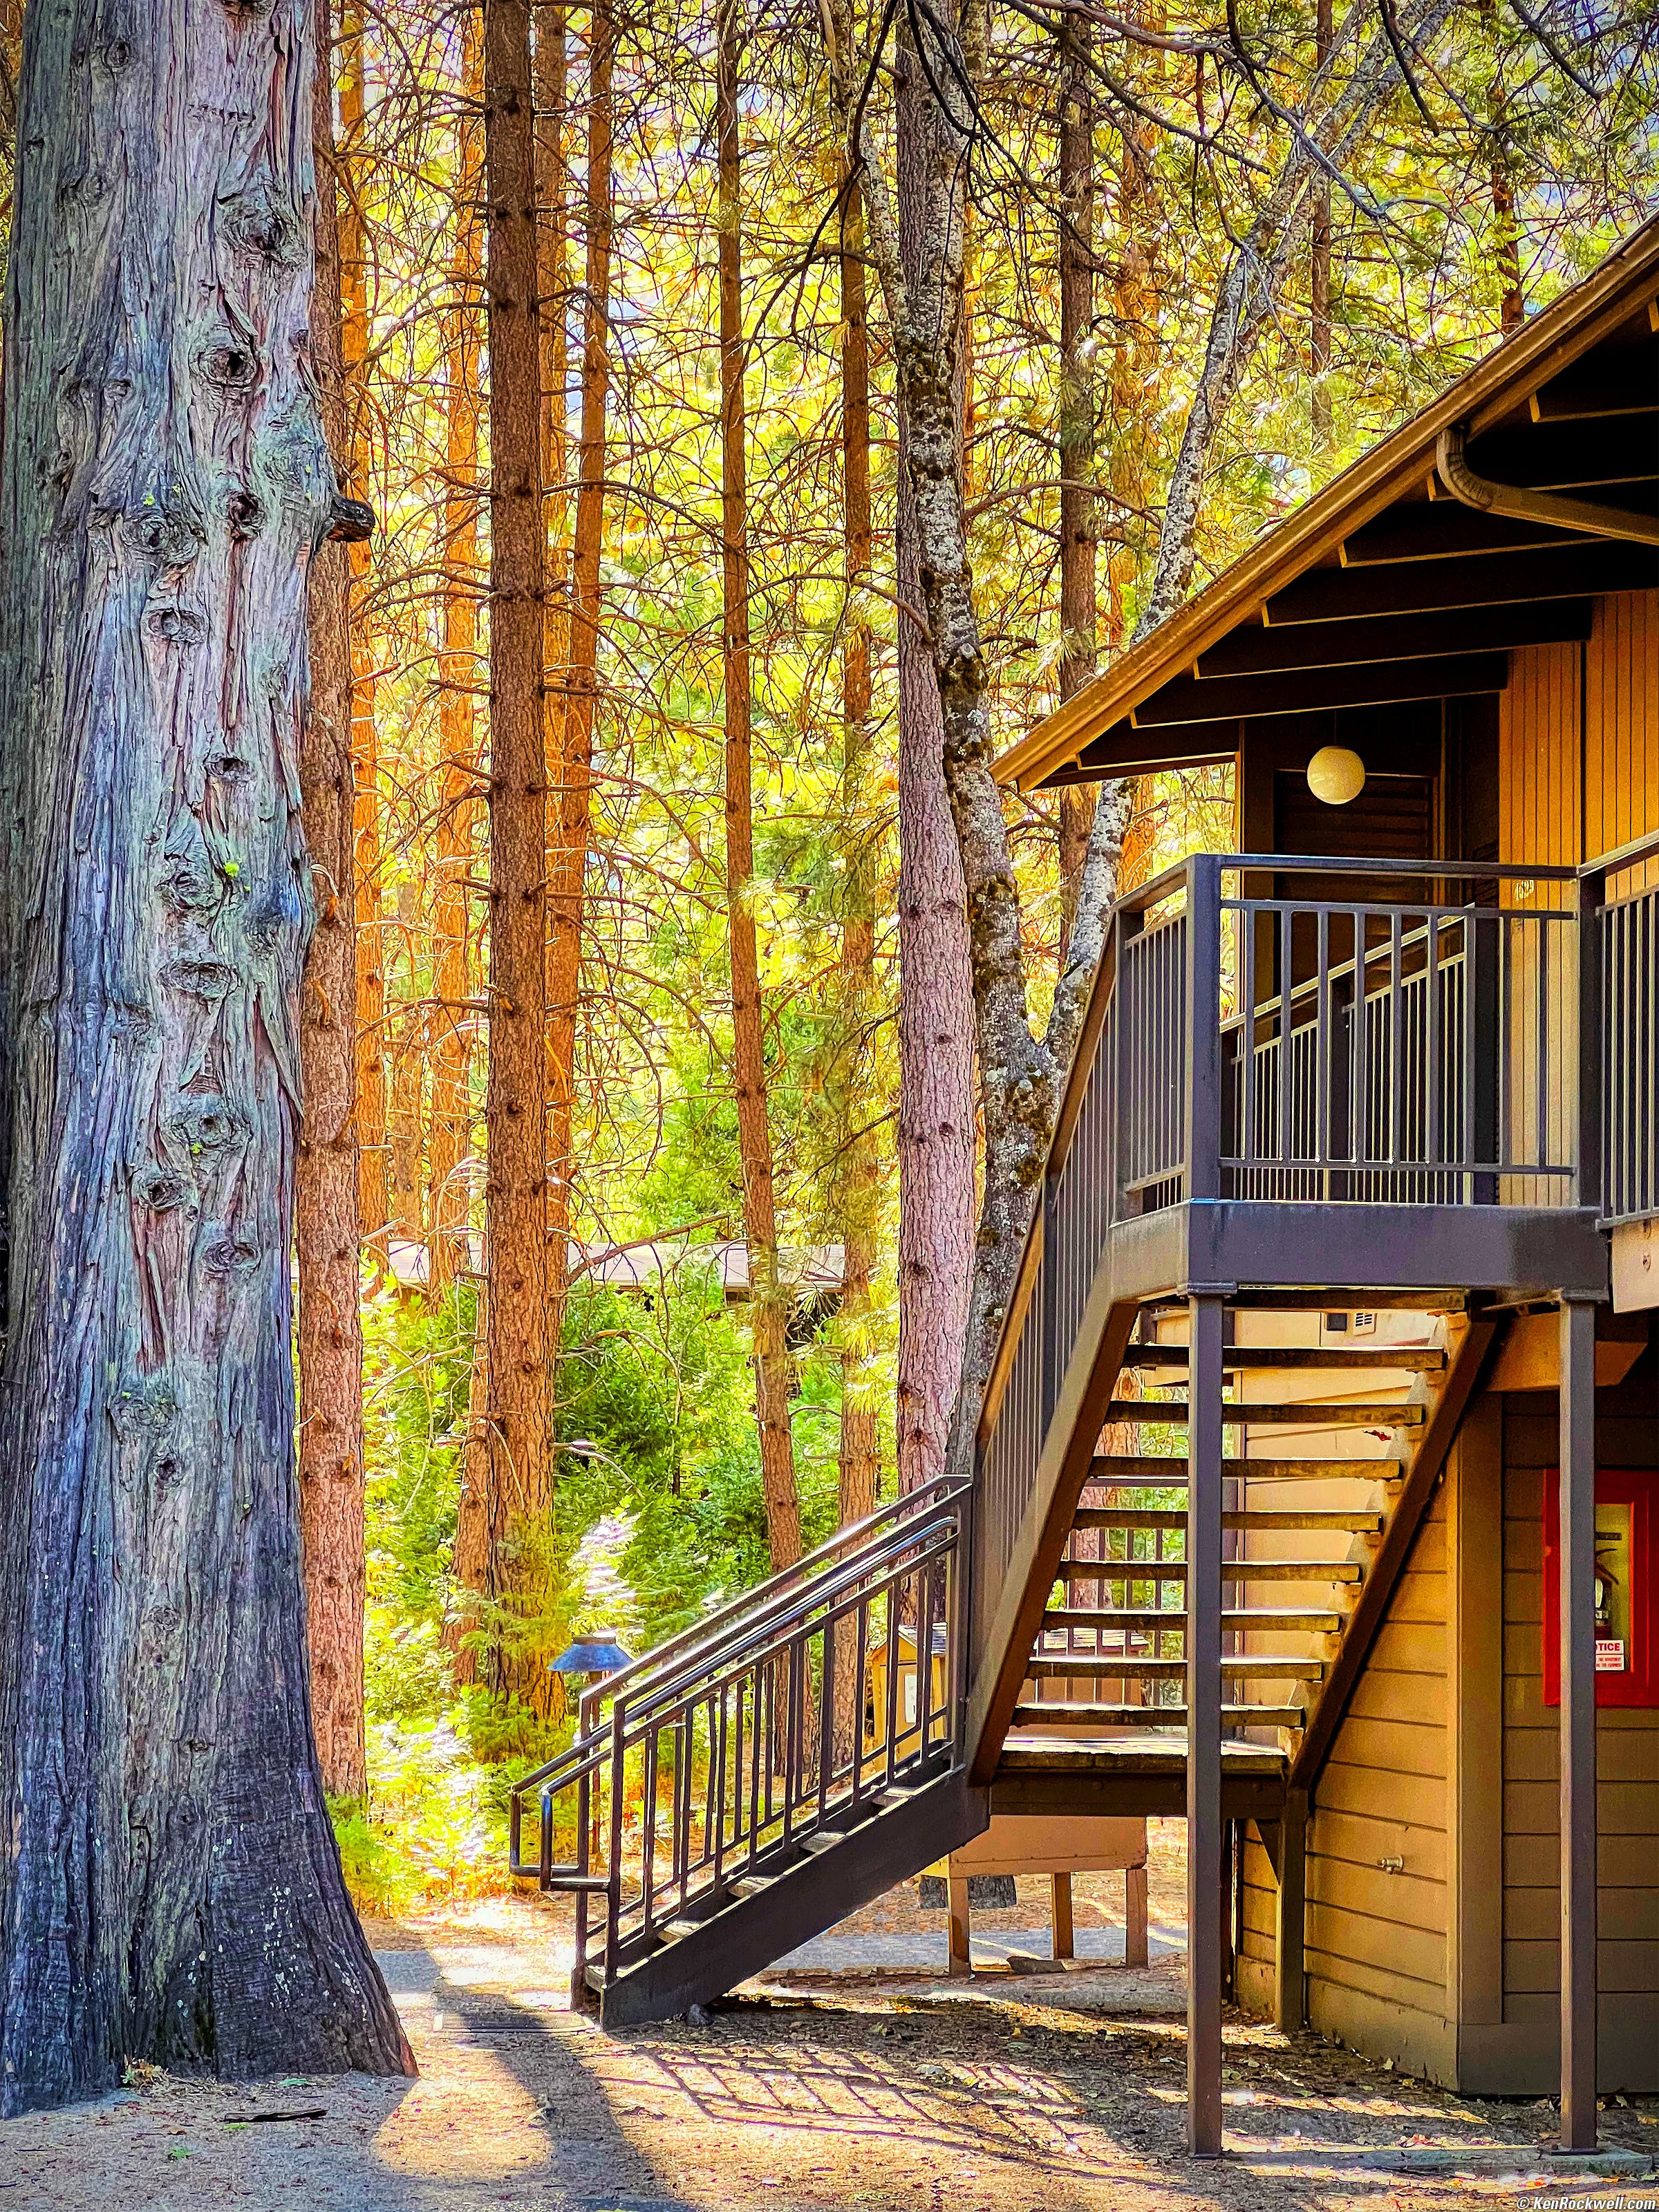
Yosemite Lodge at the Falls, Yosemite National Park, 4:10 P.M. Apple iPhone 13 Pro Max 9mm (77mm eq.) camera at f/2.8 at 1/83 at Auto ISO 200 (LV 8⅓), Perfectly Clear and then Skylum Aurora HDR from my one JPG image. bigger or fit-to-screen.
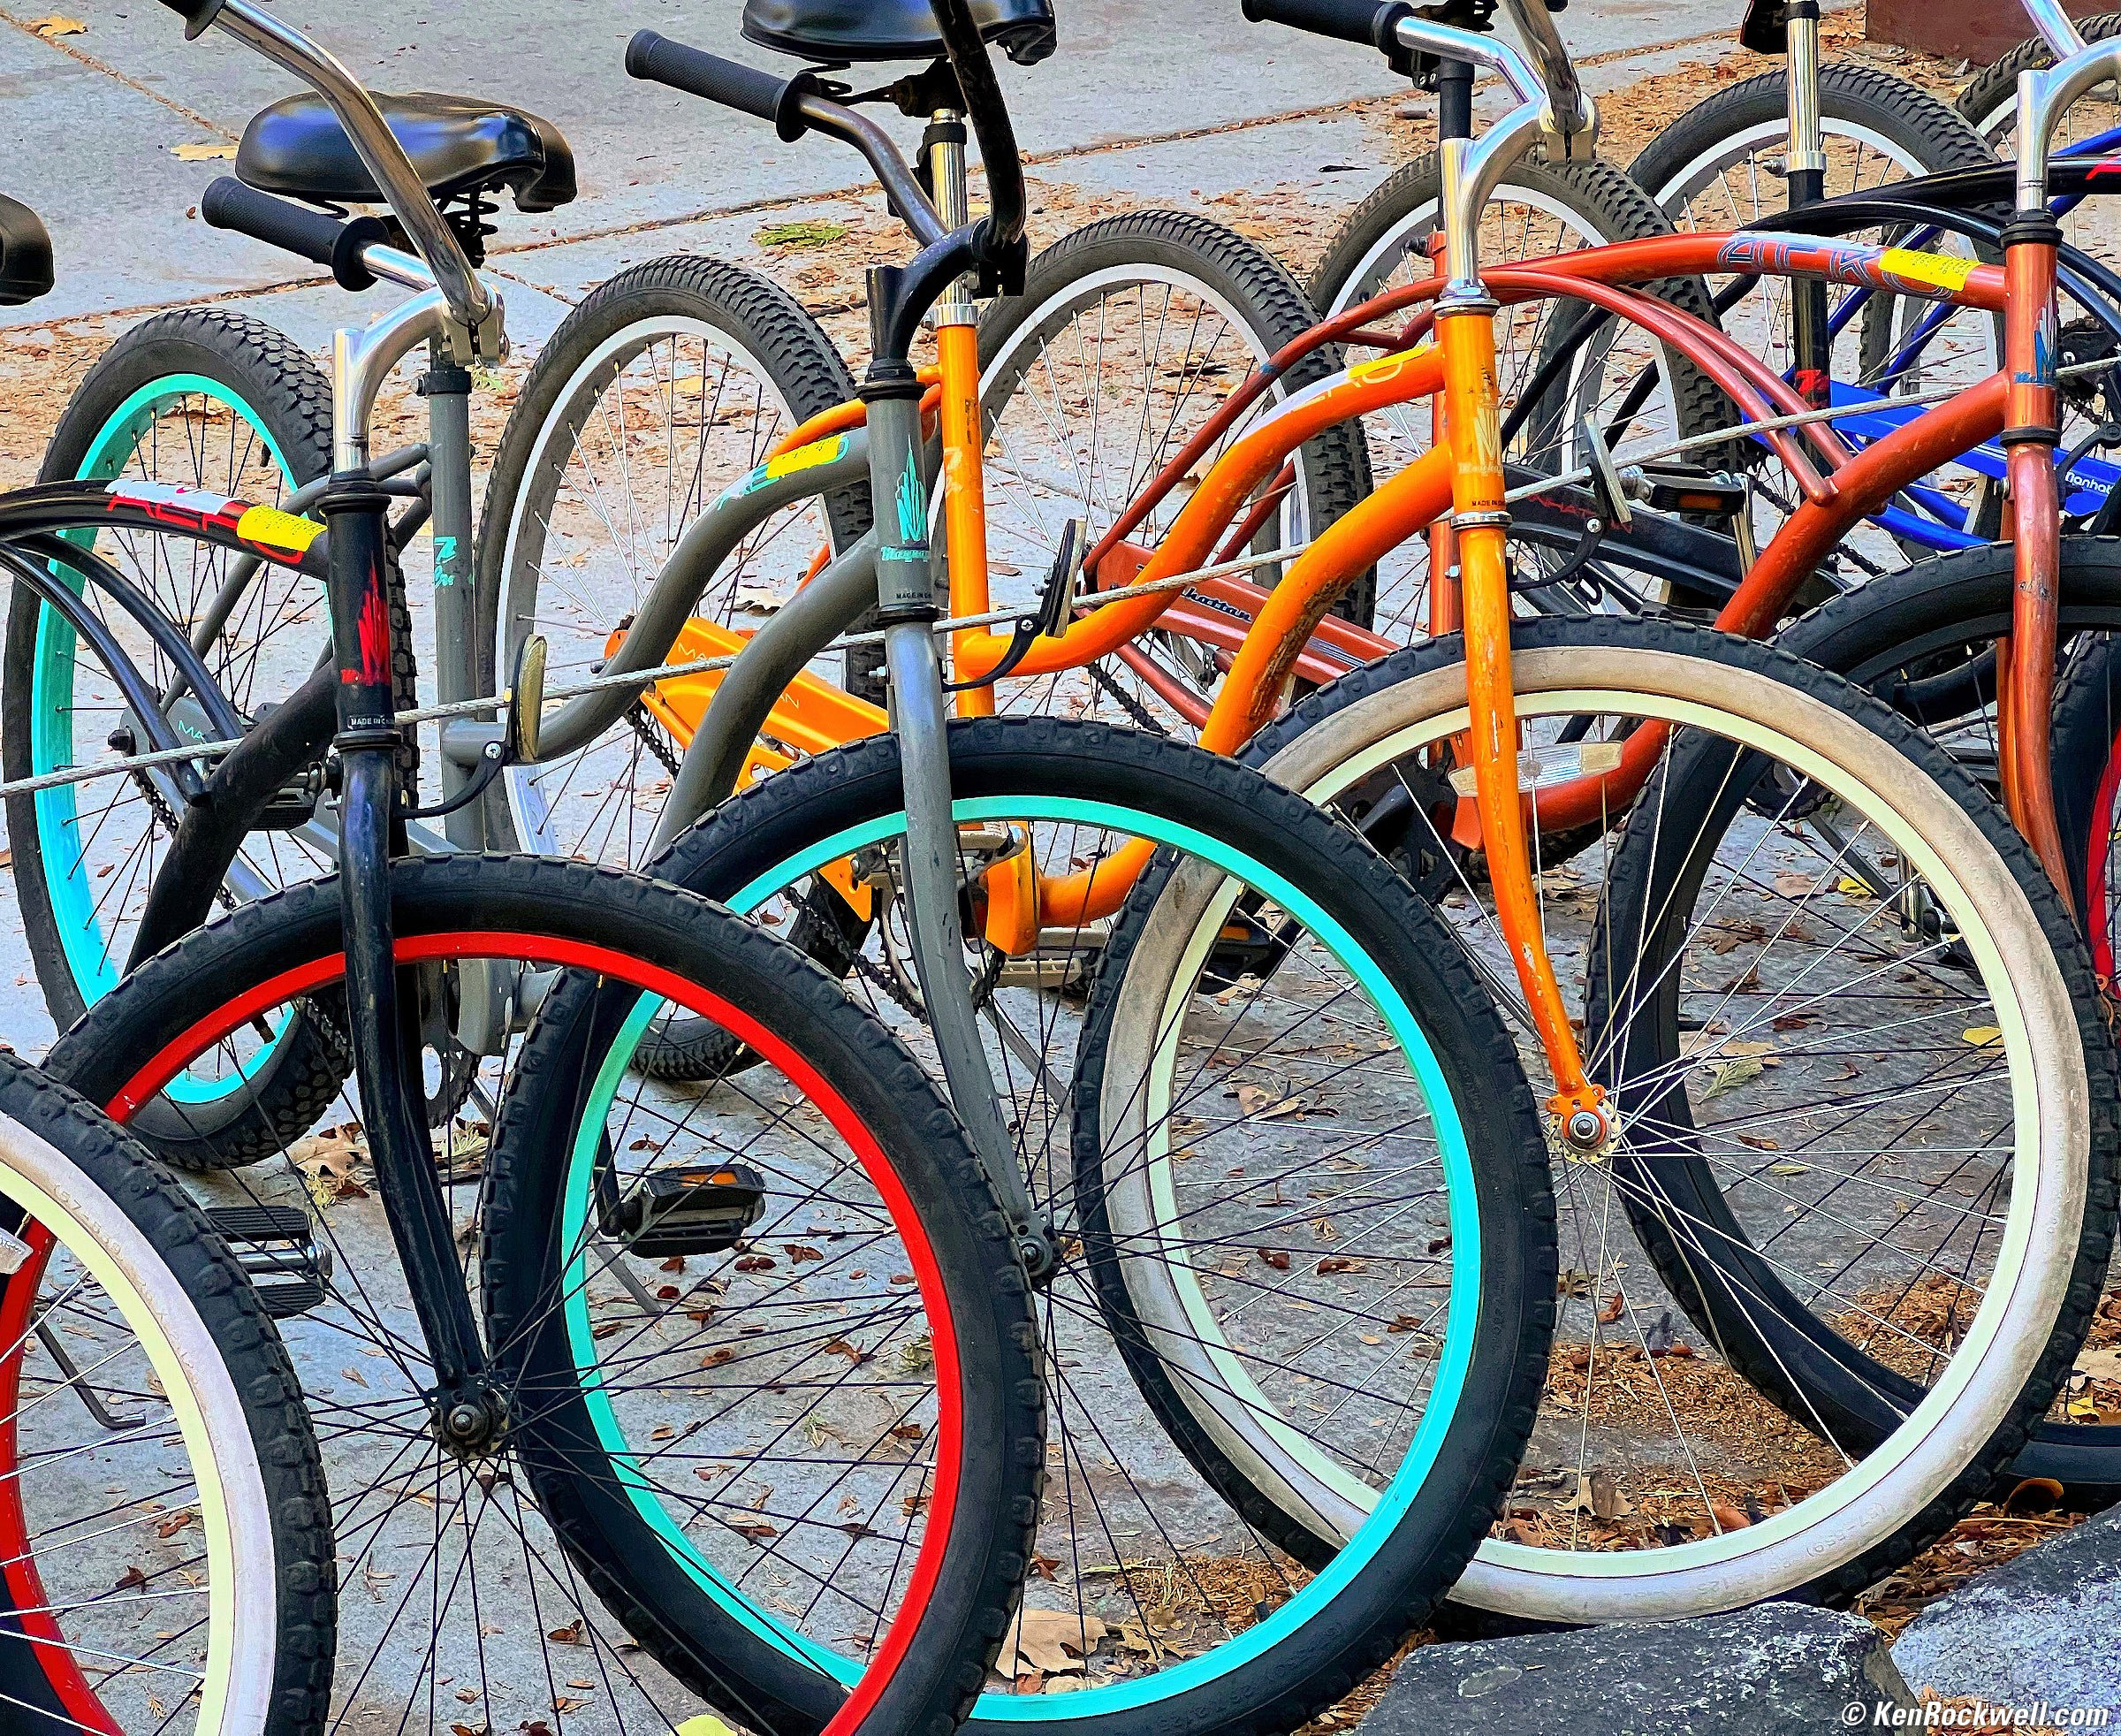
Rental Bikes at Yosemite Lodge at the Falls, Yosemite National Park, 4:17 P.M. Apple iPhone 13 Pro Max 9mm (77mm eq.) camera at f/2.8 at 1/92 at Auto ISO 250 (LV 8⅙), Perfectly Clear. bigger or fit-to-screen.
We met our group for the first time this afternoon at the lodge, and walked over to Cook's Meadow to see what we could see of Half Dome:
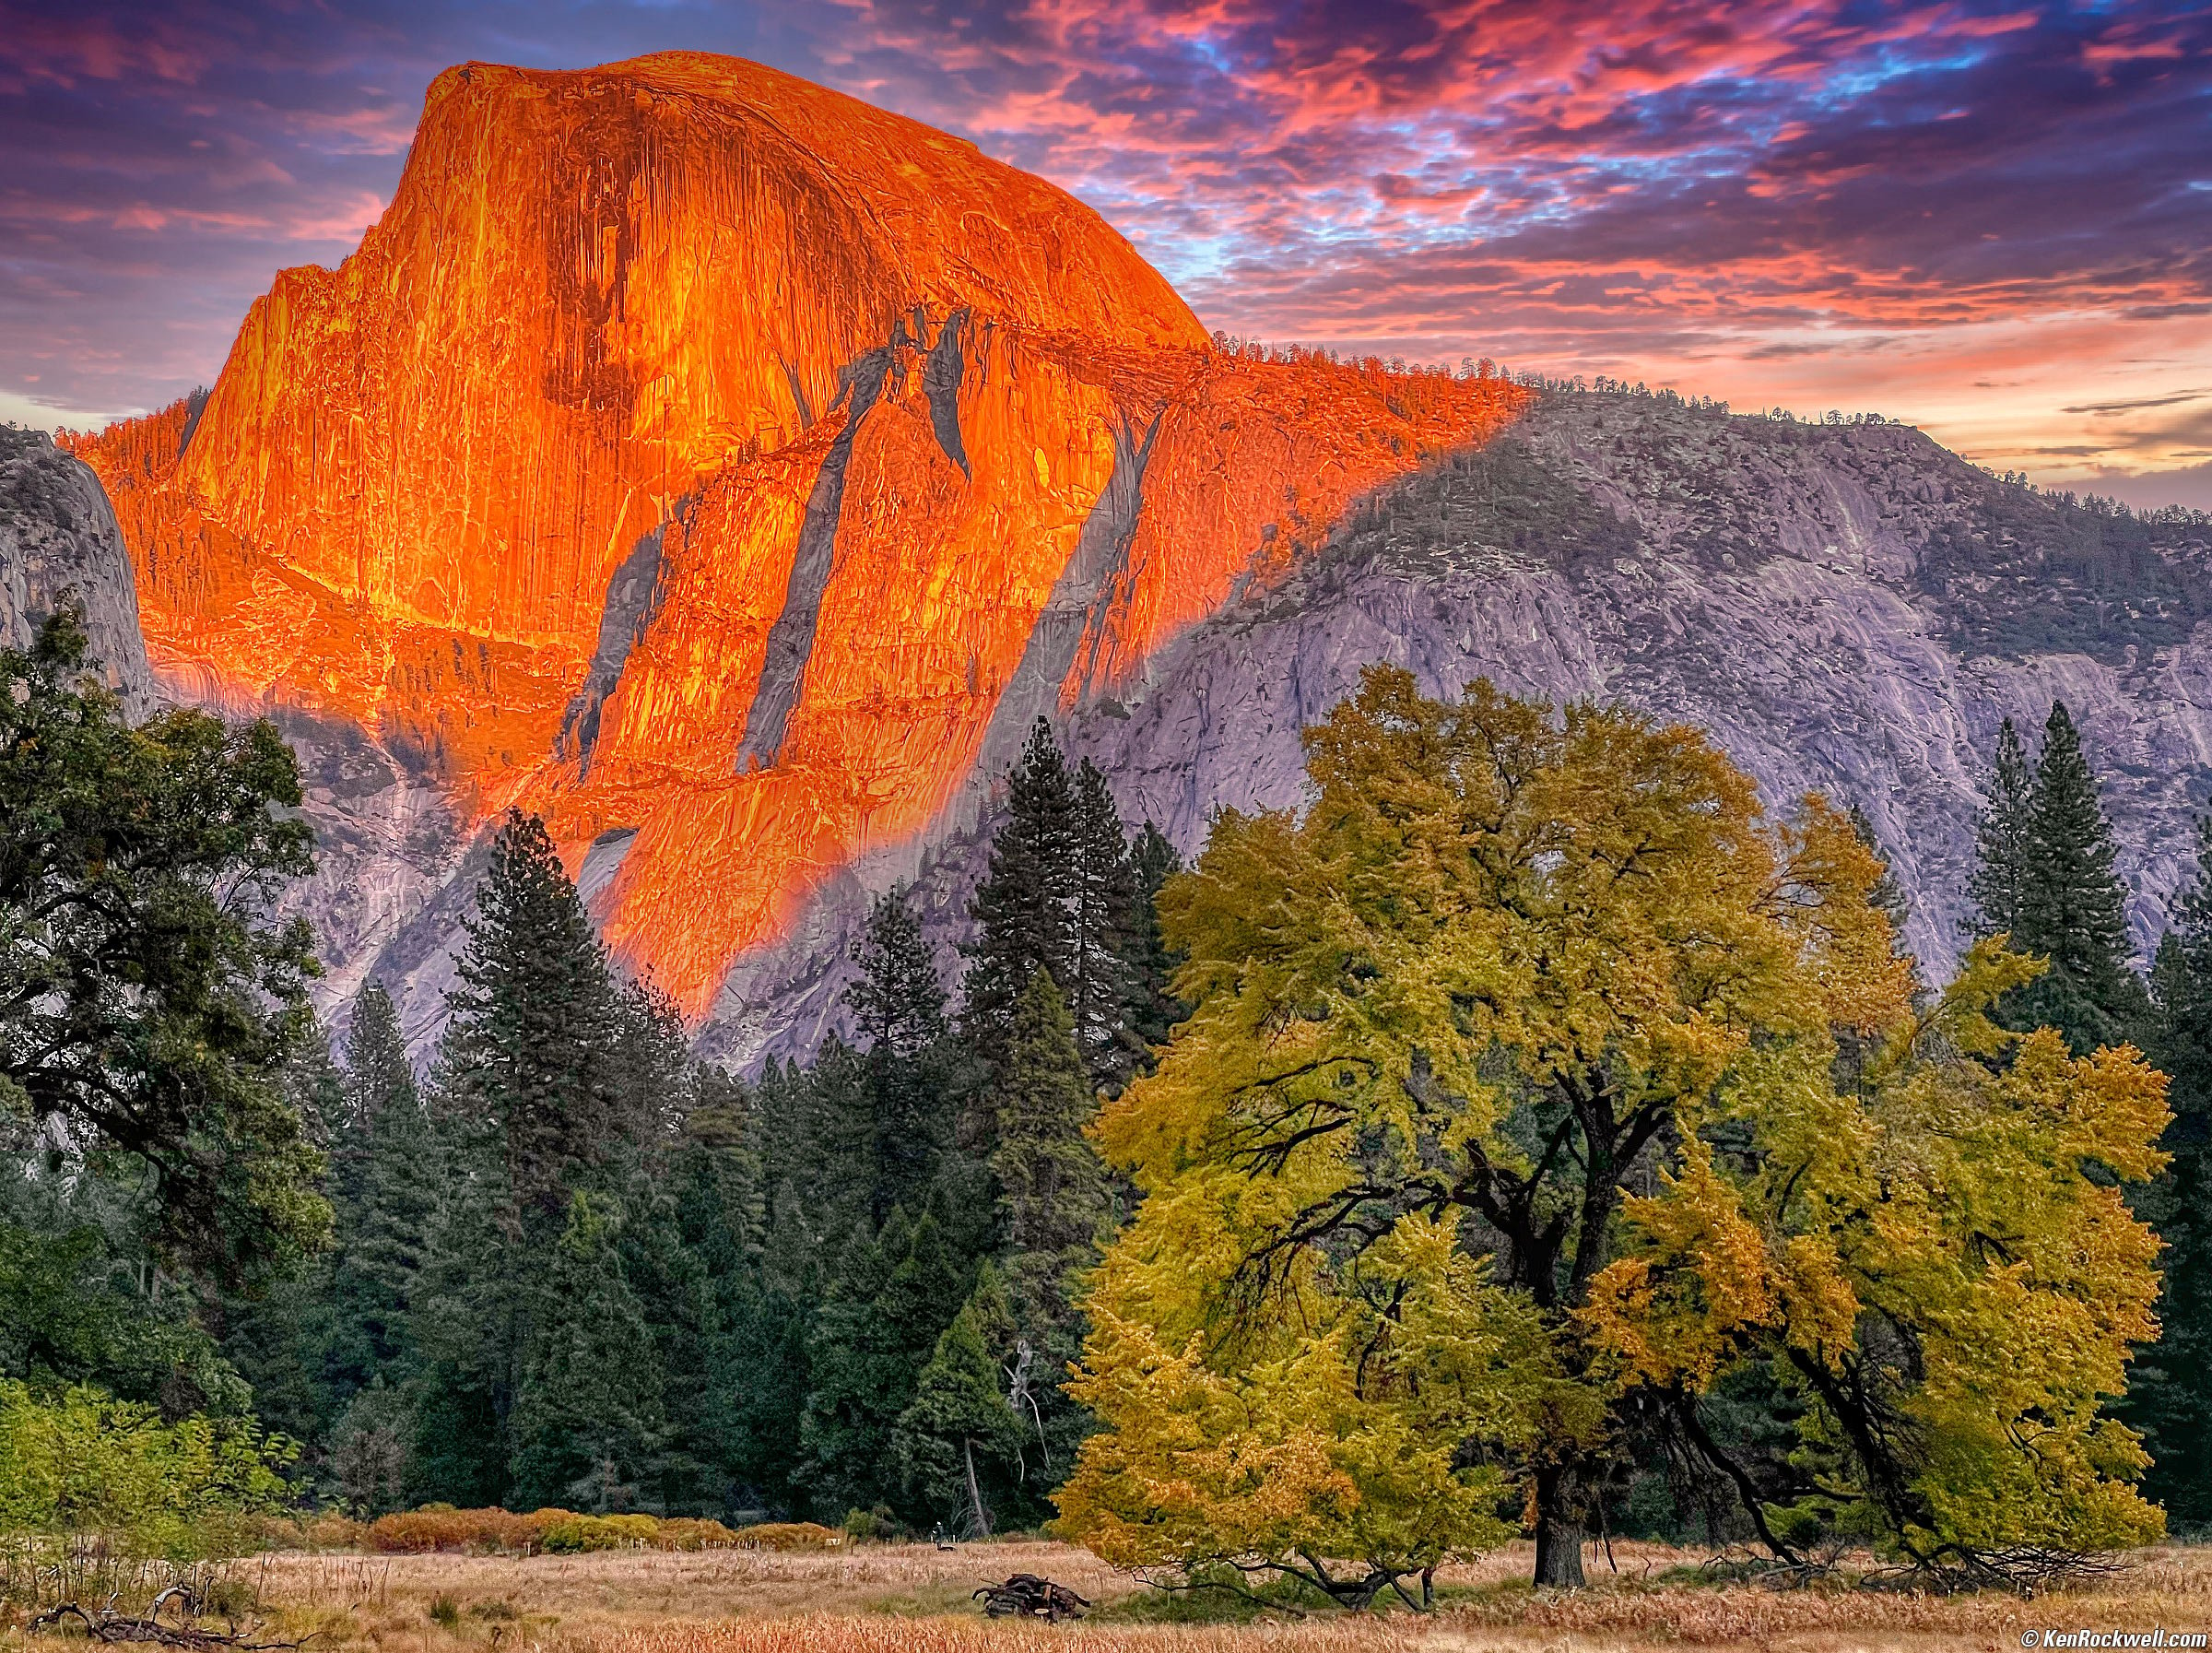
Half Dome in Last Light, Cook's Meadow, Yosemite National Park, 6:12 P.M. Apple iPhone 13 Pro Max 9mm (77mm eq.) camera at f/2.8 at 1/122 at Auto ISO 50 (LV 10.9), Snapseed on iPhone to bump up the colors then Skylum Luminar AI (updated as Luminar Neo for 2023) in my Mac to add clouds and finally Skylum Aurora HDR to add snap and vignetting, all from my one original JPG file. bigger or fit-to-screen.
Adding clouds later is nothing new; photographers have been adding clouds to empty skies by using two different negatives to print them onto the same piece of otherwise blank photo paper ever since the 1800s. Skylum Luminar AI (updated as Luminar Neo for 2023) just makes it much, much easier and even has its own cloud templates.
15 October 2021, Friday top
Two Trees Along the Merced River, Yosemite National Park, 8:05 A.M. Canon EOS R5, RF 24-240mm IS USM at 83mm at f5.6 hand-held at 1/13 at ISO 100 (LV 8.6), Perfectly Clear and then Skylum Aurora HDR from my one JPG image. bigger or fit-to-screen.
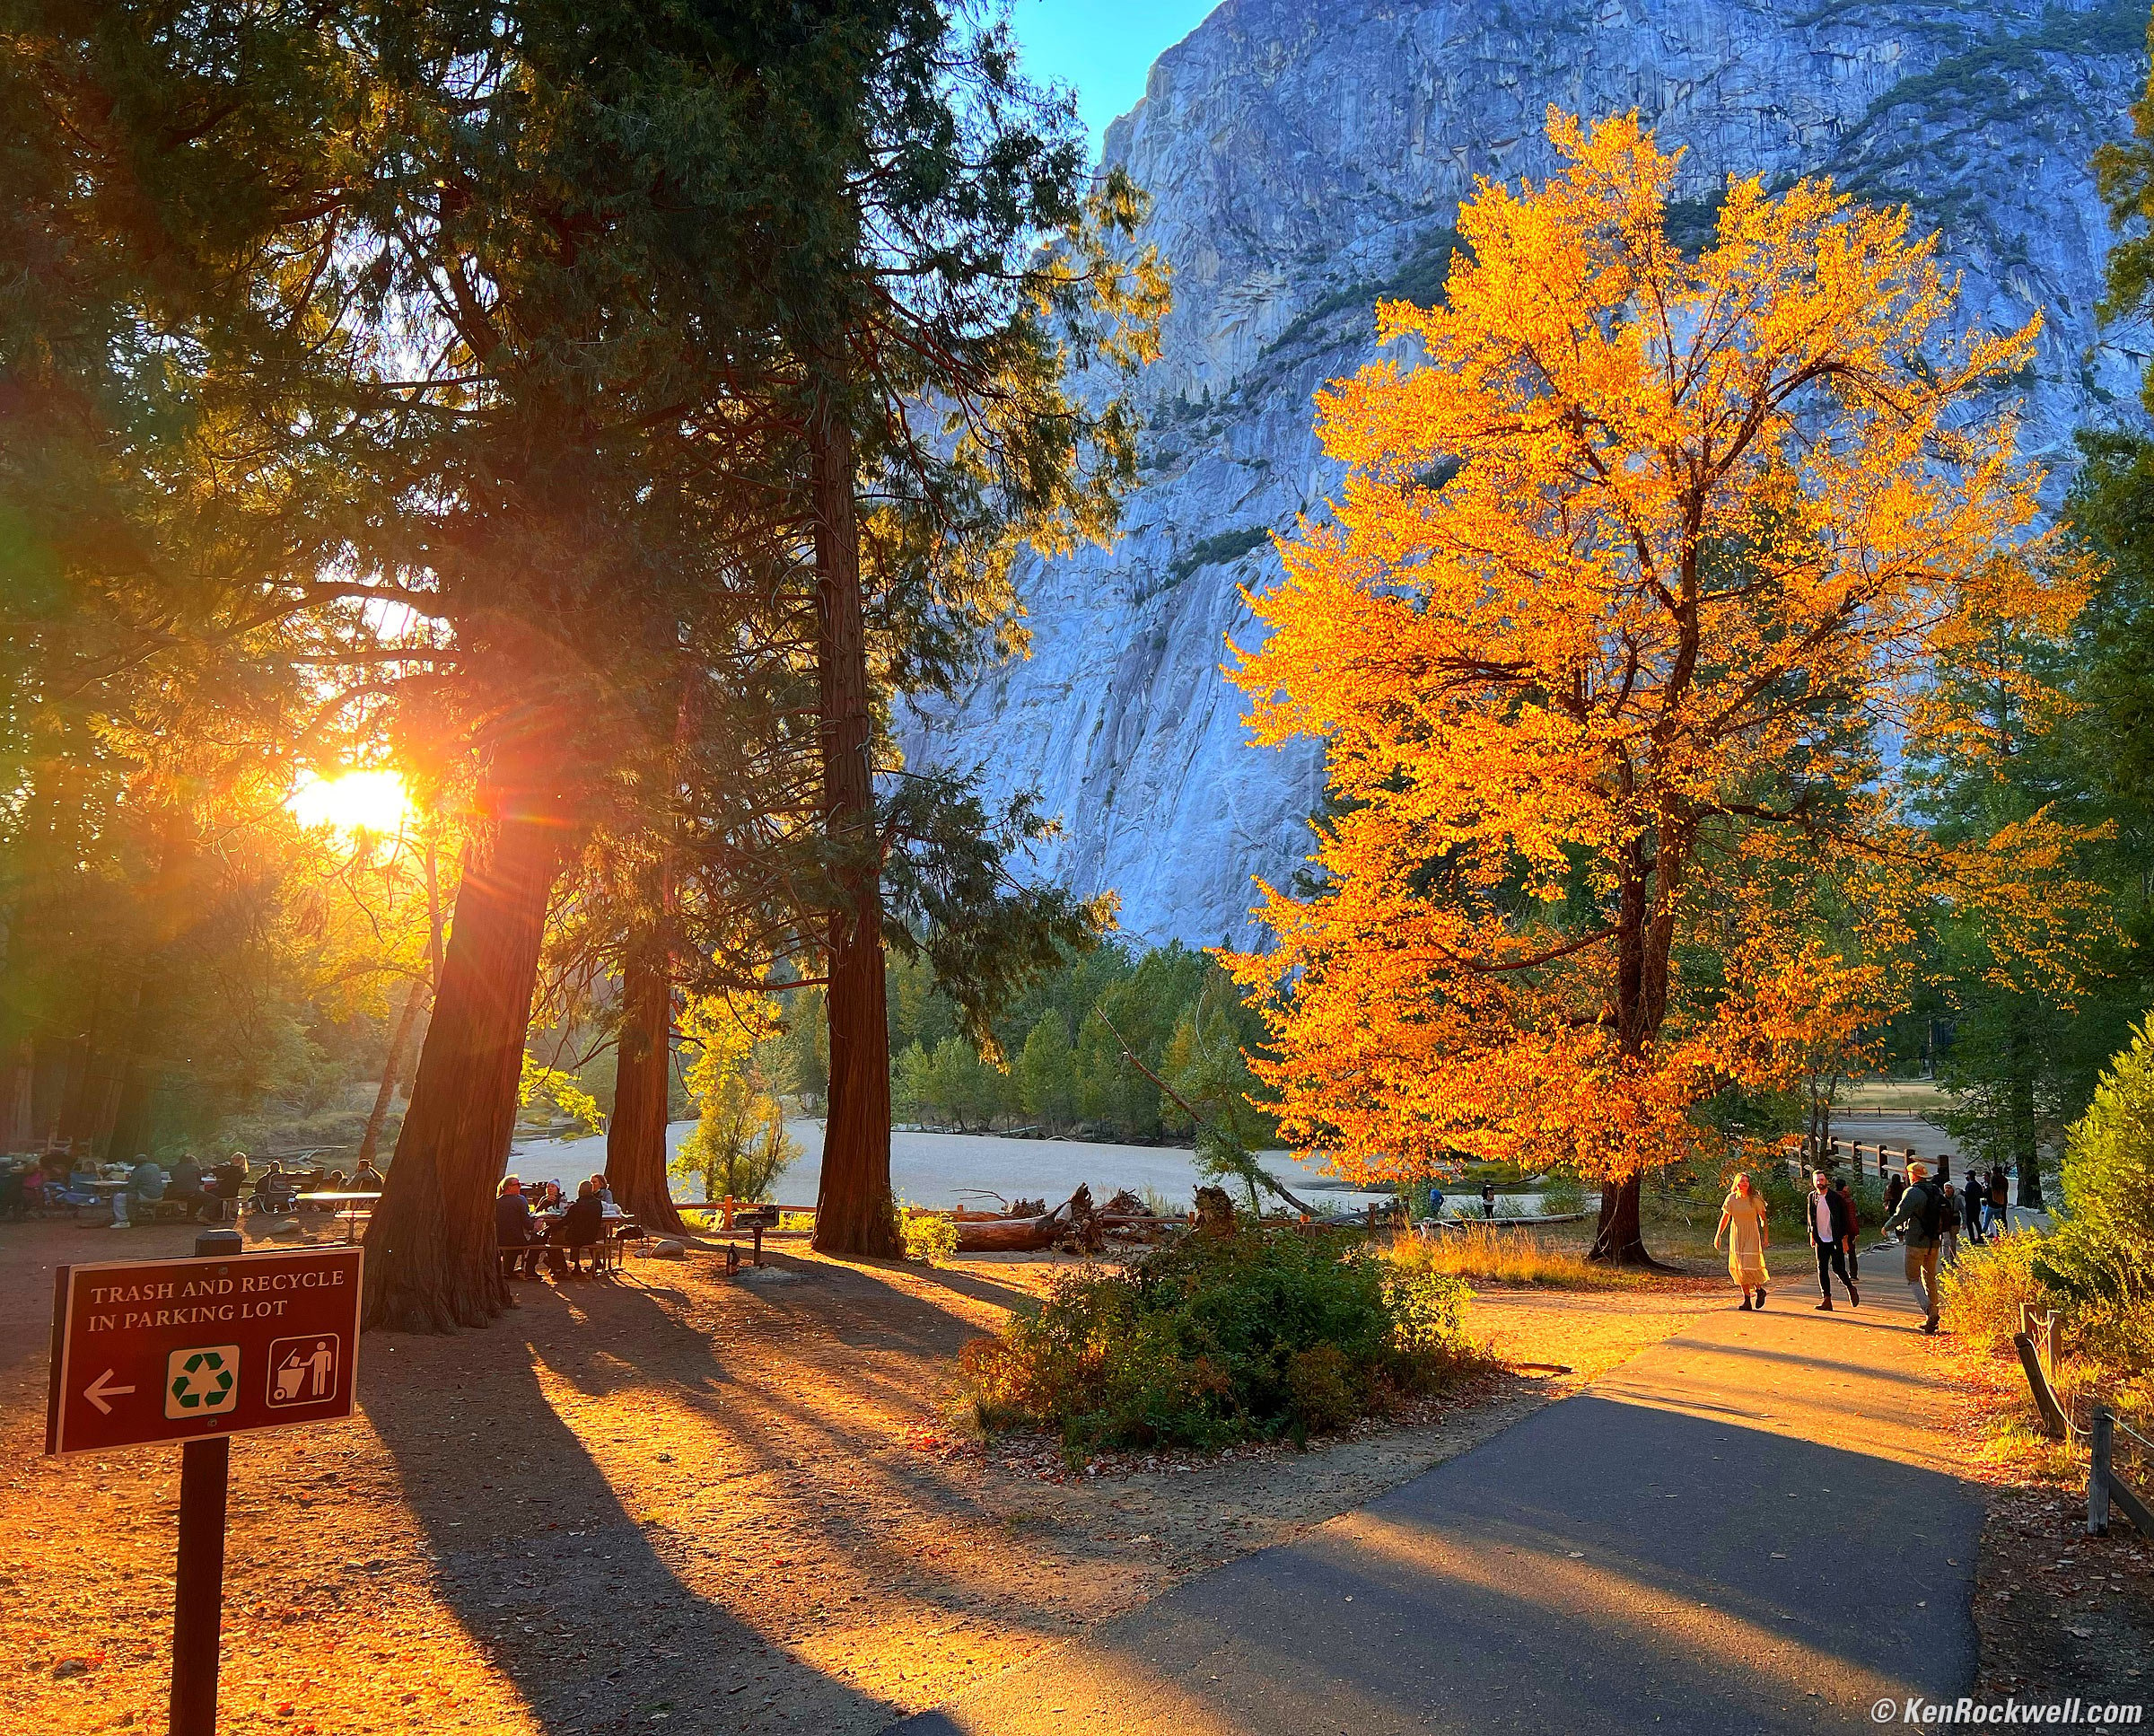
Morning in Cook's Meadow, Yosemite, 11:23 A.M. Canon EOS R5, RF 24-240mm IS USM at 24mm at f/16 (for a good sunstars) at 1/60 at ISO 100, -0.7 stops exposure compensation (LV 14.0), shade white balance to make leaves more orange, Skylum Aurora HDR from my one JPG image to make the leaves golden and awesome. bigger or fit-to-screen, or full 45 MP resolution JPG image (12 MB). Don't tell me the RF 24-240mm IS USM isn't ultra sharp!
Flames, Yosemite National Park, 12:10 P.M. Canon EOS R5, cropped from RF 24-240mm IS USM at 222mm at f/8 at 1/160 at ISO 100, -0.7 stops exposure compensation (LV 13.4), Skylum Aurora HDR to add fire and vignetting to my one JPG image. bigger or fit-to-screen.
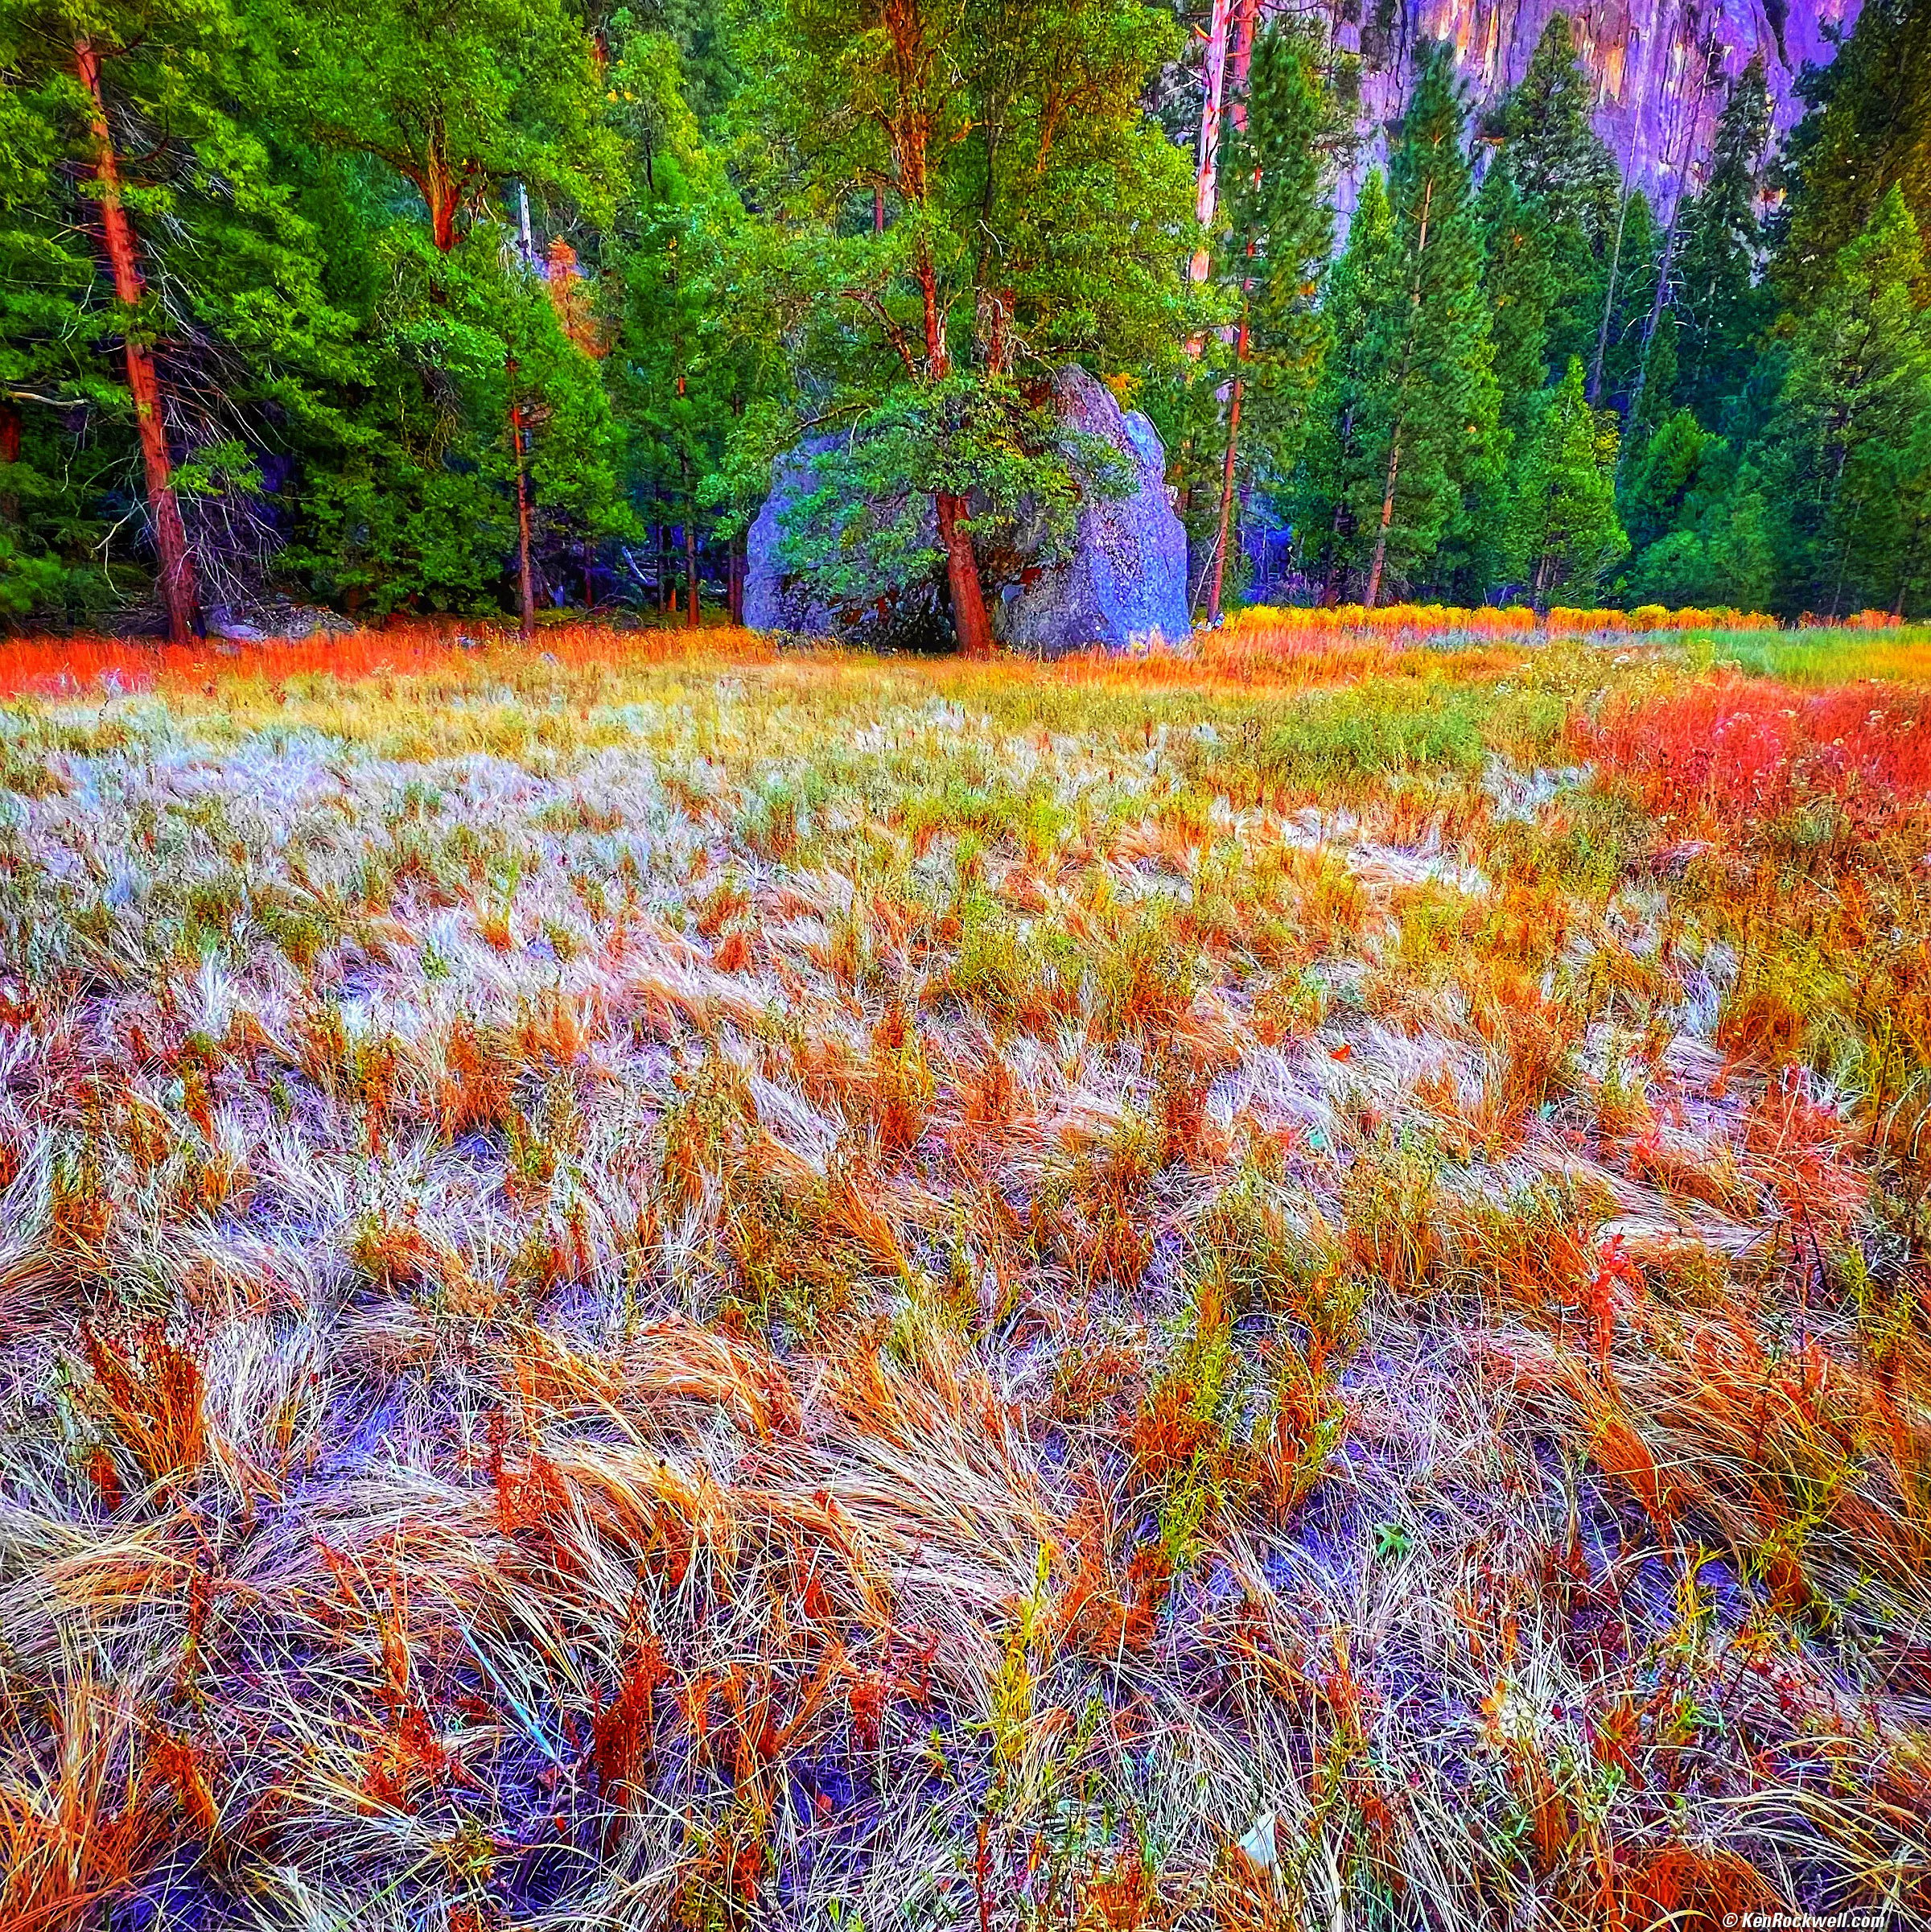
Blue Stone Sphere in a Field, Yosemite National Park, 12:28 P.M. Apple iPhone 13 Pro Max 1.57mm (13mm eq.) camera at f/1.8 at 1/122 at Auto ISO 64 (LV 9.3), square crop (38mm eq. on HASSELBLAD 6×6 cm), Snapseed and then Perfectly Clear. bigger or fit-to-screen.
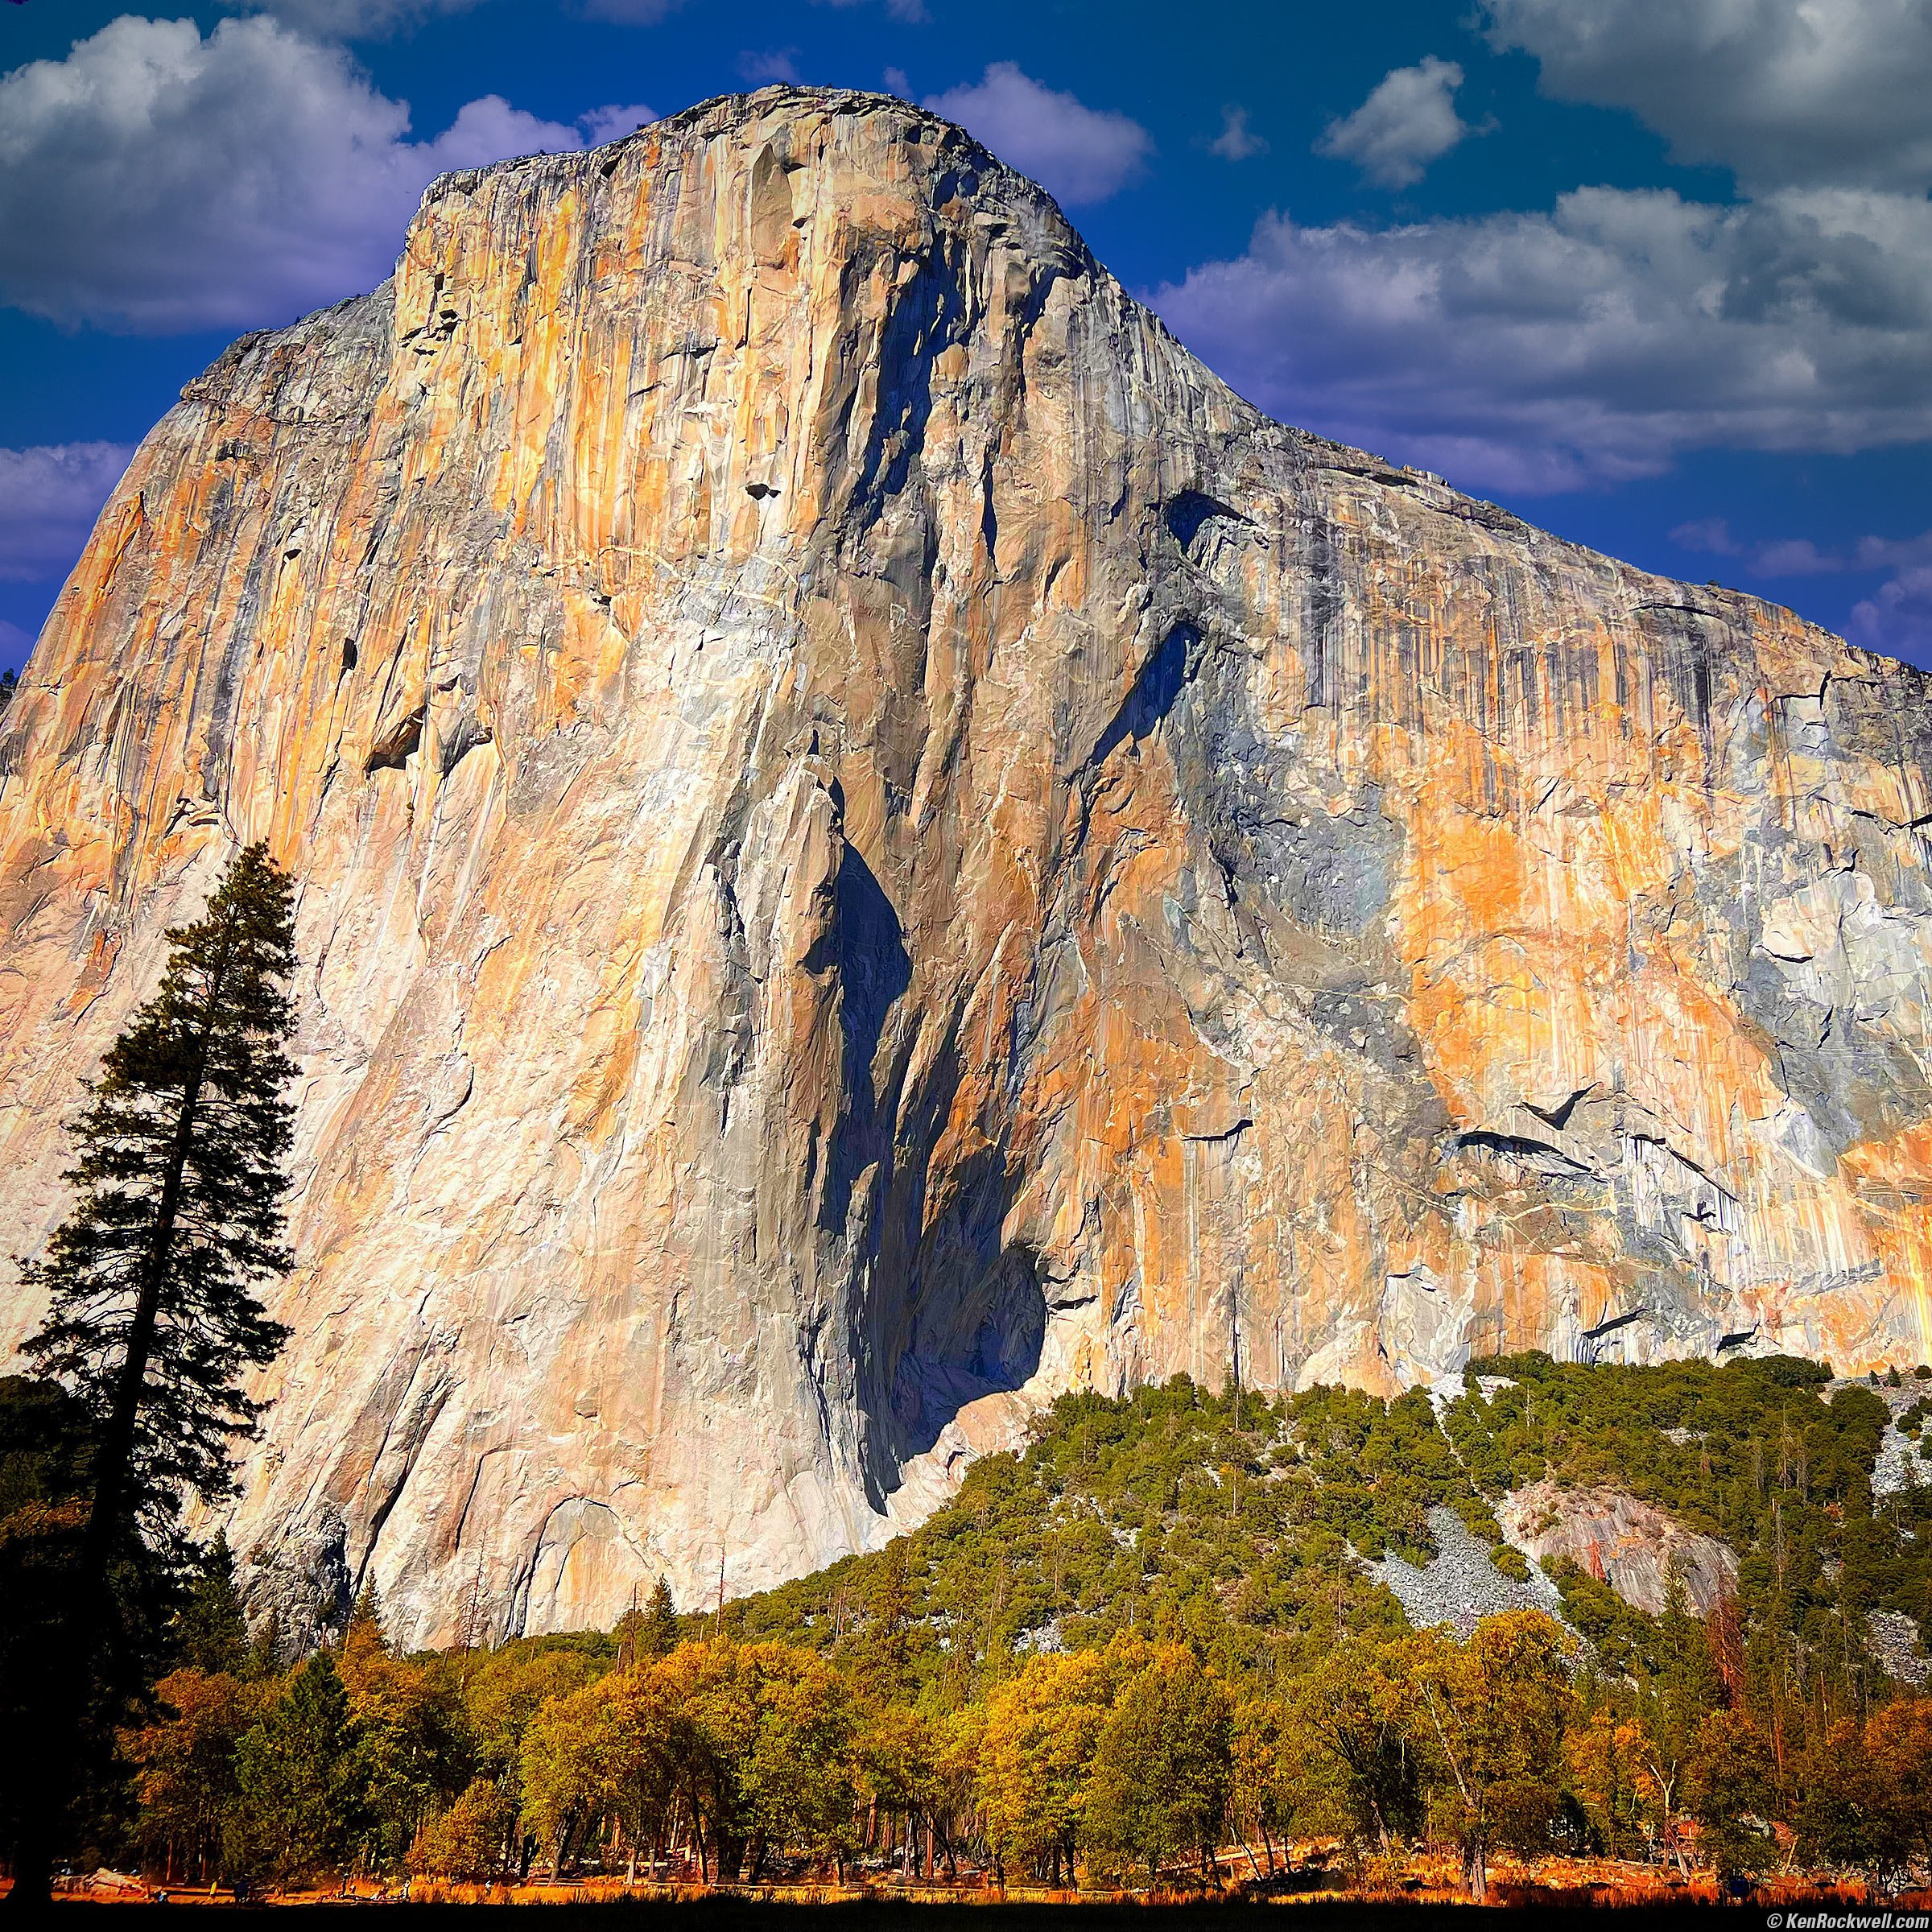
The Face of El Capitan, Yosemite National Park, 2:39 P.M. Apple iPhone 13 Pro Max 5.7mm (26mm eq.) camera at f/1.5 at 1/5,076 at Auto ISO 50 (LV 14.5), square crop (60mm eq. on HASSELBLAD 6×6 cm), Snapseed in my iPhone to add color and Skylum Luminar AI (updated as Luminar Neo for 2023) in my Mac to add clouds to the otherwise blank sky. bigger or fit-to-screen.

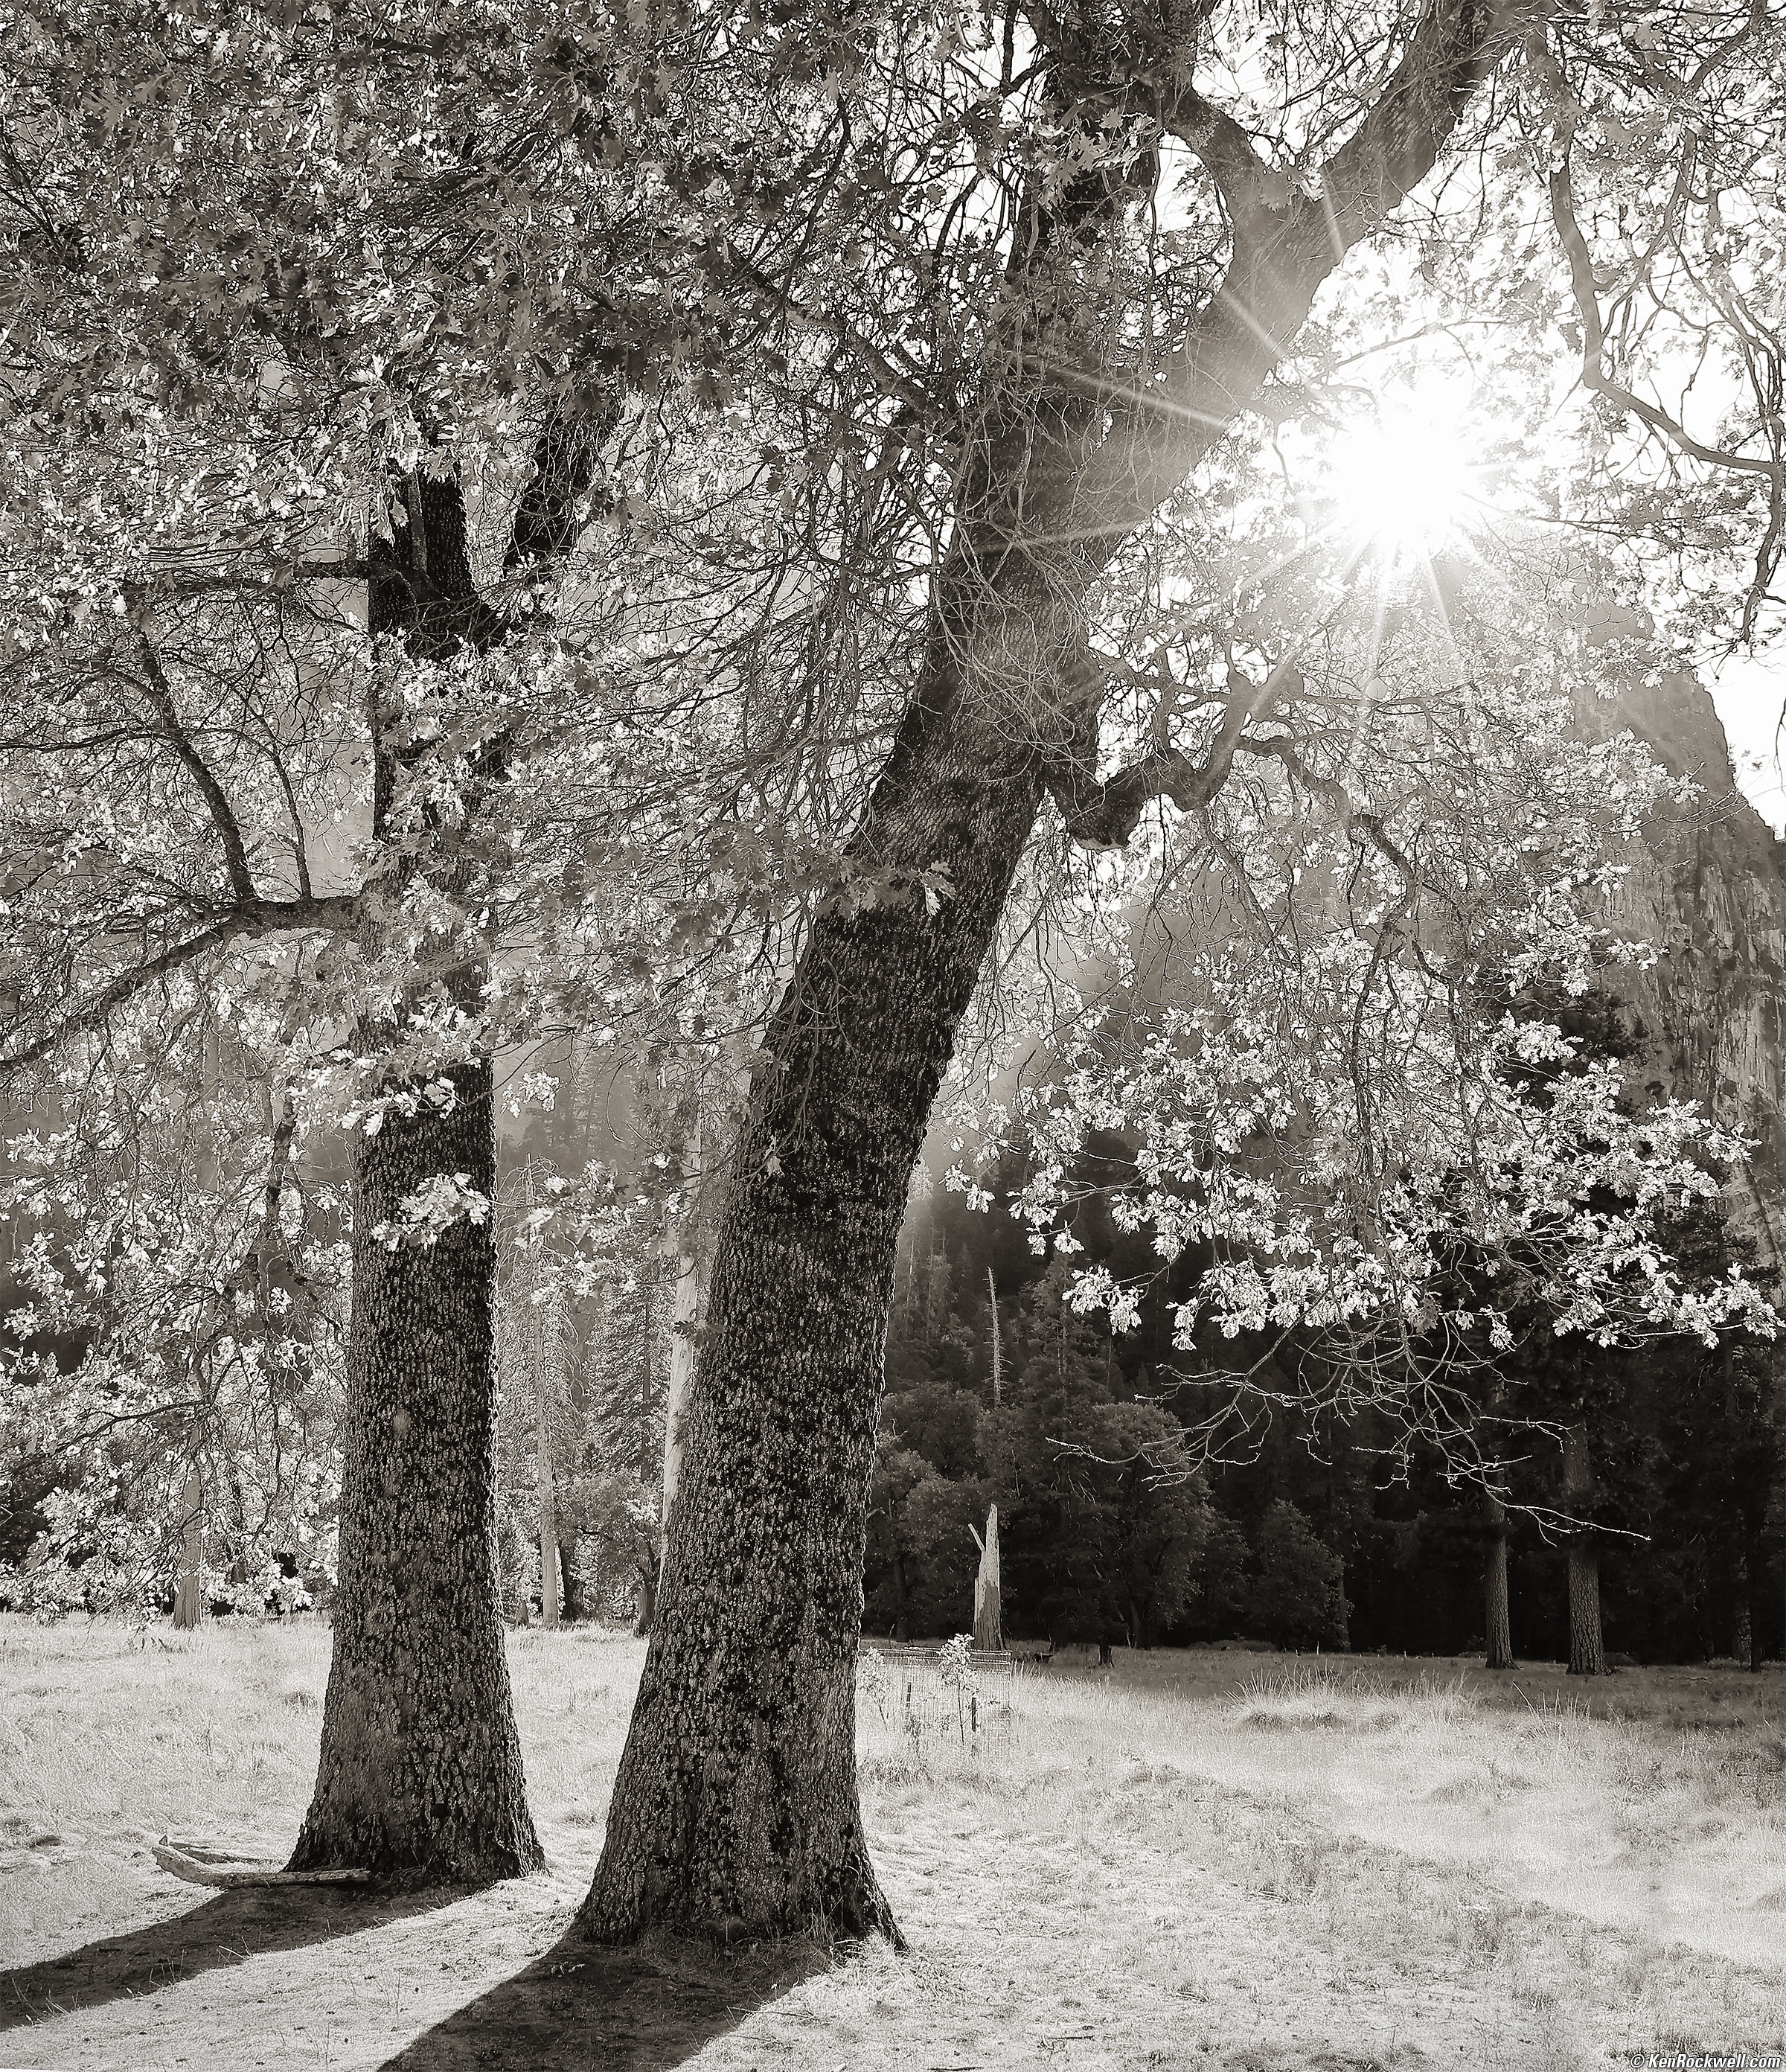
Trees Along the Merced River, Yosemite National Park, 2:53 P.M. Canon EOS R5 in 4:5 crop mode, RF 24-240mm IS USM at 62mm (240mm equivalent on 4x5″ film) at f/8 hand-held at 1/8 at ISO 100, -0.7 stops exposure compensation (LV 9.0), 4:5 Perfectly Clear. bigger or fit-to-screen.
Another trick I used in this photo was to dodge (lighten) the larger tree trunks with a levels adjustment layer mask in Photoshop CS6 (2010) to make them stand out.
Sun Trees, El Capitan Meadow, Yosemite National Park, 3:30 P.M. Canon EOS R5, RF 24-240mm IS USM at 24mm at f/11 at 1/50 at ISO 100 (LV 12.6), Perfectly Clear, split-toned print. bigger or fit-to-screen.
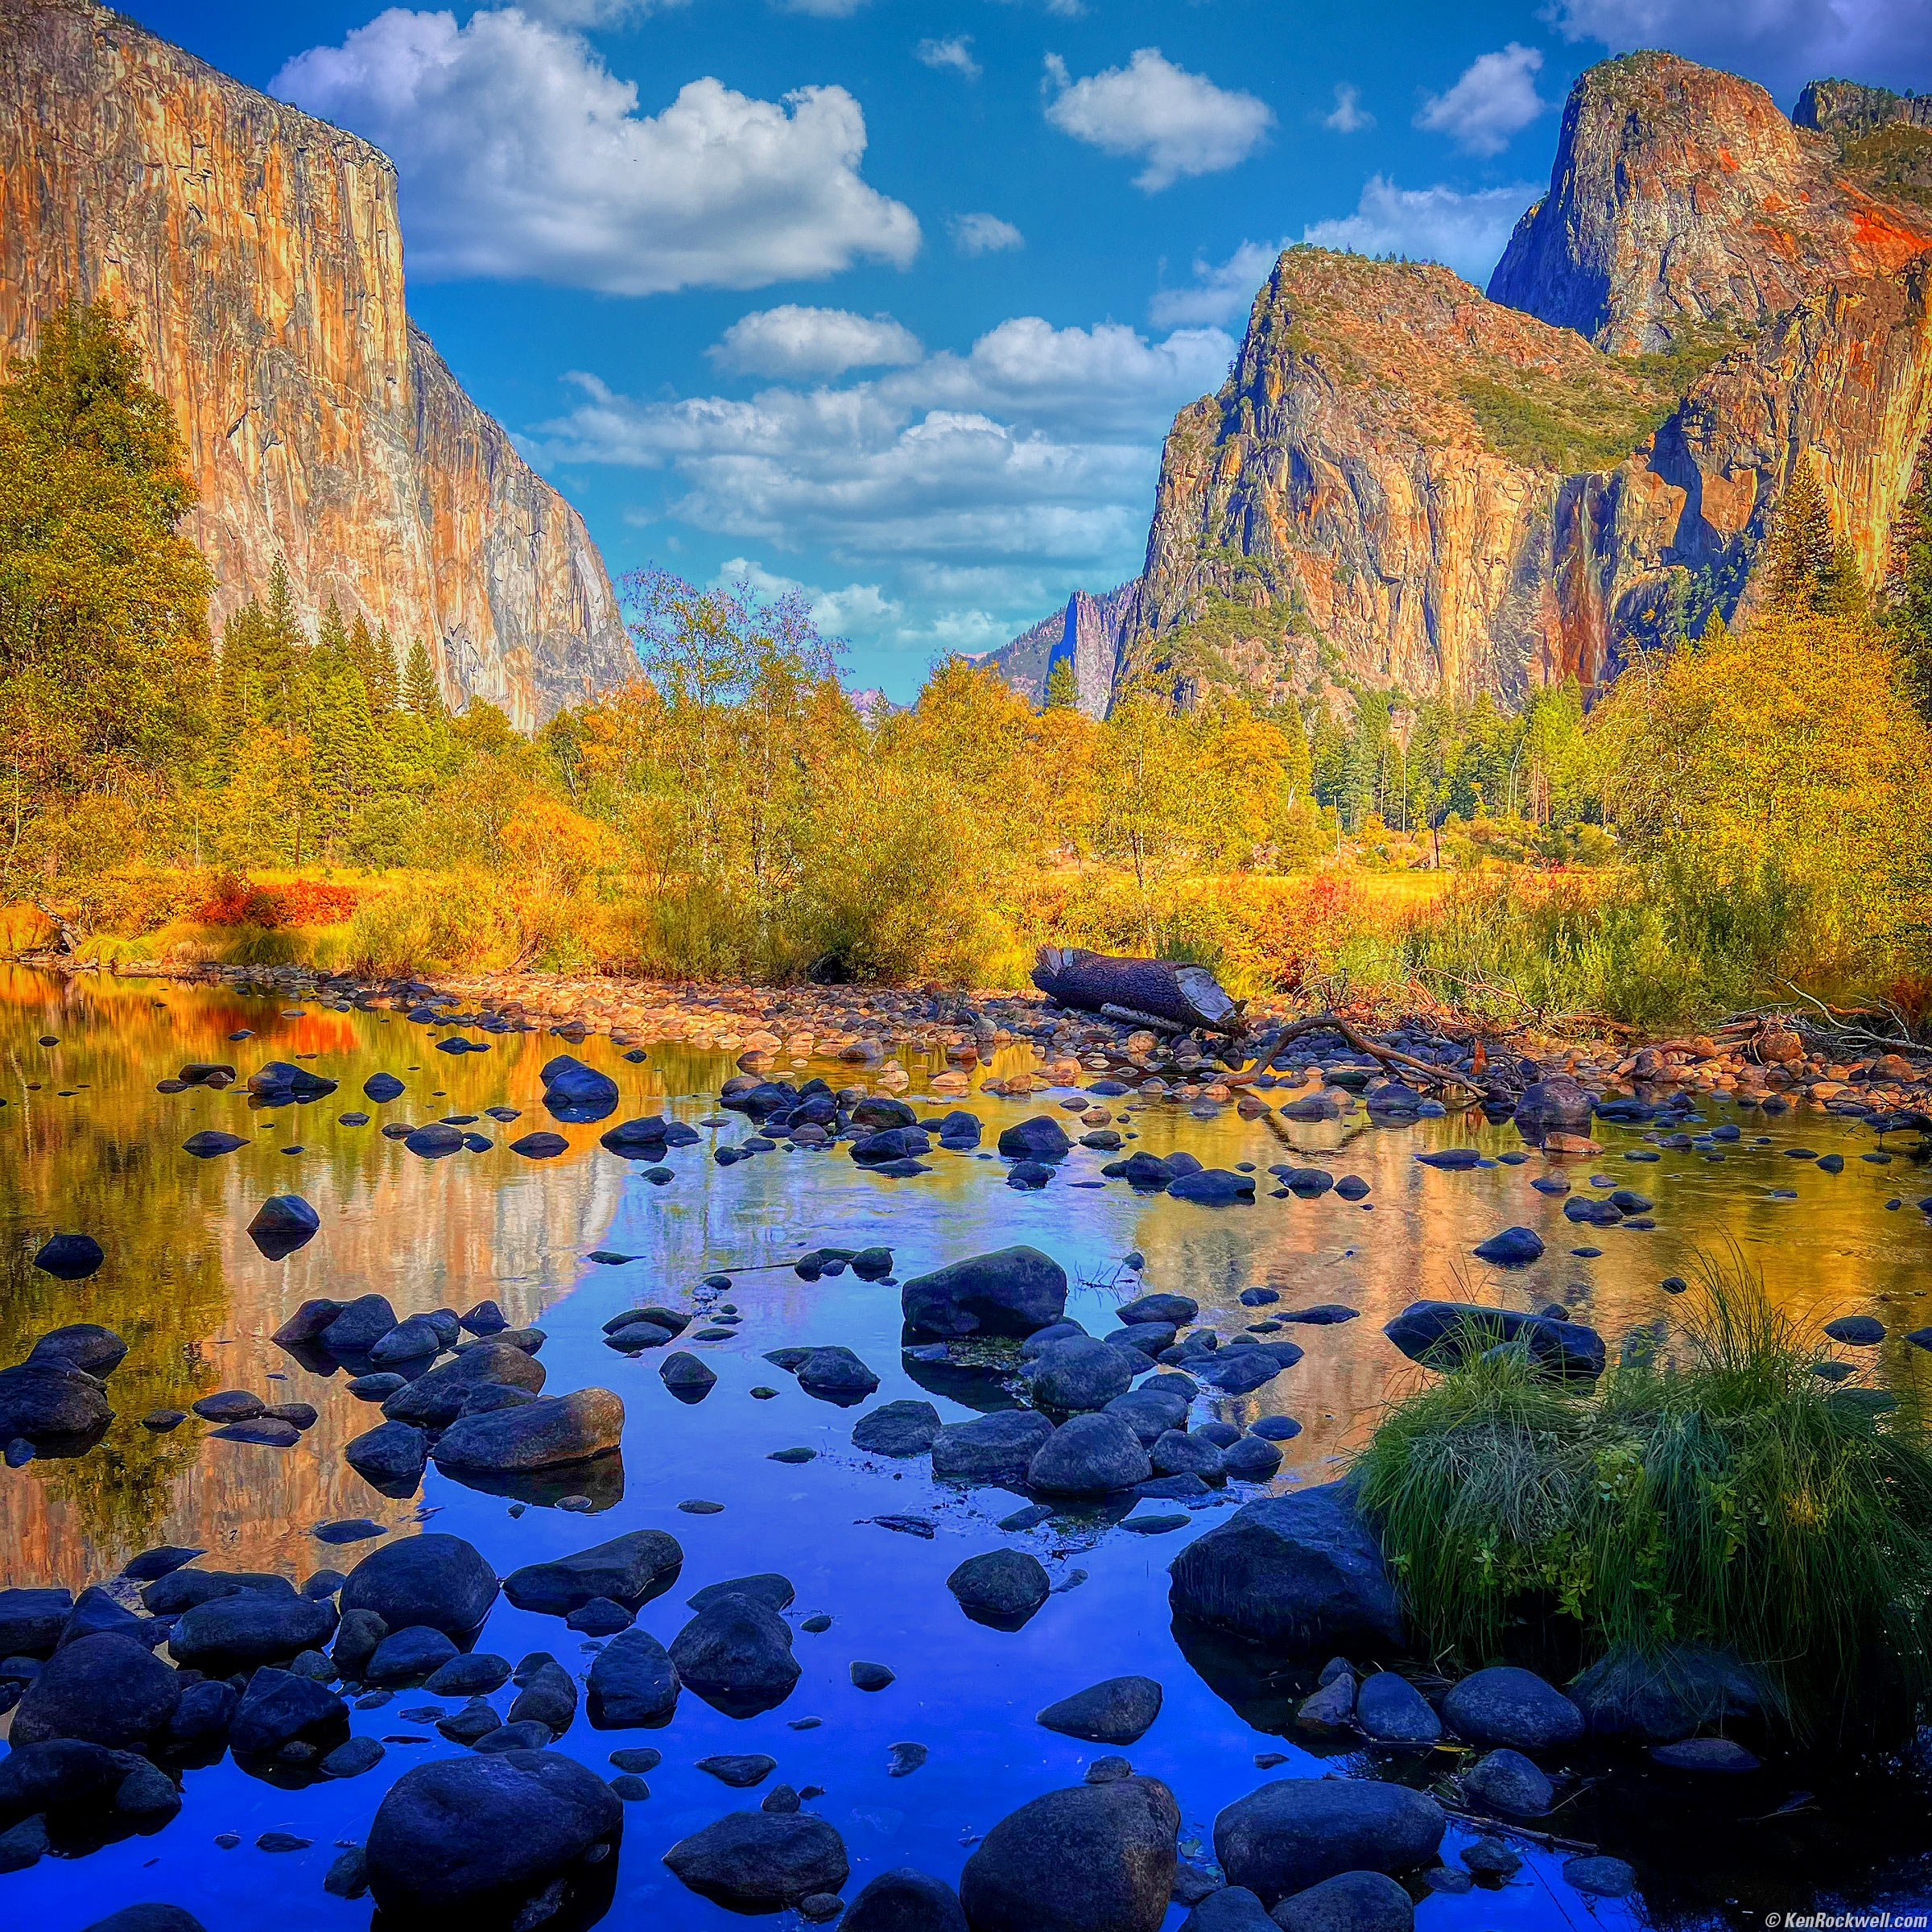
Gates of the Valley, Yosemite National Park, 3:49 P.M. Apple iPhone 13 Pro Max 5.7mm (26mm eq,) camera at f/1.5 at 1/2,045 at Auto ISO 50 (LV 13.2), cropped to a square (60mm eq. on HASSELBLAD 6×6 cm), Snapseed in iPhone to amp-up the colors, then Skylum Luminar AI (updated as Luminar Neo for 2023) in my Mac to add clouds, then Skylum Aurora HDR to add vignetting and Perfectly Clear to bring more detail to the shadows, all from my one original JPG file. bigger or fit-to-screen.
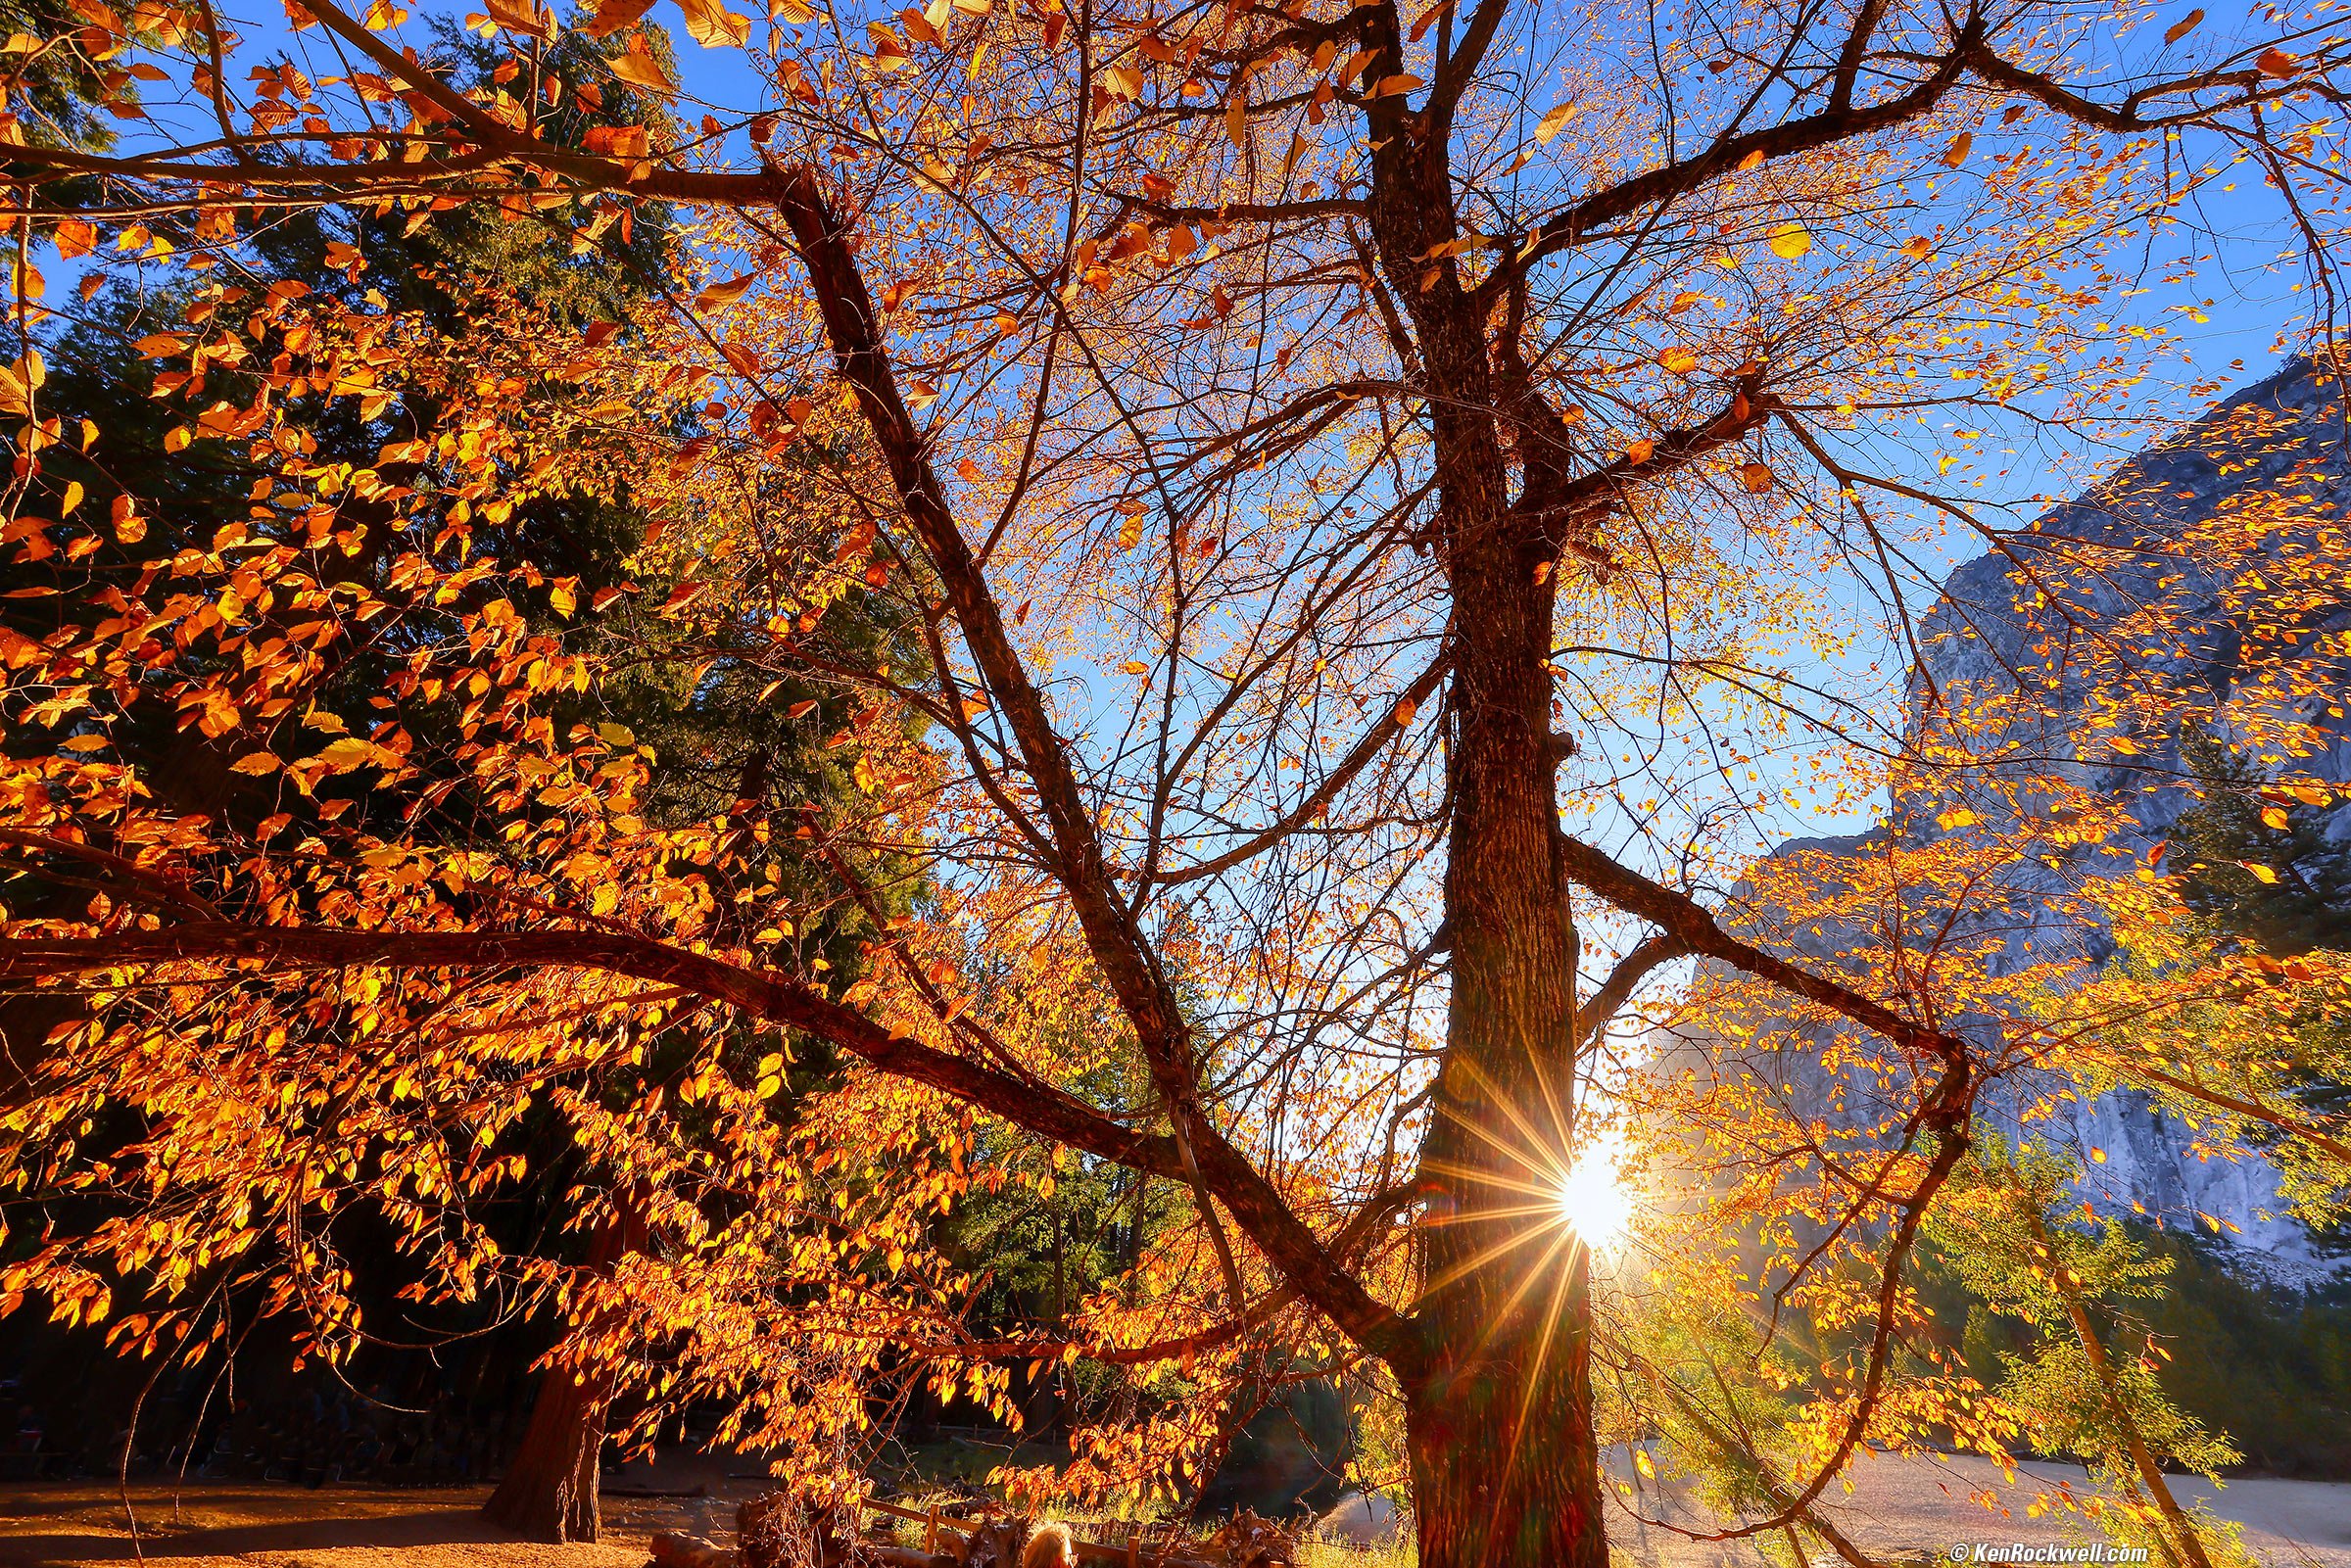
Golden Backlit Trees and Sunstar, Yosemite National Park, 5:33 P.M. Canon EOS R5, RF 14-35mm f/4L IS USM at 14mm at f/16 (for a great sunstar) hand held at 1/20 at ISO 100 (LV 12.6), Skylum Aurora HDR to amp-up the color and add emphasis with vignetting. bigger or fit-to-screen.
Glorious Golden Afternoon Light, Yosemite National Park, 5:37 P.M. Apple iPhone 13 Pro Max 5.7mm (26mm eq.) camera at f/1.5 at 1/215 at Auto ISO 50 (LV 9.9), Snapseed. bigger or fit-to-screen.
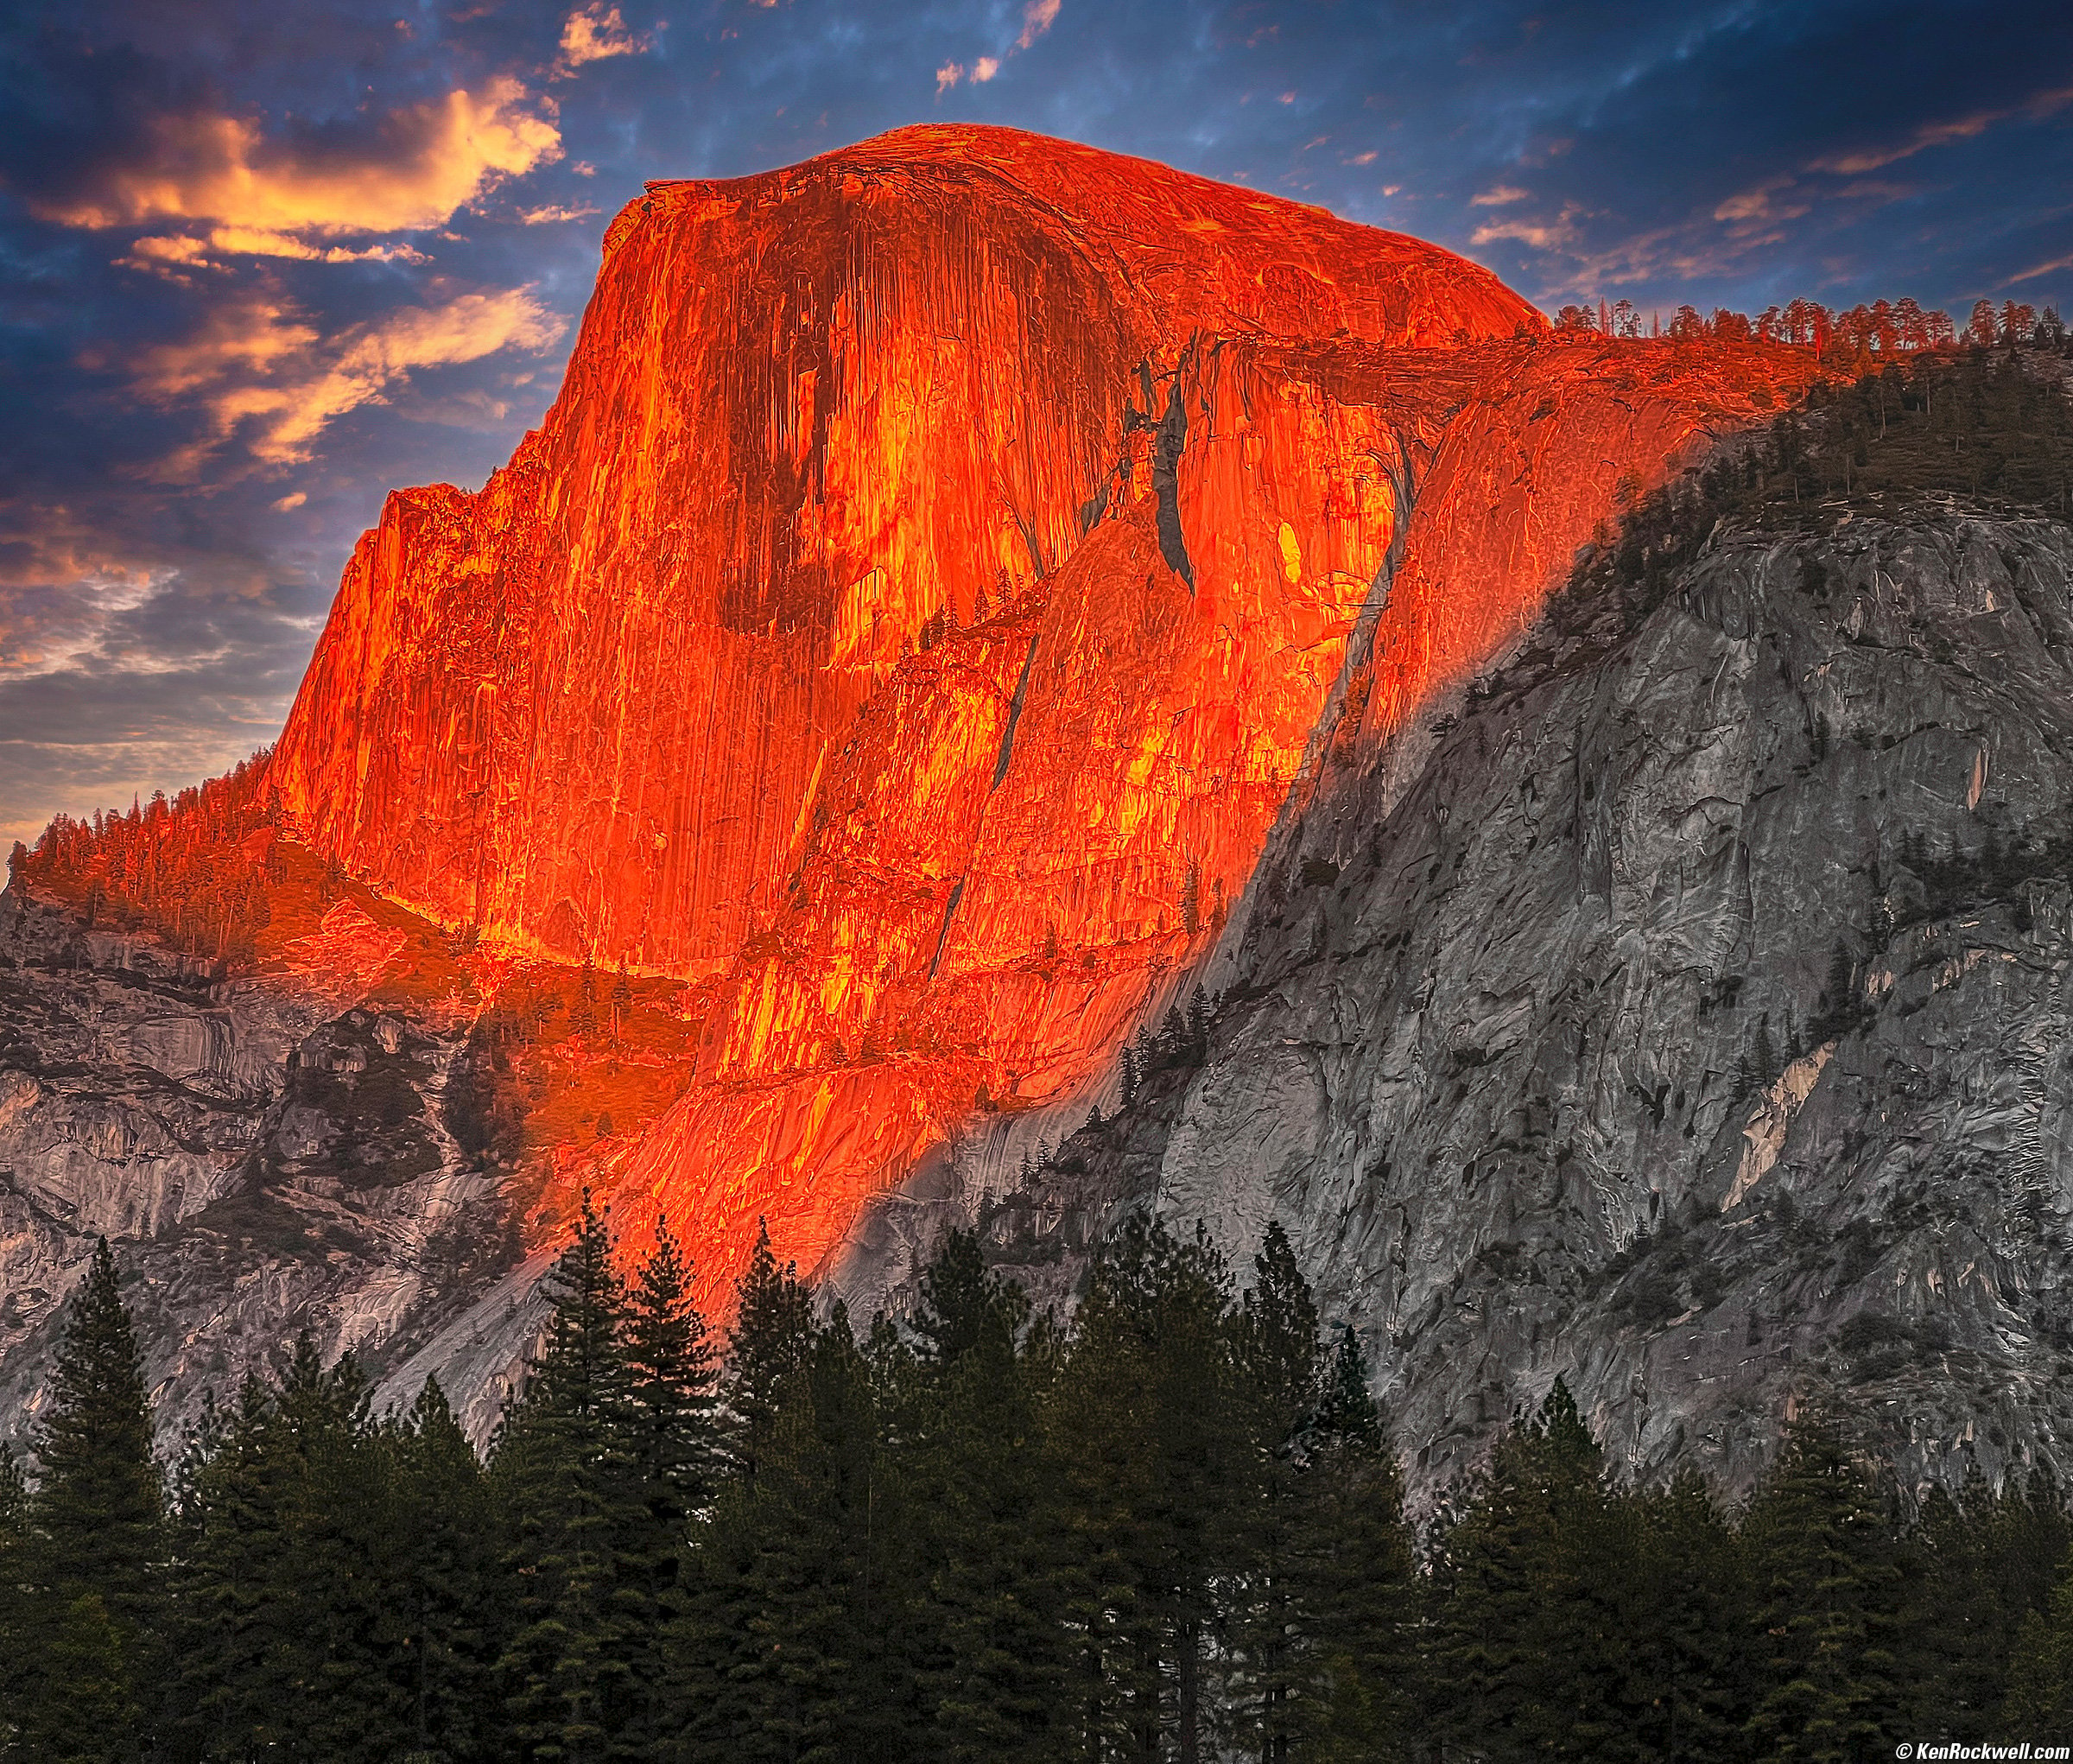
Half Dome in Last Light as seen from Stoneman Meadow, Yosemite National Park, 6:14 P.M. Apple iPhone 13 Pro Max 9mm (77mm eq.) camera at f/2.8 at 1/122 at Auto ISO 50 (LV 10.9), Skylum Aurora HDR to amp-up the red and then Skylum Luminar AI (updated as Luminar Neo for 2023) to add clouds. We had no weather on this trip, so I needed Skylum Luminar AI (updated as Luminar Neo for 2023) to add them. bigger or fit-to-screen.
This looks just like the shot above from yesterday, and it is the same rock in the same light at the same time, however shot from a different meadow as you can see from the different foregrounds.
Here's how it looked exactly as shot, without the added weather and artistic input:

As Shot. bigger.
16 October 2021, Saturday top
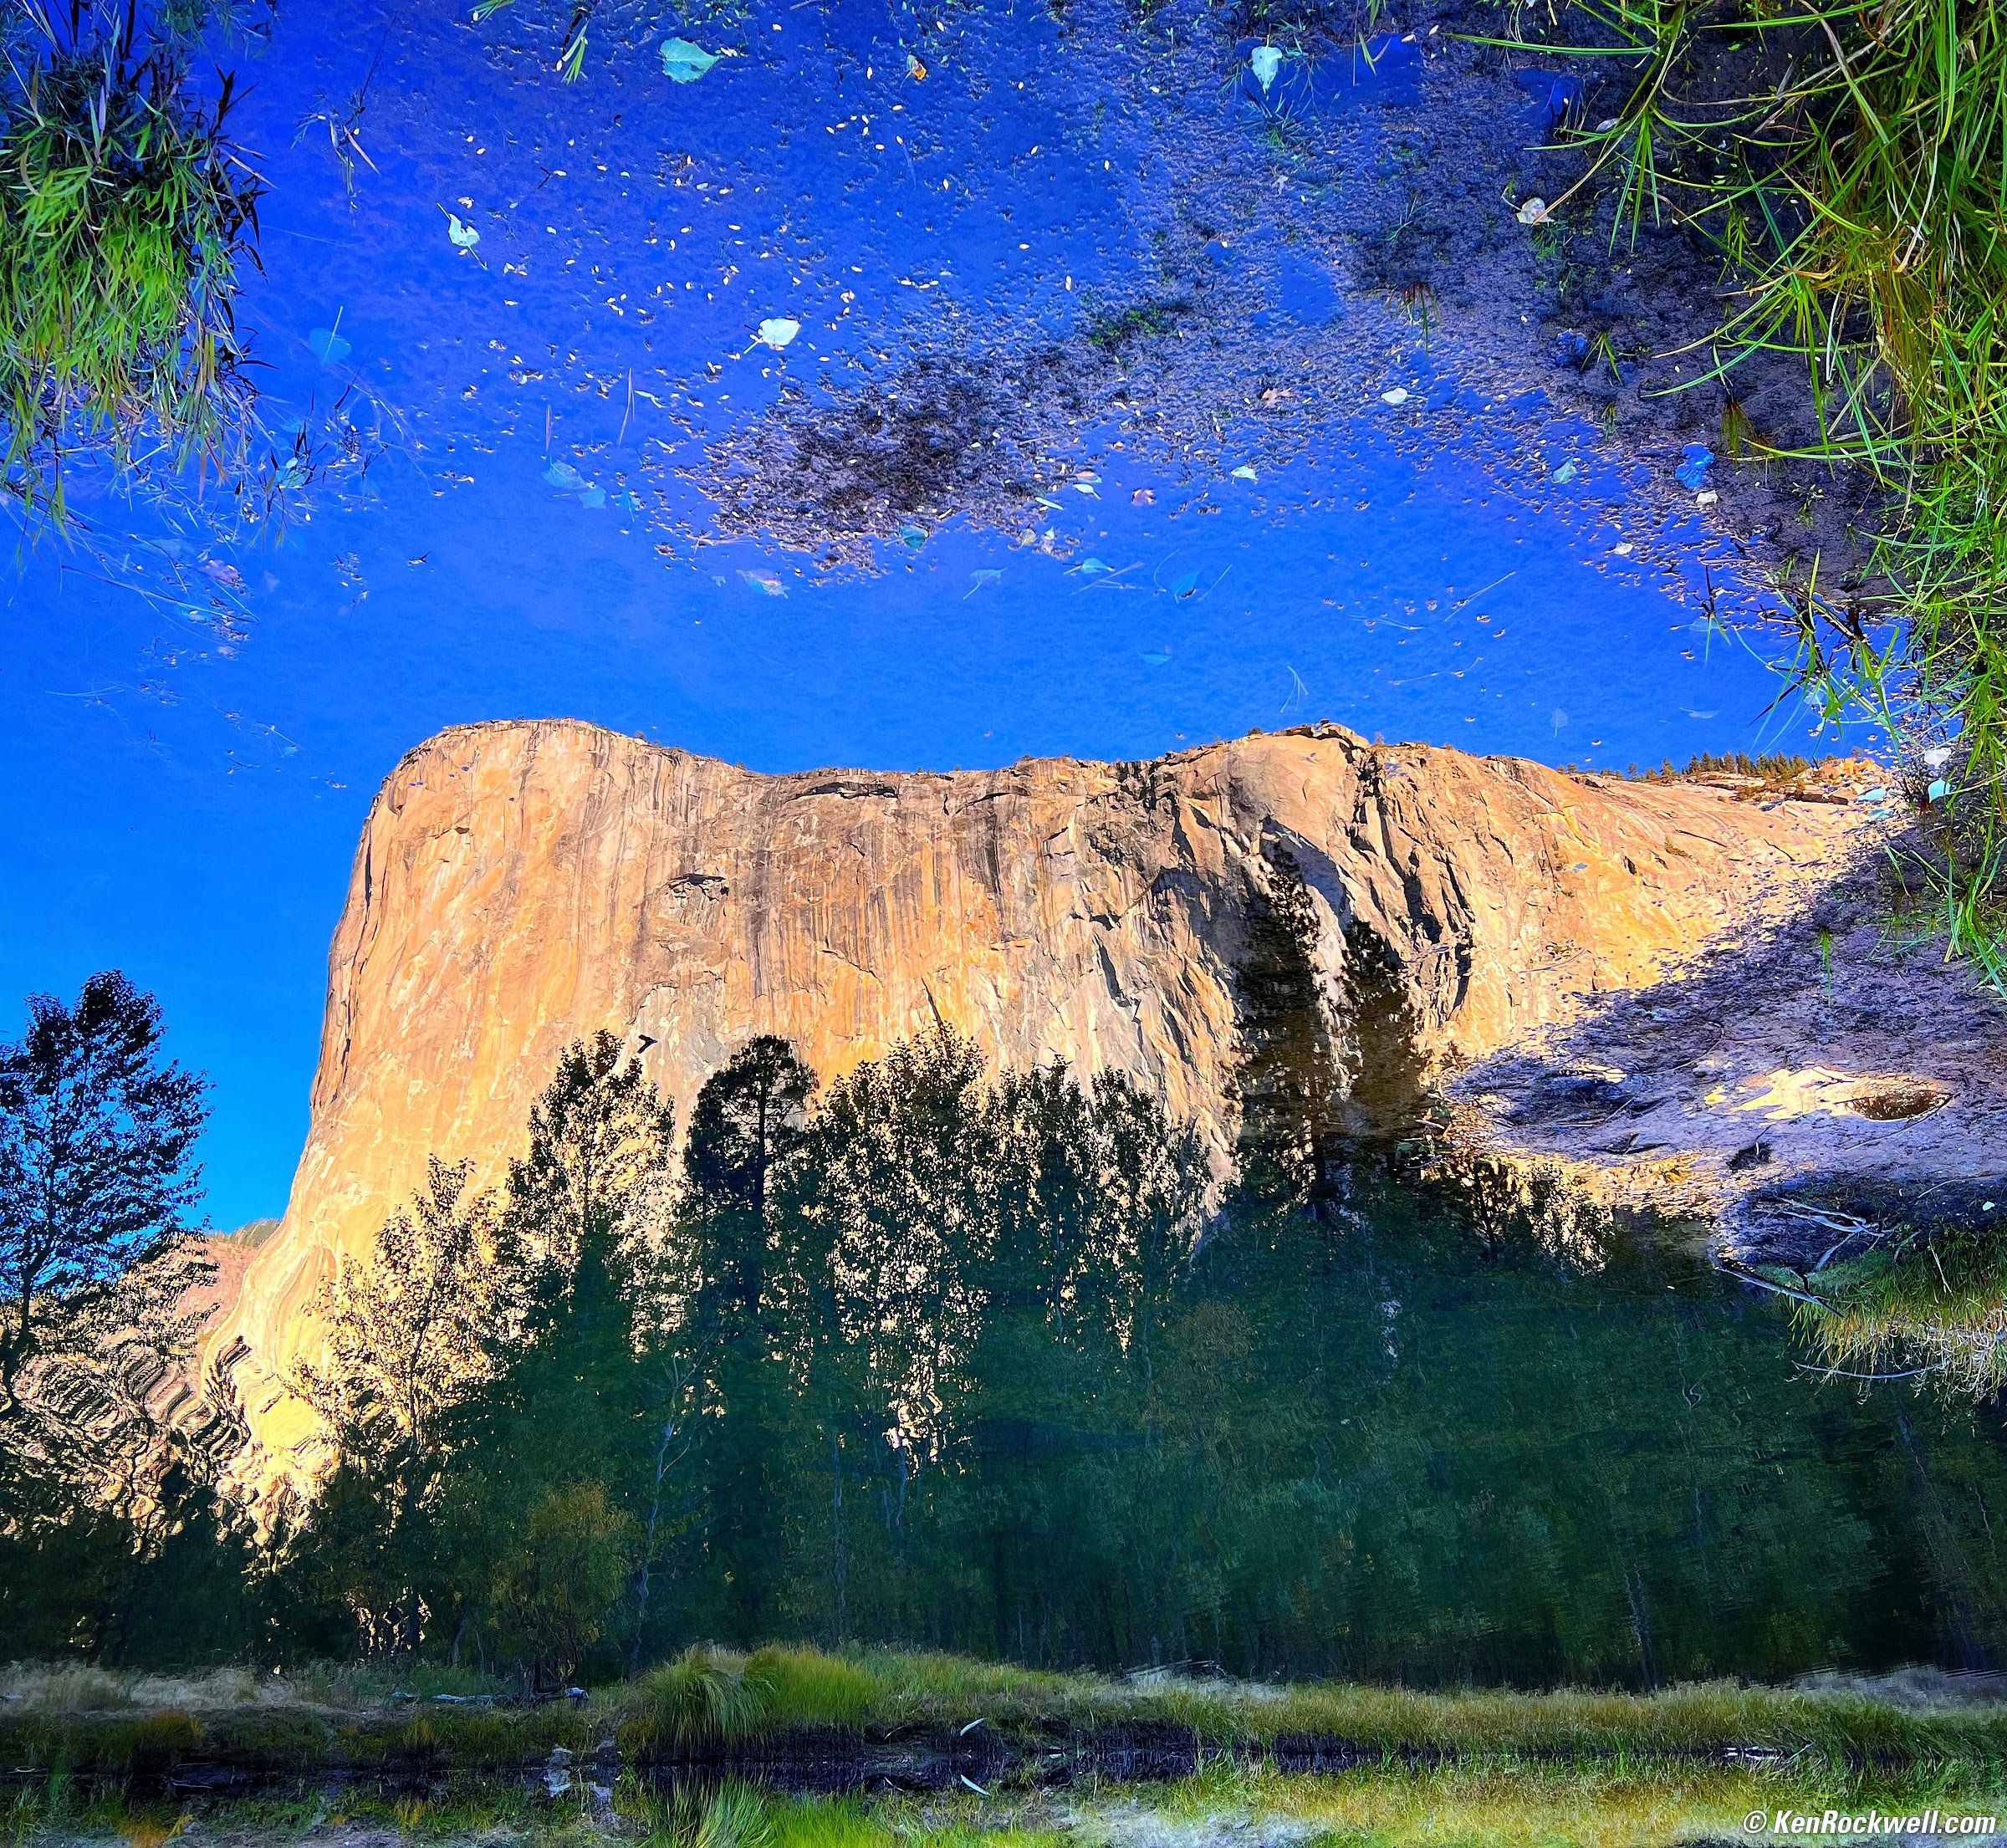
El Capitan Reflected in the Merced River, Yosemite National Park, 8:41 A.M. Apple iPhone 13 Pro Max 5.7mm (26mm eq.) camera at f/1.5 at 1/157 at Auto ISO 50 (LV 9.5), square crop (60mm eq. on HASSELBLAD 6×6 cm), Snapseed, image flipped. bigger or fit-to-screen.
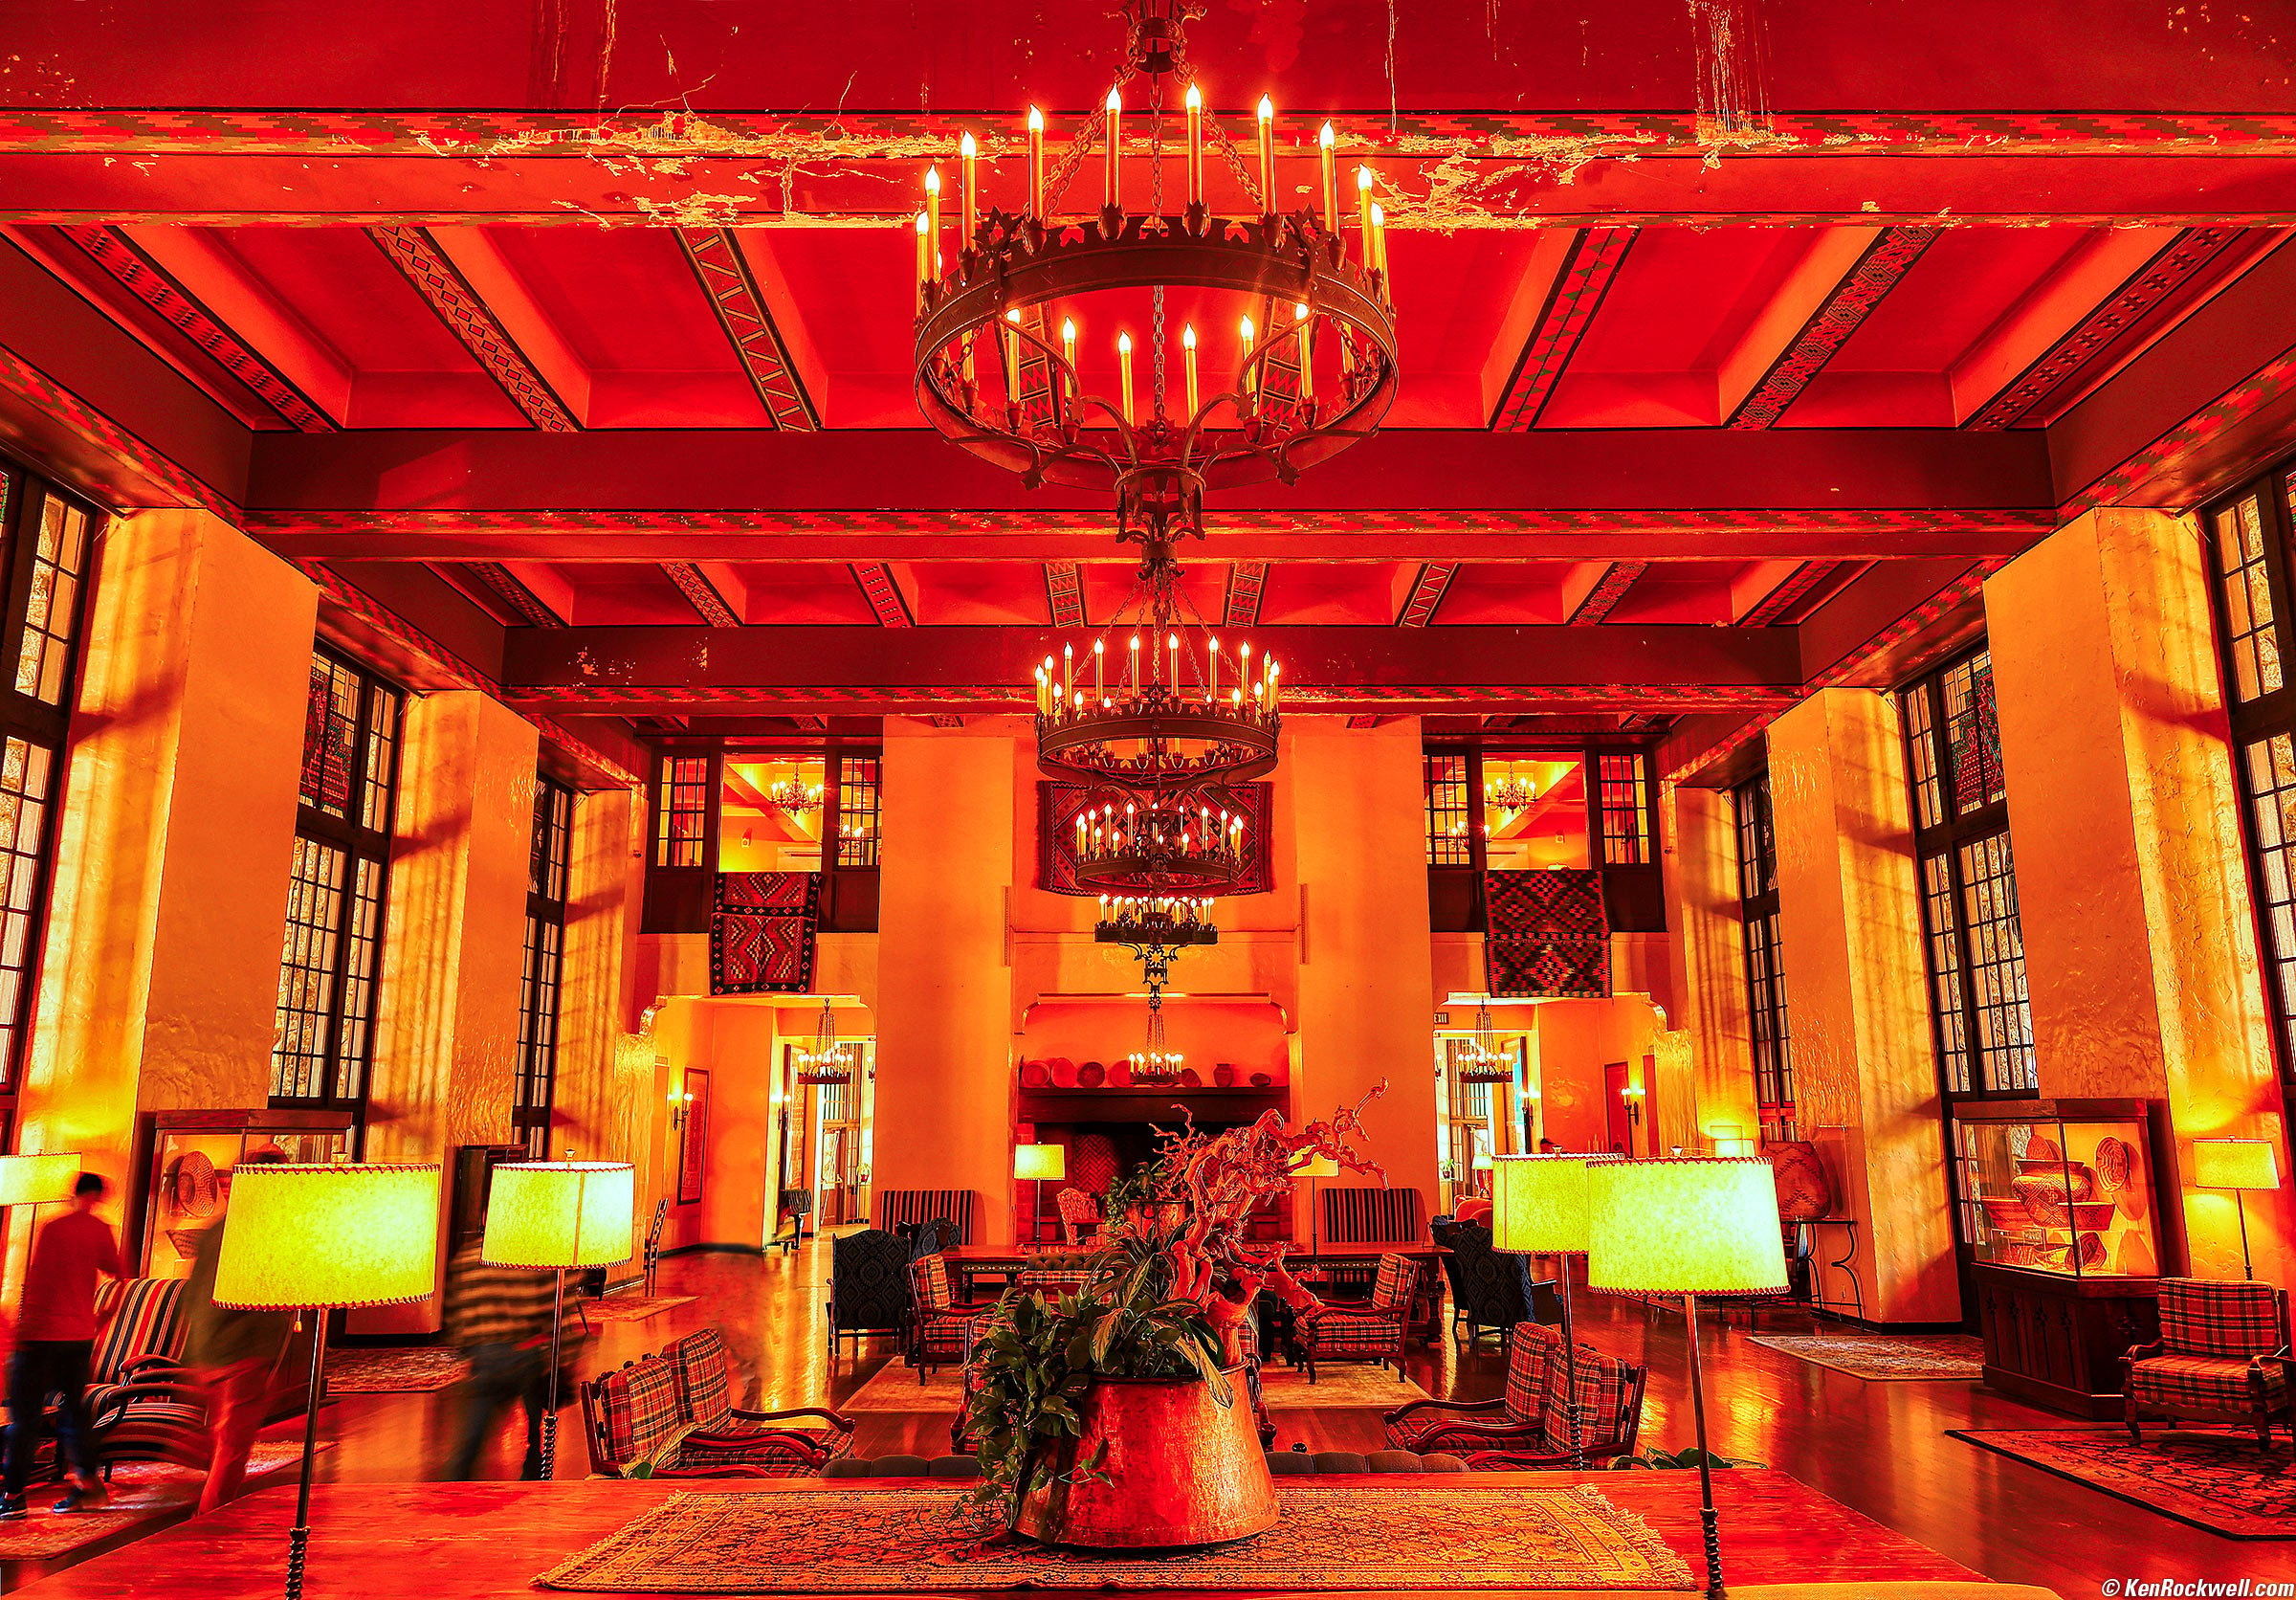
The Ahwahnee Hotel, Yosemite National Park, 12:22 P.M. Canon EOS R5, RF 24-240mm IS USM at 24mm at f/4 hand-held at 1/4 second at ISO 100, -0.3 stops exposure compensation (LV 6.0), Shade white balance to accentuate warm colors. Perfectly Clear and Skylum Aurora HDR. bigger or fit-to-screen.
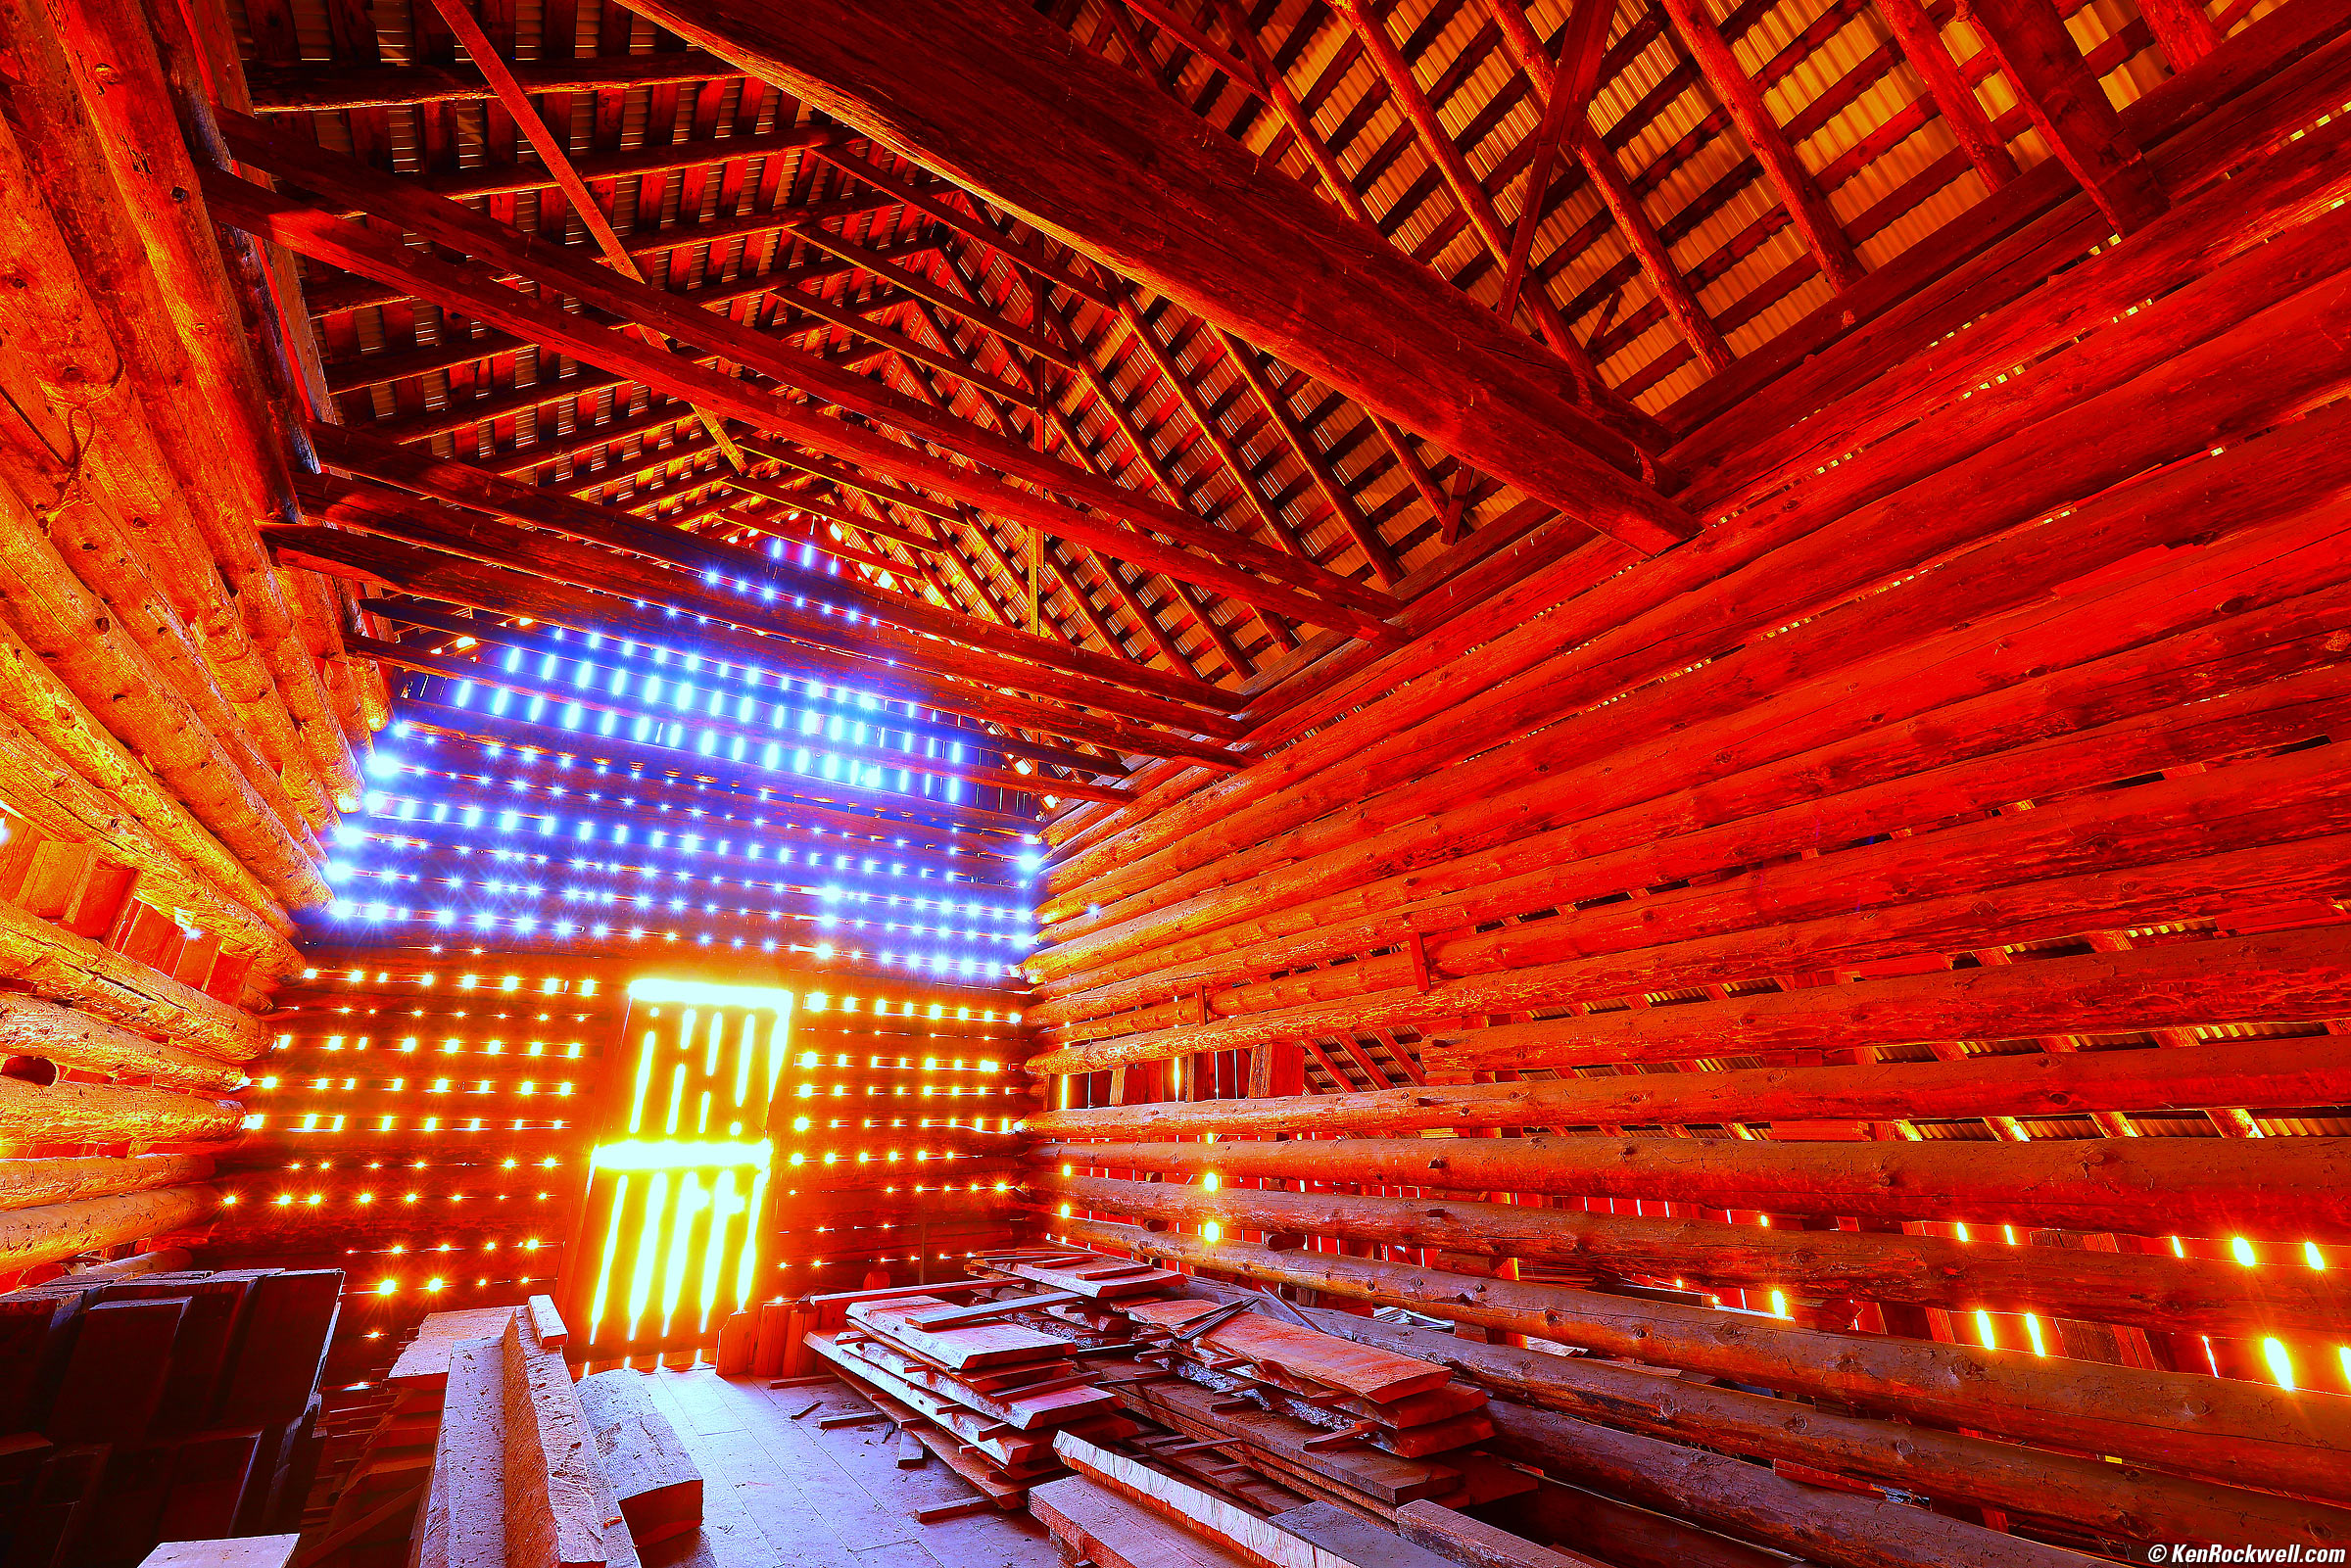
Inside the Barn, Yosemite National Park, 3:37 P.M. Canon EOS R5, RF 14-35mm f/4L IS USM at 14mm at f/8 on a tripod for 20 seconds at ISO 100, +0.3 stops exposure compensation (LV 1.6). bigger or fit-to-screen.
Critical to a sharp image is shooting the lens at its sharpest aperture (f/8 for almost every lens ever made so long as depth-of-field isn't involved), and that I shot at ISO 100 and let the exposure time fall where it may. Unless something's moving or you need more depth-of-field, the sharpest images are almost always had at ISO 100 and f/8. More casual shooters might shoot at ISO 200 or ISO 400 or higher, any of which is less sharp than at ISO 100. Ultrasharp images demand long exposure times, which demand patience.
I AirDropped this from my Mac Pro (late 2013) to my Apple iPhone 13 Pro Max for chroma processing in Snapseed because I prefer Snapseed's oversaturation to Photoshop's. I AirDropped the resulting JPG back to my Mac Pro (late 2013) for finishing in Photoshop CS6.
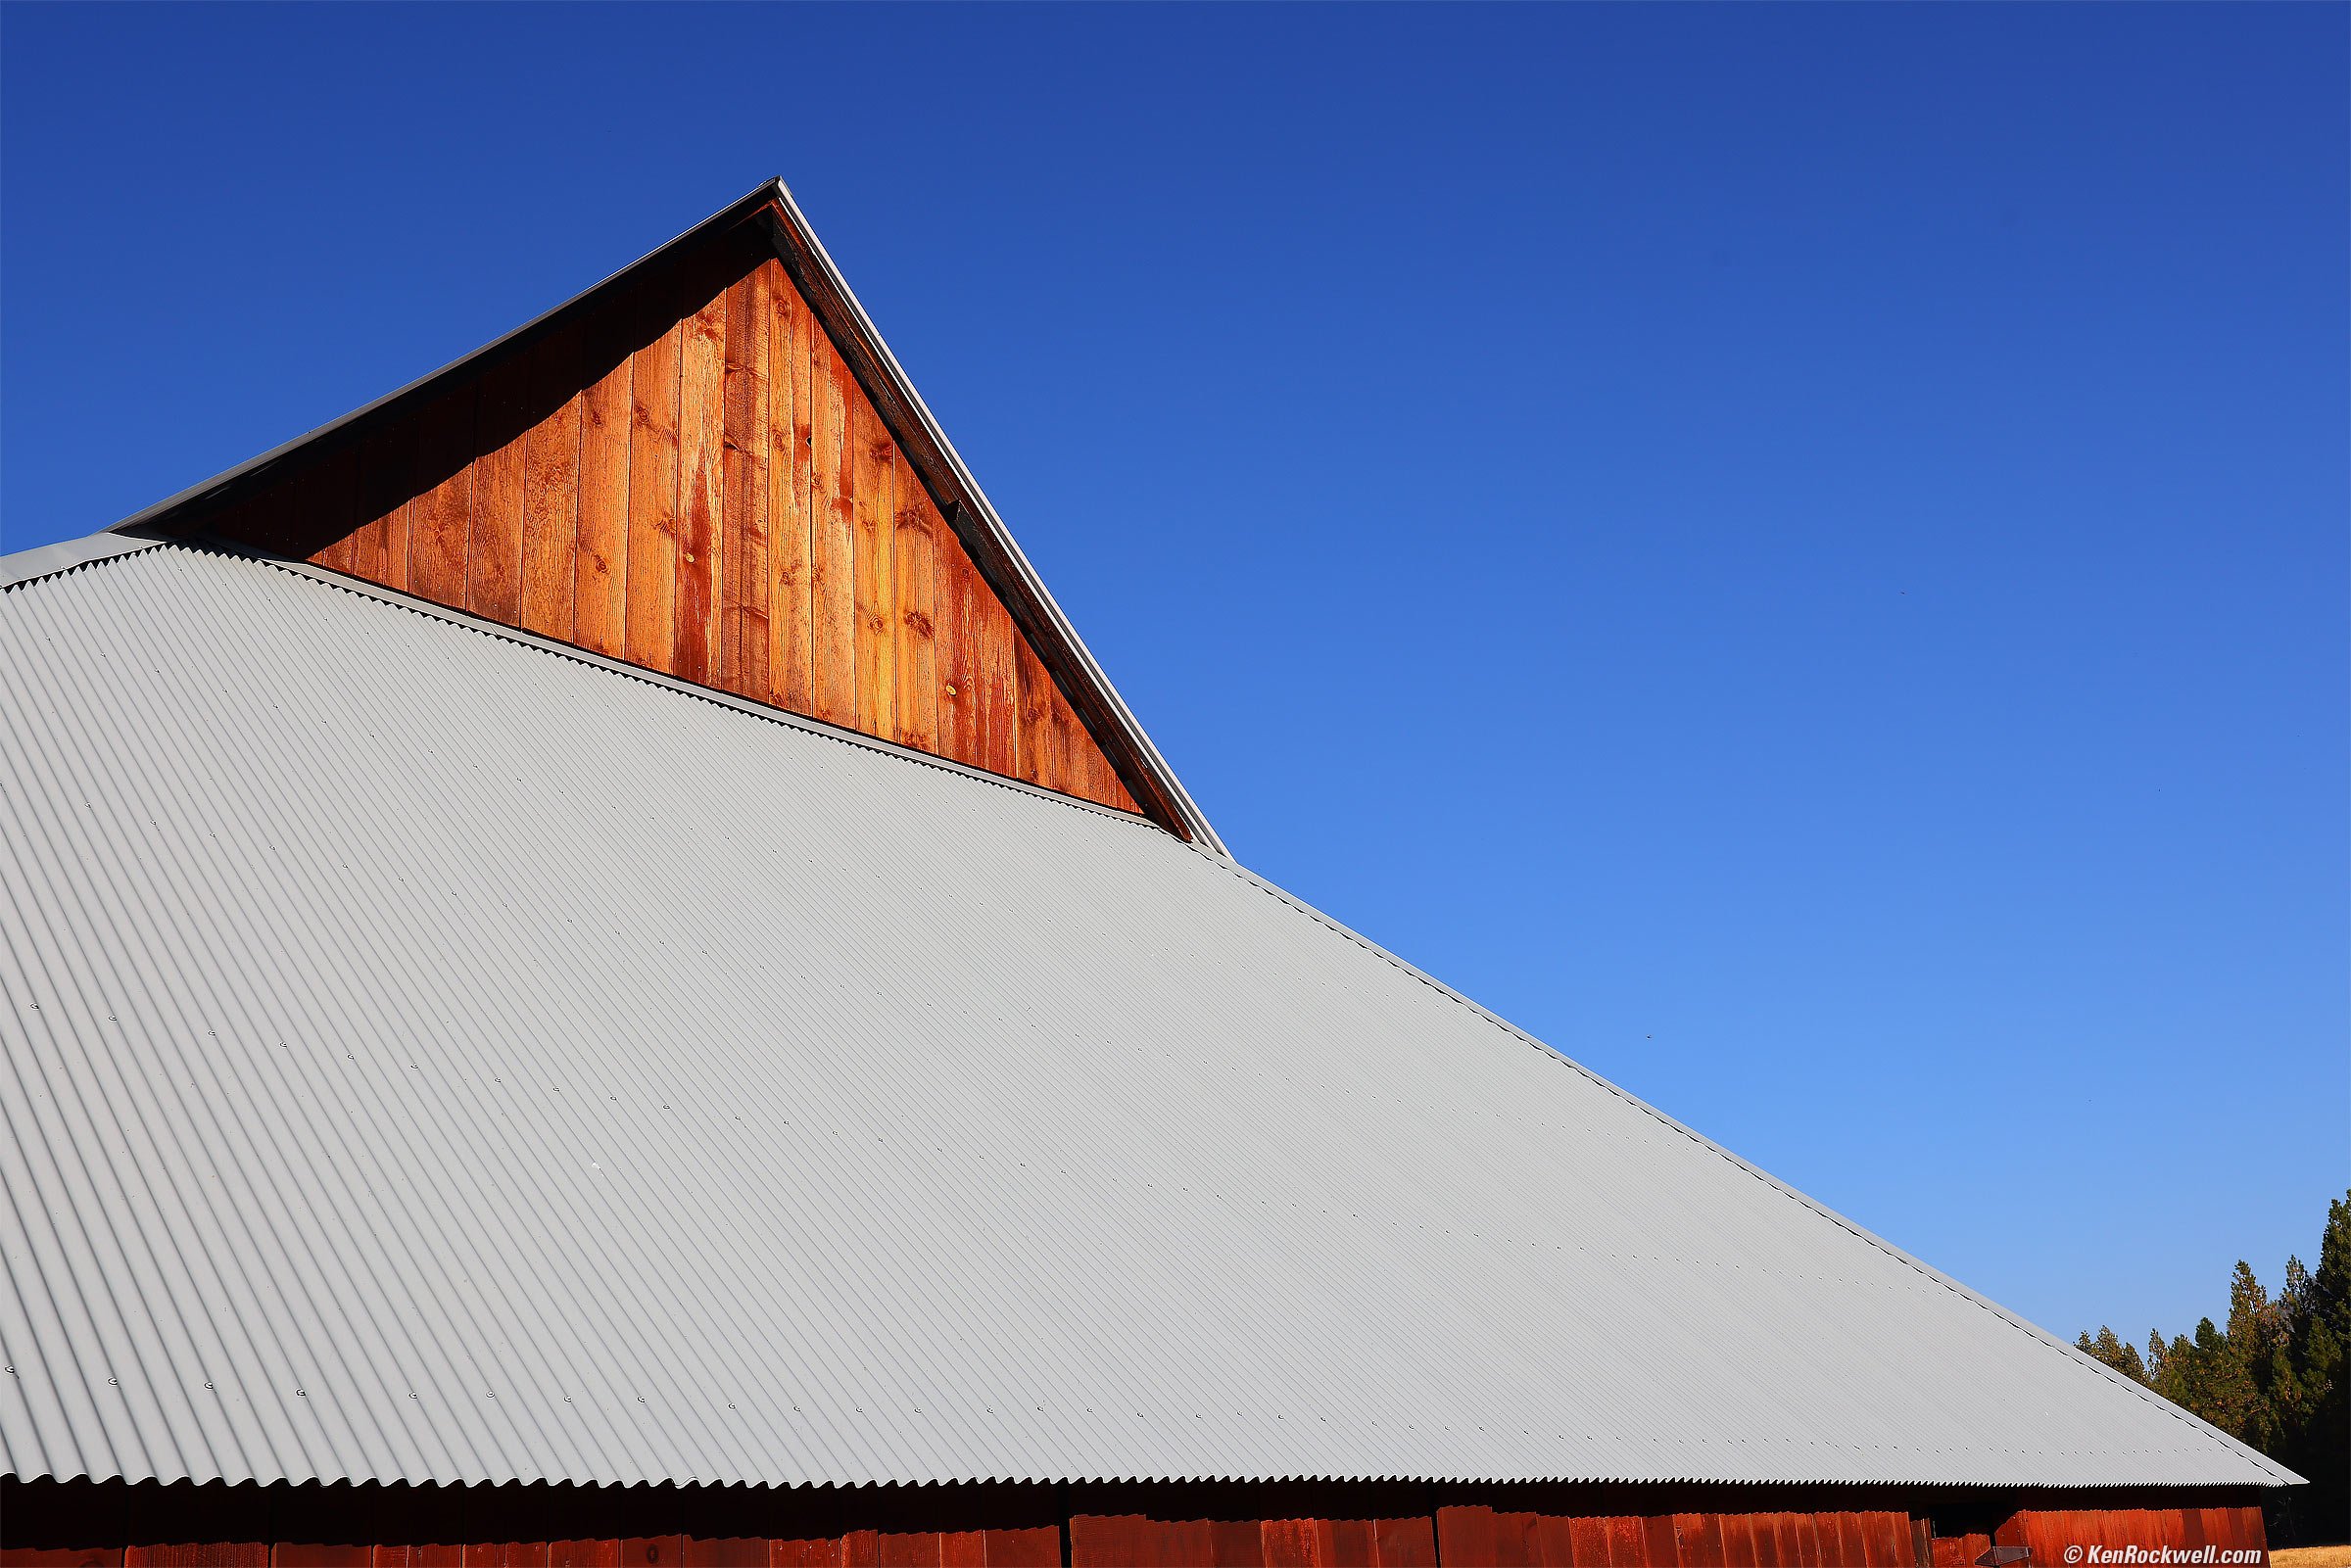
Barn and Roof, Yosemite National Park, 3:59 P.M. Canon EOS R5, RF 14-35mm f/4L IS USM at 35mm at f/10 at 1/320 at Auto ISO 100 (LV 15.0), as shot. bigger or fit-to-screen.
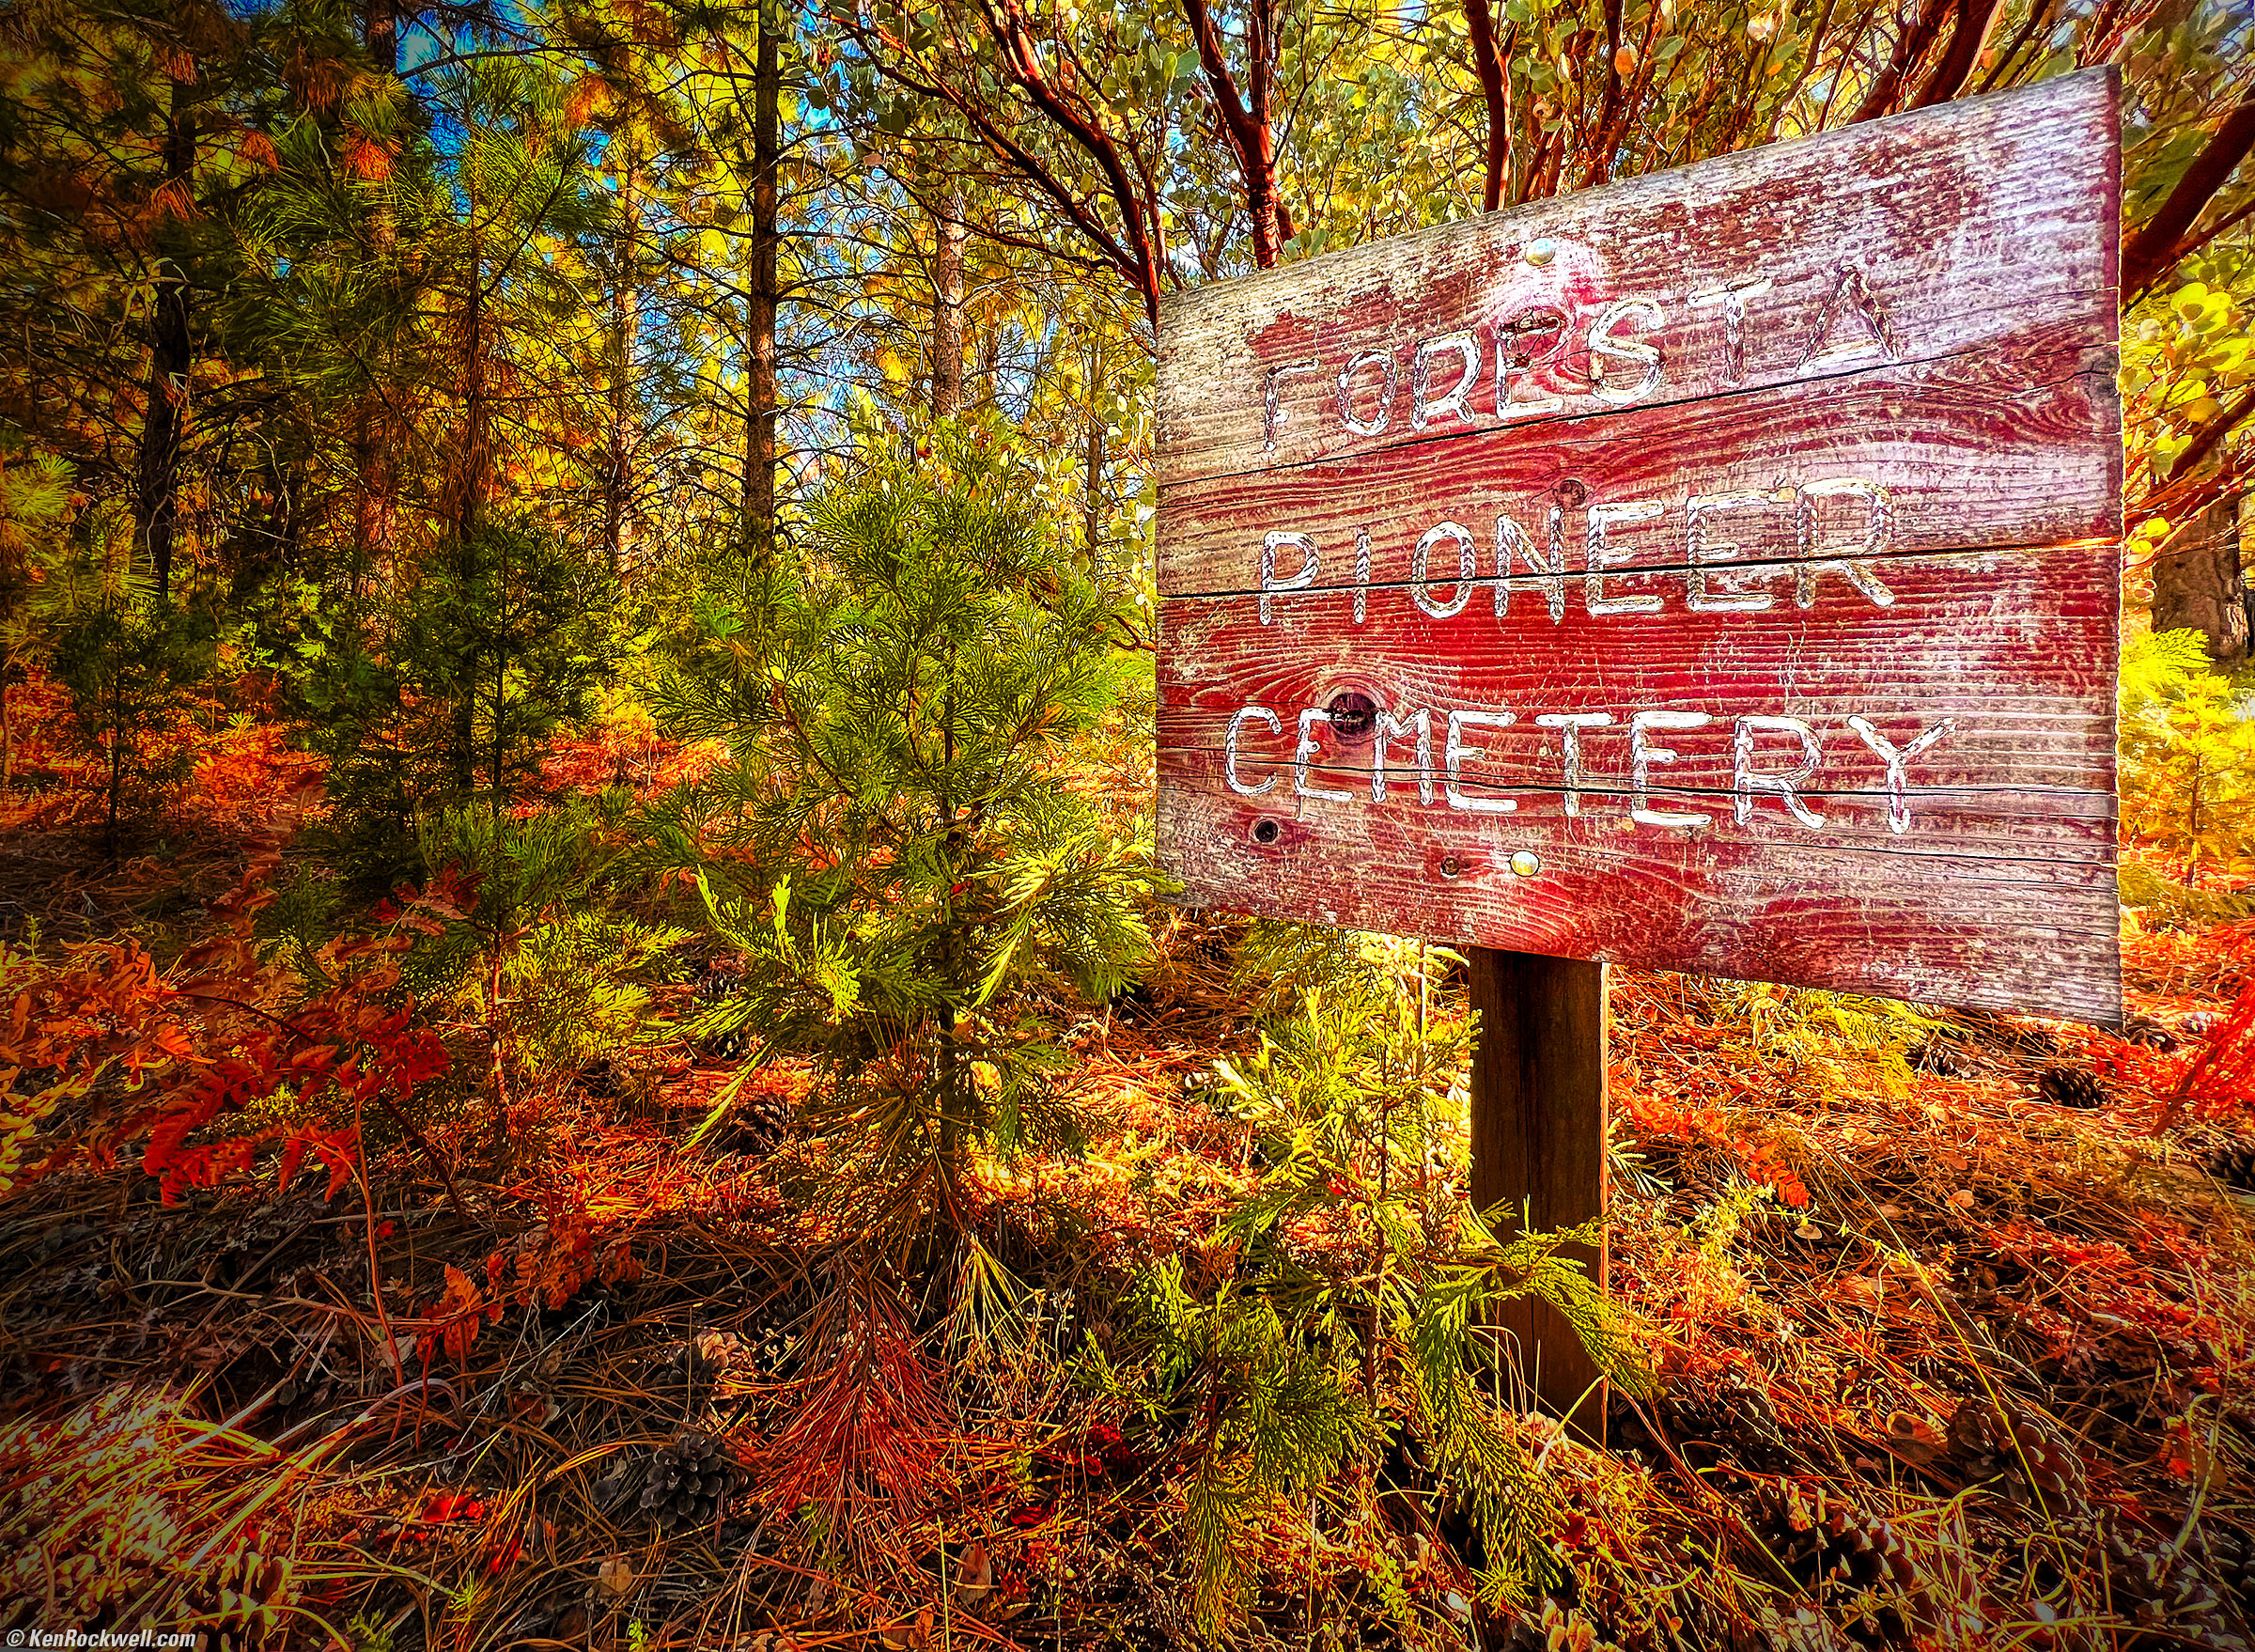
Foresta Pioneer Cemetery, Yosemite National Park, 12:25 P.M. Apple iPhone 13 Pro Max 1.57mm (13mm eq.) camera at f/1.8 at 1/121 at Auto ISO 80 (LV 8.9), Perfectly Clear and lots of vignetting added in Skylum Aurora HDR. bigger or fit-to-screen.
After this our group returned to the lodge to relax until nightfall.
As Dave and I were leaving our rooms to go back and meet the group again, I heard Dave yell "Ken, come check this out, right now!" Dave had noticed that the moon was precisely peeking over the mountain to our south and was silhouetting the trees and boulders — the real thing everyone else makes as a composite:
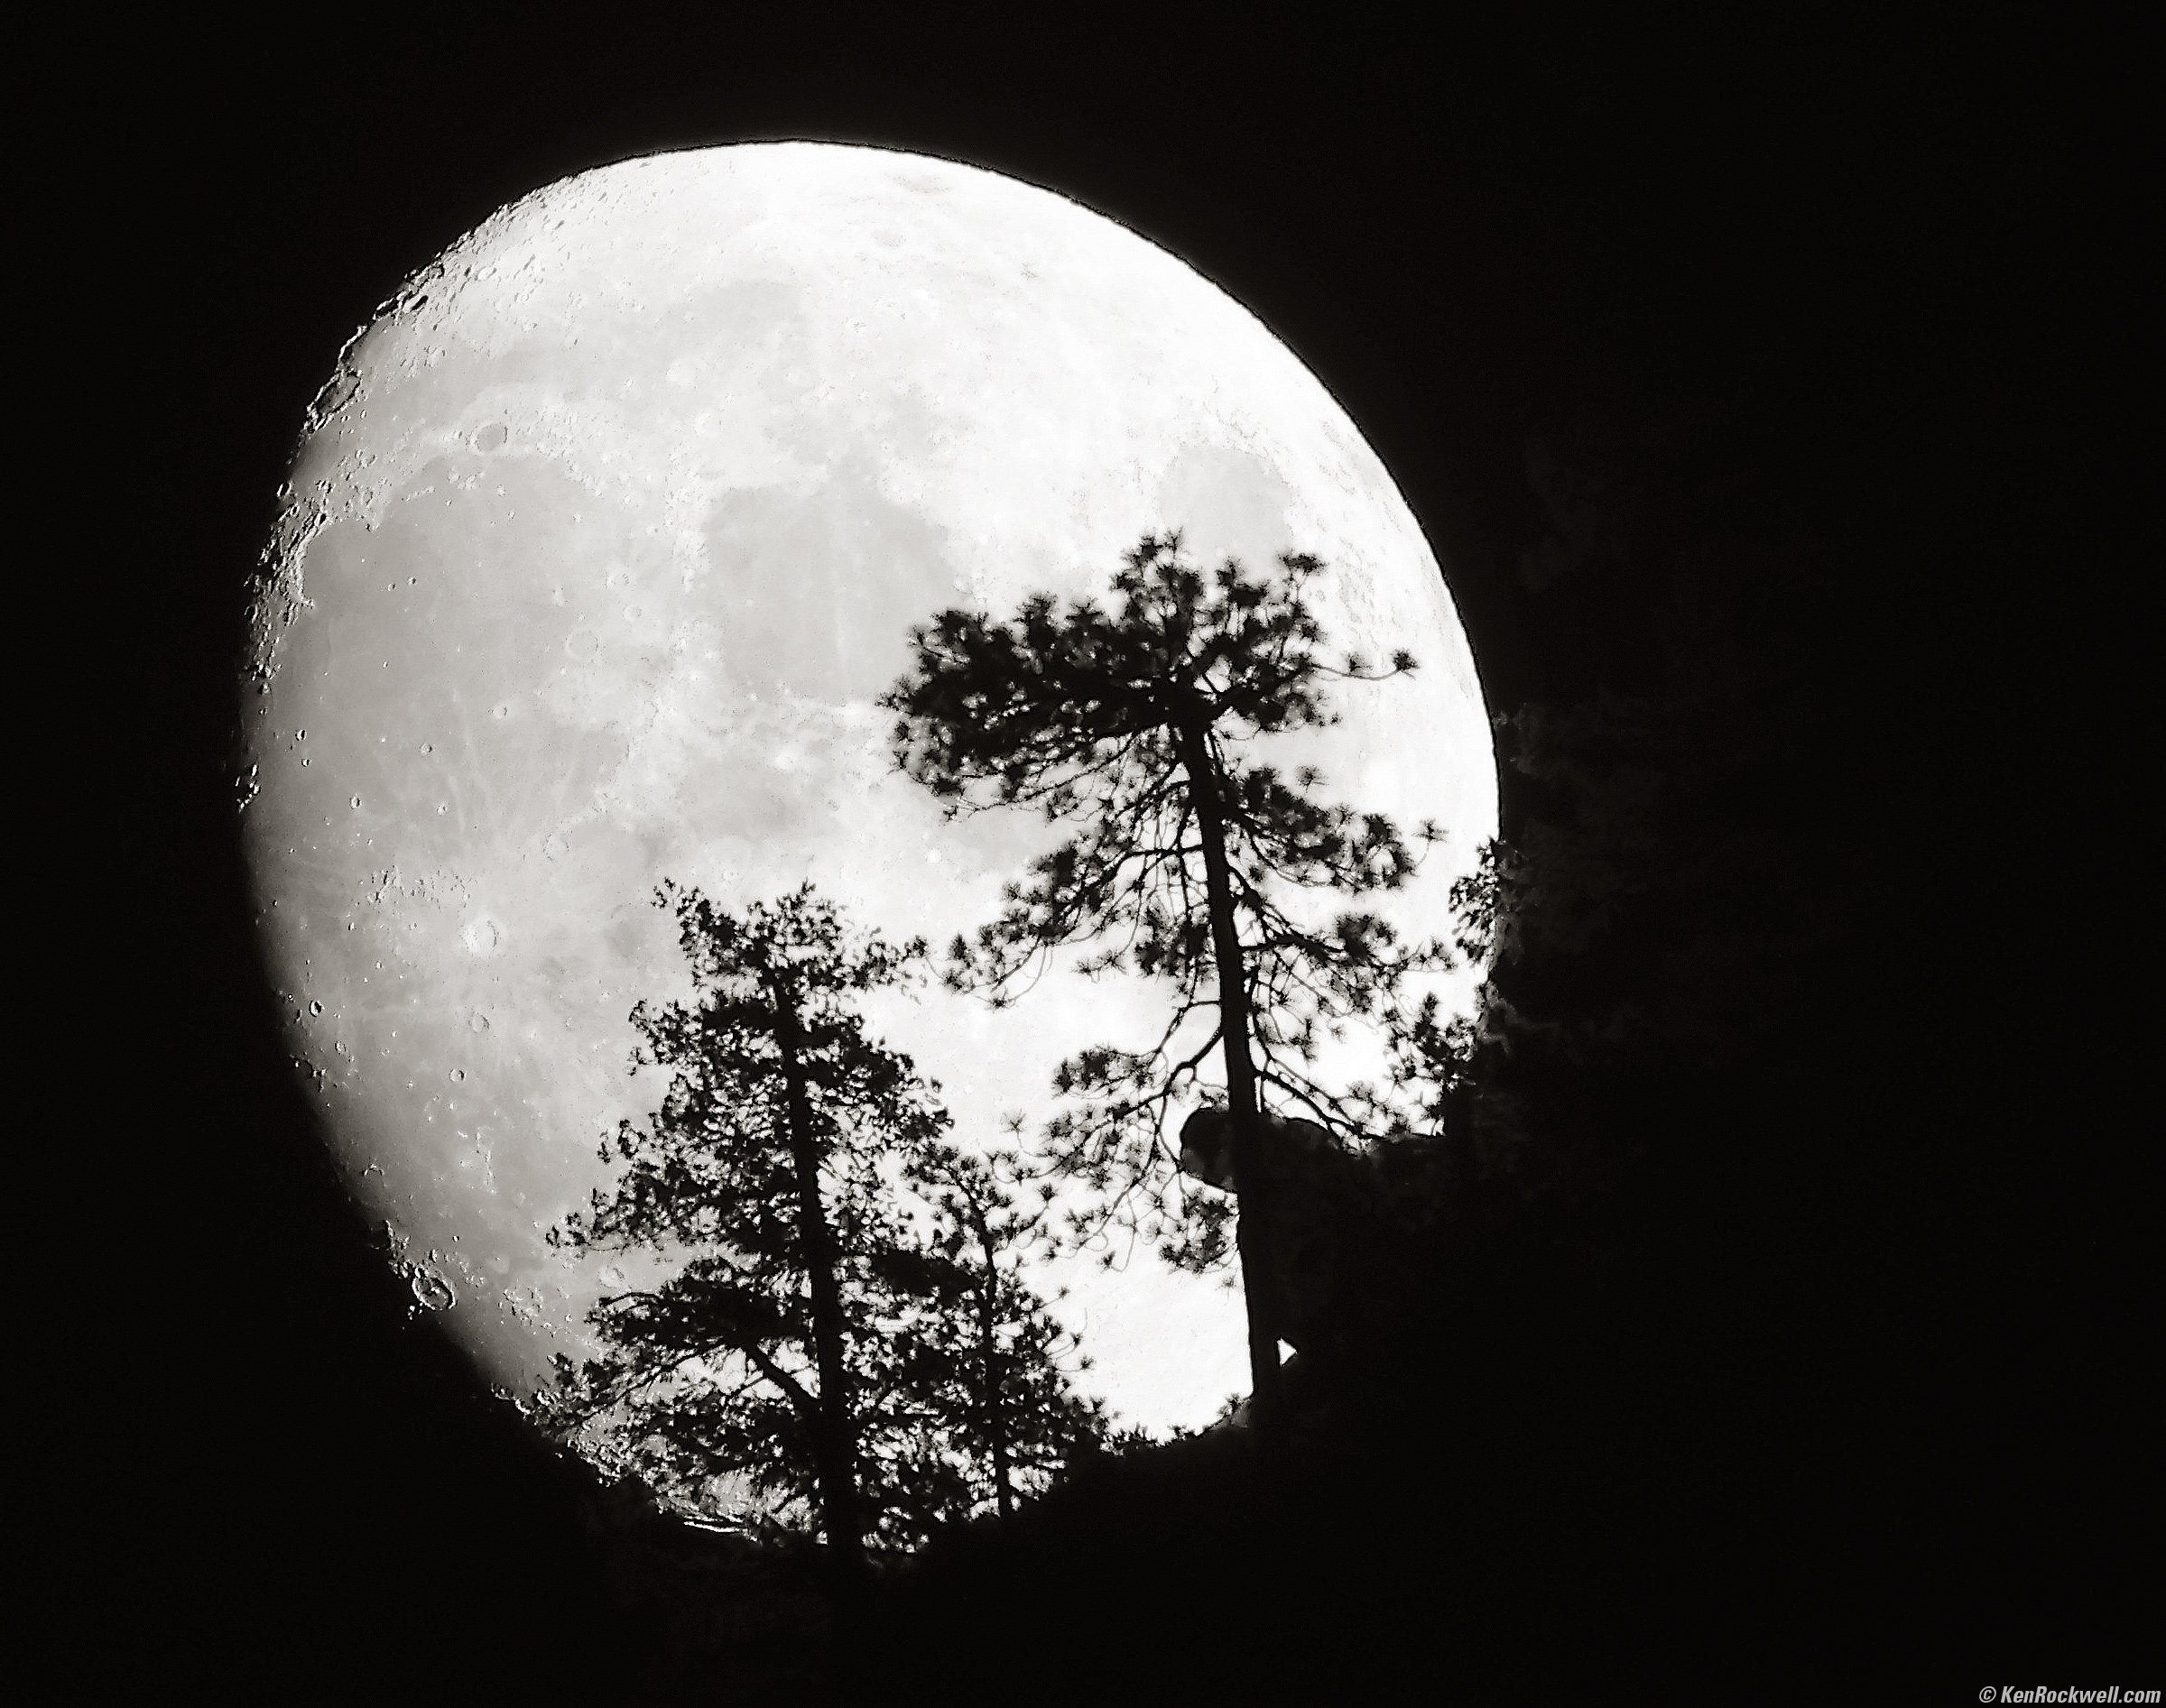
Moon Behind Pines Atop Sentinel Rock, Yosemite National Park, 8:56:32 P.M. Canon EOS R5, EF 100-400mm IS L II at 400mm wide-open at f/5.6 on EF 2× extender II (800mm actual focal length and f/11 actual resulting aperture) on EF to RF adapter at 1/200 at ISO 1,600 (LV 10.6), cropped a bit but otherwise as shot, split-toned print. bigger or fit-to-screen.
We got lucky: it turns out the path of the rising moon was following the shape of the ridge, so we had about 15 minutes to call the rest of the group over to check it out.
We went out to photograph El Capitan by moonlight:
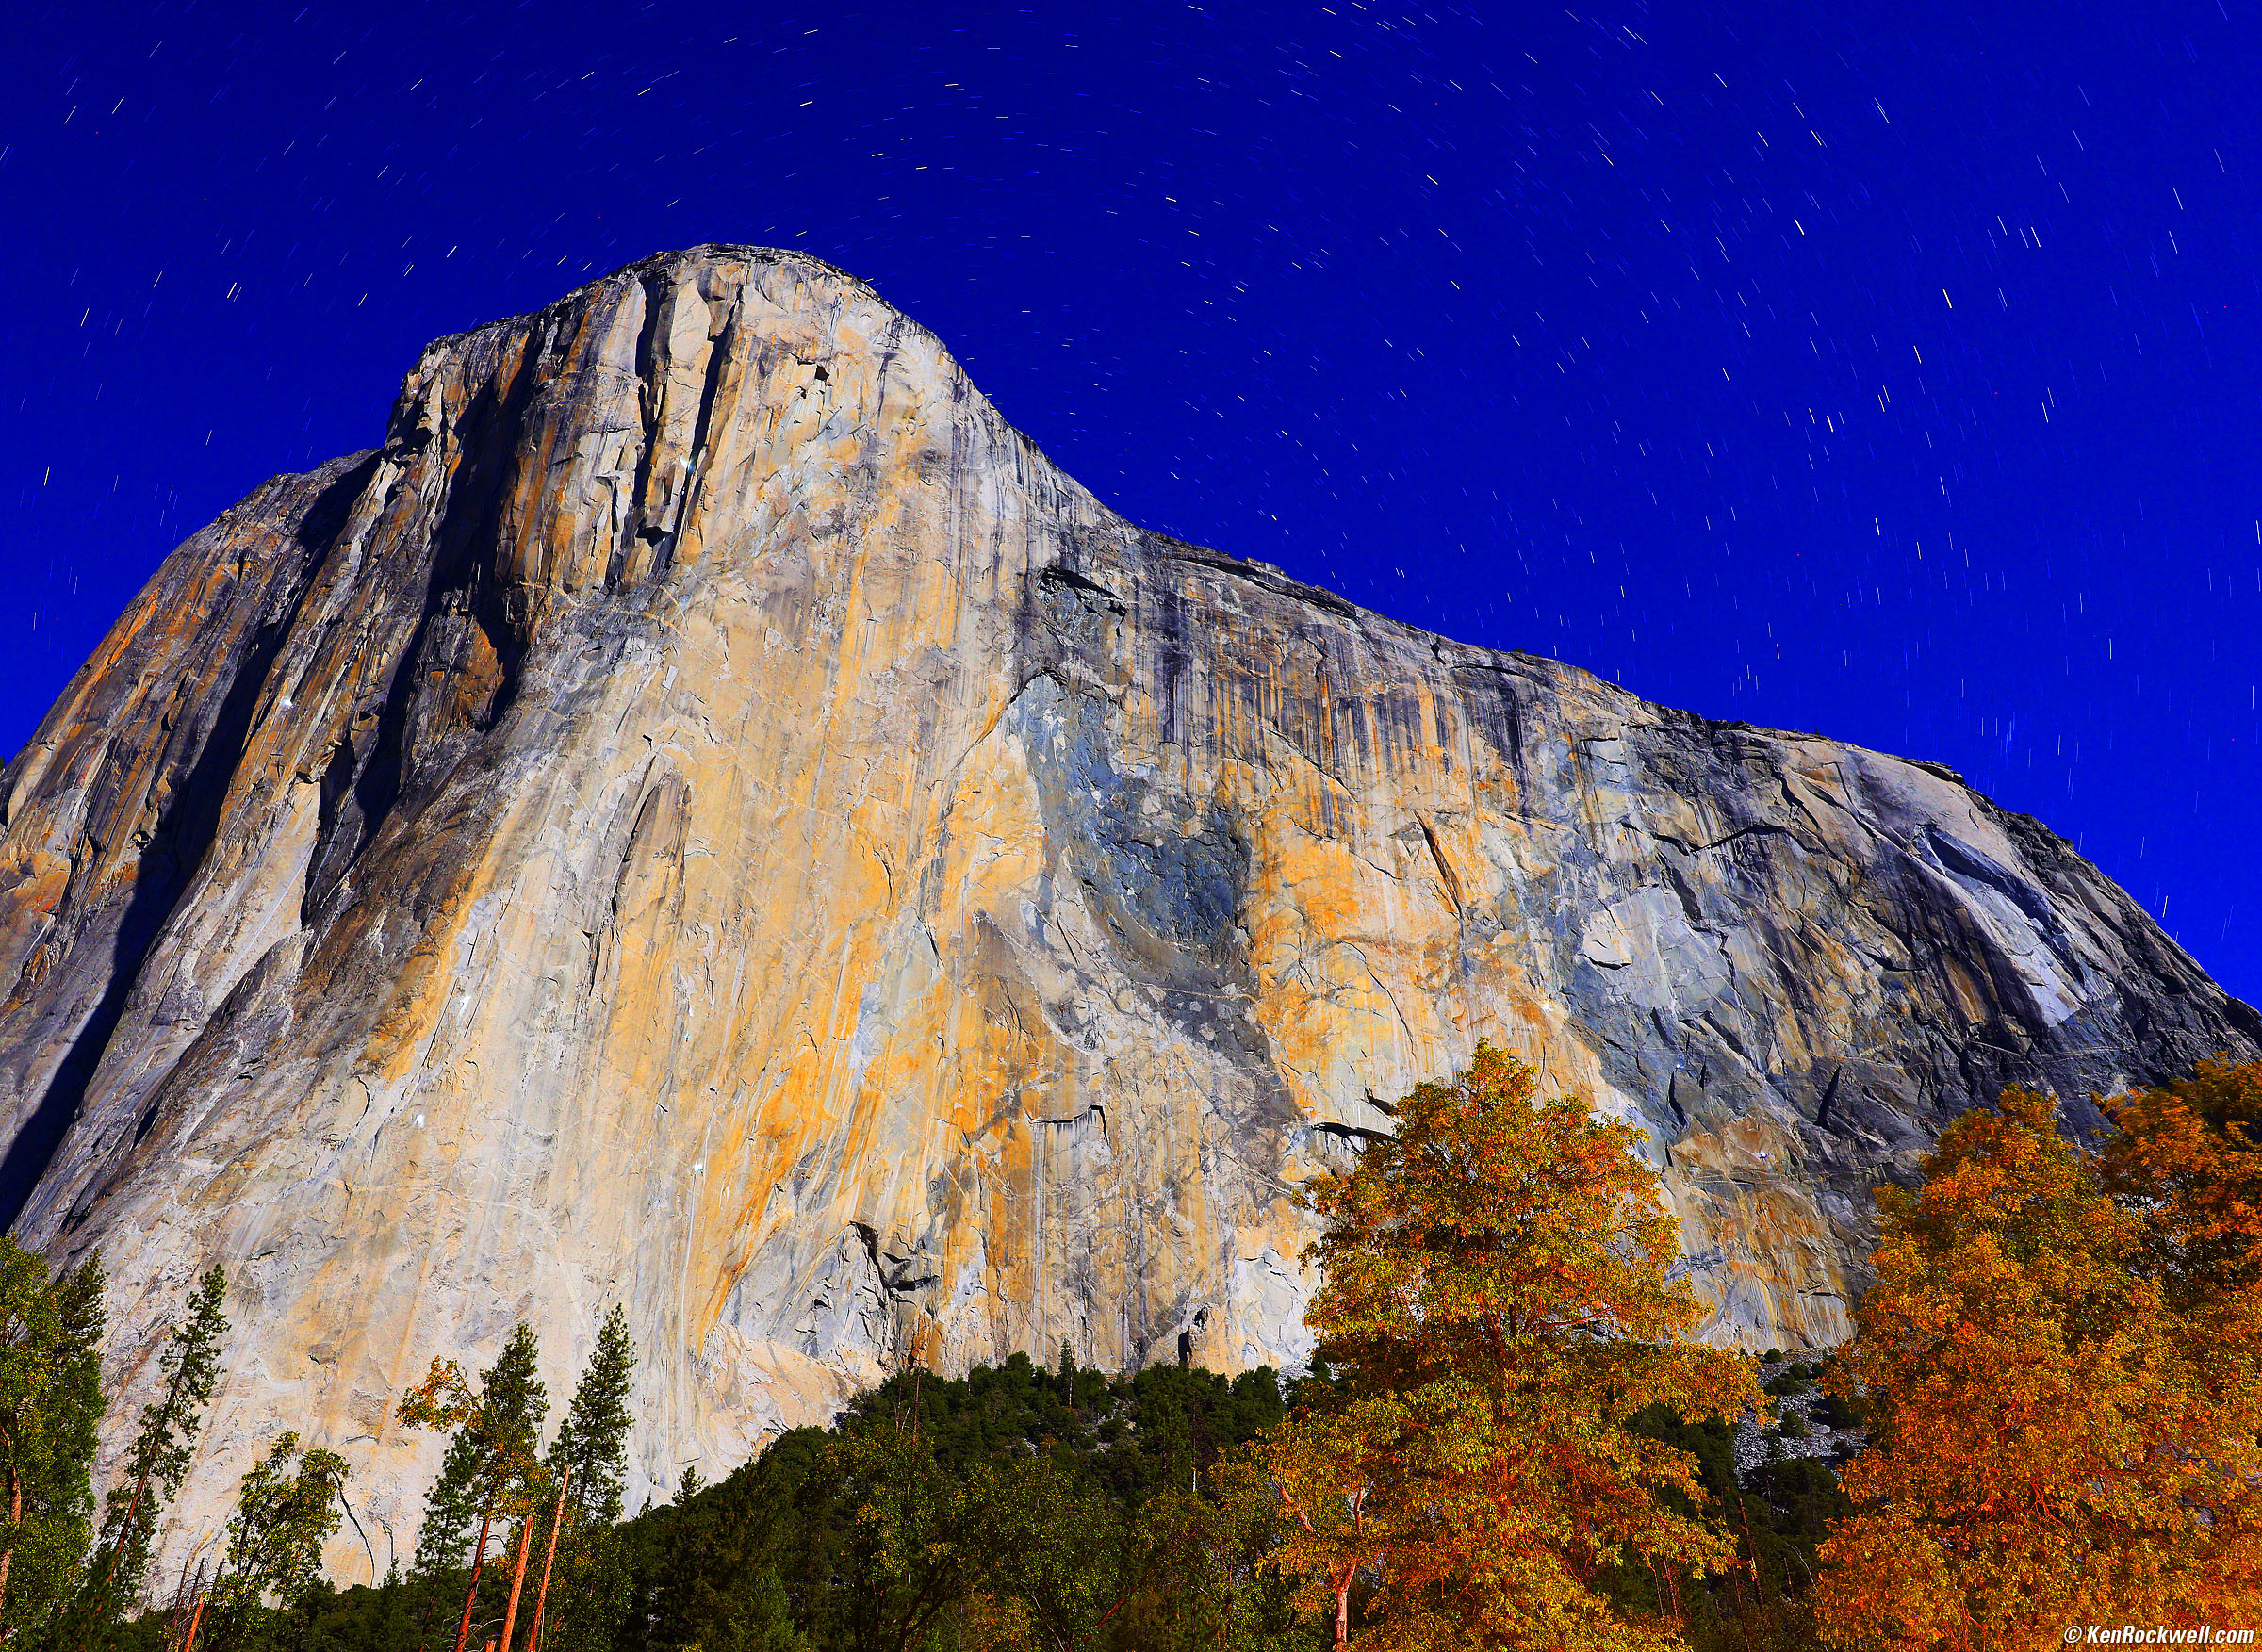
El Capitan by Moonlight, Yosemite National Park, 7:47 ~ 7:51 P.M. Canon EOS R5, RF 14-35mm f/4L IS USM at 23mm wide-open at f/4 using the R5's bulb timer for a 256-second (four photographic minutes) exposure at ISO 200 (LV minus 5.0), Perfectly Clear. bigger or fit-to-screen.
I would have gotten better results at 8 minutes at ISO 100 at f/4, but didn't feel like waiting around in the cold. As always, use the lowest ISO you can for the sharpest, cleanest results in dim light. High ISOs are for the impatient when you have a tripod. No need for f/8 (and a half-hour exposure) as the RF 14-35mm f/4L IS is just as sharp wide-open and there was no need for extra depth of field.
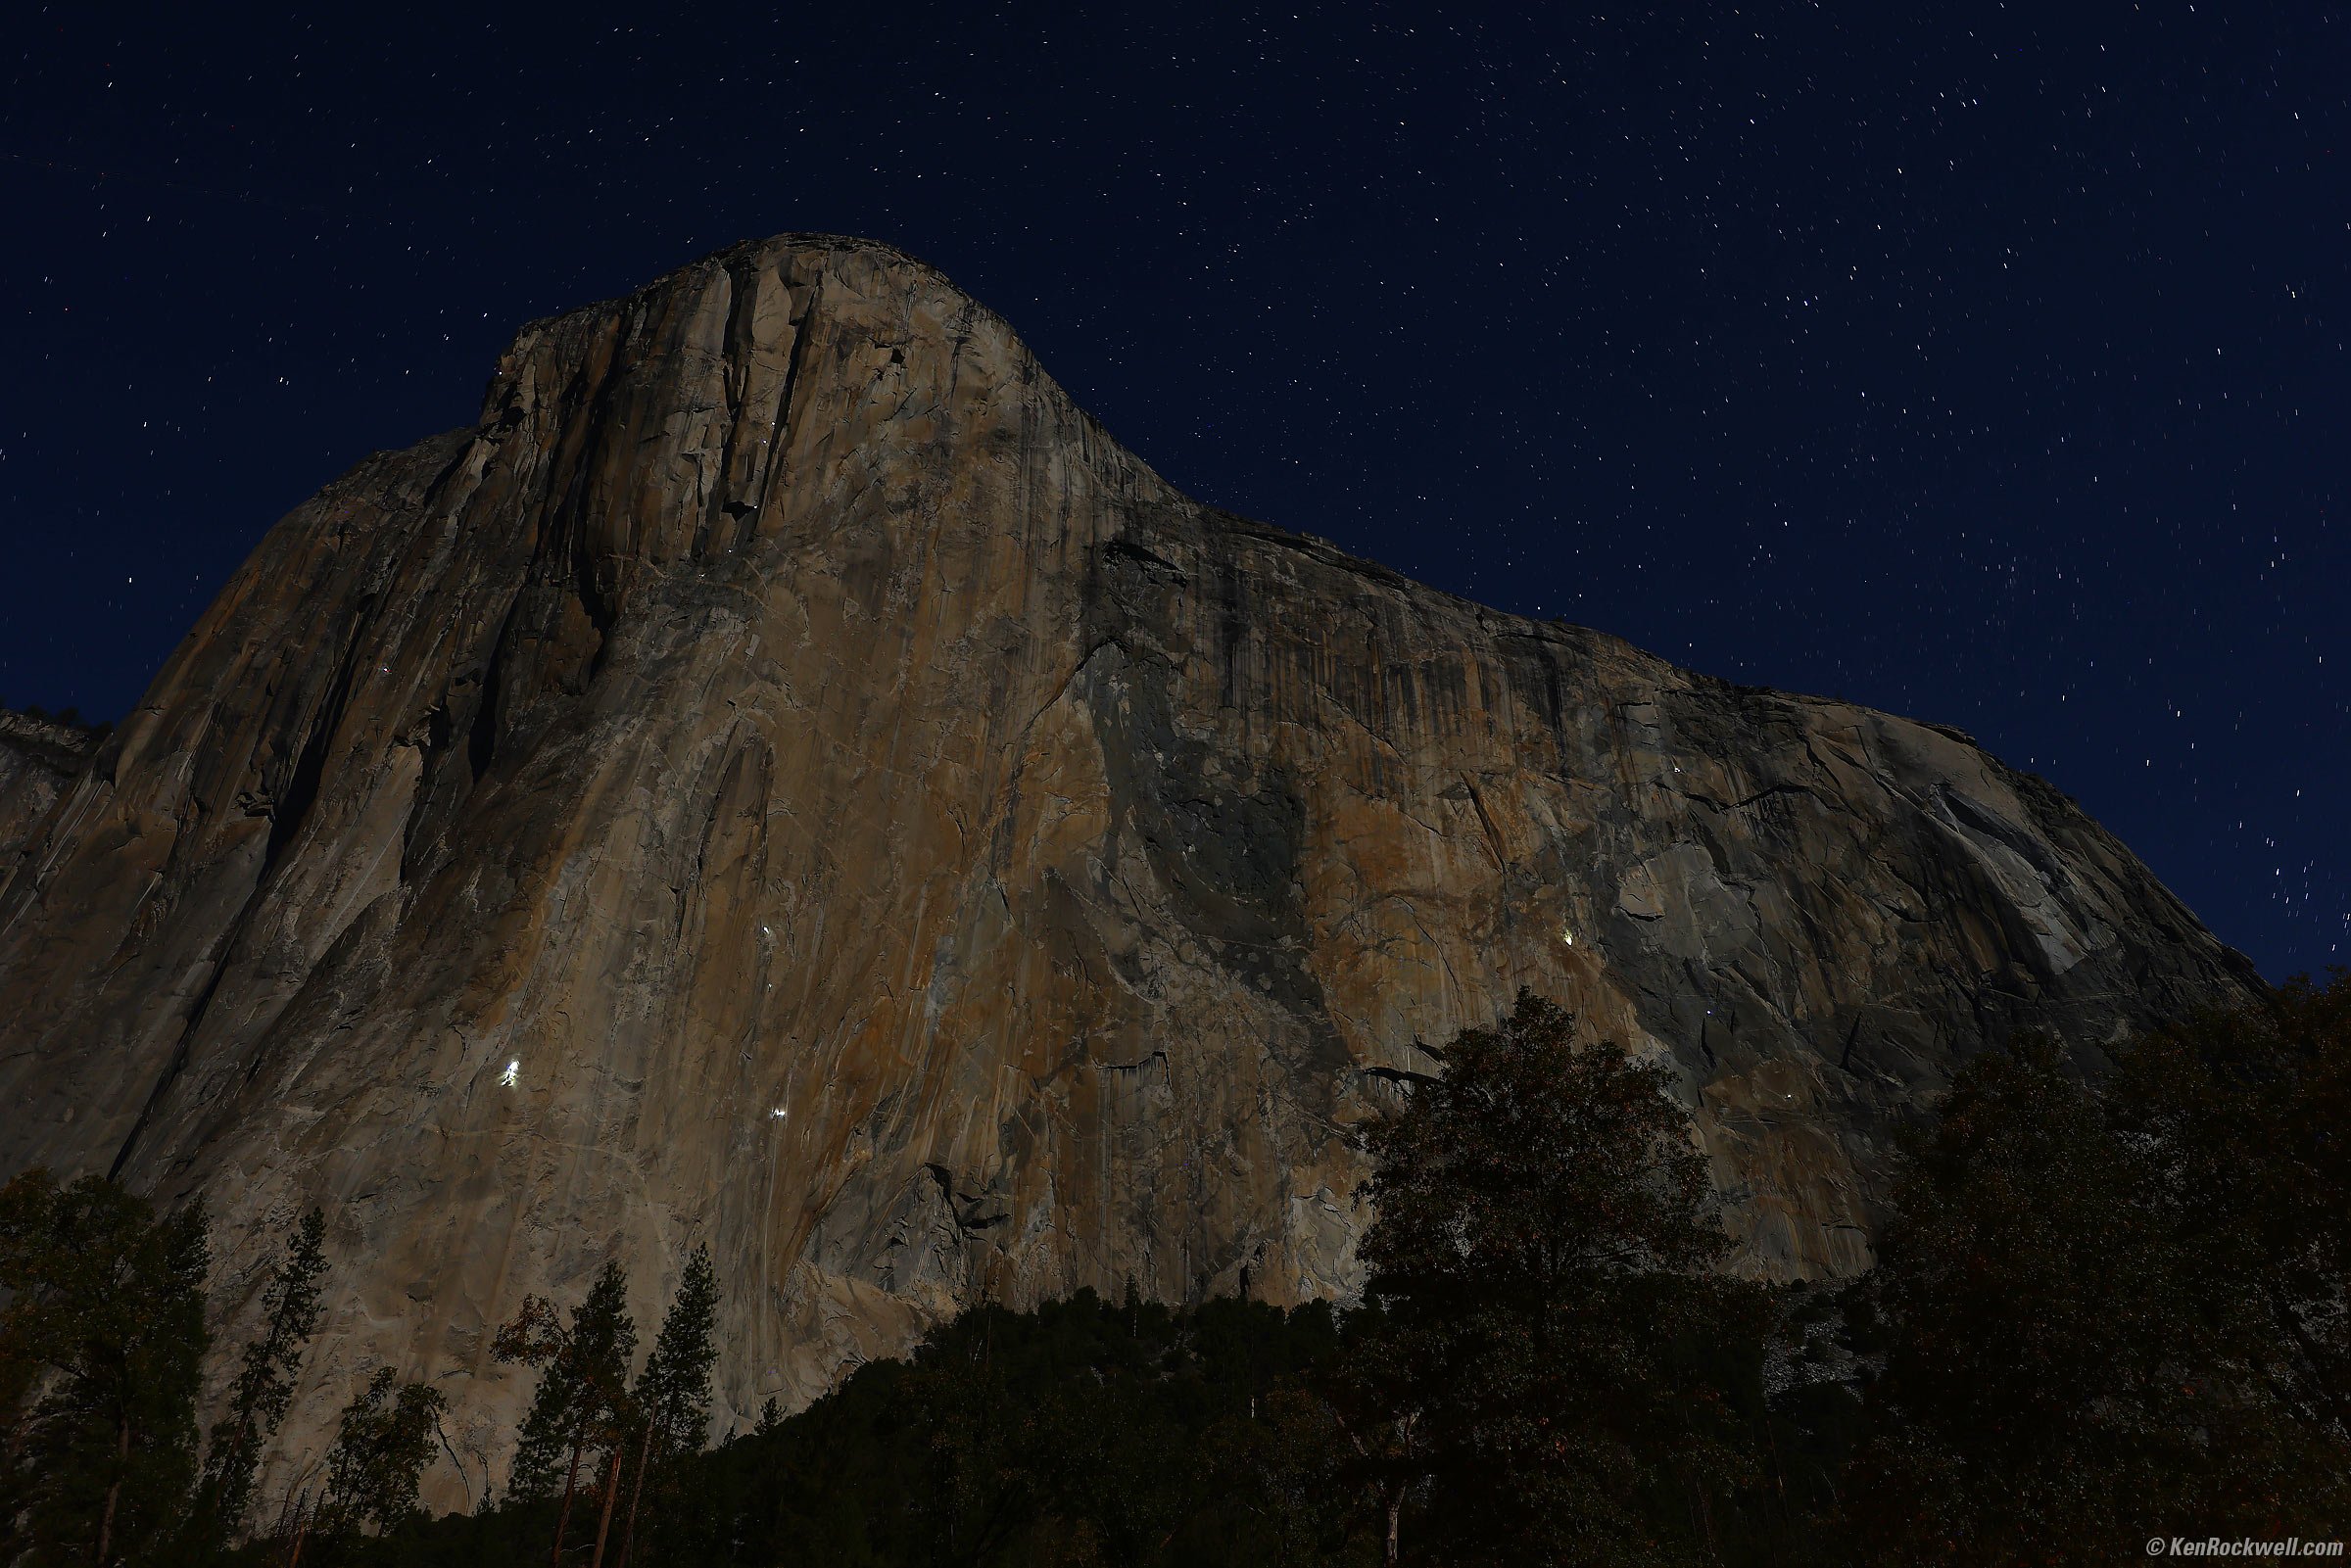
No tripod? No problem; here's how my Apple iPhone 13 Pro Max shoots hand-held:

El Capitan by Moonlight, Yosemite National Park, 8:03 P.M. Apple iPhone 13 Pro Max 5.7mm (26mm eq.) camera at f/1.5 hand-held for one-second at Auto ISO 5,000 (LV minus 4.5), Skylum Aurora HDR to bring up shadows and amplify the image in general from my one JPG image. bigger or fit-to-screen.
One second is the equivalent exposure per the EXIF data. To do this the iPhone has to held reasonably still for several seconds while it accumulates many shorter exposures, which are auto-aligned and summed together very intelligently to give us the resulting image.
For a hand-held shot lit solely by moonlight, this is extraordinary.
While of course the iPhone image has much less detail as it was forced to use a very high ISO so that I could hand-hold it (that's why I suggest you shoot at the lowest ISO possible when on a tripod), note that the iPhone shot renders the stars as dots from the short exposure rather than trails. Bravo!
I made both of the above images much lighter than they appeared to our eyes at the time for a better, but less accurate, artistic interpretation.
In actuality El Capitan's face is so dark that it makes the bright dots of climbers' lanterns appear as if stars are shining through solid granite! Here's how it looked to our eyes:
El Capitan as it Actually Looked by Moonlight, Yosemite National Park, 8:20 ~ 8:21 P.M. Canon EOS R5, RF 14-35mm f/4L IS USM at 23mm wide-open at f/4 using the R5's bulb timer for a 64-second (one photographic minute) exposure at ISO 100 (LV minus 2.0). bigger or fit-to-screen.
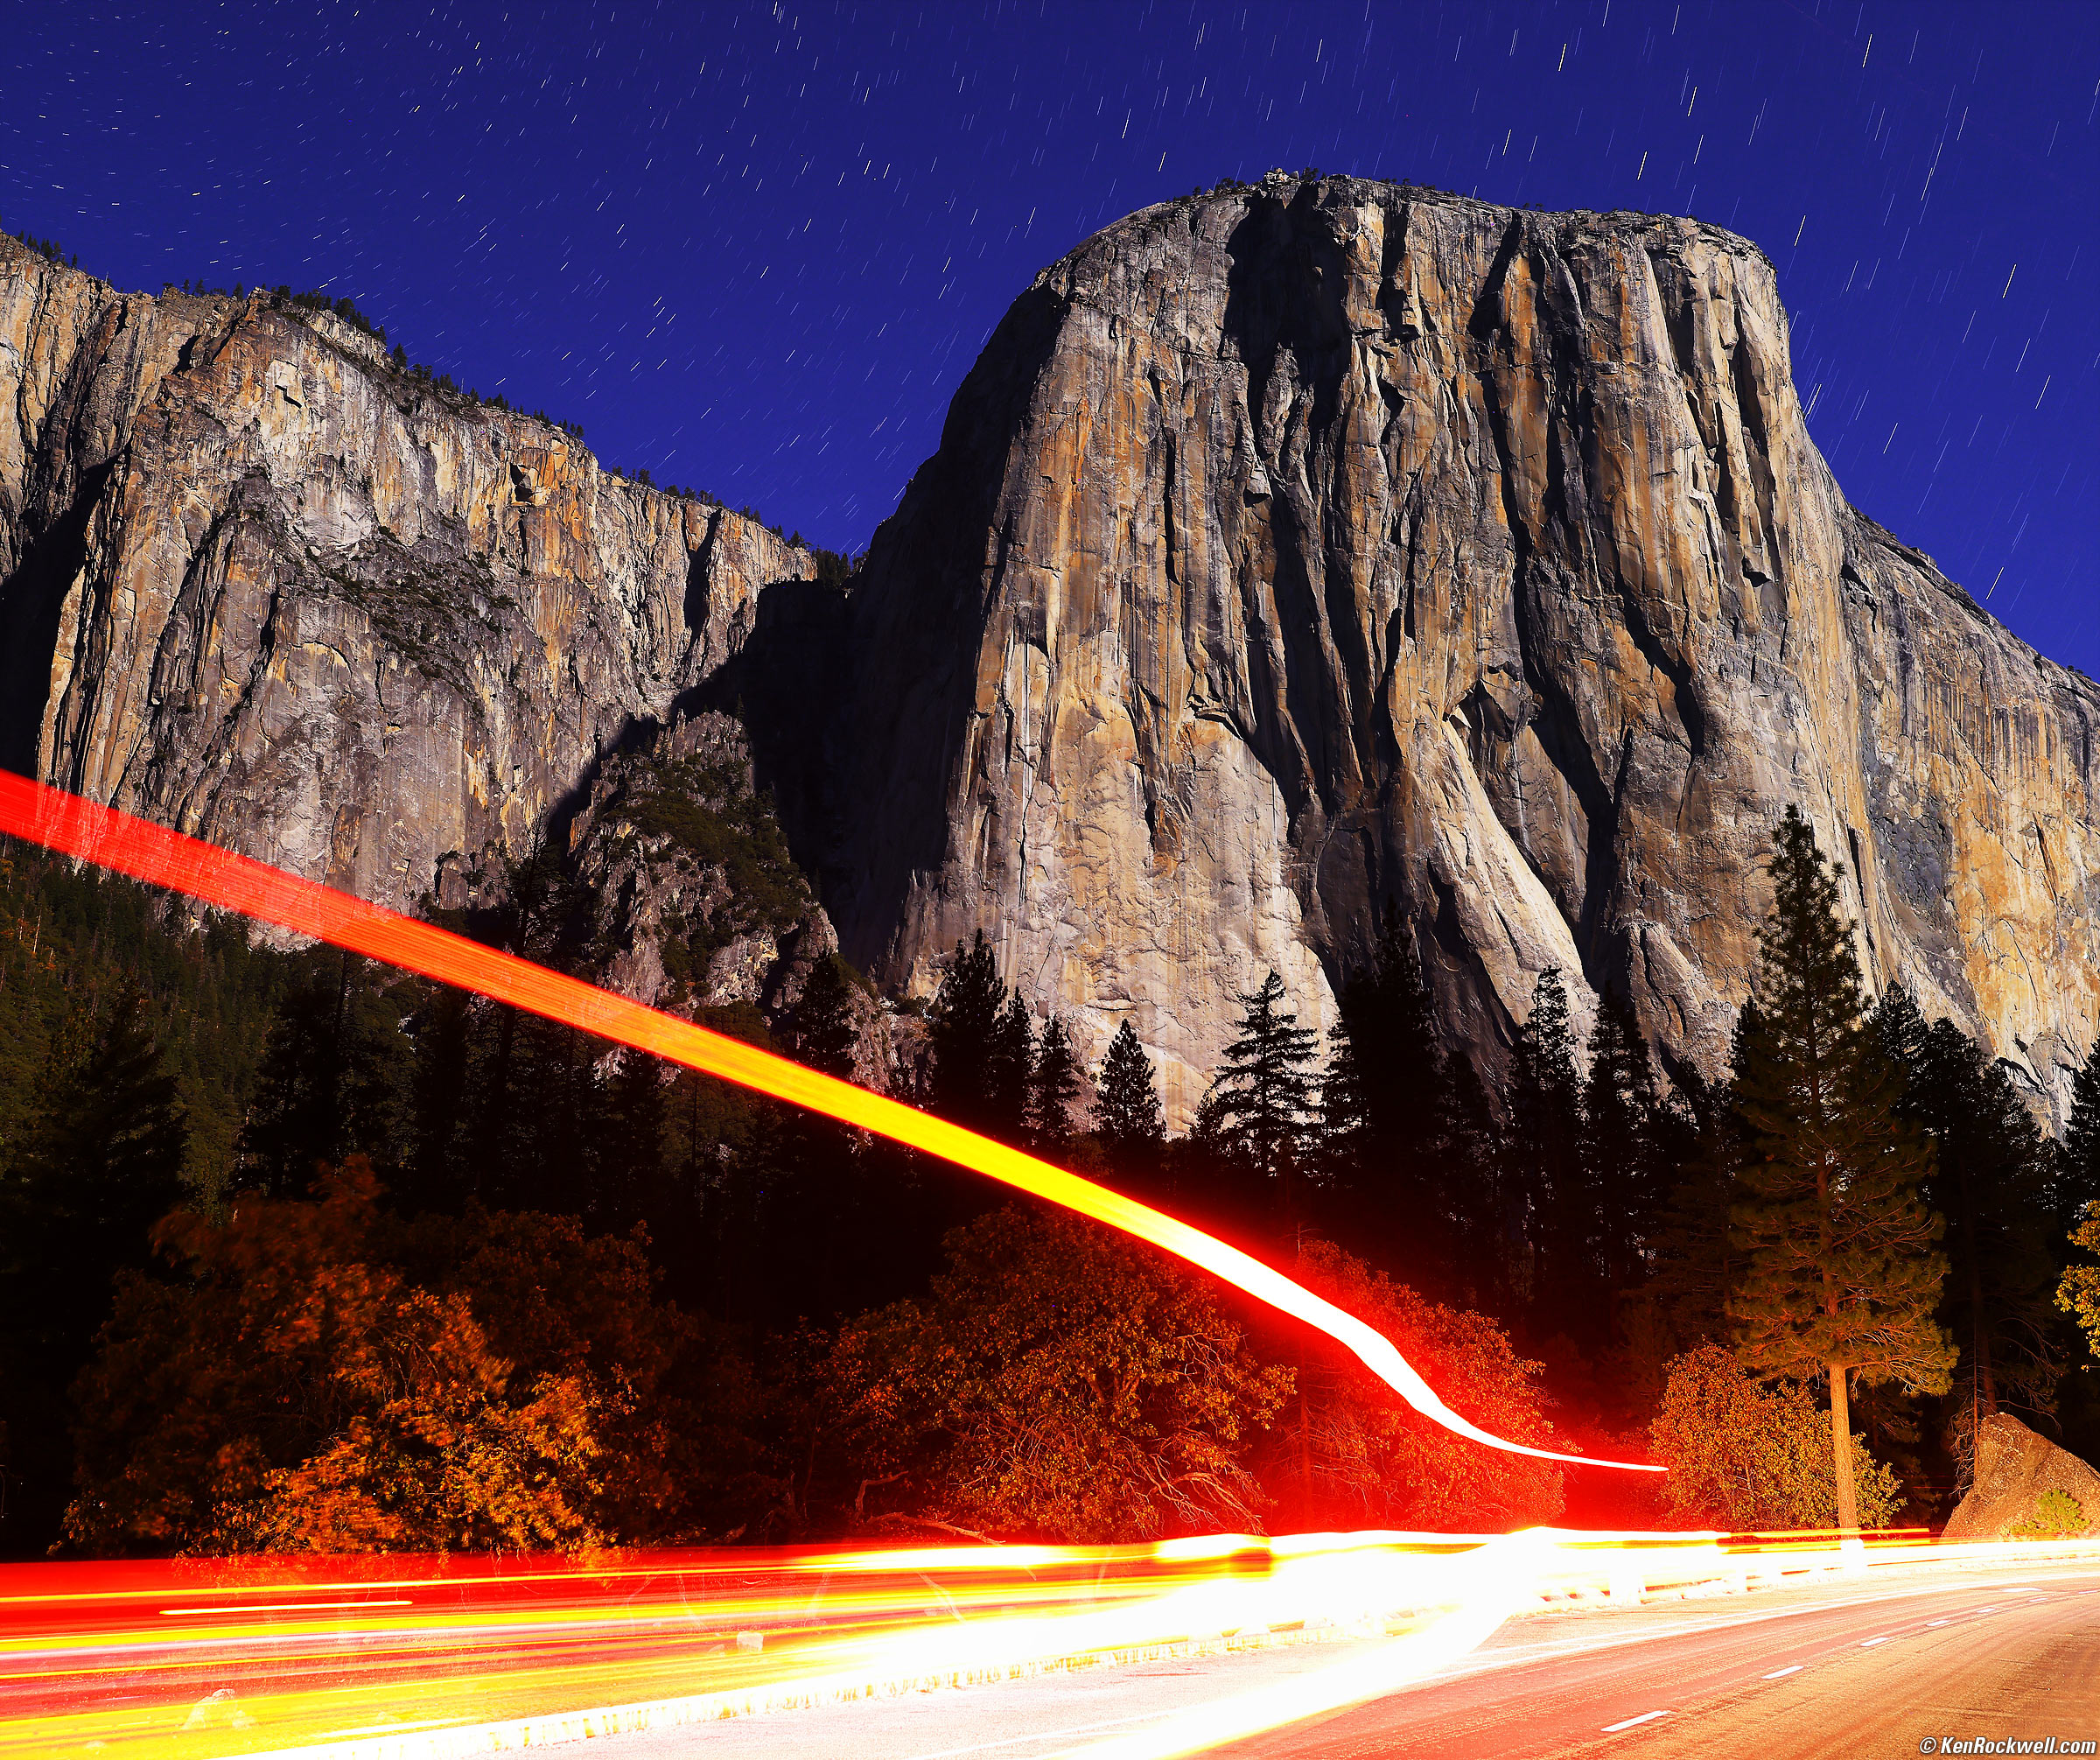
El Capitan with Red Streams by Moonlight — from a different vantage point, 8:45 ~ 8:49 P.M. Canon EOS R5, RF 14-35mm f/4L IS USM at 31mm wide-open at f/4 using the R5's bulb timer for a 256-second (four photographic minute) exposure at ISO 100 (LV minus 4.0), Perfectly Clear. bigger or fit-to-screen.
Next Page 17 October 2021 -> >
< < Back to top