Home Donate New Search Gallery Reviews How-To Books Links Workshops About Contact
Canon
5D Mark III
Users Guide
© 2012-2015 KenRockwell.com. All rights reserved.


Canon 5D Mark III (33.5 oz./950g, about $3,500) and 100mm f/2 USM. enlarge.
February 2015
Canon 5D Mark III Review Canon Reviews Other reviews
Canon 5D Mark III Lens Recommendations
Introduction top
This is a collection of my tips and tricks.
Set the LCD brightness top

Adorama pays top dollar for your used gear.
I use these stores. I can't vouch for ads below.
|
By default, the 5D Mark III varies its LCD brightness automatically.
This sounds nice, but if it drives you crazy, you can set it to one fixed value by pressing:
MENU > WRENCH •• > LCD Brightness > SET > Manual > SET.
The middle "4" setting is ideal.
Shooting outdoors at night, "2" is best.
Shooting in direct sunlight, "5" is ultra-bright, but it will blind you indoors.
I put this menu option in the MY MENU menu for easy access.
Image Settings top
Color
For people, I shoot in the STANDARD [*S] Picture Style setting (you get there by hitting the top left "*" button), and change only the saturation to +2.
PORTAIT at +1 saturation is also nice, use what looks great to you.
For everything else, I usually set +3 for saturation.
I usually shoot in Auto White Balance (AWB), but trim the colors to add 5 steps of amber (A5).
I shoot at AUTO ISO most of the time. That's the setting next to L, one or two down from ISO 100.
Auto ISO always sets ISO 400 with flash. I wish I could program this to be smarter, but it's fixed at ISO 400 regardless of ambient light.
THe AUTO ISO settings are so important that I use different ones for each kind of shooting I do.
Tweaks
I always leave the shadow optimizer (Automatic Lighting Optimizer) ON, which is its default.
I don't use highlight recovery (Highlight Tone Priority), since it deactivates the shadow optimizer above.
Exposure Compensation
My 5D Mark III usually gives the best results without any exposure compensation.
Colorful subjects in interesting light at +3 saturation can overload colorful highlights, so under these conditions with highlight optimization ("Highlight Tone Priority) OFF, I'll often set -0.7 compensation.
With highlight optimization ON, I find 0.0 compensation usually gives me the best results under most conditions.
No big deal; look at your LCD and use what looks best.
Exposure Lock top
The 5D Mark III locks the exposure by default as you half-press the shutter.
White Balance Trims (Color Adjustments) top
It's easy to set precise green-magenta or amber-blue color adjustments.
Simply press:
MENU > CAMERA •• > WB SHIFT/BKT > SET > move the dot as you like with the thumb button > SET.
This setting applies to every white balance position, even AUTO and Kelvin.
For instance, here's a shot at my default WB setting of AUTO with A5 trim, as I use for most subjects:
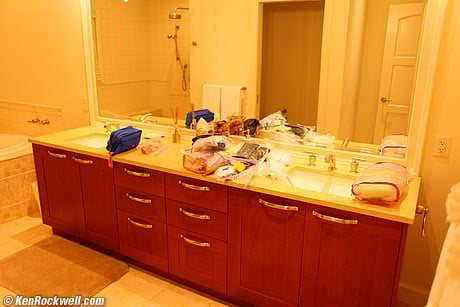
Too orange!
I then made another shot at 2,500K WB, which wasn't orange any more, but now it was way too green!
I tried a few other settings, and quickly settled on A5 (amber) and M5 (magenta) WB SHIFT, easily tweaked by looking at the LCD as I changed settings for each shot. The LEICA M9 can't do this!
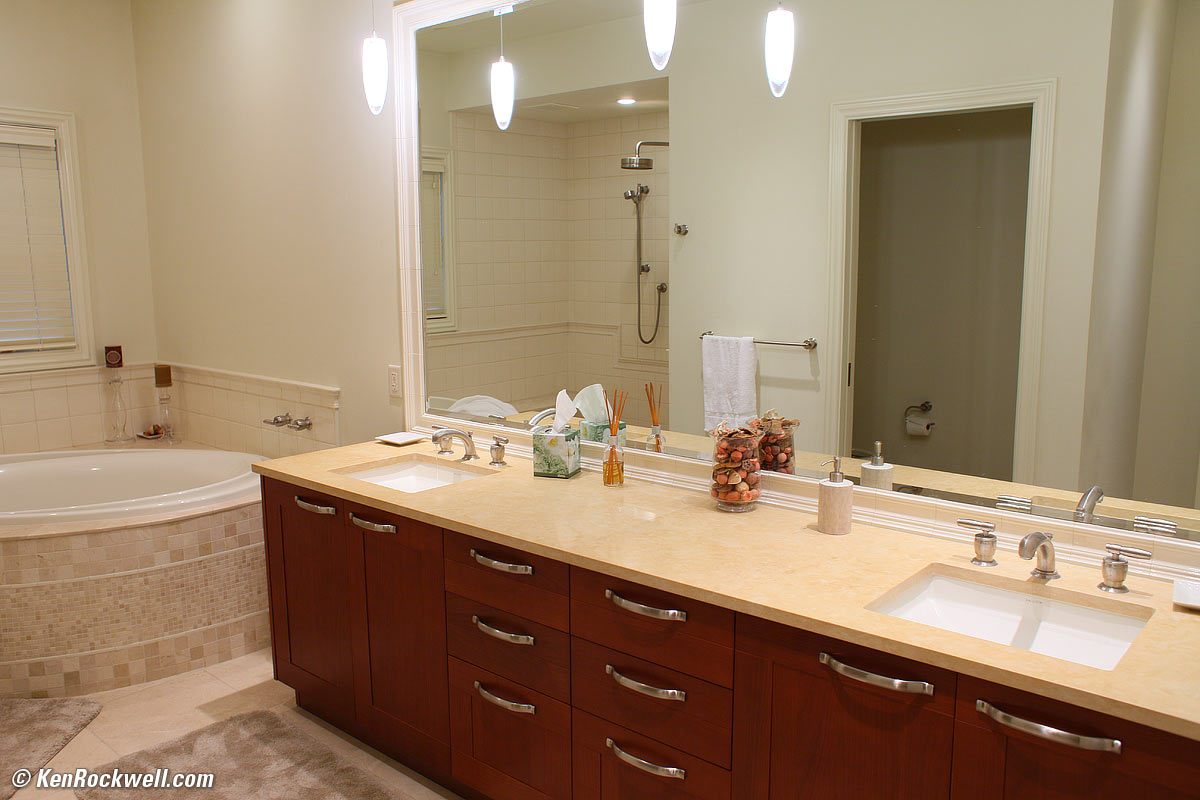
Maui Bathroom: Mixed CFL and halogen lighting, 2,500K A5 M5 WB. bigger.
As you set this, you'll see a colored chart. A and B are Amber and Blue, while M and G are Magenta and Green.
File Formats
I shoot at LARGE JPG, and set it to NORMAL (the stair-step icon) instead of the LARGE (quarter-circle icon as shown below).
Canon defaults to the FINE (quarter circle icon) setting, so I always set the NORMAL options deliberately.
Try it yourself: I've never seen any difference between NORMAL and FINE, and I do notice the smaller file sizes which transfer faster and take up much less space in my computer.
Image Size
No one needs 21MP. All it does is slow everything and clog your hard drive.
Try shooting your 5D Mark III at its M (11MP) or S (5MP) settings. If you look at your images at 100%, you'll see that the lower resolution shots are sharper pixel-by-pixel!
When I'm photographing family and friends, I shoot at SMALL JPG. Even SMALL is good enough for great 20x30" prints.
The smaller-sized images out of the 5D Mark III are spectacular. They are much, much sharper and cleaner than images from cameras on which that is their native resolution. When you start with over 20MP, it looks pretty good if you use all those to make 11MP or 5MP.
Why? Because they use less, or no, Bayer interpolation. No digital camera really resolves its rated resolution; they cheat and interpolate up, so at 100% at its rated resolution, no digital camera image is as sharp as a true scan from film.
At the 5MP setting, you have 100% R, G and B pixels, exactly as if you were using a Sigma Foveon sensor. If Sigma was selling this, they'd sell the 5MP (S) setting as if it were 15MP (also a lie).
What this means is that the lower resolution settings actually pack away lot more detail than you think. The S (5MP) setting of the 5D Mark III is a lot sharper than any 5MP camera.
M looks almost as good as L for the same reason.
If you're testing lenses, sure, shoot at L, but for everything else, try the settings for yourself, You'll probably get what you need at the smaller settings. For instance, the 11MP setting of the 5D Mark III has way more detail than any of the 12MP (native) Nikon cameras.
The resolution advantage of the 5D Mark III is obvious, even at lower settings. Try them.
Flash
For people shots, I usually use a 220EX for fill-flash, and tape a piece of 1/4 CTO gel over the flash.
Autofocus
Auto area select isn't very smart. To use it, set AI focus and all area mode.
When set to AI Focus (auto-select between either One-Shot or continuous AI SERVO), no longer will it hold tight on a still subject as you recompose. Now in AI Focus, it waits a moment, but will always start refocusing if the subject moves — or if you recompose.
If you want the AF area to zip all around the finder, chasing your subject as you recompose, set the combination of AI SERVO and auto-AF area select. Select a point, it focuses, and as things move, it will try to stay on your subject. It works, but not as well as even the Nikon D7000 today.
If you set it this way, it dithers and moves around so much that it will certainly impress new Canon users for a few minutes, but is very distracting if you actually intend to take pictures with all this dancing around on top of your viewfinder image.
Modes
You have three choices:
ONE SHOT
Use this for still subjects. The camera focuses, and locks as soon as it gets focus. You then may recompose.
Use this, and wait for AF to lock, before you grab the focus ring with a lens with manual-focus override. Otherwise, the 5D Mark III will keep trying to pull focus control away from you.
AI SERVO
The camera keeps trying to focus as things move around. It never stops; it always tracks your subject in and out.
Don't use this setting if you want to use instant manual-focus override by grabbing your lens' focus ring: the 5D Mark III will keep trying to focus under you.
AI FOCUS
I use this most of the time. This clever setting usually selects whichever of the two settings above is appropriate, and uses it.
This setting cleverly locks itself when the subject is still, and tracks it when it's moving.
I only select ONE SHOT when I know I'm shooting stills, otherwise, for kids or whatever pops up, AI FOCUS is my choice.
You can use manual-focus override in AI FOCUS, but only if it has locked, which it rarely does. In most cases, the 5D Mark III will keep trying to focus in AI FOCUS unless you're on a tripod.
Trick: You can redefine the depth-of-field preview button to switch to the AI SERVO mode when held down:
C.Fn 2 > Custom controls > Preview button > set to "One Shot <--> AI Servo"
AF Point Selection
I use just the center point if I'm being careful in ONE SHOT, and usually select all sensors for general shooting in AI FOCUS.
The center sensor is more sensitive than the others in dim light. If the other sensors aren't doing well in dim light, choose the center sensor and you'll be much happier.
TIP: When you've selected an off-center AF sensor, we all know a center-press the thumb controller will reselect the center point, if you've got the menus set to use the thumb controller to select AF areas. That's obvious, but what's not is that if you press the center of the thumb nubbin again, it will return instantly to the off-center sensor you had selected!
Every time you press the center, it swaps between selected and center sensor.
More Fun
When set to AI Focus (auto-select between either One-Shot or continuous AI SERVO), no longer will it hold tight on a still subject as you recompose. Now in AI Focus, it waits a moment, but will always start refocusing if the subject moves — or if you recompose.
A new feature is the option of smaller "pinpoint" AF areas. THey are indicated by little ticks inside the larger boxes. I don't use them.
If you want the AF area to zip all around the finder, chasing your subject as you recompose, set the combination of AI SERVO and auto-AF area select.
Moving the AF area selector won't wake up the 5D Mk III.
The Quick Control Screen top
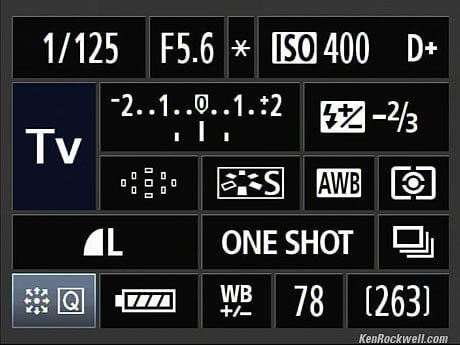
Canon 5D Mark II Quick Control Screen (Mark III similar).
You can control everything from one tap of the SET button, if you turn on this feature by pressing:
MENU > CAMERA••••• (C.Fn) > C.Fn IV Operation/Others > SET > 3: Assign SET Button > SET > 5: Quick Control Screen > SET.
Now when you tap SET, it wakes up a control screen on the rear LCD from which we can control everything with the dial, joystick and SET button.
Once you get this screen, use the thumb button to drive around, and the dial to change the setting. If you need more details about what you're setting, press the SET button again, but it's not necessary.
There's no need to press OK or DONE or EXIT. The instant you've changed something, it's done.
I do wish I could drive off one end of the screen and arrive at the other side, but it stops at the ends.
You can read and set apertures and shutter speeds on this screen, but in manual exposure mode, there is no indication for the correct exposure. For manual exposure, look at the bar graph in the finder or on the old top LCD.
If you tap the INFO button, you'll call up the very similar INFO screen, which does drive the bar graph to let you set read manual exposure.
INFO Screen top
I didn't have a graphic for the Quick Set screen, so the screen shown above is more precisely the INFO screen you'll get if you press INFO twice.
They are the same, except that the bottom bar shows details on what you're setting if you're in the Quick Control screen.
If you call up this screen with the INFO button, it doesn't go away. To make this INFO screen go away, you have to press INFO again.
INFO Button
Tap this if you're not playing back, and it shows all sorts of goodies about how your 5D Mk III is set, the time and date, and how many shots and how much free space is left on your card.
Tap it again and the screen I showed above pops up, and won't go away until you press INFO again.
Total Recall Camera State Memories top
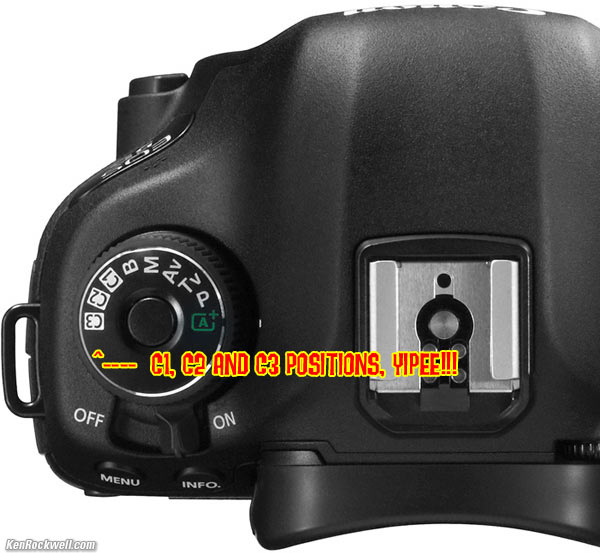
Canon 5D Mk 3 shooting mode dial: C1, C2 and C3.
Set these before you go out, and everything you'll need will be right at your fingertips all day or forever.
Each time you turn the dial to one of the C1, C1 or C3 positions, everything is reset to what was stored in that position.
Feel free to change any settings as you shoot in the C1, C2 or C3 positions. You won't erase what you saved. These changes will stay until the camera times-out, usually one minute (you can change that duration in the menus), and the next time you go to shoot, even if you had changed something, you're back at your saved settings.
If you want to return to the saved settings more quickly, just move the dial to any other position and return.
To Save a Suite of Settings
To save a complete camera-state setting of your 5D Mark III:
1.) Set the camera as you like. Everything is saved.
2.) Press:
MENU > WRENCH ••• > Camera user setting > SET > Register > choose the C1, C2 or C3 position > OK > SET.
To Make a Permanent Change to a Stored Setting
To change a stored setting:
1.) Set the dial to that setting, C1, C2 or C3. This recalls the setting.
2.) Change something.
3.) Save the camera's current state back into that dial position:
MENU > WRENCH ••• > Camera user setting > SET > Register > Carefully select the correct C1, C2 or C3 position > OK > SET.
If you select the wrong C1, C2 or C3, you will have overwritten the settings at that position.
To Make a Temporary Change to a Stored Setting
Just change something as you would anywhere else.
As soon as you select or re-select a C setting, or as soon as the camera goes to sleep and wakes up again after your preset Auto Power Off time, set by pressing:
MENU > WRENCH • > Auto Power Off > (select time period) > SET,
your originally saved C setting is recalled.
The C settings are not altered unless you deliberately save something into them as described above.
To Make a Longer Change to a Stored Setting
The 5D Mark III system allows all sorts of ways to make things easier.
As we just learned, if you change something in a C mode, after the camera resets in usually about a minute, all your temporary settings are reset.
What if you want to keep using slightly different settings for a longer period of time?
Easy!
If you want to save them for up to about a half-hour or so, while in a C setting, press:
MENU > WRENCH • > Auto Power Off > (select longer time period) > SET.
Now the 5D Mark III will work in your C mode in your new settings for that period of time after you make your last shot, and then after that time (30 minutes maximum), automatically reverts to whatever you saved in that C setting. (If you leave that C setting and return, it also resets instantly.)
Here's the clever part: you keep that setting for 30 minutes, and when the 5D Mark III resets to your saved C setting, the time-out period also reverts to whatever you saved before, probably one minute! Thus you can alter a C setting for a while, it won't change, and when you're done, Voilà!, you're back to where you wanted to be!
To Make a Longer Change to a Stored Setting
Let's not forget the usual P, Tv, Av and M positions.
When you change one of them, they stay that way forever.
The four of them together are sort of like an unlocked C setting: every time you come back to them, they are as you left them, but if you change something while in them, they stay that way.
If dealing with some weird light that requires odd White Balance settings, you may want to use the P, Tv, Av or M positions, and then if a different opportunity presents itself, flip into one of your C modes, and as soon as you click back into any of P, Tv, Av or M positions, you're where you left off.
Brilliant!
To have these settings update automatically
Each of these settings remains unchanged until you save a different set of settings to that dial position.
New on the 5D Mark III is that you can choose to have these settings automatically update as you change the settings, as Nikons do in their settings banks. Set this way, when you leave one setting, it will be as you left it when you return. This is handy for when you first get the camera as your preferences finalize, but I'd set it back to its default of fixed after you get comfortable.
If you save the same thing to two locations and set "auto update," they both update until you change something in just one of them.
My personal Total Recall settings top
Of course everything about the camera is saved into each of these memories. This is what I saved that changes for me from setting to setting.
C1 |
C2 |
C3 |
|
| Used for | General Scenics |
People and Family |
Sports |
| Exposure Mode | Pro (P) |
Pro (P) |
Pro (P) |
| Resolution | L |
S |
S |
| Picture Style | +3 or +4 Saturation |
0 Saturation |
0 Saturation |
| ISO | Auto |
Auto |
Auto |
| Max Auto ISO | 12,800 |
25,600 |
25,600 |
| Minimum Auto ISO Shutter Speed | AUTO |
1/125 |
1/250 |
| Auto Light Optimizer | |||
| External Flash | disabled * |
enabled |
enabled |
| AF | ONE SHOT |
AI FOCUS |
AI SERVO |
| AF Sensors | One sensor |
Auto (all) |
One Sensor** |
| Advance | Continuous Silent |
Continuous Silent |
Continuous High (6 FPS) |
* When set to disable, the external flash's AF illuminator works, but the flash doesn't fire. Of course this fires by default; to disable it, use the first red camera menu > External Speedlite Control > Flash firing > (enable or disable).
** Set so the 5D Mark III automatically tracks the subject all around the finder.
Shadow Lightening ("Automatic Lighting Optimizer") top
I leave this on all the time, which is its default position.
You can can tweak this by pressing:
MENU > CAMERA•• > Auto Lighting Optimizer > (standard) > SET.
It works well as needed, and leaves things alone if not.
Highlight Recovery (called "Highlight Tone Priority" in menus) top

My house. Roll mouse-over to see with highlight recovery OFF.
Canon calls this "Highlight Tone Priority" in the menus. It is off by default. You set it by pressing:
MENU > CAMERA••••• (C.Fn) > C.Fn III: Image > SET > 3: Highlight Tone Priority : Enable.
Highlight recovery works by reducing exposure, and them lightening most of the of the image, except for the highlights. Everything stays the same, except that blown-out highlights might not blow-out, but only if you're lucky.
It rarely makes any visible improvement. This example is the one time it actually did. It only pulls-in about one more stop, and when you've lost a highlight, it usually is either further overexposed than that, or it's OK without any of these shenanigans.
"Reducing exposure" is another way of saying that it shoots at a higher ISO by default. You can't shoot at ISO 50 or ISO 100; with highlight recovery ON, it starts at ISO 200.
Sadly, the 5D Mark III has rather visible noise in the shadows at ISO 200, even in broad daylight.
Therefore, I avoid this feature for careful work, and leave it ON when I'm already using higher ISOs.
It's easy to assign this ON or OFF in the C1, C2 and C3 positions, so it's easy to have it turn ON or OFF as conditions change.
HDR Mode performance top
The HDR mode is easy to set:
1.) Press the oddly-marked button between MENU and RATE.
2.) Spin the rear dial to HDR.
3.) Make your selections.
4.) Hold the shutter down so it can make a few shots.
The 5D Mark III processes all the images, and records a finished result, no software needed.
You can select it to save all the original source images, too, if you want them.
I leave mine set to AUTO for exposure range; the camera knows better than we do what it needs.
Long Exposures top
The rear red pilot light stays on during long exposures.
I'd skip Long Exposure NR; I get great results without it even at 30 seconds.
Live View top
I don't use this.
To get it to go, you need to activate it in a menu somewhere.
If you can find that, the live view (and movie-making) button is the one with the silver camera icon just to the left of the viewfinder eyepiece.
Video top
THere is no continuous autofocus while shooting video. THe 5D Mark III does not replace a camcorder! (see page 226.)
I prefer my real camcorder for home movies. The 5D Mark III is shot professionally, but that means with professionals who specialize in "focus pulling" for careful manual focus.
Manual monitor and record levels (pages 234 and 235.)
Drop-frame and NDF time code.
To set the play volume, turn the front dial.
Finder top
With heavy carrying, the diopter setting sometimes changes. If the finder suddenly seems weird, reset the little dial on the top right of the eyecup.
Folders top
It's easy to make new folders. I put this item in the MY MENU menu.
Each time you make a new folder, it's number increments by one. You can't name them.
It's easy to use this menu to see what folders you have, and what's in them.
I make a new folder each day. Sadly, unlike Canon's point-and-shoots, there is no option for having new, dated, folders automatically created for you each day. Again, the Powershot and EOS teams need to have sake together more often.
Automatic Lens Optimization top
The 5D Mark III can correct for light falloff and lateral color fringes for lenses for which correction data has been loaded into it.
As shipped, data only for 27 lenses are loaded into the 5D Mark III:
14/2.8 L II
24/1.4 L II
35/1.4 L
50/1.2 L II
85/1.2 L II
200/2 L IS
300/2.8 L IS II
300/2.8 L IS
400/2.8 L IS II
400/2.8 L IS
400/4 DO IS
500/4 L IS
600/4 L IS
800/5.6 L IS
16-35/2.8 L II
17-40/4 L
24-70/2.8 L (not for version II, oddly, but you can install it below)
24-105/4 L IS
28-300 L IS
70-200/2.8 L IS II
70-200/2.8 L IS
70-200/2.8 L
70-200/4 L IS
70-200/4 L
70-300 L IS
70-300 DO IS
100-400 L IS
The 5D3 can store data for up to 40 different lenses if you load it into your 5D3.
Here is the list of lenses for which correction data is available:

List of lenses for which correction data is available for the 5D Mark III. Click for the list including all the teleconverter combinations.
THe blue checks are my personal selections; you can select up to 40 for yourself.
To load this data into your camera so that the 5K Mk 3 can correct it:
1.) Install EOS Utility software from the CD that came with your 5D3. My software disc is marked v25.0.
2.) Turn it off, and then put the lens for which you need data on your 5D Mk III.
3.) Connect the 5D Mk III via USB, then turn on the 5D3. (EOS Utility will start by itself if its not open.)
4.) Click the "camera settings" option from the main screen of EOS Utility.
5.) Under the Shooting Menu (red camera icon) in the EOS 5D Mark III window that opens, click the "Lens Aberration Correction" line.
6.) A new, bigger window opens with a list of lenses.
7.) Check the lenses you want. If you run out of your 40 maximum, uncheck some of the lenses Canon had checked as default.
8.) Click OK.
9.) Click Main Menu.
10.) Click Quit.
Now your camera has this data for eternity. No, I have no idea why this isn't presintalled at the factory as it ought to be.
Do this for every lens or lens and teleconverter combination you've got for which the camera has no data.
Oddly, almost every lens made by Canon is here, except the classic 80-200mm f/2.8L, which needs no correction, and the 20-35mm f/2.8L, which does.
AF Microadjustment top
Don't touch this.
If you have to ask how to set it, then you'll probably make it worse if you fiddle with this.
If you insist on playing with it, know that only about one lens in twenty needs any adjustment, and the results are only visible at large apertures.
If you use zoom lenses, be forewarned that there is only one setting available per lens, and that zooms may need different settings for each focal length.
When you do set it, the 5D Mark III is smart enough to recall different settings for different lenses as you set them, automatically.
When setting it, use natural targets like trees. Don't use tilted flat targets, since the actual location of the AF sensors is never really exactly where they are marked in the finder.
To set it, you need to make many, many test shots to arrive at a setting. Every shot varies a little from shot to shot; no AF system gives the same result for each shot. Make at least 5 shots at every distance, and try every distance, since the settings can vary by distance.
It's marked in "Forward" and "Backward," which makes no sense. As observed, "Forward" means that the focus is pushed further away from the camera, and "Backward" means that focus is pulled closer to the camera.
Help me help you top
I support my growing family through this website, as crazy as it might seem.
The biggest help is when you use any of these links when you get anything, regardless of the country in which you live. It costs you nothing, and is this site's, and thus my family's, biggest source of support. These places have the best prices and service, which is why I've used them since before this website existed. I recommend them all personally.
If you find this page as helpful as a book you might have had to buy or a workshop you may have had to take, feel free to help me continue helping everyone.
If you've gotten your gear through one of my links or helped otherwise, you're family. It's great people like you who allow me to keep adding to this site full-time. Thanks!
If you haven't helped yet, please do, and consider helping me with a gift of $5.00.
As this page is copyrighted and formally registered, it is unlawful to make copies, especially in the form of printouts for personal use. If you wish to make a printout for personal use, you are granted one-time permission only if you PayPal me $5.00 per printout or part thereof. Thank you!
Thanks for reading!
Mr. & Mrs. Ken Rockwell, Ryan and Katie.
Home Donate New Search Gallery Reviews How-To Books Links Workshops About Contact