Home Donate New Search Gallery Reviews How-To Books Links Workshops About Contact
Adobe Photoshop CS6
(April 2012-)

Adobe Photoshop CS6.
2023 Update: You can get CS6 on DVD for about $150 at eBay if you know How to Win at eBay, and never have to pay any subscription fees!
This free website's biggest source of support is when you use those, or any of these links, when you get anything, regardless of the country in which you live. Thank you! Ken.
I've used CS6 since 2012 and still use it every day in 2023 on Mac Mojave OS 10.16, High Sierra 10.15 and even Snow Leoplard 10.6. It won't run on Catalina or Big Sur, or newer, but it runs great back at least as far as Snow Leopard.

March 2023 Better Pictures Adobe Nikon Canon Fuji LEICA All Reviews
Previous version Photoshop CS5 review
Previous previous version Photoshop CS4 review
Apple Aperture review and usage
Introduction top

Adorama pays top dollar for your used gear.
I use Adorama, Amazon, eBay, B&H. I can't vouch for ads below.
|

Photoshop has been the world's top computer program for editing and optimizing images for over twenty years.
Photoshop has been around since 1990. Photoshop CS6 is really Photoshop 13; Adobe changed the name to CS, "Creative Suite," back at version 8 to make it seem bright and new, as opposed just to a perennial update. Photoshop is one of the longest running franchises in consumer software.
First there was Photoshop (1990), then Photoshop 2 (1992), then Photoshop 3 (1994), then Photoshop 4 (1995), then Photoshop 5 (1997), then Photoshop 6 (1999), then Photoshop 7 (2000), then Photoshop CS (v.8, 2001), then Photoshop CS2 (v.9, 2002), then Photoshop CS3 (v.10, 2005), then Photoshop CS4 (v.11, 2008), then Photoshop CS5 (v.12, 2010), and now Photoshop CS6 (v.13, 2012). CS4 was very buggy, and otherwise, every version of Photoshop has been the world standard for image editing.
I earn my living using Photoshop about six days a week. I live in Photoshop. Sometimes I've even dreamt in Photoshop, which scared the heck out of me when I woke up and realized how much of my life is spent in Photoshop, instead of outdoors.
While Photoshop CS6 has 62% more features than Photoshop CS5, what really maters to professionals are the simple improvements that let us get more done faster. We don't want to be using Photoshop at all; we want to be out shooting, delivering final product and making money, not playing on a computer. These ergonomic improvements, like the new Crop Tool, let us make more pictures faster, so we make more money, which makes the price of this software irrelevant to the full-time professional.
If you're a casual photographer, there's nothing about Photoshop CS6 (a.k.a. version 13) that requires you to buy it. Photoshop 5.5 of the late 1990s (that would be Photoshop CS "minus 2.5") has everything you need today, including great color management, so long as it runs on your computer. If you don't need color management, I started using Photoshop 3 (CS "minus 4") in 1995, and it worked fine if you're not in a rush. If you do this for fun, there's no reason you need to update to CS6, and in fact, Aperture or Lightroom are probably better programs for you. See Is It Worth It.
Speed has nothing to do with how fast it can crunch big files. To a pro user, speed is how fast we can tell Photoshop what to do with as few clicks as possible; how fast we can get the commands out of our imagination and into Photoshop. We have a lot of images to work, and they each need different work. The more images we can complete faster, the more money we make.
As far as crunching big files, that's never been a problem. Back in 2000 in Photoshop 6 (a.k.a. CS "minus 2") on my Dual 450 MHz G4 PowerMac, I had no problem working on 100 MB 4x5" film scans, so 36 MP cameras today are a piece of cake. I haven't seen a progress bar in Photoshop for years. Savvy pro users have always known how to work on an optimally-sized file so that they're never slowed down, while casual users often tried to work with oversized files. Anyway, number-crunching speed hasn't been a problem for anyone sane for years.
Photoshop originally was designed and sold to professional graphic artists, printers and publishers in the early 1990s, not individual photographers.
By the middle 1990s when individuals first were able to afford computers that could edit photographs, photographers had few choices for serious work other than Photoshop. Photoshop became the standard because it was in the right place at the right time, and because it got better and better.
Photoshop was always, and still is, bigger and more complex than the much simpler needs of photographers, so simpler programs better suited to photographers are more popular today in 2012. Today I use Photoshop CS6 every day not so much for its basic adjustment and cropping ability, but more for its perspective transformations for my studio photography and its mechanical abilities to let me format my images for publication like resizing, sharpening, adding layers of specialized text, changes of color spaces, file and image formats and much more.
For the great majority of photographers, simpler, broader programs like Aperture and Lightroom are far more popular.
Even when I use Aperture to make global corrections to my LEICA M9 DNG (raw) files, I still use Photoshop for final formatting for publication.
Any of these programs can work on one image in detail at a time, or process many images at once, however Aperture and Lightroom are best for running through many images at a time, while Photoshop is better for working-over one image at a time in extremely careful detail.
Personally, I use Phase One Media Pro to view my images and sort good from bad, then I drag the good ones into Photoshop CS6 to format them for their intended use. If I'm shooting raw, which I only do with my LEICA M9 because its internal image processing is so bad that it can't make good JPGs on its own as do Nikon and Canon, I'll use Aperture to make most of my image adjustments on the DNG files, export the results as JPGs, catalog and sort in Phase One Media Pro, and finish each file in Photoshop CS6.
Performance top
I just got my copy of CS6 at the end of May, 2012, and am just starting to play with it.
The great news is that it's a no-brainer; it was easy to move to it and just keep using it exactly as before.
Operating System
Photoshop CS6 runs great on my 2010 hex-core 3.33 GHz Apple MacPro on OS 10.6.8, which is Apple's previous OS. I've got 8 GB RAM.
I use Apple's previous OS because I use Dreamweaver 8 (from 2005) to write this site, and Dreamweaver 8 won't run on OS 10.7. I still need to review Dreamweaver CS6, and if it does what I need, I can update my OS and drop Dreamweaver 8.
Installation
A key differentiator between well-designed and carelessly-designed software is how fast and easily it installs.
The great news is that Photoshop CS6 is trivially easy to install.
Older Versions
After installing the new CS6, all my older versions are still all up and running.
I no longer use CS5 or buggy CS4 which are all still on my computer, but I do still use Photoshop CS2 in Rosetta mode to scan from my 1999 scanner.
Rosetta
For those of us still using 1990s scanners or plugins, Photoshop CS4 was the last version that could Open Using Rosetta.
Licenses and Adobe Accounts
When you buy CS6, you may install it on two machines and use it on only one at a time. I installed it on my studio machine, and if I wanted to install it on my laptop for use in the field, that would be OK, too. If you need your assistant to work on your images back at the studio while you're out using Photoshop on your laptop, you'll need to buy a second copy.
The only gotcha is that you need an "Adobe Account," without which you can't run the software, much less install it.
No big deal; we all have Adobe Accounts already from previous software installations.
If you need to operate in secrecy, you need different software. Even back around CS2 (or maybe it was Photoshop 7), Photoshop recognized if you were scanning money, showed you a warning box, and refused to open it. Since Adobe knows who you are, it's trivial for Adobe to send the Secret Service your personal information and physical location in real-time if they choose to. Adobe knows what you're doing because Photoshop is talking to Adobe over the Internet in the background; that's how activation works. Run many days offline, and the program will stop running until you go online again for it to validate and swap data.
All this comes from the 1990s, when criminals were letting "friends" "borrow" their Photoshop installation CDs, and later installation keys, to allow illegal "free" installations of Photoshop. This was all completely illegal, and just about put Adobe out of business since only one person was buying a CD for the whole world each time, so Adobe instigated tighter controls to make this illegal shenanigans nearly impossible.
Moving In: Migration from CS5 and earlier
The great news for we honest users is that since we've already got Adobe Accounts, we no longer need to bother typing in all our registration information; Adobe already has it from last year's upgrade.
Every time I get a new version of Photoshop, it's sad how long it takes to get all my Actions and Presets and Keyboard Preferences and Screen Workspaces back to where I was so I can get back to work.
I was encouraged when I saw a "Migrate Presets" option while installing, but sadly, all it seems to have brought over was my screen presets. None of my other personal preferences followed from CS5. No Actions, no Keyboard Shortcuts and nothing else seems to have come over, so here's how I got back in the saddle quickly:
Actions
To get my Actions back, I had to go into my previous version of Photoshop (CS5 for me), go into the menu from within the previous version's Action Pallet, find the SAVE ACTIONS option, and save all my actions as a file someplace. Name this file something like "My CS5 Actions" so you can find the one .ATN file you'll save which stores all your actions.
Then open CS6, go into its Actions menu from within its Action Palette, and select Load. Find the one file you just saved from inside the previous version, select it, and voilà, all your actions ought to be back.
Keyboard Shortcuts
To get my preferred keyboard presets (for instance, I use F8 for Save For Web, etc.), I had to go into EDIT > Keyboard Shortcuts and reprogram them all from scratch.
CMD Z Undo
By default, CMD Z undoes, and then redoes, so we can compare an effect.
I prefer to have CMD Z always step backwards, which used to be an option in PREFERENCES.
That option went away in CS4, so today, to keep stepping backwards, use OPT CMD Z.
Start-Up
For decades, my biggest complaint was how long it's taken to start Photoshop each time. Regardless of me using the latest machine or software, it's always taken too long to start.
Photoshop CS6 is the best there's been, but it can still take 15 seconds to start if you haven't run it in a while.
If you just closed it, so much is already in RAM that it starts much more quickly.
Look
The first shocker is that Photoshop now defaults to the Metallica look: all black-on-black. While this might seem "cool" to new users, it's far less legible than white-on-black menus.
No worries, if you're not a Darth Vader Interface fan, go to Photoshop > Preferences > Interface > Appearance > Color Themes, and choose something more normal.
"Color Themes" aren't: they're all just different shades of gray or black.
You might be able to load your own custom color sets. I didn't bother to try; the lightest of them works great for me.
Flat, Square and Gray
The interface has taken steps backwards, taking away color, curves and shading in the menus and drop-downs to bring us back to a flatter, uglier, squarer and grayer interface last seen in the 1990s before Mac OSX. I forget, but even in Mac OS 7 I think we had rounded tabs and shading, but not in Photoshop CS6's interface.
I prefer the look of older OSX versions of Photoshop. The 3D shading and subtle color coding in the interface helped me mouse around and make changes faster as I fly along.
Sadly Adobe is following the trend of flatter, squarer, duller and grayer. I expected it, but I don't like it. Hey, if art and appearance isn't important, we photographers may as well go home. Look is important, and even CS2 looks much better. Just look at the drop-down boxes; CS6 is all flat and gray, while all the previous CS versions shaded and blue-highlighted the drop-downs.
New Gray Background
New is an ever-present gray background, present even if you have no image open. (It may be different colors with different interface color preferences).
Two good things about this screen-filling background is that to click back into Photoshop, all you need to do is click the background, and to open a new file in Photoshop, just double-click the background.
It also lets you drag Photoshop, your open images and all your palettes around your screens as one item.
Personally, I prefer not to have this background, which hides other things I'm trying to do. To make this new background go away, I hit WINDOW > and uncheck APPLICATIONS FRAME.
The Photoshop Ps Icon top
Still Photoshop CS6's least attractive feature, its icon is now a flatter square two-tone blue box. Boring, and it looks like all of Apple's other blue icons, so it takes me more time to see it as I'm selecting among all the programs I use to earn my living.
The last good, unique and easy to see out-of-the-corner-of-your-eye as you mouse-around Photoshop icon was CS2.
NEW: Auto Background Save
New is the ability to have Photoshop automatically save versions as you work, in case you forget or don't want to have to keep saving your work.
It's on by default, and you can adjust or disable this in PREFERENCES > FILE HANDLING > AUTO SAVE.
NEW: Content-Aware Automatic Curves and Levels
New are very clever automatic brightness and contrast adjustments.
In the olden days, these were simply based on white, black and gray points.
Today, the new AUTO options in the Brightness and Contrast, Levels and Curves adjustments are all fueled from a database of thousands of professional images. Photoshop looks at your image, and tweaks the curves for it in many subtle ways to arrive at much better auto adjustments than did earlier versions.
This new method for AUTO adjustments is used by default, and if you prefer the old way, you can select that instead.
The new AUTO adjustments even plots the curves it has chosen, so that you can edit the curve from there if you like.
Tools and Filters
Spot Healing Brush (J)
Seems the same as CS5, except for a more obnoxious crosshair reticule when selecting textures to use as references
NEW: More Content Awareness
Content Aware Move Tool (recompose tool; the "shuffle" crossed-arrows icon)
The most useful content aware tool is the Content Aware Move tool, which allows the relatively simple ability to select something and move it around, while the software fills-in whatever it guesses may have been behind it.
To use this, select the object you want moved, click the Content Aware Move icon (J, with the Healing Brush tools, looks like two crossed arrows), and drag your object where you want it. Done!
Content Aware Patch Tool
The patch tool now has content aware fill.
Make your first selection, show it an area from which you want it to patch, and voilà, you're patched.
Content Aware Fill
To Content Aware Fill, simply select CONTENT AWARE as your option in the FILL box (EDIT > FILL > CONTENTS > USE > CONTENT AWARE), along with the usual Black, White and other options.
NEW: Film Simulations
To conjure up a whole library of film simulations, create a Color Lookup adjustment layer, and select under its properties for 3DLUT FILE select your choice, especially FILMSTOCK.
You can play around with the ABSTRACT and DEVICE LINK options as well.
NEW: Selective Blurring Filters
Iris Blur (sharp center)
If you want a sharp center and soft sides, it's now easier than ever.
Go to FILTER > BLUR > IRIS BLUR, and you can select the center around which all else will be softened.
As you're doing this, you can make more than one selecting of areas to keep sharp, and you can edit the shape of these areas, as well as how fast they transition from soft to sharp.
To control the strength of the blurring, you drag around an adjustment wheel that appears in the center of the selected sharp area.
Graduated Blur (one side or top blurred)
To soften the top and leave the bottom sharp, select FILTER > BLUR > FIELD BLUR.
Of course you can adjust the angle, transition width and strength of what's blurred or not.
Tilt-Shift Blur (central line sharp)
This tilt-shift, or "miniature" in Japanese, is two of the above blurs. It leaves a path across the center sharp, and blurs the rest. You can adjust the angle, position, transition width and strength of what's blurred or not.
Select FILTER > BLUR > TILT-SHIFT, and the top and bottom (or left and right) will blur, keeping a central line sharp.
Quick Selection Tool
The Quick Selection tool (W) is improived from CS5. It tends to work best with a hard brush, and smaller brushes allowed more precise auto selection.
Now we can change the size and hardness of its brush with CTL + OPT and moving our mouse scroller slide mouse, but on my machine, I still use [ and ] to change size, and SHIFT + [ or ] to change the hardness.
The Quick Select tool still tries to be too smart and follow sharp breaks, instead of relaxing and selecting the larger item I want selected, so I have to do more clean-up showing it where to go. There isn't a fast way to make it just relax and tighten up and straighten-out sloppy selections, use the old Polygonal Lasso Tool for selecting areas with straight lines.
What is much better is its ability to select fluffy white objects in front of a white background. I never used to be able to pull translucent objects from my white seamless backdrop on CS5:
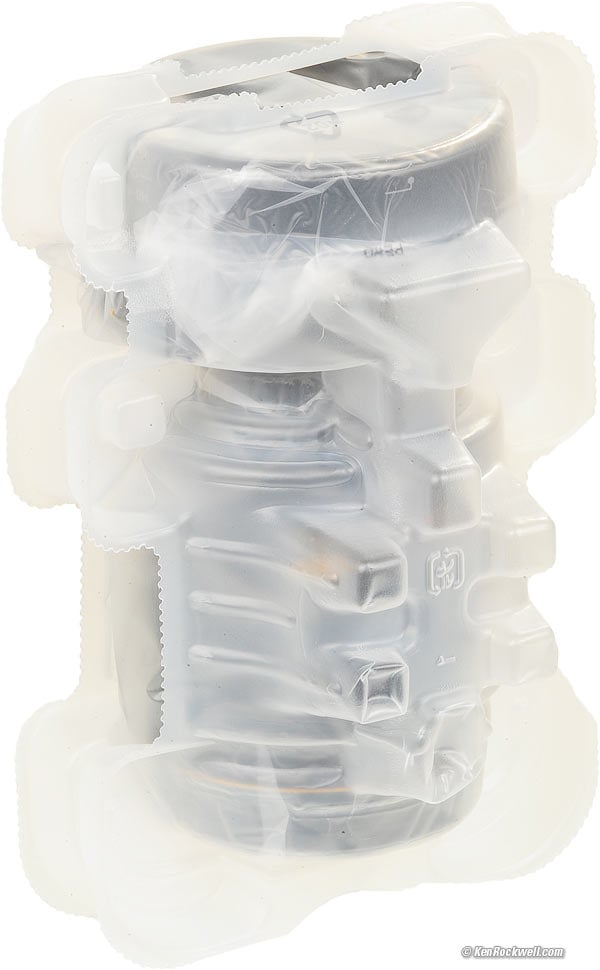
Nikon 28mm f/1.8 box contents.
The most important and most used tool that's been in Photoshop since day one is the Crop Tool, and it's just had its first makeover.
Among other things, the cropped image is now live under your crop marks, automatically recentering itself as you move your selection around.
Also new is the option to choose among several aspect ratios for the crop box. I used to have to use the Marquee tool, set an aspect ratio, and then Edit > Crop, so now it's much faster to have this all in the crop tool. This is very important; I often need to crop to a square or some other defined shape.
There is more junk on-screen around the crop frame as you're trying to use it, like corner and mid-edge marks, and more distractions popping up (like pixel location data) than with the old tool. If you prefer the old crop tool, just click the gear along the top, and select Use Classic Mode.
By default, a dopey "thirds" grid is laid over your image, but it can be removed in Preferences.
New in the crop tool is a straighten tool, which after a few clicks, can allow a live preview of the rotated image as you drag it around, much as Aperture's rotate tool does. I prefer this to making multiple guesses at rotation with some of the other non-real-time tools.
NEW: Adaptive Wide-Angle Lens Filter top
The new Adaptive Wide Angle filter (Filter > Adaptive Wide Angle) is a new filter, in addition to the unchanged Lens Correction filter, that adds some very clever innovations for fisheye and panorama users.
The top left tool allows one to drag a line over a curved part of the image, and presuming you have an automatic lens profile available for your lens (most lenses have profiles automatically available), the filter forces that segment of the image to be straight.
Do this over several other parts of a fisheye image, and voilà, you've forced a fisheye shot into an image with all the straight lines you want.
Do this to a stitched or rotating lens panorama shot, and you can force the top lines of bulged-out buildings to become straight! You can do this for each bulged-out segment, so your panoramic interior and exterior shots can lose the curved look, but retain the huge angles covered. If you tilted up or down, you can drag a tool on the lines you've drawn, and force those segments to be level or at any other angle you prefer.
Improved: Black and White Conversions
New is an AUTO option in the BLACK AND WHITE adjustment layer.
To use it, create a B&W adjustment layer, and select AUTO.
In AUTO, Photoshop CS6 now will look at the image, and adjust the mixing of the various colors to give what it hopes to be the best rendition.
If you love this, great, if not, it's trivial to move the color sliders once CS6 has moved them for you in AUTO, or do it all manually.
Added: New Black and White Toning Options
Once you've simplified the color image to monochrome, there are new options for split-toning.
In addition to all the usual ways, now we can use the new toning profiles added to the Gradient Map in Adjustment Layers.
To use these, create a Gradient Map adjustment layer, click the drop-down in the Gradient Map panel that opens and you'll see a selection of gradients. Now click the little gear to get another drop-down with yet more options. Select Photographic Toning, and go to town.
NEW: Skin Tone options in Select Color Range
Want to select a person in color, and make the rest of the picture black-and-white? It's even easier now in CS6.
Go to SELECT > COLOR RANGE, and in the SELECT drop-down, new is SKIN TONES. Select the skin in your image, select INVERT, and then convert the rest to B&W, leaving the skin in color.
It responds to all skin colors, be they black, pink or yellow, and looks for faces, too. If you want to exclude extraneous objects that are skin-colored but not matching the skin in your photo, just reduce the FUZZINESS slider, which will focus it on the skin in your image.
Save for Web
Save For Web seems the same, but then again, whatever is new is often hidden. The good news is it continues to work great.
There no longer are the idiot warnings when you accidentally hit Save For Web with huge images.
I liked these warnings in earlier versions of Photoshop; they reminded me that I had forgotten to resize my work!
Save-As How and Where You Want It
Photoshop CS6 still lacks an easy, intuitive, fast way to save new processed images in all the crazy places I want them to go, in the formats I want them.
Yes, I can select all this each time I Save As, but I work so fast that I still have to make a format selection each time and navigate through my file structure to define the target location, unless I want a PSD or whatever format Photoshop picks, and want it in the Source Folder.
I wish it had a "Recent Locations and Formats" dropdown as I'm Saving-As, but no.
One possible way that could help is a script that lets us select images, and define where and how they will be saved. To play with this, select FILE > SCRIPTS > IMAGE PROCESSOR, in which you can define what goes where how.
Usage top
Intro New Specs Usage Recommendations
See How to Use Photoshop as well as the rest of this review. Not covered elsewhere is:
To have images open separately, instead of in tabs
Photoshop > Preferences > Interface
Unselect Open Documents as Tabs.
(On windows, it's possibly in Edit > Preferences > Interface.)
How to Get Rid of the Default "Thirds" Crop Boxes
It's hidden as a pre selected drop-down option in the Options Panel. Find that, and select NONE under Crop Guide Overlay.
Noise Reduction
Oddly, the noise reduction ability inside Photoshop isn't very good by modern standards.
Not to worry, because Adobe Camera Raw (ACR), which comes along with Photoshop, has fantastic reduction ability, and it cheerfully also works with JPG and other image formats, not just camera-original raw files.
Be sure to set ACR's preferences to allow it to see JPG files, and you're good to go.
Changing JPG White Balances
Adobe Camera Raw (ACR) also has a better one-bar slider to change White Balance color temperature than does Photoshop.
To do this in Photoshop we still need to futz with curves and sliders for red and blue separately in Levels or Curves, while ACR has a simple temperature slider (Most people would change this in Lightroom or Aperture first).
To do it in Photoshop, another option is to create a Photo Filter Adjustment Layer, select a warming or cooling filter, and then use the DENSITY slider for the precise effect needed.
Recommendations top
Intro New Specs Recommendations
If you work in Photoshop all day, every day as I do to earn a living, the little bit of time I save, especially with the new crop tool, easily pays for the upgrade.
If you're a newcomer, Photoshop has been the world standard for image editing since before any individual could afford a scanner and long before the invention of the first practical DSLR.
If you're a casual user who still hasn't figured out 99% of the software you already own, there is no reason you need to update to CS6 unless some particular new feature really grabs you. If you're not using it all day, or if the price of the software matters to you, see Is It Worth It.
For me, the added cropping speed has already made this upgrade worthwhile for me, and the new smart AUTO adjustments seem to be getting me to where I need to be faster. When you use it all day, every day, even a small increase in how fast it churns out work makes it all worthwhile.
In its day you could get it new from Adorama and from Amazon.
If you've found the time, effort and expense throgh which I go to research and share all this information, this free website's biggest source of support is when you use this link get your copy from Amazon, or use any of these links, when you get anything, regardless of the country in which you live. Thank you! Ken.
Help me help you top
I support my growing family through this website, as crazy as it might seem.
The biggest help is when you use any of these links when you get anything, regardless of the country in which you live. It costs you nothing, and is this site's, and thus my family's, biggest source of support. These places have the best prices and service, which is why I've used them since before this website existed. I recommend them all personally.
If you find this page as helpful as a book you might have had to buy or a workshop you may have had to take, feel free to help me continue helping everyone.
If you've gotten your gear through one of my links or helped otherwise, you're family. It's great people like you who allow me to keep adding to this site full-time. Thanks!
If you haven't helped yet, please do, and consider helping me with a gift of $5.00.
As this page is copyrighted and formally registered, it is unlawful to make copies, especially in the form of printouts for personal use. If you wish to make a printout for personal use, you are granted one-time permission only if you PayPal me $5.00 per printout or part thereof. Thank you!
Thanks for reading!
Mr. & Mrs. Ken Rockwell, Ryan and Katie.
Home Donate New Search Gallery Reviews How-To Books Links Workshops About Contact