Home Donate New Search Gallery Reviews How-To Books Links Workshops About Contact
Nikon D3200 User's Guide
© 2012 KenRockwell.com. All rights reserved.

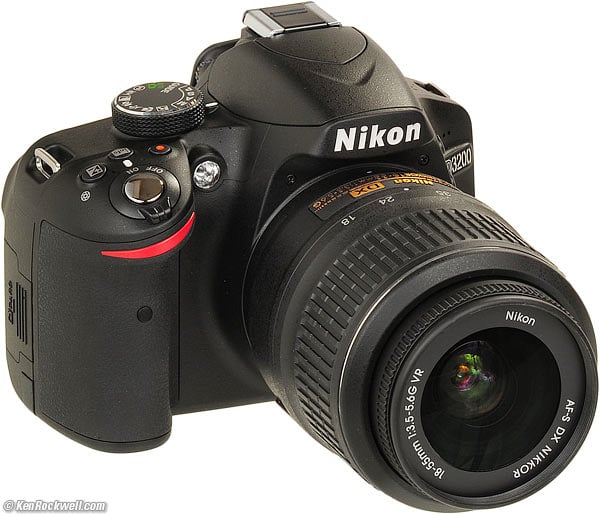
Nikon D3200 with included 18-55mm VR.
July 2012 More Nikon Reviews Nikon Lenses All Reviews
My online Nikon D3200 Guide below is very simple and to-the-point.
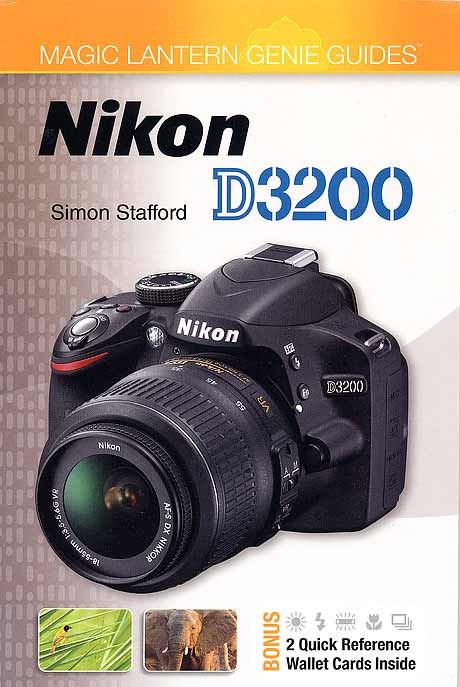
If you'd like a real printed book, the best I've seen so far is Simon Stafford's D3200 Guide. It's a smallish book perfect to take in your bag loaded with precise specifics about how to use the D3200. It's also got a few punch--out plasticised cards to keep in your wallet. It's much better than most of the guides I've seen which are mostly generic picture-taking guides with just a picture of one camera on the cover and in the title.
Here now is my completely different online guide:

Adorama pays top dollar for your used gear.
I use these stores. I can't vouch for ads below.
|
Initial Menus and Set-Up top
As I go through the menus, I leave most of them alone.
These are what I set away from their defaults:
PLAYBACK Menu (top blue tab) top
Get to these by pressing MENU > Playback:
Playback Display Options
This is where I enable my D3200 to show all sorts of helpful extra screens when playing back. If you don't care to see any of these extra things, then ignore this.
Additional photo info > check RGB histogram, Shooting Data and Overview > DONE > OK.
Transition effects > OFF > DONE > OK. By default, there are some time-wasting animations as you move among your photos
Be sure to select DONE and click OK, otherwise your Display Mode preferences won't be saved.
SHOOTING Menu (next green camera tab) top
Get to these by pressing MENU > Shooting:
Set Picture Control
Standard > 6 Sharpening > +2 Saturation > OK. (used for people.)
Vivid > 6 Sharpening > +3 Saturation > OK. (use for places and things.)
Be sure to press OK after changing or selecting either, otherwise your Picture Control changes won't be saved.
Image Quality
BASIC.
BASIC JPGs look the same as FINE or NORMAL JPGs, but take up only 1/2 to 1/4 the space.
Image Size
Small (6 MP or 3,008 x 2,000 pixels).
No one needs 24 Megapixels, or even the MEDIUM setting of 13.5 MP.
I make plenty of 20 x 30" (50 x 75 cm) prints from 6MP cameras, and they look great. Set down to 6MP, the D3200 makes even sharper images than native 6 MP cameras, and I've seen great 40 x 60" (1 x 1.5 meter) prints made from the 6MP D40.
By setting the smaller resolution, everything about transferring, storing, backing-up, selecting and editing your images runs much, much faster than if you leave the camera at its defaults.
At the default of LARGE NORMAL you get 6 MB files, while at SMALL BASIC, I get pictures which look identical with only 700 kB of data.
White Balance
I use Auto White Balance, but set it to look warmer (more orange) because I prefer it.
To do this, press MENU > Shooting Menu > White Balance > Auto > click right to A5 > OK.
This gives warmer (more Amber) images. Adjust this to your personal taste; it is one of the biggest changes you can make to your images.
ISO Sensitivity Settings
ISO Sensitivity > 100. This sets the lowest ISO the D3200 uses in bright light. 100 is the lowest, and looks great.
Auto ISO Sensitivity Control > ON. This lets the D3200 increase its ISO (its sensitivity to dim light) automatically when the light gets darker.
Maximum Sensitivity > 6,400. The D3200 looks swell at ISO 6,400 when it needs it. Set a higher value, like Hi 1, to let the D3200 use a higher ISO in dim light to trade grainer pictures for less long-shutter-speed blur, or a lower value, like 3,200, to prevent more grain at the expense of potentially blurrier photos.
Minimum Shutter Speed > Auto. This lets the D3200 pick the best slowest shutter speed based on your zoom setting, and is optimized for landscapes, portraits, and other subjects that hold still. For kid and moving people photos, I set 1/125 to stop action better, and for sports, I set 1/250 to stop action.
Active D-Lighting
This lightens shadows and controls washed-out highlights.
I set it ON. It makes all pictures look better.
Auto Distortion Control
This keeps straight lines from curving, if caused by lens limitations.
I set it ON.
Movie Settings
By default, the D3200 makes huge 1080/30p HD files. For more reasonably-sized files, use the 640x424 and Normal quality settings.
SETUP Menu (orange wrench tab) top
Get to these by pressing MENU > Setup:
Format Card
I do this every time I insert a card. It erases all the previous images, and gives me a clean, orderly card on which to record more with the least risk of data corruption.
Info Display Format
This controls the look of the rear Info LCD that we see when setting the camera.
I prefer Classic Blue.
Auto Info Display
I set this OFF.
If ON, the rear settings screen on the LCD (a.k.a. the Info Display) turns on every time you tap the shutter halfway.
Image Comment
I set this to record my © name, address, website and phone number in the EXIF of every shot.
It's easy to do this: first select Input Comment, and enter what you'd like to have added to every file's EXIF.
Then click Attach Comment, and then remember to click DONE and OK, otherwise the D3200 will forget everything you just entered.
Beep
I set this OFF.
It is rude to beep when you're in public, and it doesn't tell us anything anyway.
Professional cameras default to OFF, while the D3200 defaults to ON.
Rangefinder
This is a bar-graph on the bottom of the viewfinder when focusing lenses manually.
I set this ON.
File Number Sequence
Set this ON. It defaults to OFF due to a firmware defect.
If left OFF, files will start at 0001.JPG every time a card is formatted, or a blank card is inserted.
If left off, as time goes on you will have a hundred files with the same number, like DSC_0024.JPG on your hard drive, and never be able to search or catalog them properly.
By setting this to ON, the D3200 numbers files up to DSC_9999.JPG, and only then does it repeat. This prevents too much file name duplication on your hard drive, or on your online galleries.
Buttons
I prefer my Fn button to set the White Balance.
I prefer my AEL-AFL button only to lock auto exposure, not focus.
I set Shutter-release button AE lock to OFF, since I prefer to lock it with the AEL-AFL button when needed.
I let the camera focus and lock, then point the camera as needed for proper exposure and hold the lock button, if needed.
Autofocus Settings top
The D3200 has no external autofocus mode controls, except for the rear AF-Area selector, which is only active in some special modes. Otherwise, the only external AF contreol might be an AF/MF switch on your lens.
Therefore, most of the AF system is set in menus:
AF-A, AF-S and AF-C Modes
These control how the D3200 focuses: does it focus and lock (AF-S), does it keep focusing in and out (AF-C), or do you let it figure this out for itself automatically (AF-A)?
Left as-is, the D3200 is set perfectly. It defaults to the AF-A mode, which automatically selects between the older AF-S (single focus and lock, best for still subjects) and AF-C (continuous tracking autofocus, best for moving subjects) modes.
If you want to select among the AF-S, AF-C and AF-A modes, do it by pressing either the INFO or < i > buttons, then the < i > button to highlight the adjustments on the right side of the screen, then click down to the AF-A (Focus Mode) option, click OK, and now you can select among them.
AF Area Modes top
By default, the D3200 magically makes its best guess about which of the 11 AF areas to use, and lights up those AF areas in the finder.
The D3200 usually guesses correctly in this mode, but if it's being distracted by extraneous foreground elements, we can force the D3200 to use the sensors we prefer in three other modes.
You can select these areas manually, but not in this default Auto-area select mode.
To change this mode, press either the INFO or < i > buttons, then the < i > button to highlight the adjustments along the right side of the screen, then click down to the white rectangular box (AF-area mode), and press OK. Now we can select among:
Single-point AF ( [ o ] icon)
With this option, you selected just one AF point to use with the rear selector. It lights in red in the finder, and the D3200 uses only that one sensor to focus.
Select the AF point with the rear thumb control. As you change the selections, they light in red in the finder. Push the center button, and the D3200 selects the central sensor. Once selected in this mode, the D3200 always uses the same AF sensor until you change it.
Dynamic-area AF ( [ - o - ] icon)
This is the same as Single-point AF, except that this mode allows the focus point to move around automatically to track a moving subject.
Select the AF point with the rear thumb control. As you change the selections, they light in red in the finder. Push the center button, and the D3200 selects the central sensor. Once selected in this mode, the D3200 always starts focusing with the same AF sensor, and it will track around the finder as it needs to. If you let off the shutter and then press it again, the D3200 will start focusing from the same selected point as before.
3D-tracking AF (3D icon)
Same as above, but smarter. The D3200 sees in both color and depth, and does and even better job of tracking a moving subject around the finder.
This mode is very helpful even with a subject that's not moving: focus with the central sensor, and as you recompose, the D3200 swaps AF sensors automatically to select the one that's now over the subject in the new composition!
Select the AF point with the rear thumb control. As you change the selections, they light in red in the finder. Push the center button, and the D3200 selects the central sensor. Once selected in this mode, the D3200 always starts focusing with the same AF sensor, and it will track around the finder as it needs to. If you let off the shutter and then press it again, the D3200 will start focusing from the same selected point as before.
Auto-area AF (default, white box icon)
This is the default.
In Auto-area AF, the D3200 looks at the subject, does its best to guess where is your subject, and selects the best AF areas automatically.
I use this mode all the time. If it isn't working well, I go to 3D or Single-point and pick the AF area myself.
Movies top
Press the Live View (Lv) button on the back. The rear LCD turns on, and you can see your picture.
Hold the shutter button halfway, and the D3200 slowy focusses.
Press the red button near the shutter to start, and press again to stop.
If you need to refocus while rolling, hold the shutter button halfway again.
You select the resolutiopn and quality in the menus.
Help me help you top
I support my growing family through this website, as crazy as it might seem.
The biggest help is when you use any of these links when you get anything, regardless of the country in which you live. It costs you nothing, and is this site's, and thus my family's, biggest source of support. These places have the best prices and service, which is why I've used them since before this website existed. I recommend them all personally.
If you find this page as helpful as a book you might have had to buy or a workshop you may have had to take, feel free to help me continue helping everyone.
If you've gotten your gear through one of my links or helped otherwise, you're family. It's great people like you who allow me to keep adding to this site full-time. Thanks!
If you haven't helped yet, please do, and consider helping me with a gift of $5.00.
As this page is copyrighted and formally registered, it is unlawful to make copies, especially in the form of printouts for personal use. If you wish to make a printout for personal use, you are granted one-time permission only if you PayPal me $5.00 per printout or part thereof. Thank you!
Thanks for reading!
Mr. & Mrs. Ken Rockwell, Ryan and Katie.
Home Donate New Search Gallery Reviews How-To Books Links Workshops About Contact