How to Photograph the Milky Way
On iPhone On Mirrorless & DSLR

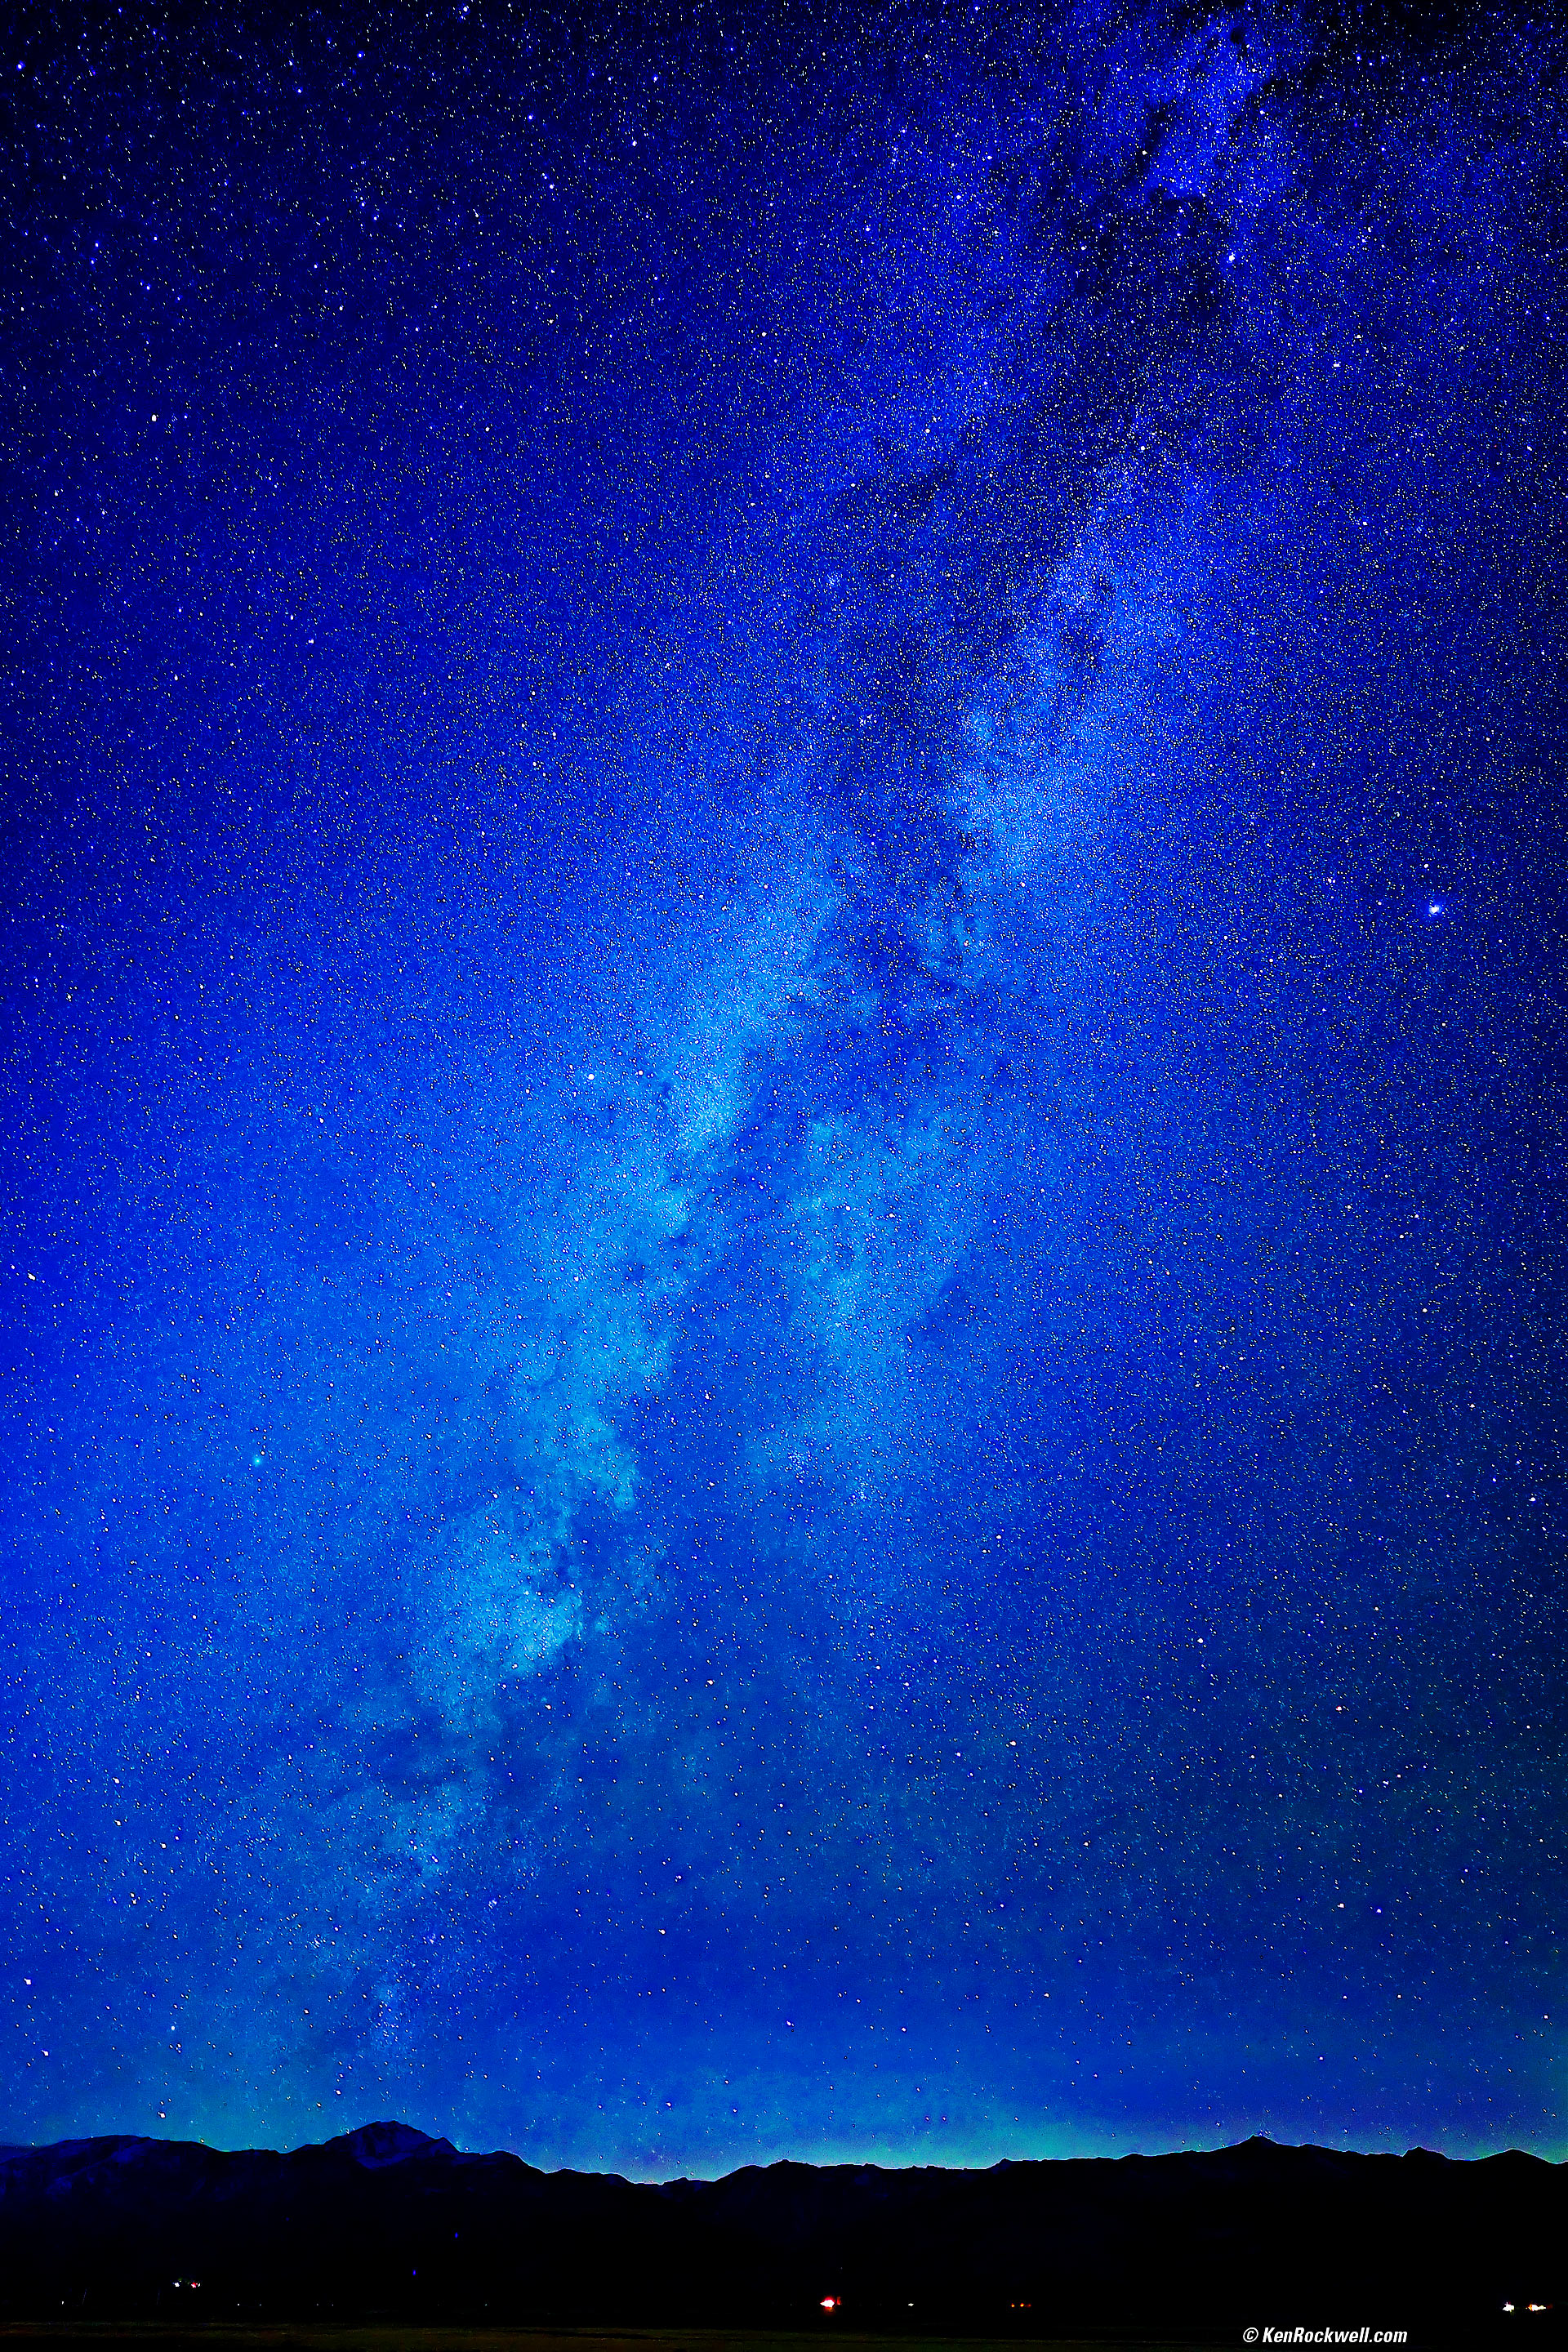
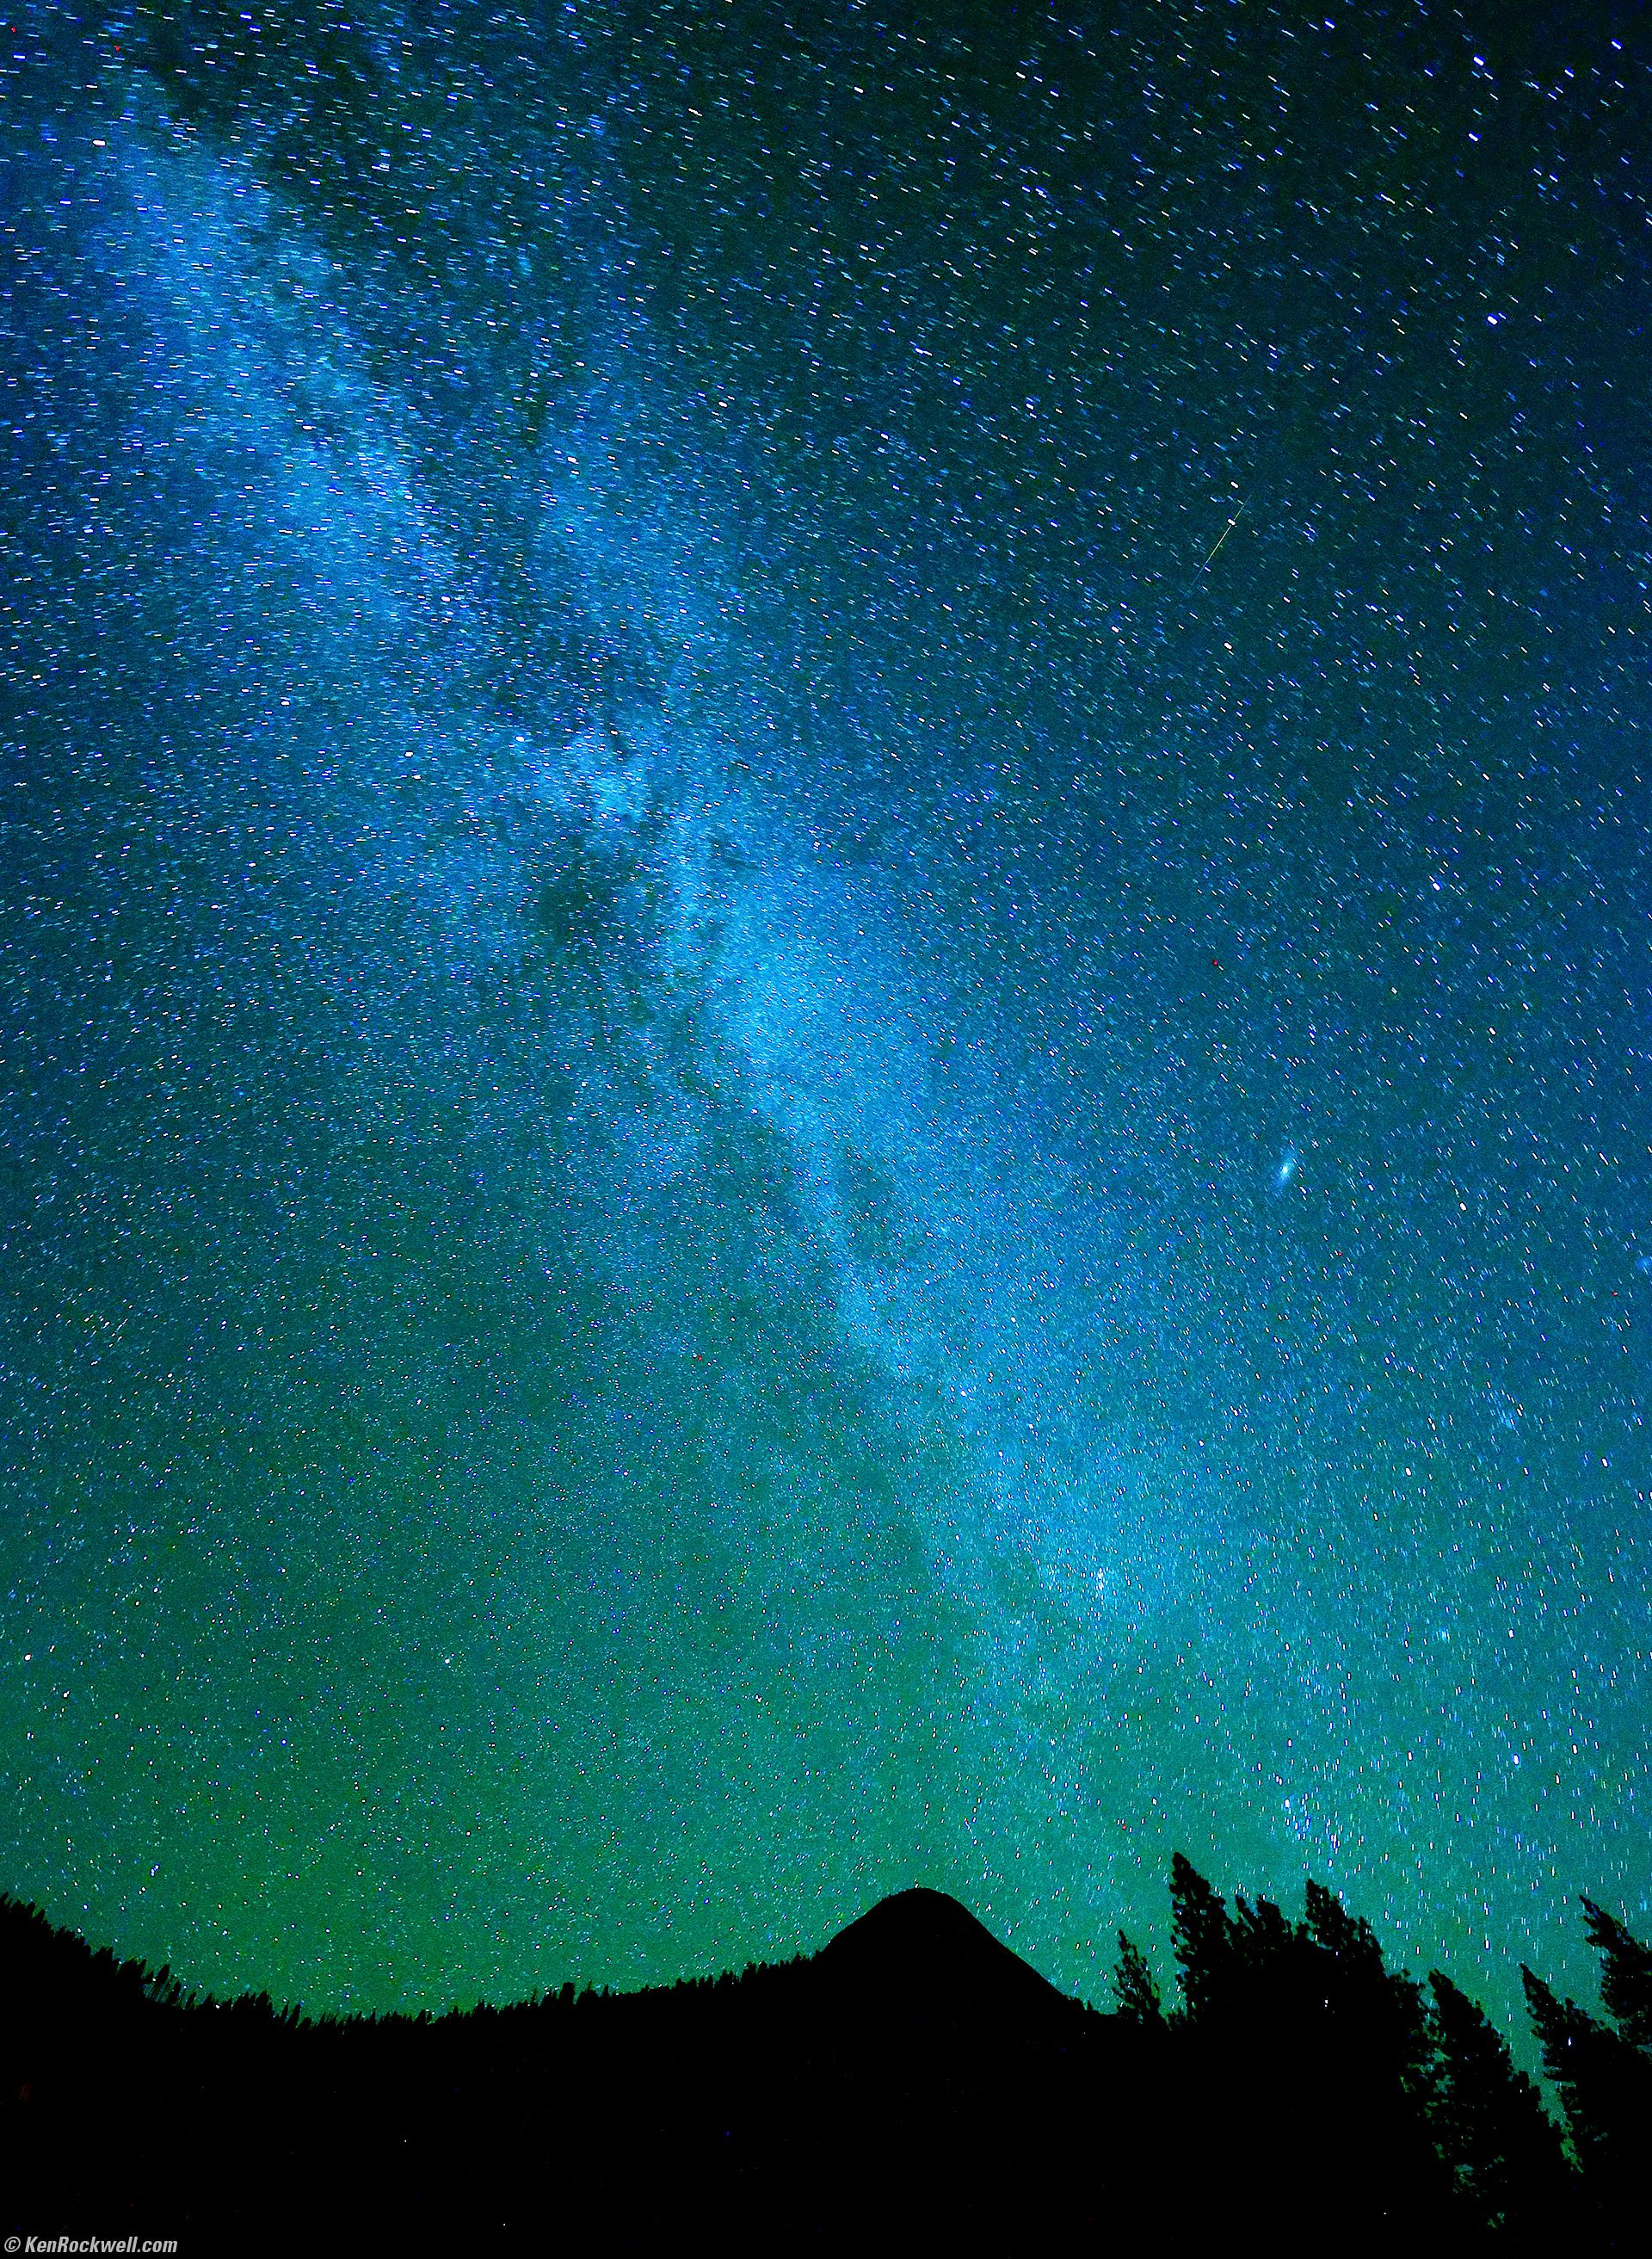
The Milky Way, Bridgeport, California, 9:26 P.M., Tuesday, 21 October 2025. Canon EOS R1, RF 20mm f/1.4L VCM wide-open at f/1.4 for 15 seconds at ISO 3,200 (LV minus 8.0!!!), curves adjustment layer masks in Photoshop 2021, casual use of my Oben CT-2491 Carbon-Fibre Tripod and Oben GH3W-15 Geared Head. More tech details. bigger or fit-to-screen, or camera-original 17 MB © 24 MP JPG.
I used Tungsten white balance to keep the night sky blue rather than icky orange.
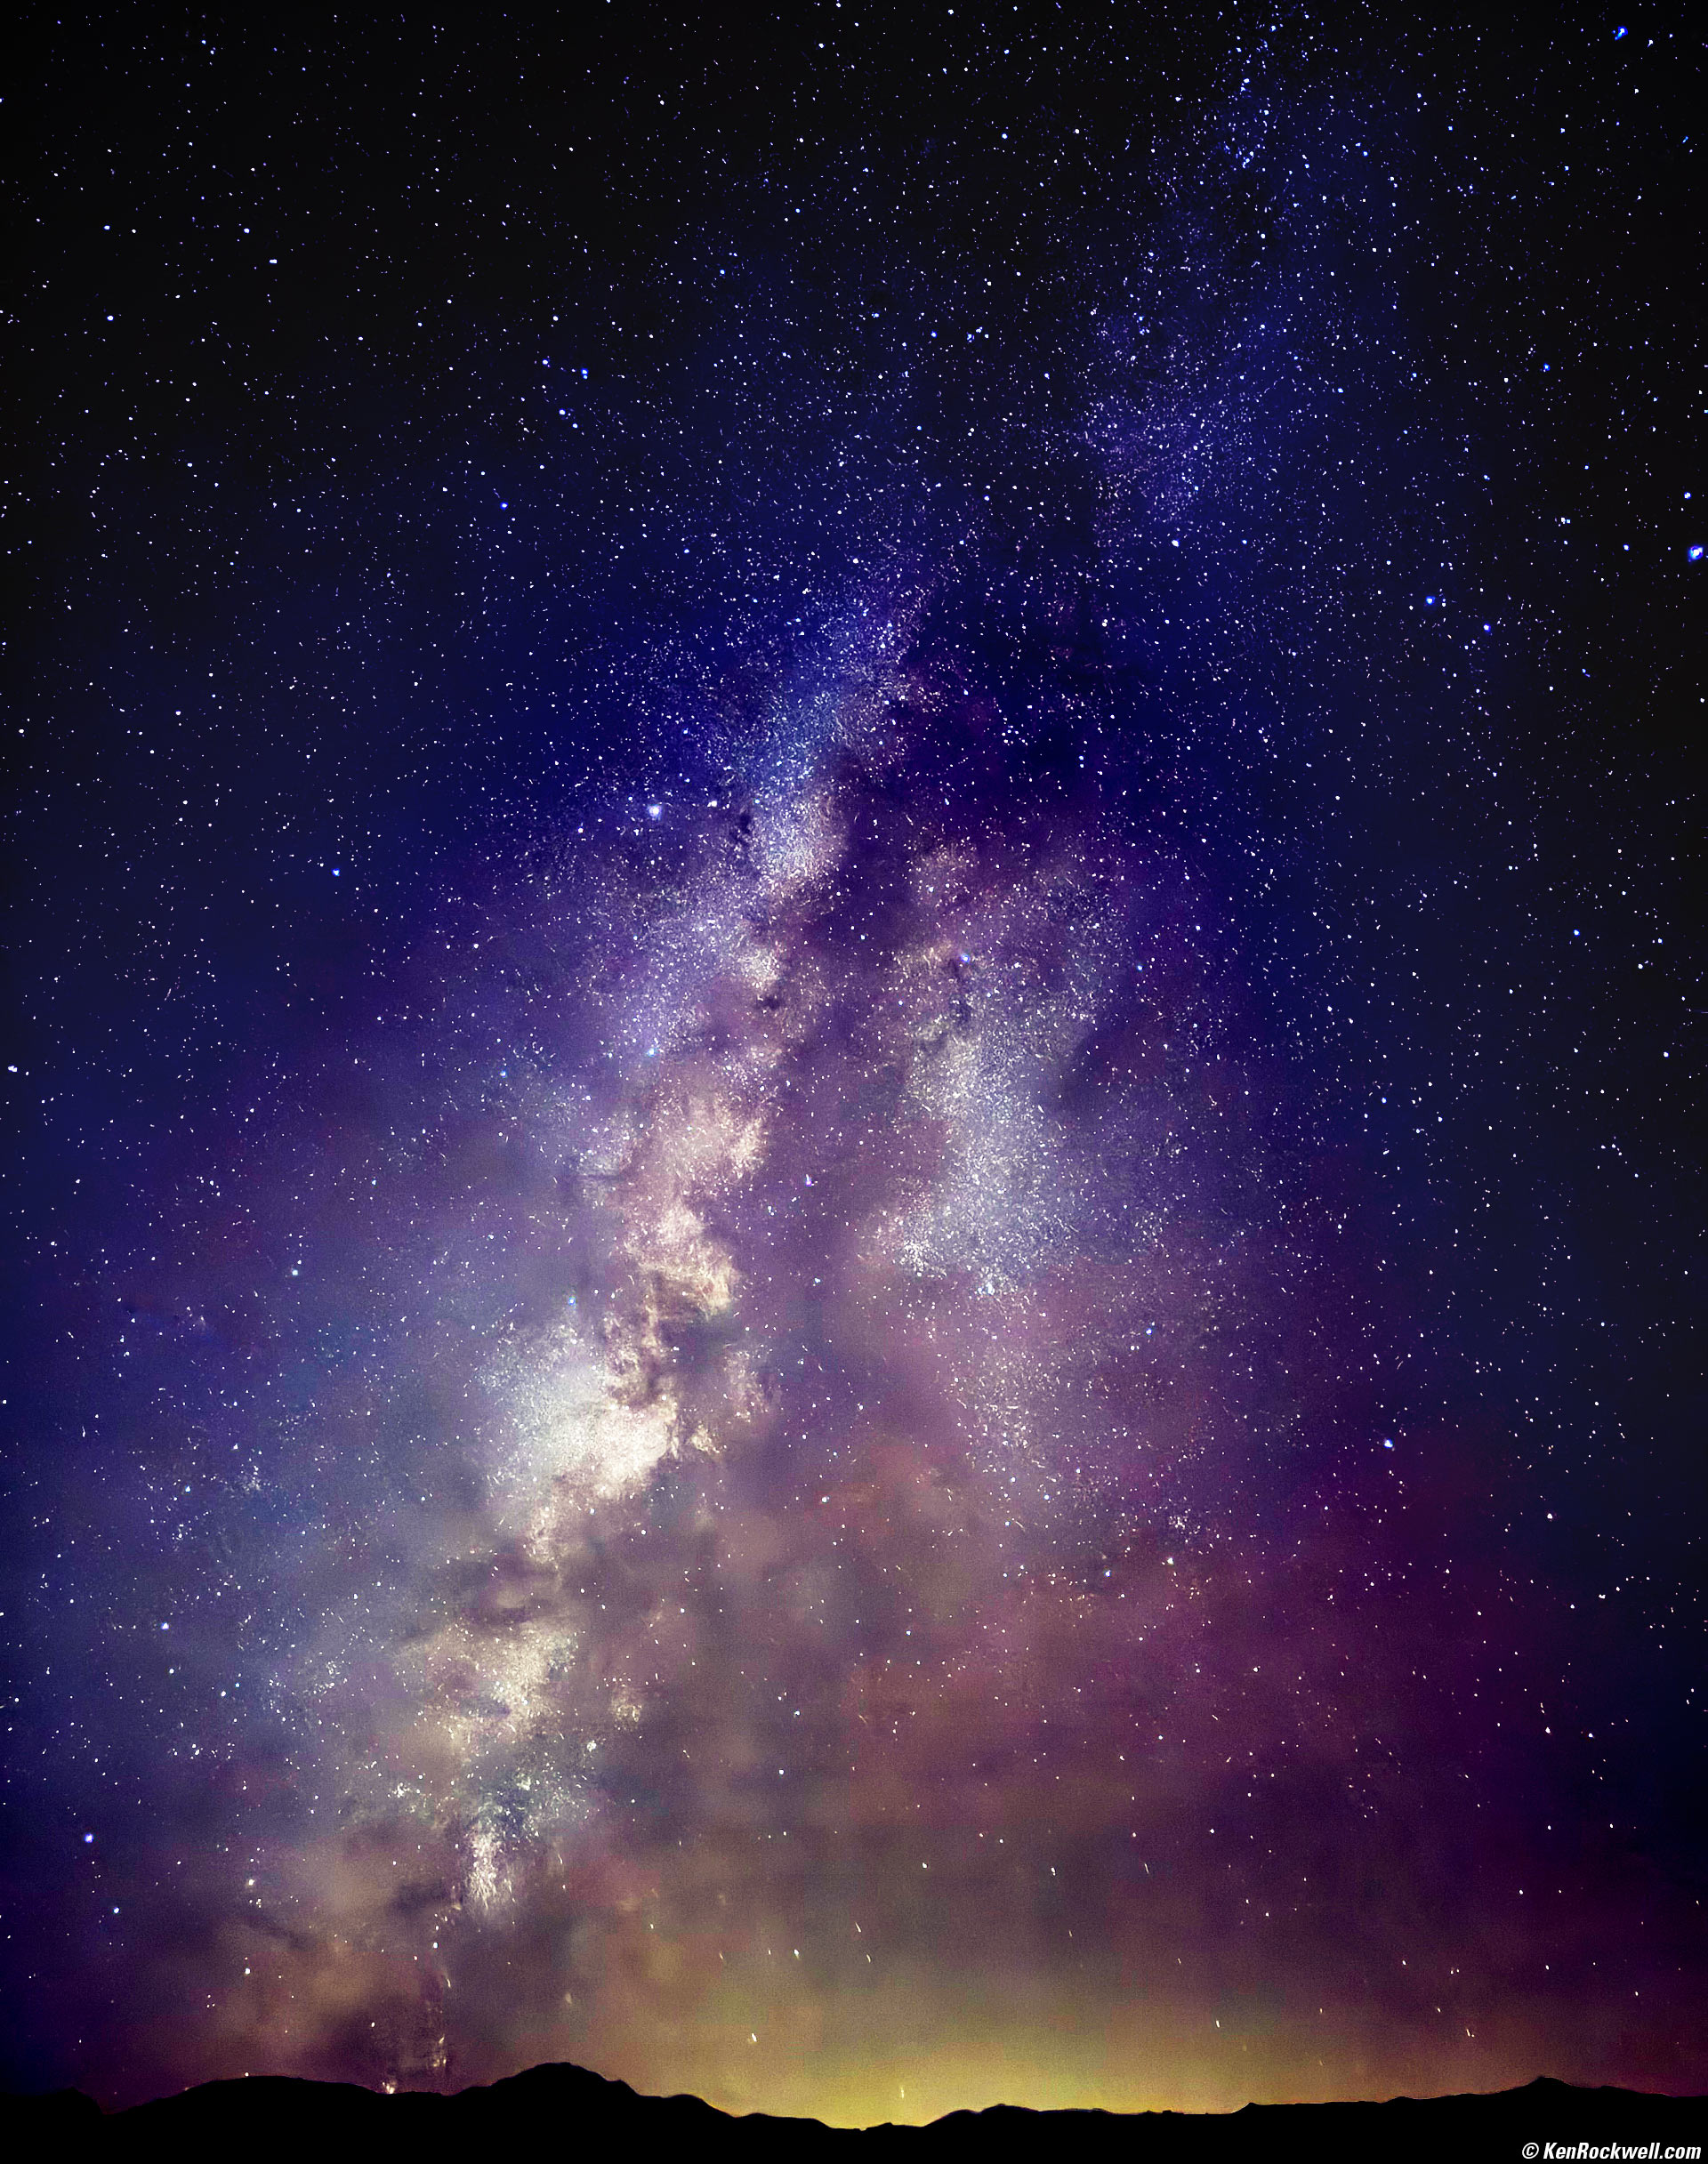
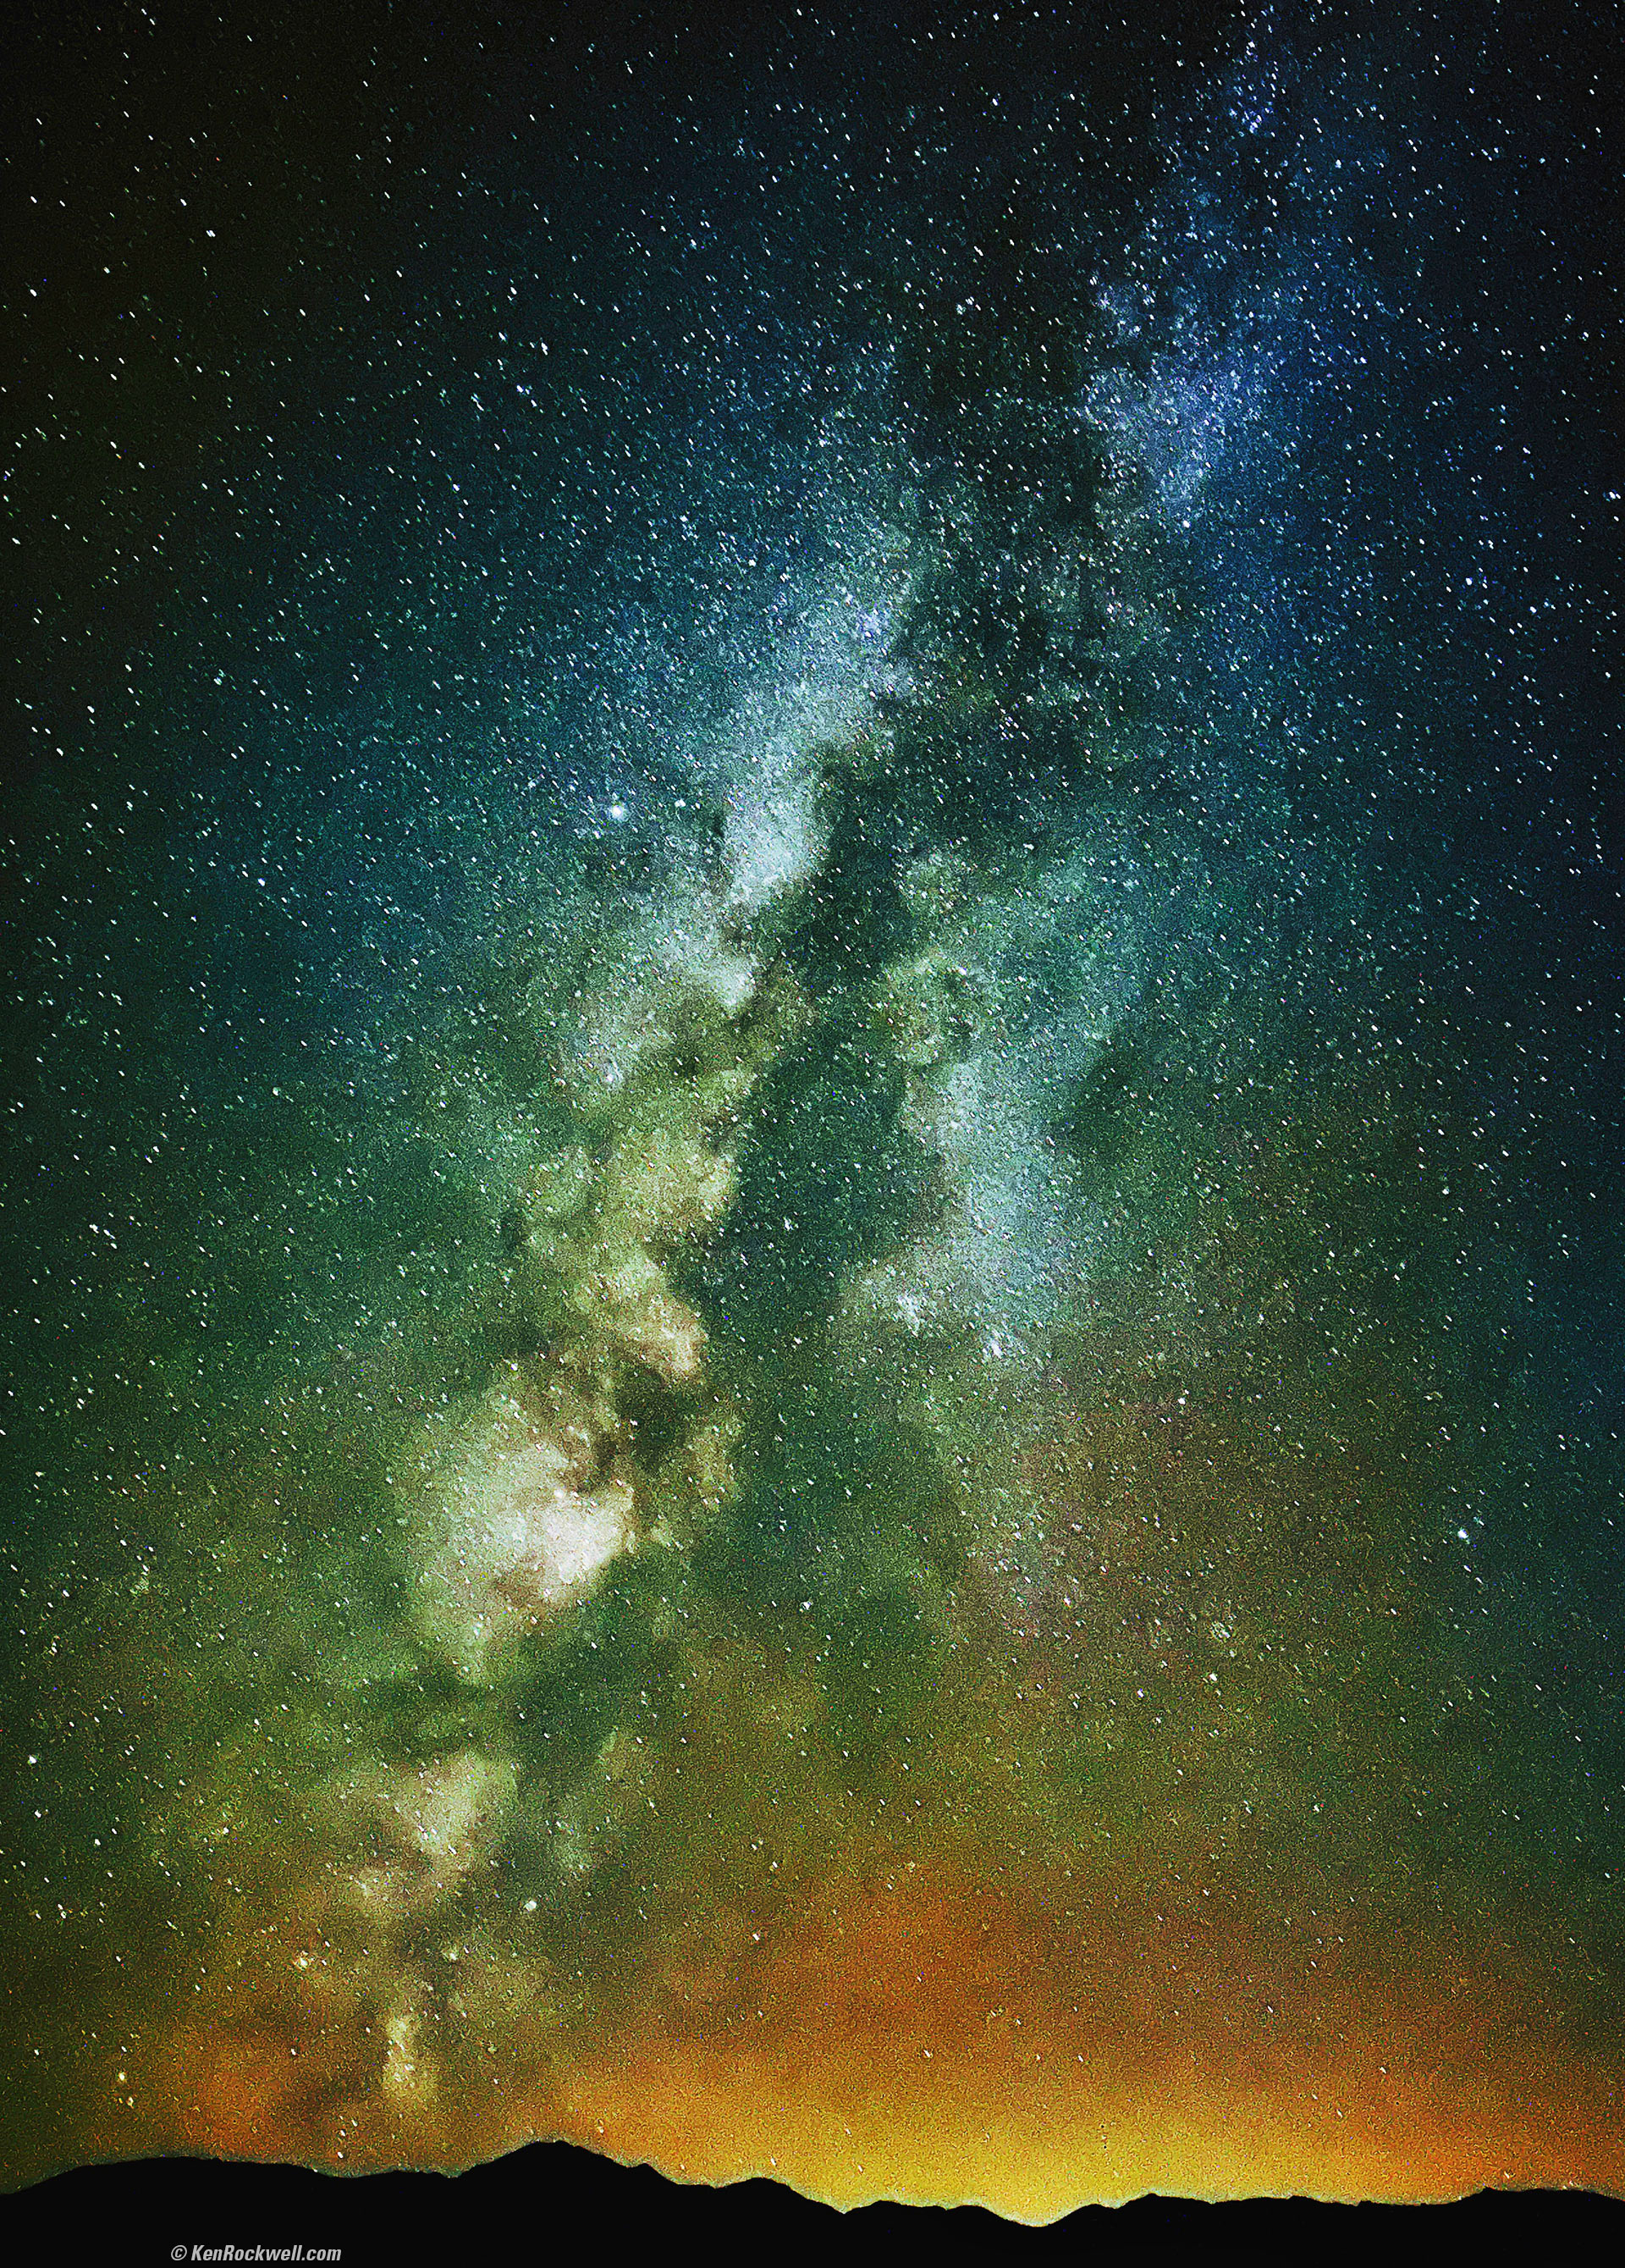
The Comet Swan (C/2025 R2), the North American Nebula and the Milky Way, Bridgeport, California, 9:12 P.M., Tuesday, 21 October 2025. iPhone 17 Pro Max 1× (6.8mm actual or 24mm eq.) camera at f/1.8 for 10 seconds in Night mode at Auto ISO 2,500 (LV minus 6.3!!!!), Tweaked in iPhone's native Photos app and curves adjustment layer masks in Photoshop CC, casual use of my Oben CT-2491 Carbon-Fibre Tripod with my Oben GH3W-15 Geared Head and Oben SPA-1000 iPhone adapter. More tech details. bigger or fit-to-screen.
With the flash off you can simply point-and-shoot the Milky Way handheld, but use a tripod and we can expose for up to 30 seconds rather than the default 3 seconds hand-held. Exposing for 30 seconds reports as a 10 second exposure above.
Even better than ordinary Canon, Nikon, Sony, Fuji and LEICA cameras, the iPhone is so smart in its night mode that it compensates for earth motion to keep the stars as dots and not trails!!!
As shot, both of these above were murky (milky 😁) gray. Most of the color comes from my hijinx in editing.
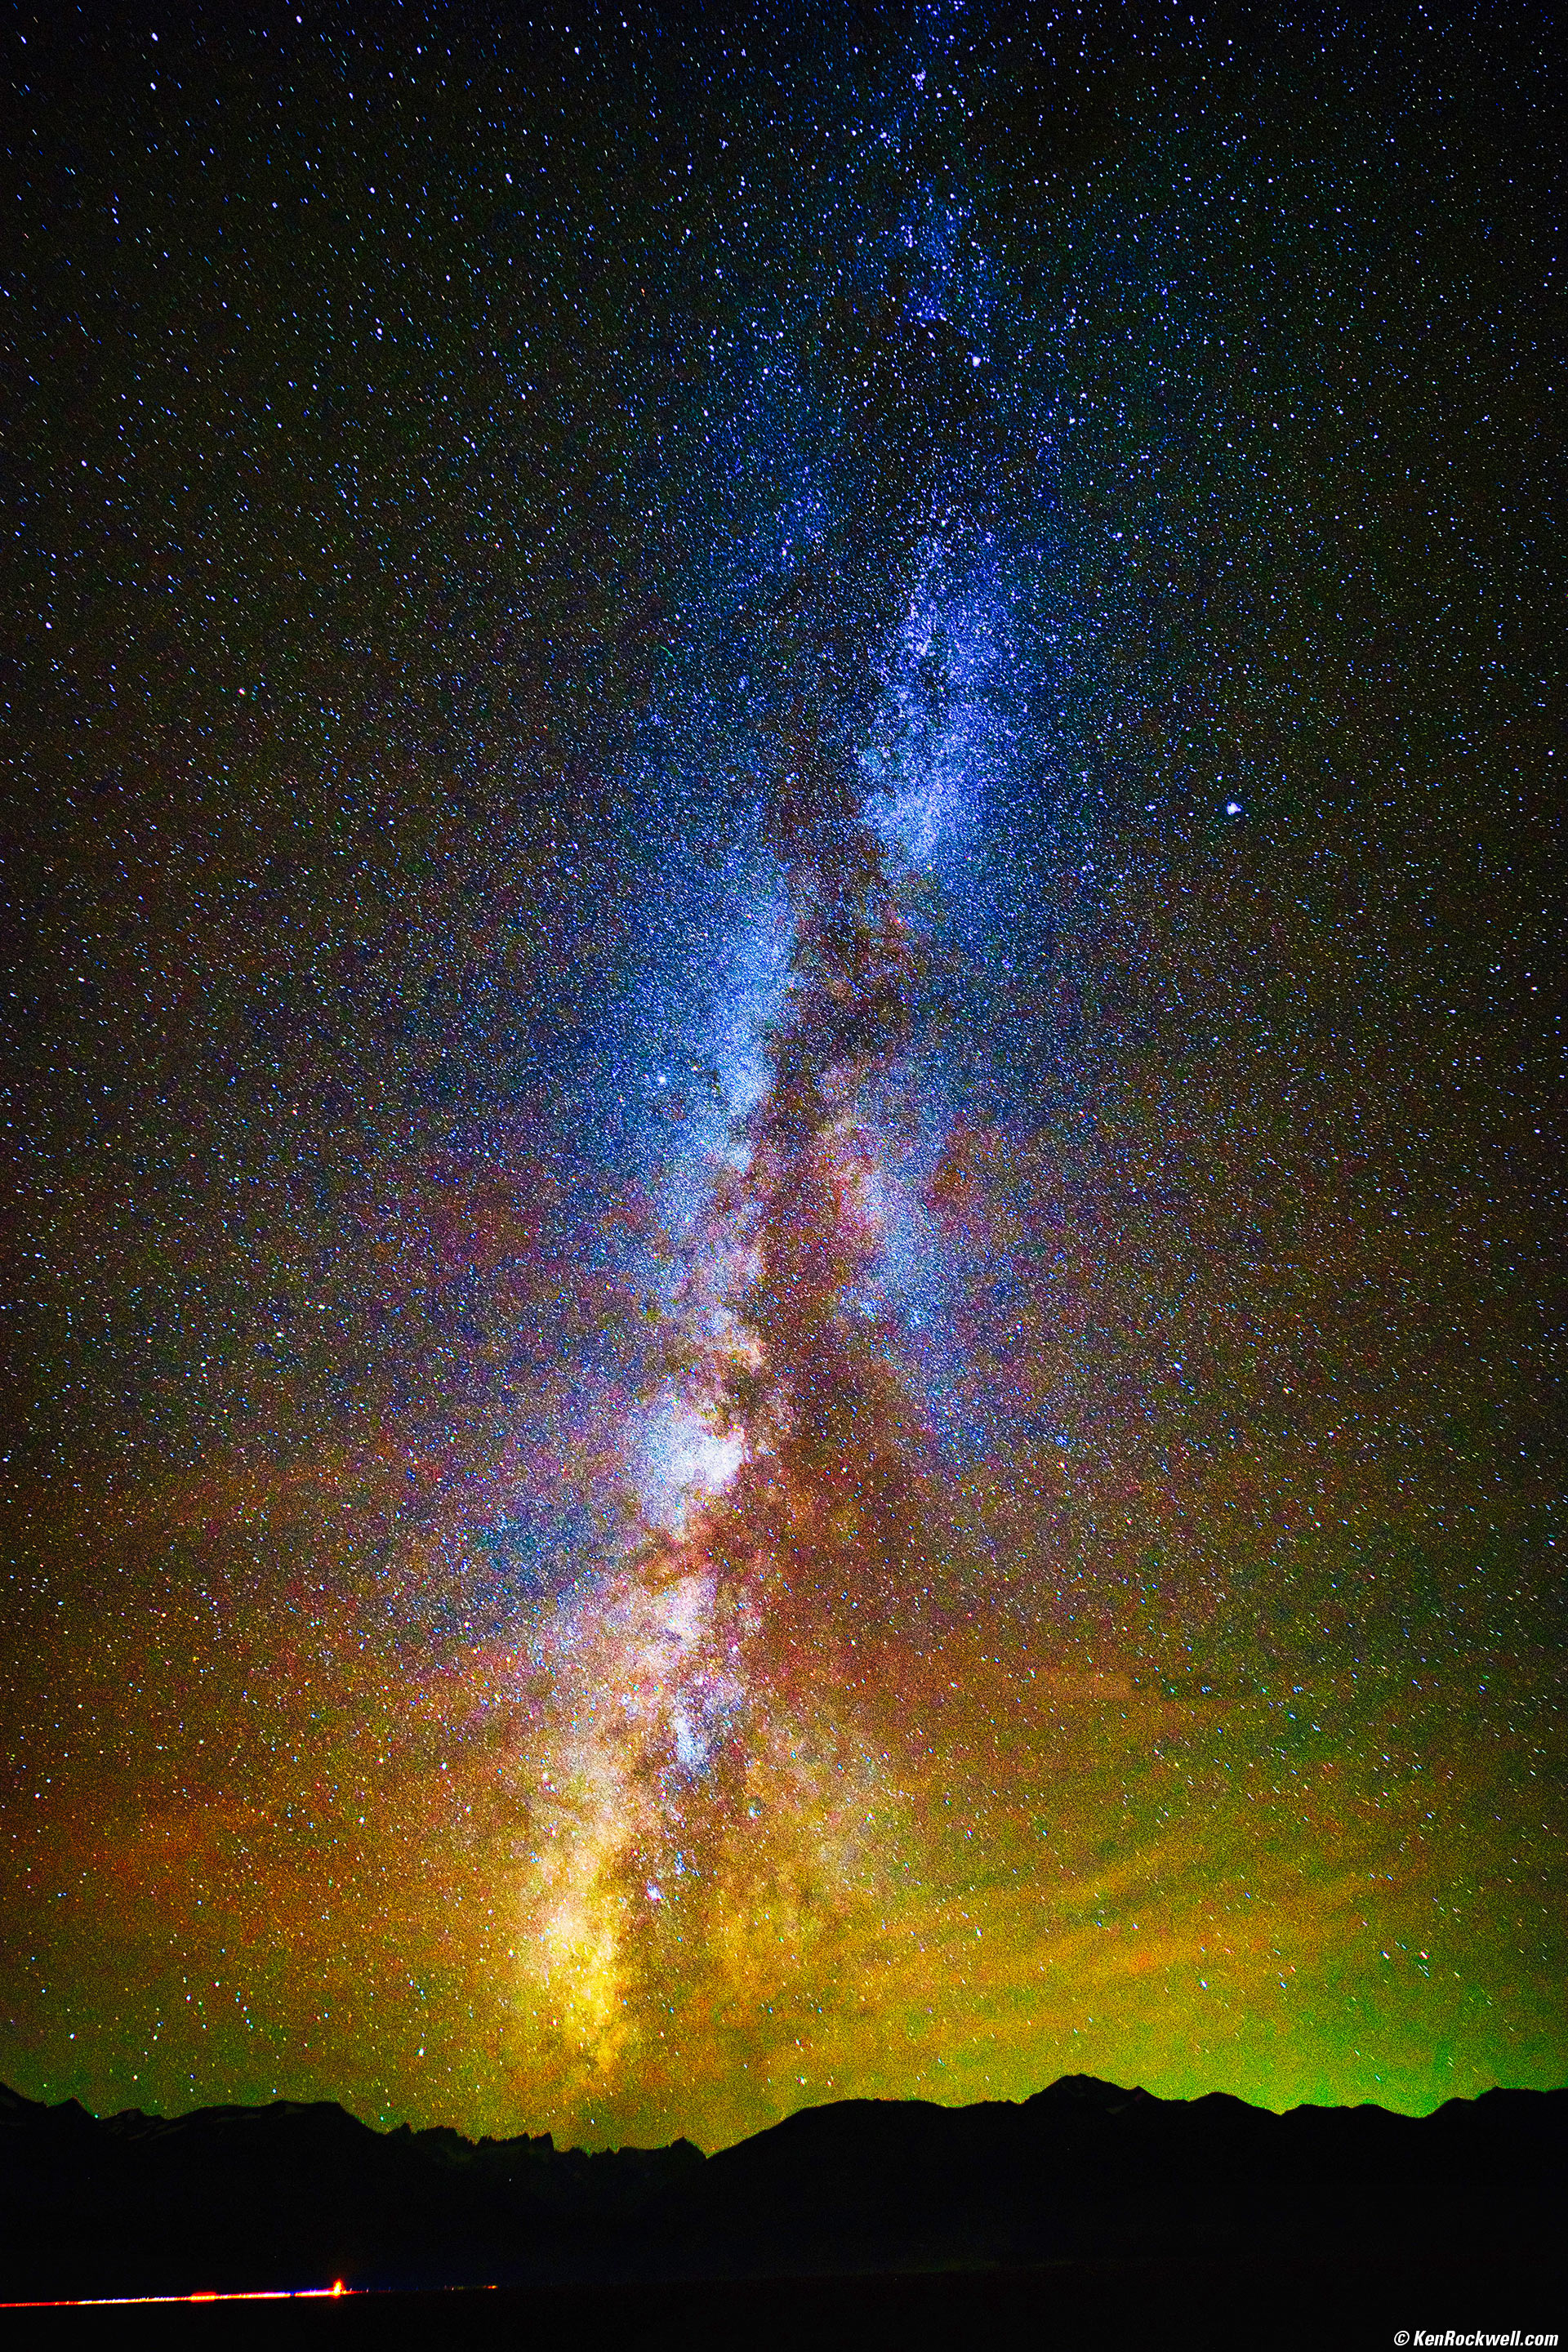
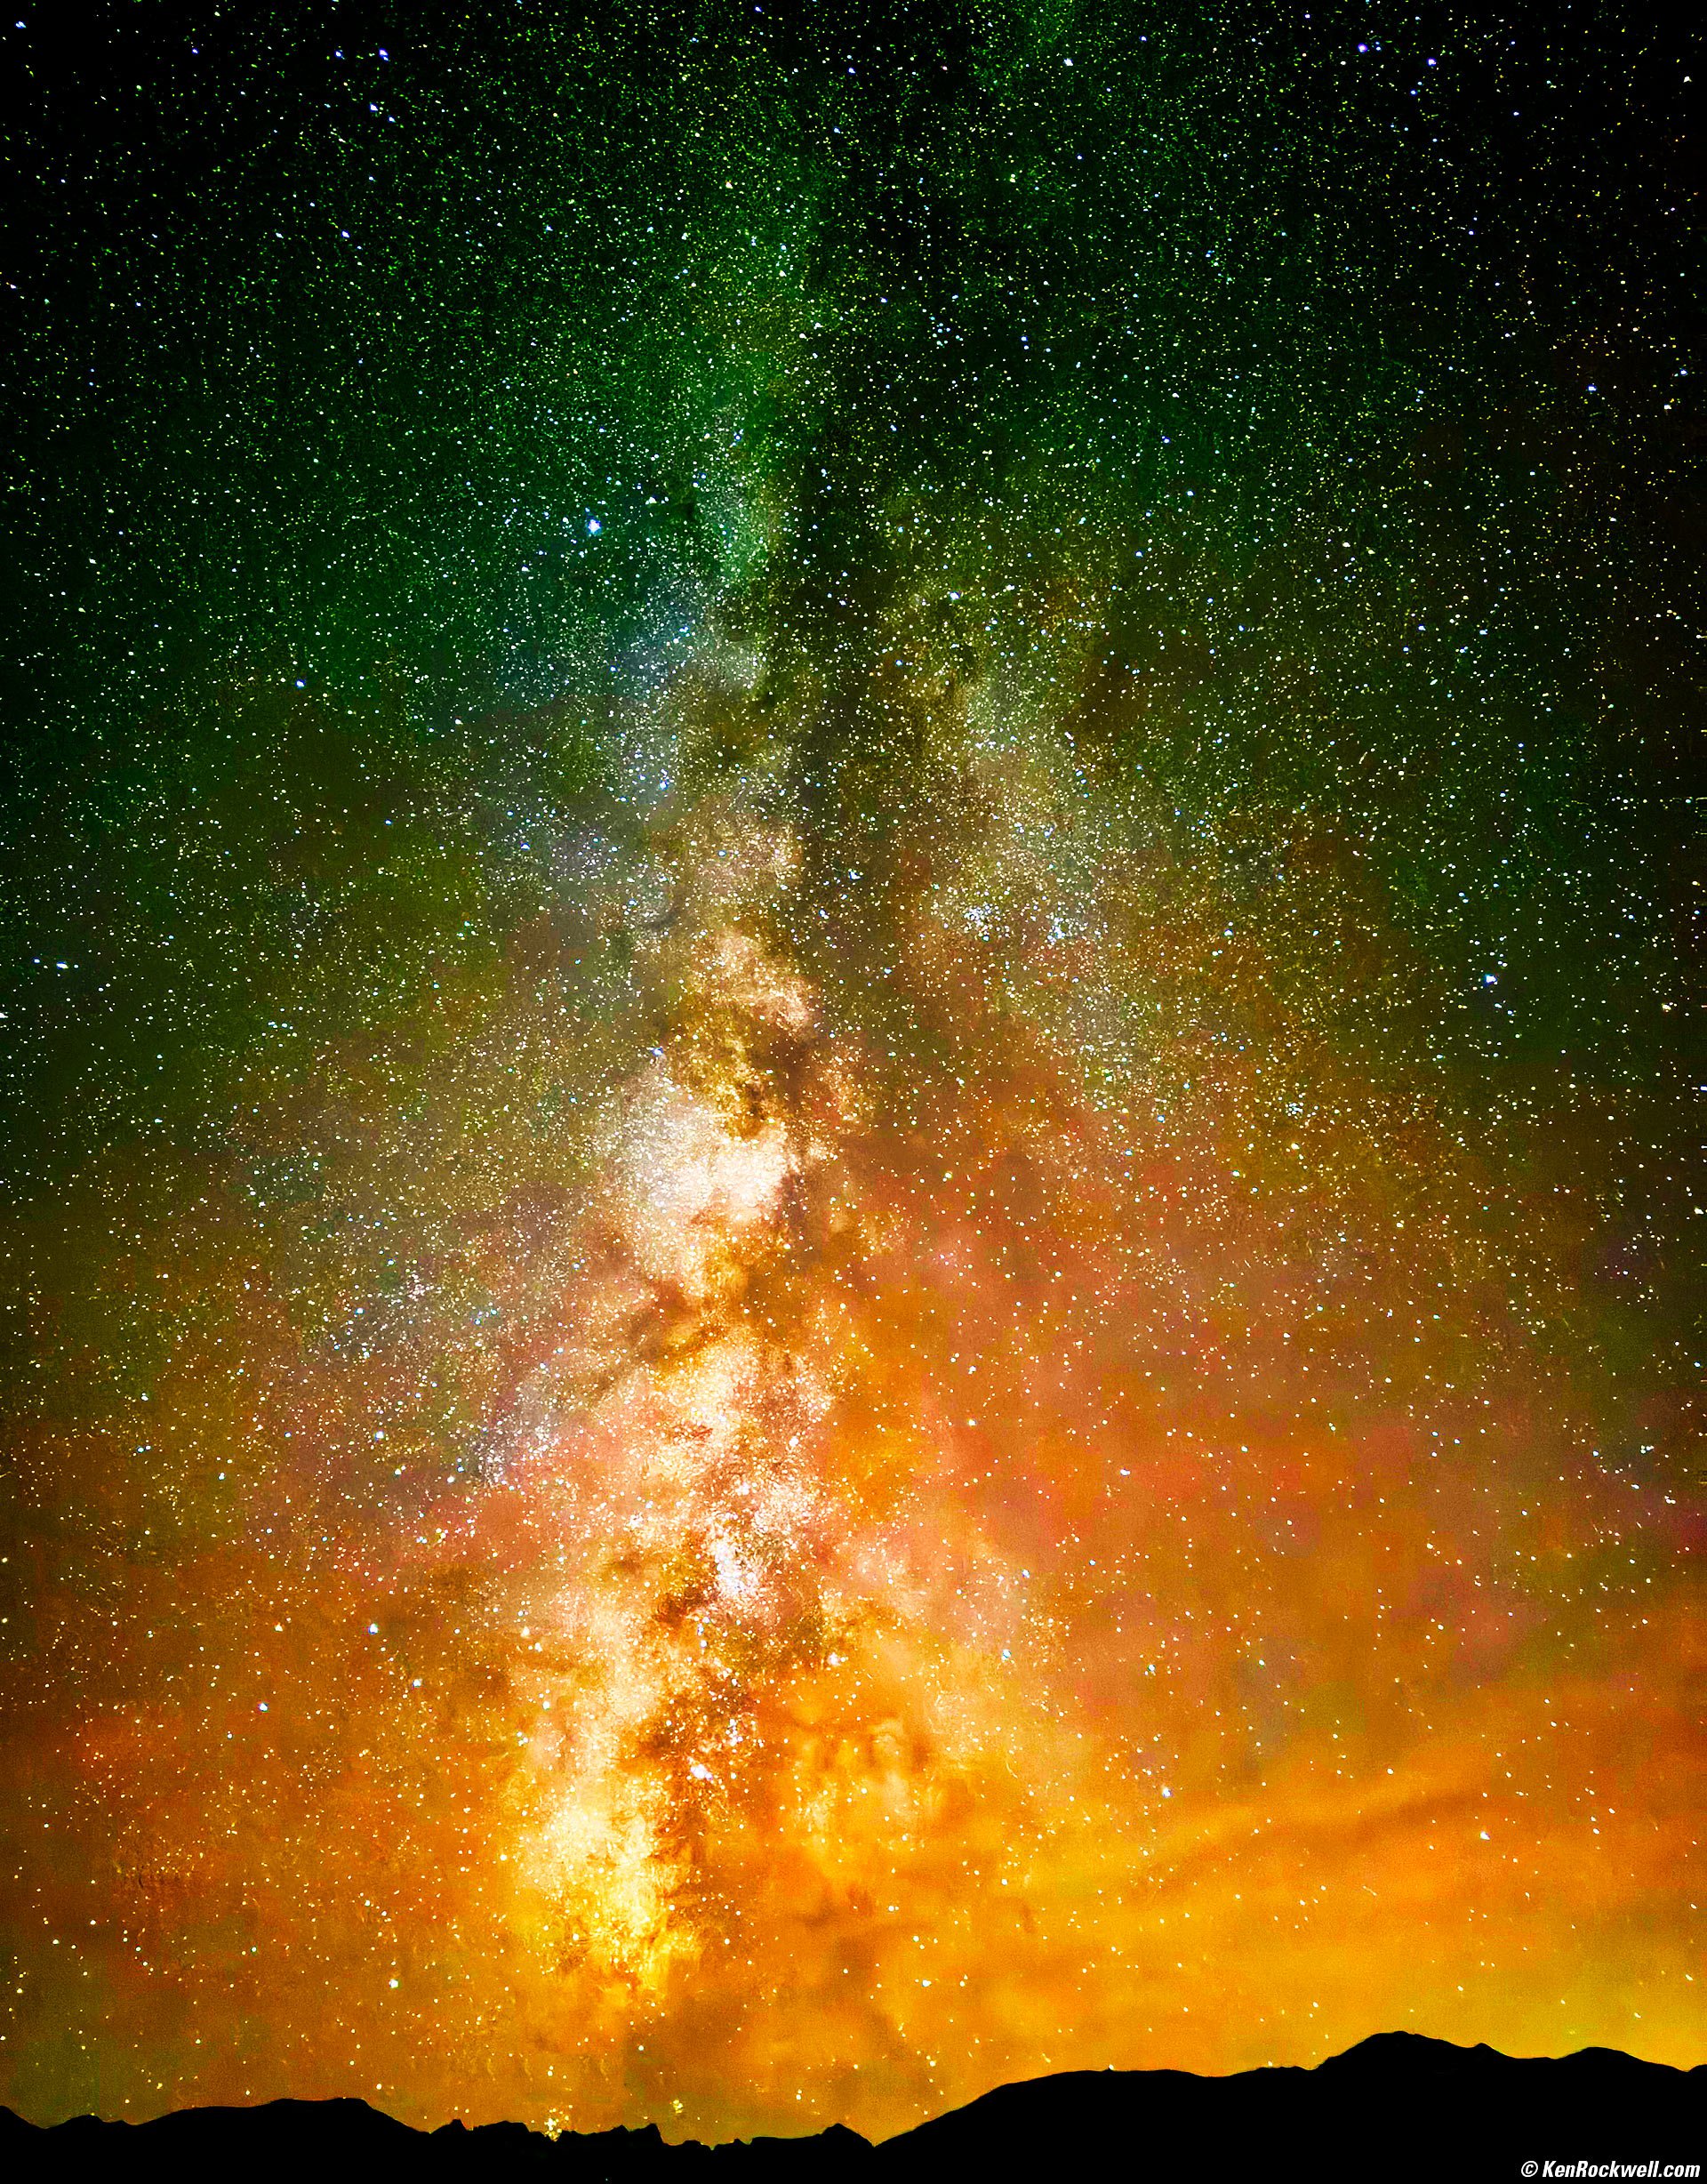
The Milky Way, Bridgeport, California, 8:43 P.M., 14 October 2023. Canon EOS R6 II, Pergear 14mm f/2.8 II wide-open at f/2.8 for 30 seconds at ISO 6,400 (LV -8 — that's minus 8!!!), tungsten (3200K) White Balance, Skylum Luminar Neo. More tech details. bigger or fit-to-screen.
The Milky Way as seen from Bridgeport, California, 8:12 PM, 22 October 2013. Canon 5D Mk III, Canon RS-80N3 remote cord, Canon 16-35mm f/2.8 L II at 16mm, f/2.8 at 32 seconds at ISO 6,400 (LV -8), shot as CR2, processed in Aperture 3 and Photoshop CS6. Bigger.
The Milky Way as seen from Twin Lakes Road, Bridgeport, California, 9:35 P.M., 19 October 2022. Apple iPhone 14 Pro Max 1× (6.9mm actual or 24mm eq.) camera, f/1.8 for 10 seconds at Auto ISO 12,500 (LV -8.6, that's LV minus 8.6!). bigger or fit-to-screen.
The Milky Way, Bridgeport, California, 8:30 P.M.,14 October 2023. Apple iPhone 15 Pro Max 1× (6.89mm actual or 24mm eq.) camera at f/1.8 for 10 seconds at Auto ISO 3,200 (LV -6⅔ — that's minus 6⅔!!!), Skylum Luminar Neo. More tech details. bigger or fit-to-screen.
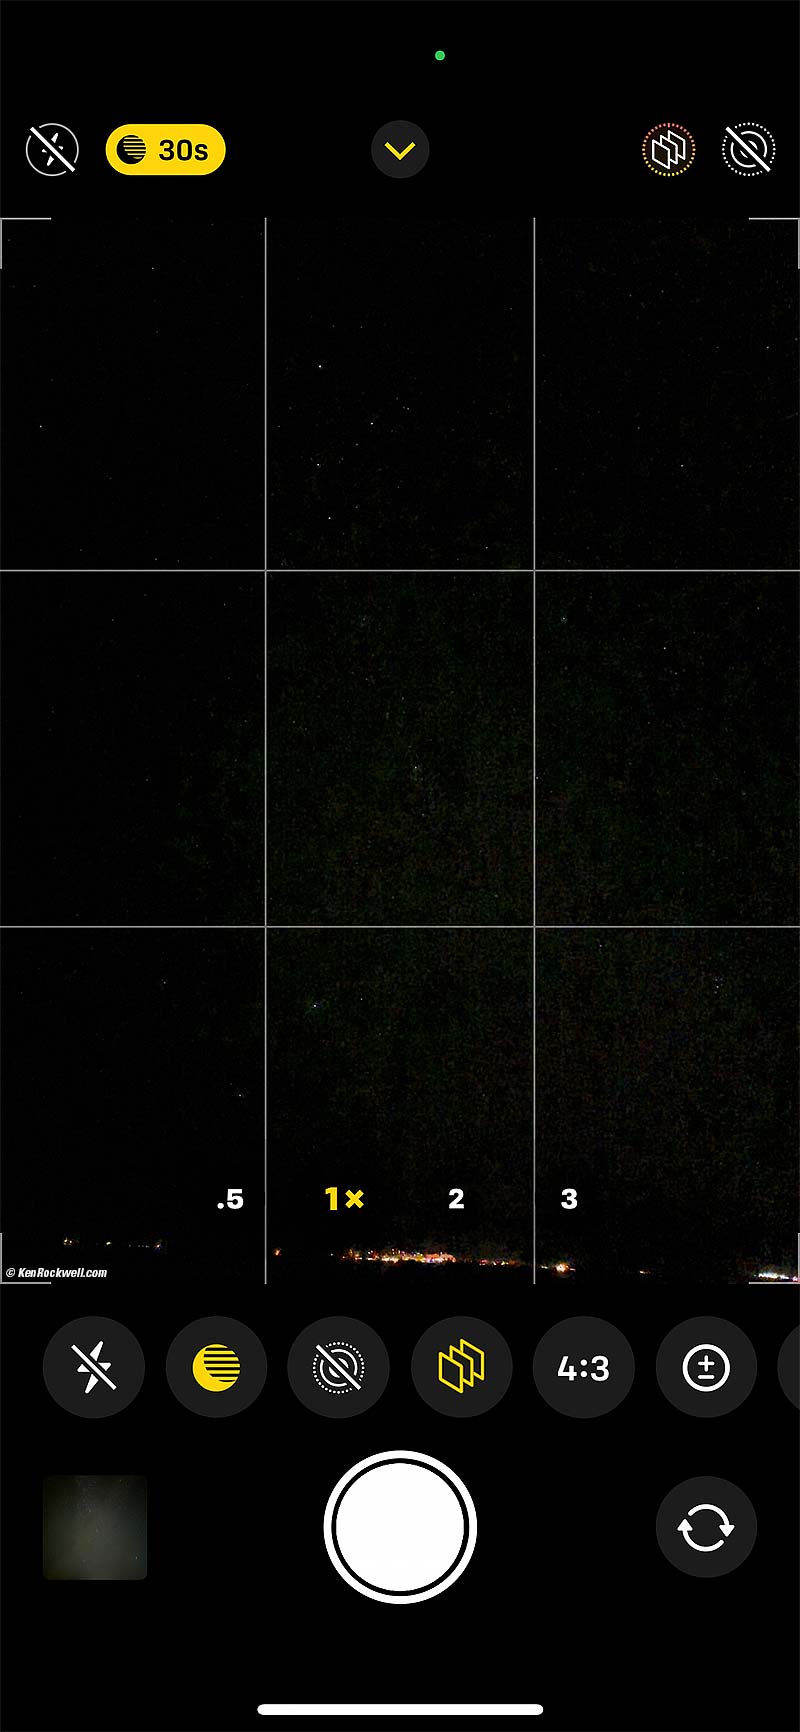
I put my iPhone on a tripod and invoked the Night (time exposure) mode by making sure the flash was off (tap the flash button on the top left until it shows off). With the flash off you can simply point-and-shoot the Milky Way, but by using a tripod it will let me expose for 30 seconds rather than the default 3 seconds hand-held. Time exposures are shown with a yellow icon at the top left, if it's not yellow and showing something like "3s" then tap it to turn it on. Once it's on, tap the triangle in the top center to get to more settings (shown at the bottom). Tap the yellow moon (night mode) icon to see the exposure time slider, and slide it to its maximum.
The iPhone is super-smart and its accelerometers let it know if you're on a tripod or not, and offers different exposure time options: up to 10s handheld or 30s on a tripod, if it's dark enough.
For this shot I had it set to 30s, and that's how long it took to expose. The EXIF reports 10s, which I'll assume is how much actual exposure happened (night mode is numerous shorter exposures which are aligned and then added together).
As-shot it's a very dark image, which is how the Milky Way appears to our eyes. It's pitch black out there. iPhone does a fantastic job of making things look natural in any light, however I want this image to look bright as it does above, so again Skylum Luminar Neo made it easy to erase airplane tracks and embolden the image. I used both the Enhance slider as well as Curves inside Neo.
This all-content, junk-free website's biggest source of support is when you use those or any of these links to approved sources when you get anything, regardless of the country in which you live. Thanks for helping me help you! Ken.
December 2023, March 2023, October 2019, October 2013 Better Pictures Nikon Canon Fuji LEICA All Reviews

Introduction top

Adorama pays top dollar for your used gear.
|
The Milky Way is a huge, dim, milky-looking firmament that crosses the entire sky every night. It's so dim that it's usually only visible away from city lights.
It's so dim that it was nearly impossible to photograph on film, but today it's not too difficult to photograph with just about any camera, and as of the iPhone 11 Pro Max from 2019 you can shoot it with your iPhone!
iPhone 17 Pro Max iOS 26 (2025~2026)
The Comet Swan (C/2025 R2), the North American Nebula and the Milky Way, Bridgeport, California, 9:12 P.M., Tuesday, 21 October 2025. iPhone 17 Pro Max 1× (6.8mm actual or 24mm eq.) camera at f/1.8 for 10 seconds in Night mode at Auto ISO 2,500 (LV minus 6.3!!!!), Tweaked in iPhone's native Photos app and curves adjustment layer masks in Photoshop CC, casual use of my Oben CT-2491 Carbon-Fibre Tripod with my Oben GH3W-15 Geared Head and Oben SPA-1000 iPhone adapter. More tech details. bigger or fit-to-screen.
With the flash off you can simply point-and-shoot the Milky Way handheld!
The iPhone is super-smart and its accelerometers let it know if you're on a tripod or not, and offers different exposure time options. Use a tripod and we can expose for up to 30 seconds rather than the default 3 seconds hand-held.
Time exposures are shown with a yellow moon icon at the top right also showing seconds. If it's not yellow and showing something like "3s" then tap it to turn it on. Once it's on, tap the six-boxes icon at the top right to get to more settings shown at the bottom.
For this shot I had it set to 30s, and that's how long it took to expose. The EXIF reports 10s, which I'll assume is how much actual exposure happened (night mode captures numerous shorter exposures which are aligned and then added together).
If the spinning shutter icon implies it's processing after an exposure but it still says "hold still," hold still or you can blur the result.
iPhone 14 Pro Max (2022~2023)
I used my Oben CT-2491 Carbon-Fibre Tripod with my Manfrotto 410 (née Bogen 3275) Geared Head and Oben SPA-1000 iPhone adapter to hold my iPhone 14 Pro Max for the shot above, and it also works simply hand-holding it braced against something.
By default the iPhone will try to use flash, so turn that off by tapping the flash icon at the top left (held vertically). Now that the flash is off, you'll see "☽ 3s" at the top (held vertically as shown below). For the cleanest image we want the longest exposure, so tap the little " ^ " symbol at the center top and then along the bottom tap the ☽ moon (time exposure) icon and slide the time all the way to 30 seconds. Tap and release the ◉ shutter button, wait for 30 seconds to count down, and you've got your shot. If you hand-hold, the default exposure is about 2 seconds and the maximum time is about only 10 seconds.
The iPhone knows from its acceleration sensors if it's on a tripod or not, and only allows times longer than 10 seconds if you're on a tripod. It's also brilliant in knowing that the longest any normal person will hold an iPhone for a long exposure is only a few seconds, and adjusts accordingly hand-held. Even though you'll get something even handheld for just a few seconds, longer exposures collect more light and result in more detail and less noise.
The indicated exposure times on the time exposure scale refer to the total time iPhone is exposing and counting down (like 30 seconds maximum in the shot above), the effective exposure time recorded in EXIF data is less (10 seconds in the shot above). This is because iPhone is using magic to capture and combine many, many separate shorter, sharper shots into the one file it saves.
Most of the editing of the iPhone 14 photo above I did in the free Snapseed app on my iPhone while we had breakfast the next morning at the Bridgeport Inn. Back at my studio I amped it even further in Skylum Luminar Neo.
I tried Neo's Noise AI noise reduction, but all it did was blur the sky. I prefer the noise, which for all I know are a zillion other stars that add to this picture.
The Apple iPhone 14 Pro Max shot this as it looked to our eyes: dim and monochrome. I used Snapseed and Skylum Luminar Neo to make it brilliant like this, the way I wanted it to look. It certainly didn't look like this when we were there! The actual Milky Way is very dim to our eyes, against a sea of stars.
Mirrorless cameras can be a pain as they often don't have much of a finder image in the dark. Here's something Nikon Z cameras can't do:
Screen Shot: You can see the stars live! bigger.
The finders of Nikon Z cameras, at least as of 2023, work very poorly in the dark. They become extremely noisy and nearly useless even in ordinary backyard nighttime light, while the iPhone is still amazingly clean and clear, showing us individual stars, even under starlight!
The iPhone 14 Pro Max is much more sensitive in low light, but even in 2019 I was able to shoot this with the iPhone 11 Pro Max:
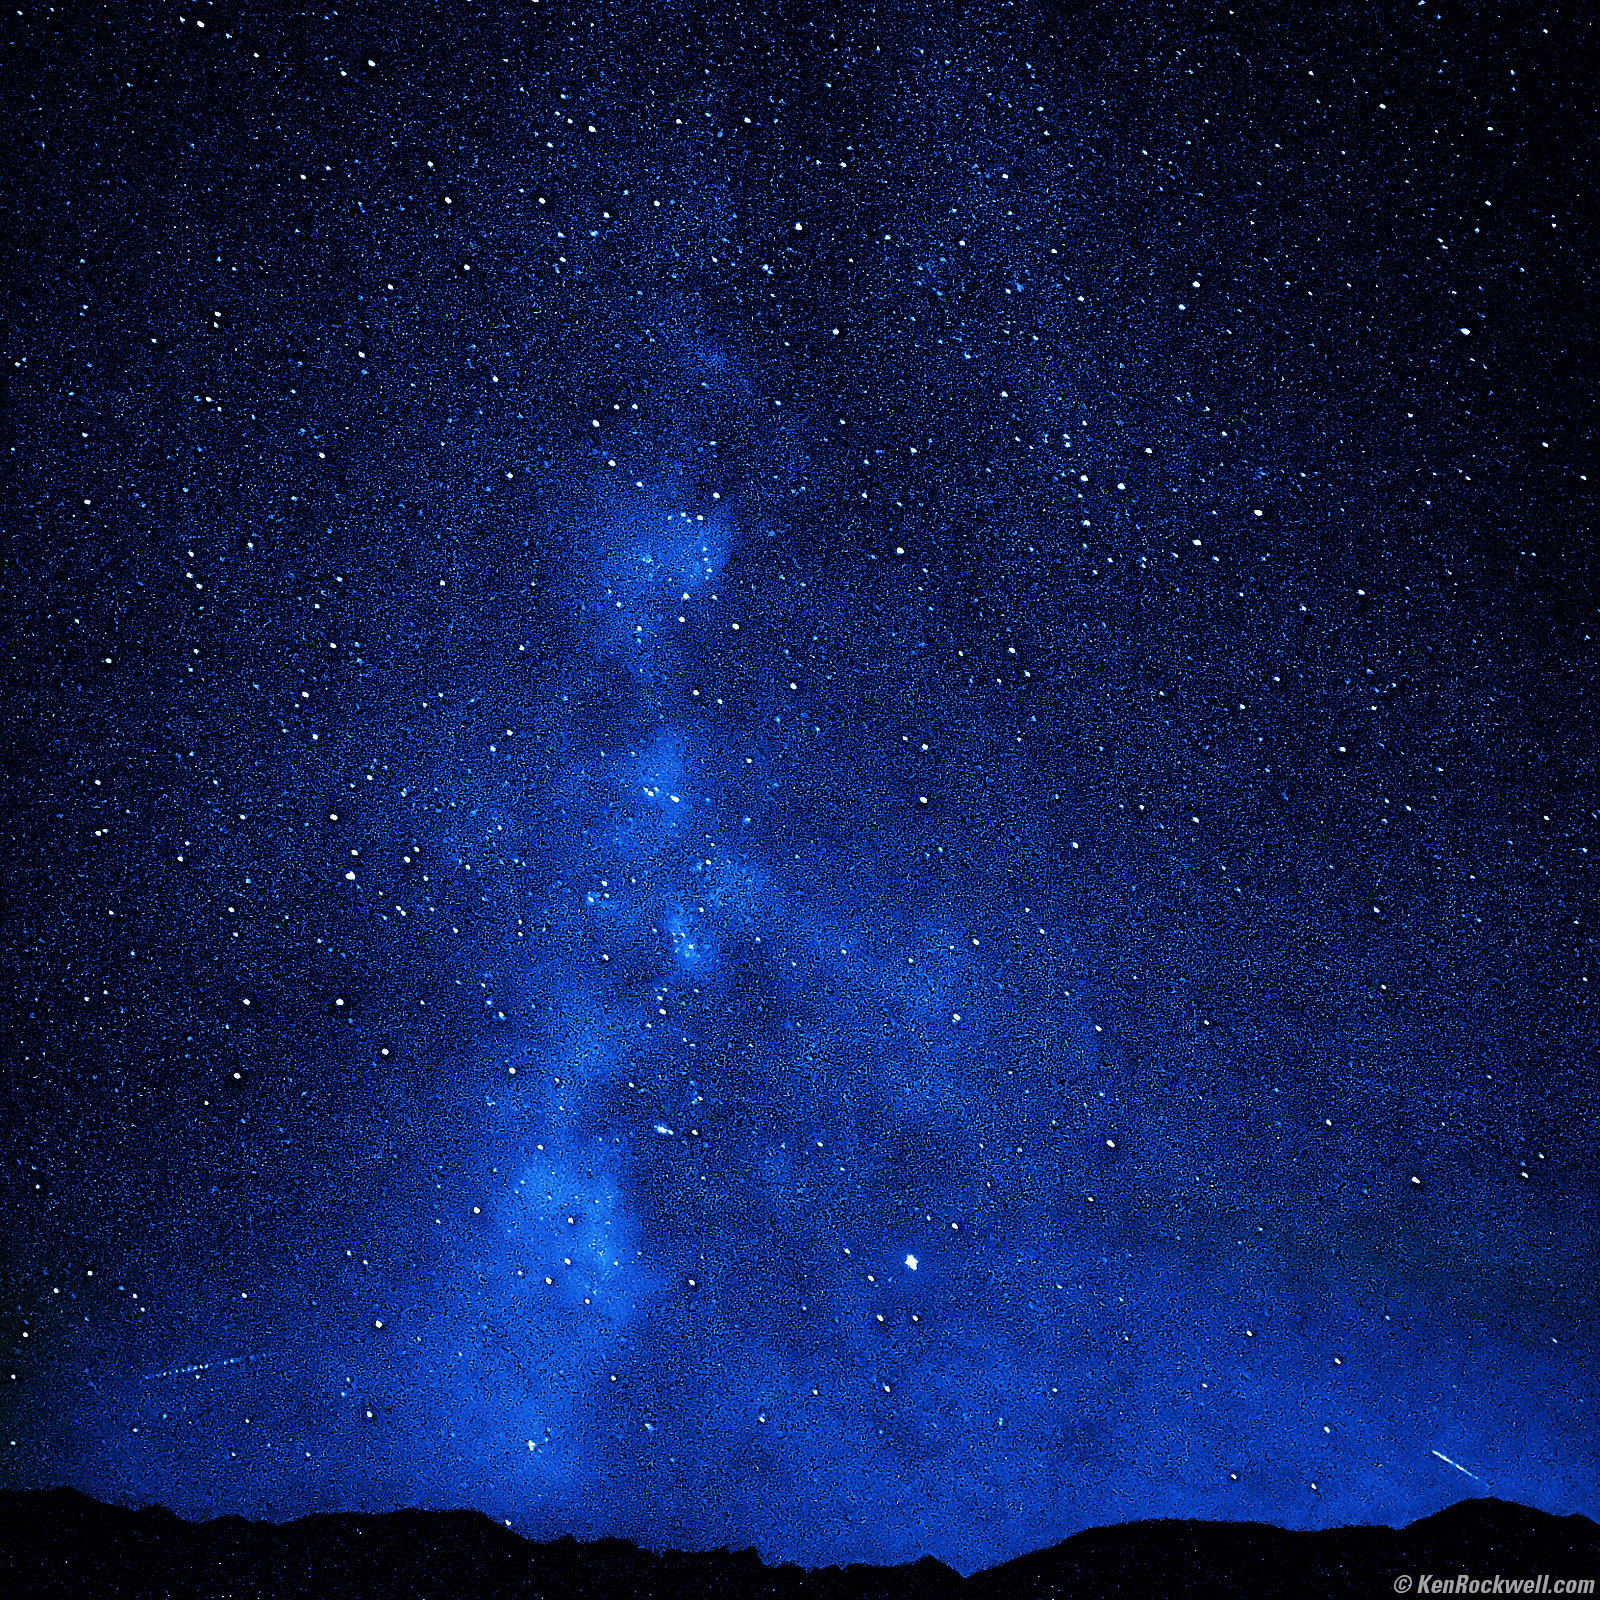
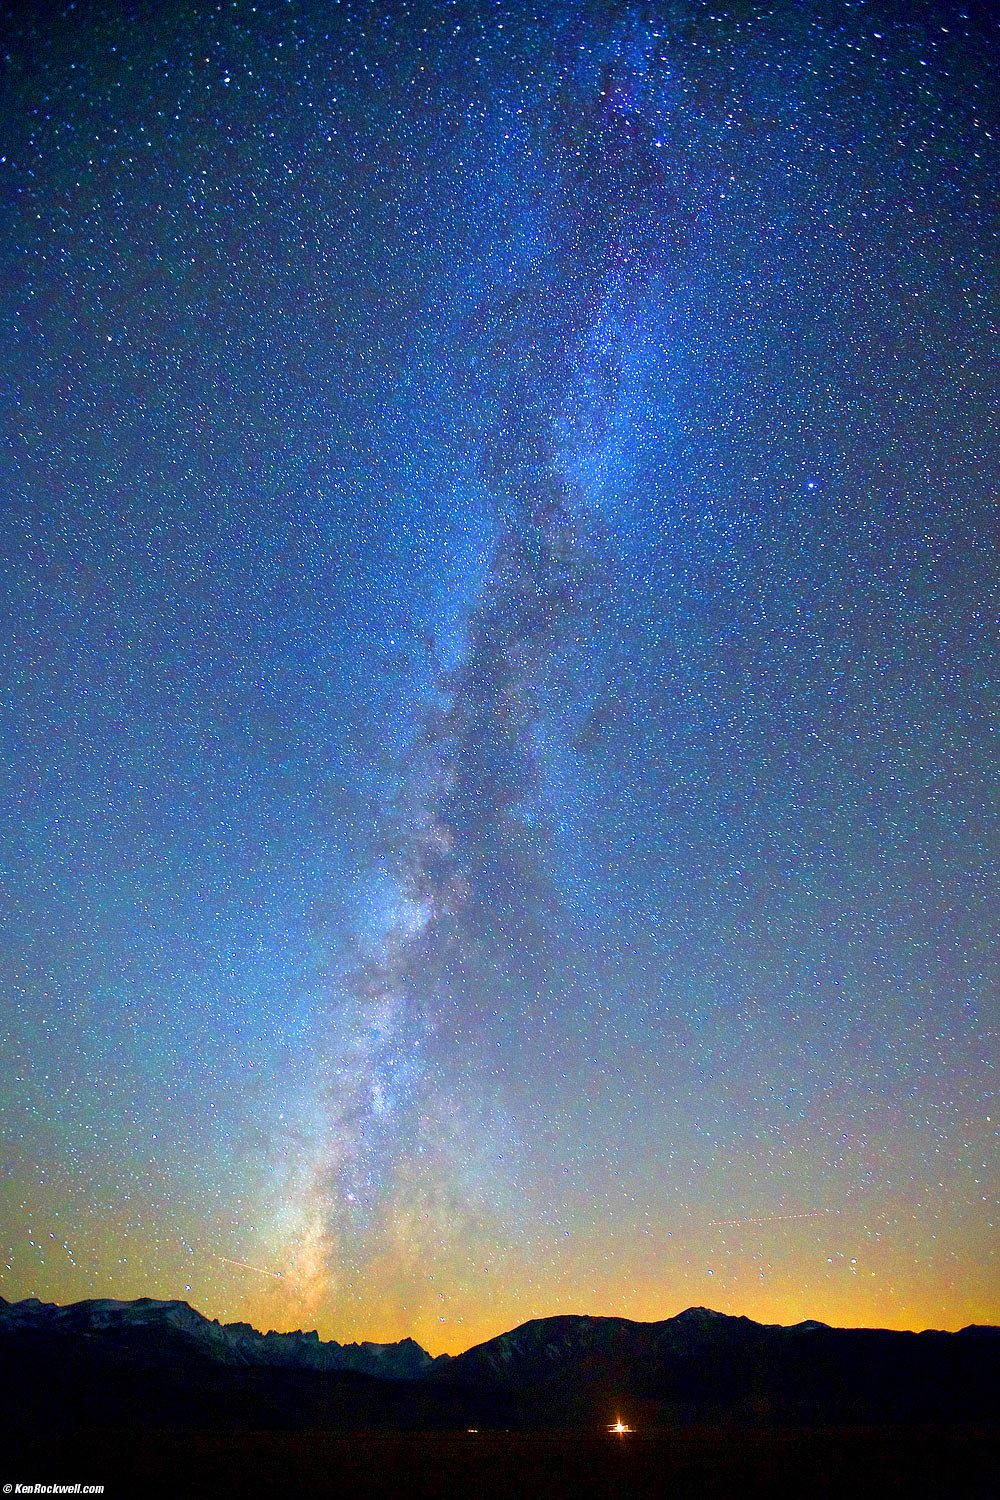
The Milky Way as Seen from Bridgeport, California's Eastern Sierra, 7:34 P.M., 22 October 2019, Doe!!! iPhone 11 Pro Max tripod-mounted with XUMA MTA-300B Tripod Adapter, 4.25mm (26mm equivalent) ultra-wide camera at f/1.8 at 1 second (30 second composite time exposure mode) at Auto ISO 12,500 (LV -5.4). bigger.
The lines at the left and right bottom are airplanes in motion. I added the blue color in Photoshop after forcing this iPhone 11 Pro Max image to monochrome to reduce noise. This is my favorite shot, especially scouting for it!
1.) Get fastest, widest lens you can. A 14mm f/1.8, 20mm f/1.8 or 24mm f/1.4 are best, an f/2.8 ultrawide or zoom is next best, and if all you have is an 18-55mm kit lens, use that.
2,) Turn off the flash.
3.) Use your AF system's center sensor to focus on a distant city light, or a very bright star or planet. It's easy to focus on the moon, but if the moon is up, the Milky Way won't be as visible. It's important to focus on something as far away as possible. If your AF system isn't working, magnified Live View might. Focus on something as far away as possible; if you focus on something 20 feet away, the stars won't be sharp.
4.) Once in focus, set your lens or camera to Manual Focus (MF) so it won't move. (With Nikon manual-focus AI-s lenses, just set the lens to its infinity stop and you're done. Most AF lenses don't have a stop exactly at infinity.)
5.) Put the camera on a tripod, and be careful not to touch the focus setting.
6.) Set Manual exposure mode.
7.) Set 30 seconds exposure time.
8.) Set the lens to its widest aperture (the smallest f/number, like f/1.4, f/2.8 or f/3.5 depending on your lens).
9.) Set this ISO:
Maximum Aperture |
ISO |
800 |
|
1,250 |
|
1,600 |
|
3,200 |
|
6,400 |
|
10,000 |
|
f/4 |
12,800 |
f/4.5 |
16,000 |
f/5.6 |
25,600 |
10.) (optional) Set Tungsten white balance to keep the sky blue as I did at the top. Otherwise, it will probably look brown or orange in the camera's default AUTO white balance setting.
11.) Shoot.
Hint
Our biggest problem is the rotation of the earth and sky blurring our stars with long exposures. Use a clock-drive and you you can shoot at ISO 100 and make a much longer exposure for much cleaner images. With a clock drive the horizon line will be blurred rather than the stars. Also hackers will composite many images together for the best, sharpest skies and horizons.Dedicated astro guys love these because they can expose as long as they want for deep, clean images at low ISOs, while regular folks like me have to shoot mostly with ultrawide lenses and high ISOs to keep exposures shorter than 30 seconds for sharp astro shots.
The more dedicated will make numerous exposures and put them together with special software that rotates them to compensate for some of the sky's (or earth's depending on your point of view) rotation as well as have a sharp horizon.
A well aligned clock-drive lets you make hours-long exposures and keep it all sharp, mostly dependant on how well you align it.
The Milky Way and the Andromeda Galaxy as seen from Stoneman Meadow, Yosemite National Park, California, 8:39 P.M., 21 October 2022. Canon EOS R6, Tungsten white balance to make it blueish, RF 15-30mm IS STM at 15mm, f/6.3 for 80 seconds on a tripod at ISO 6,400 (LV -7.0, or minus 7.0!). More tech details. bigger or fit-to-screen.
Discussion
Exposure
Look at your LCD after you shoot, and make a different exposure if you like. Cameras will vary in their actual ISO.
Be careful; you're in the dark and underexposed (too dark) images will look best on your LCD at the time. Images that will look the best tomorrow usually look a stop or two too bright on your LCD as you look at them out in the dark.
Exposure Time
30 seconds is about the longest exposure we can use with an ultrawide lens and not get motion blurring due to the Earth's rotation. Feel free to use longer exposures, but you'll start to see the arcs traced by the stars. 30 seconds is about right for the best trade-off between high ISO noise and star trail blur with an ultrawide lens.
The wider your lens, the less the star motion will appear and the longer can be your exposure. I used a 16mm lens here; longer lenses, like 35mm, will enlarge the motion. For instance, with a 35mm lens your exposure can only be about 15 seconds before star motion becomes visible.
A reader in Iceland suggests diving 600 by your focal length to get the longest time in seconds you might want to use. For example, with a 15mm lens, 40 seconds (600/15) is about the longest exposure you'd want before blur becomes obvious.
If you look closely at my sample image above you will see some star motion. Shorter times would reduce this, but demand a higher ISO with more noise, and longer times to use a lower ISO would add much more blur.
Long Time NR
Set Long Time NR (Long Exposure NR) if you get fogging at the edges of the image. If you set this, the camera makes a second long dark exposure to remove the edge fogging, but you have to wait an extra 30 seconds after each shot. You don't need this with most DSLRs made since about 2007; I didn't use it above.
Cable Release, Self Timer and Mirror Lock-up
Use any of these if you like, but with exposures this long, these aren't needed because any vibration occupies such a tiny fraction of the total exposure that it isn't visible.
Clock Drives
If you have a clock-drive for a camera or one for a telescope that tracks the Earth's rotation, and mount your camera on it, you can use ISO 200, possibly stop down your lens a little for sharper results, and use these longer exposure times:
Aperture |
Time at ISO 200 |
f/1.4 |
256 seconds |
f/2 |
8.5 minutes |
f/2.8 |
17 minutes |
f/4 |
34 minutes |
f/5.6 |
68 minutes |
Location and Foregrounds
Dark areas are best, and a lake is even better because you can have a reflection in the lake.
Your camera will pick up light pollution better than your eye. Don't blame your camera if you get an orange tint to the sky with Tungsten white balance; it's probably distant street lighting that your naked eyes can't detect.
Avoid anything in the foreground like the shadow of a bristlecone pine; you want to show only one strong subject in your image, so if it's the Milky Way, don't get anything in the way.
If you want to show star trails behind bristlecone pines or Delicate Arch, those are clichées and that's another article.
Multiple Exposures
Summing multiple exposures does the same thing as simply using a longer exposure. With a longer exposure, the camera automatically averages everything over the entire exposure interval.
Ignore multiple exposures, unless your camera can't make exposures as long as you'd like, and beware: you'll get motion blur as strong as the entire period from beginning to end of your exposure sequence, and there will be little dark spots in the star trails for when your camera was advancing.
Multiple exposures may be useful for periods much longer than a few minutes or if you're on a clock drive, but don't help for photographing the Milky Way or Northern Lights where we don't want more than a 30-second exposure.
Thanks
Many thanks to photojournalist Ted Soqui who made us shoot this on DSLRs during a workshop in October 2013.
Help me help you top
I support my growing family through this website, as crazy as it might seem.
The biggest help is when you use any of these links when you get anything, regardless of the country in which you live. It costs you nothing, and is this site's, and thus my family's, biggest source of support. These places have the best prices and service, which is why I've used them since before this website existed. I recommend them all personally.
If you find this page as helpful as a book you might have had to buy or a workshop you may have had to take, feel free to help me continue helping everyone.
If you've gotten your gear through one of my links or helped otherwise, you're family. It's great people like you who allow me to keep adding to this site full-time. Thanks!
If you haven't helped yet, please do, and consider helping me with a gift of $5.00.
As this page is copyrighted and formally registered, it is unlawful to make copies, especially in the form of printouts for personal use. If you wish to make a printout for personal use, you are granted one-time permission only if you PayPal me $5.00 per printout or part thereof. Thank you!
Thanks for reading!
Ken Rockwell.
Home Donate New Search Gallery Reviews How-To Books Links Workshops About Contact