How to Photograph Air Shows
Sample Shots Intro Cameras Lenses
Stabilization Filters Focus Settings Exposure
Falloff & Lens Corrections Camera Supports
JPG vs Raw Selecting & Editing More
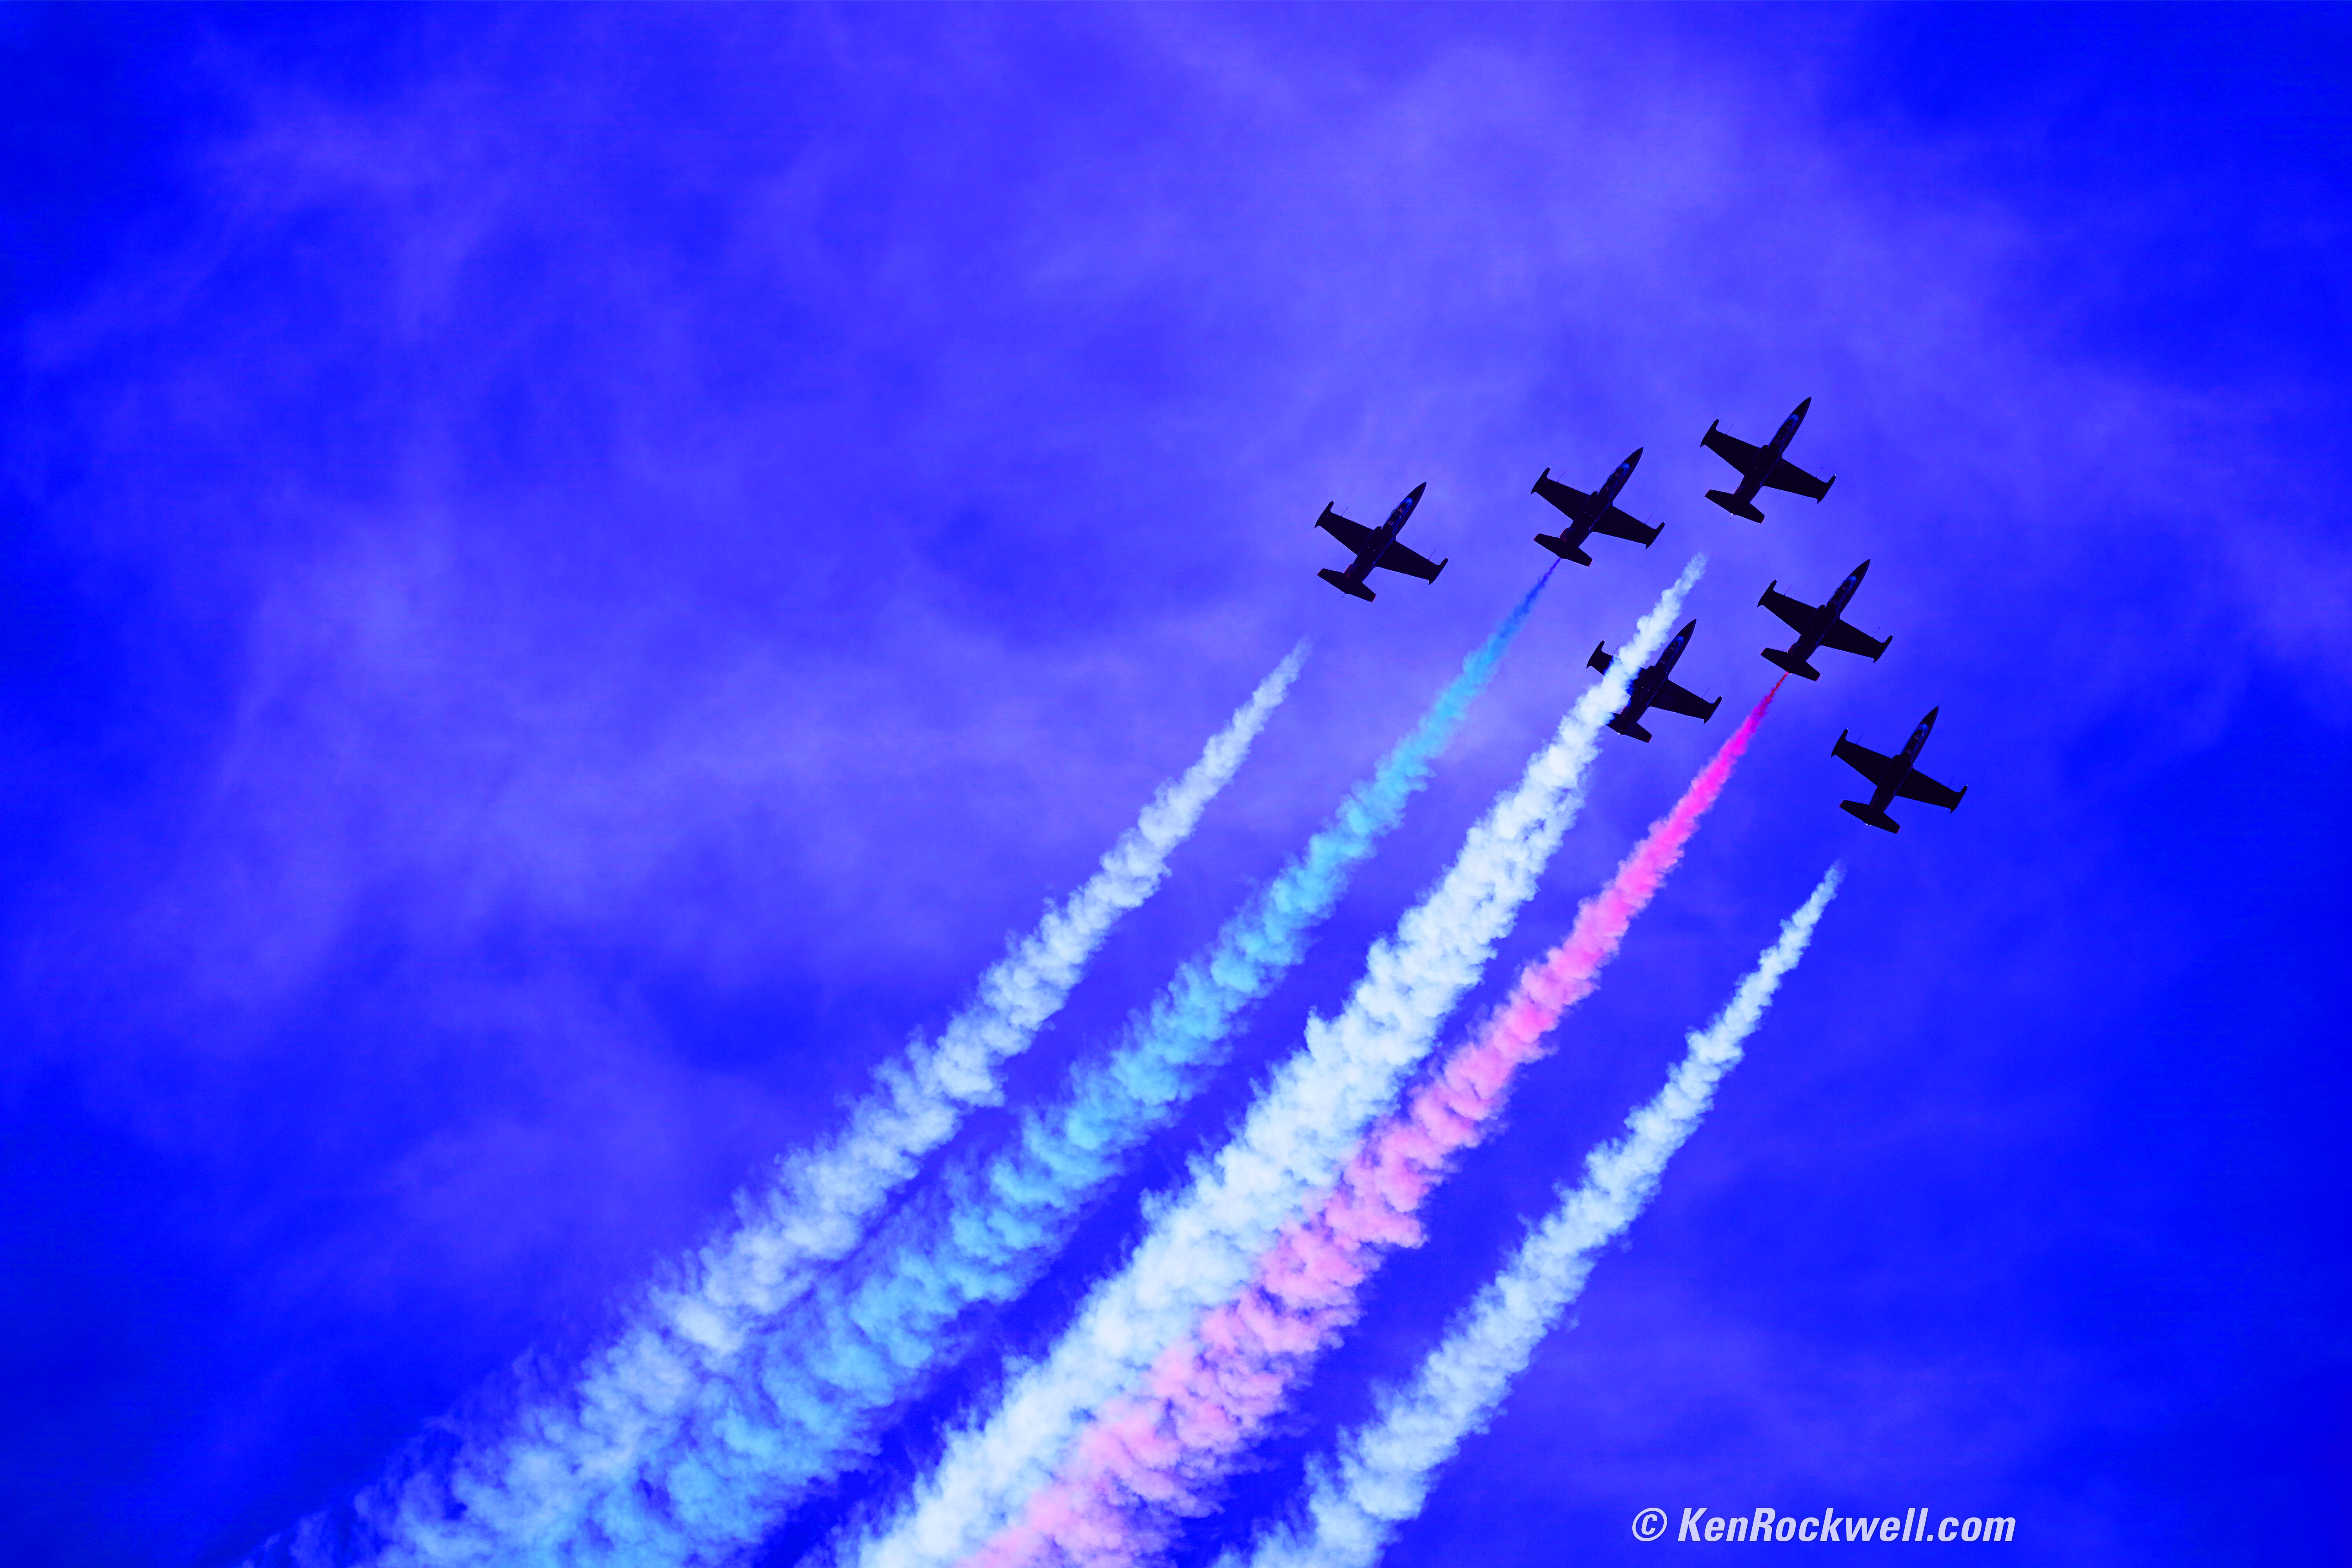
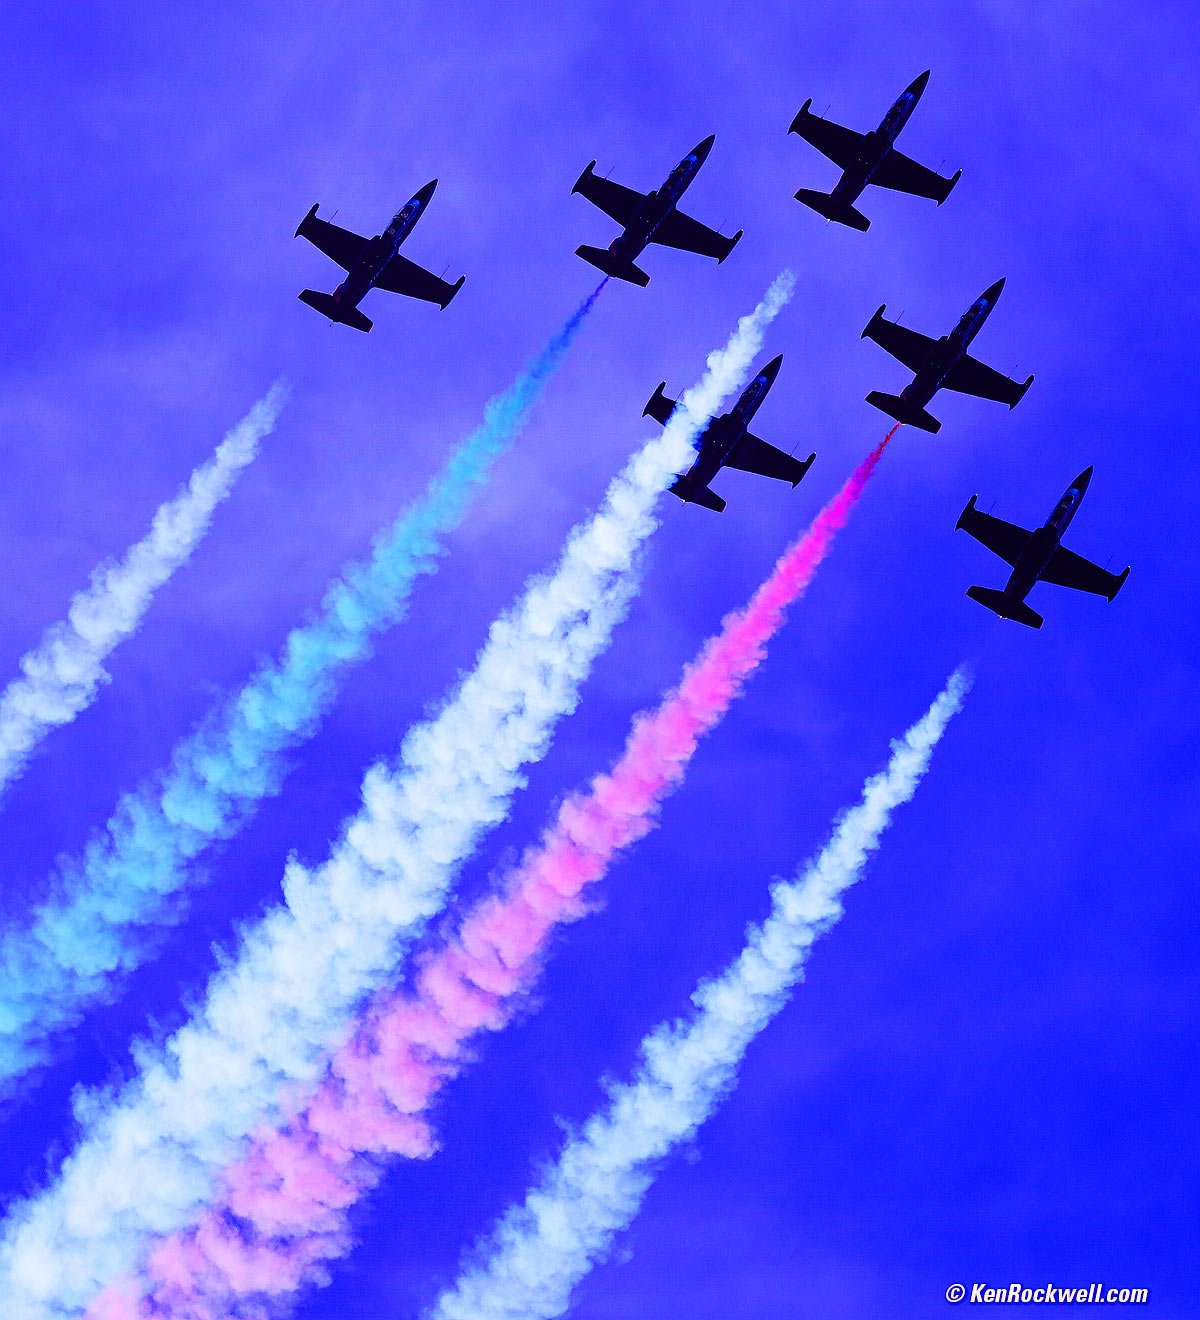
Red, White and Blue Smoke behind Jets, Miramar Air Show, 28 September 2018. Sony A9, Sony 400/2.8 on Wimberley WH-200, f/2.8 at 1/2,500 at ISO 100. bigger or full-resolution.
This 100% all-content website's biggest source of support is when you use any of these links to approved sources when you get anything, regardless of the country in which you live. I use the stores I do because they ship from secure remote warehouses where no one gets to touch your new camera before you do. Buy only from the approved sources I use myself for the best prices, service, return policies and selection. If you find this as helpful as a book you'd have to buy, consider helping me with a gift of $5.00.
October 2018 Better Pictures Nikon Canon Sony Fuji LEICA All
See also Aerial Photography

Sample Air Show Shots
Top Sample Shots Intro Cameras Lenses
Stabilization Filters Focus Settings Exposure
Falloff & Lens Corrections Camera Supports
JPG vs Raw Selecting & Editing More
MCAS Miramar, San Diego California, USA, 28 September 2018. All shot as NORMAL JPG files; no raw needed:
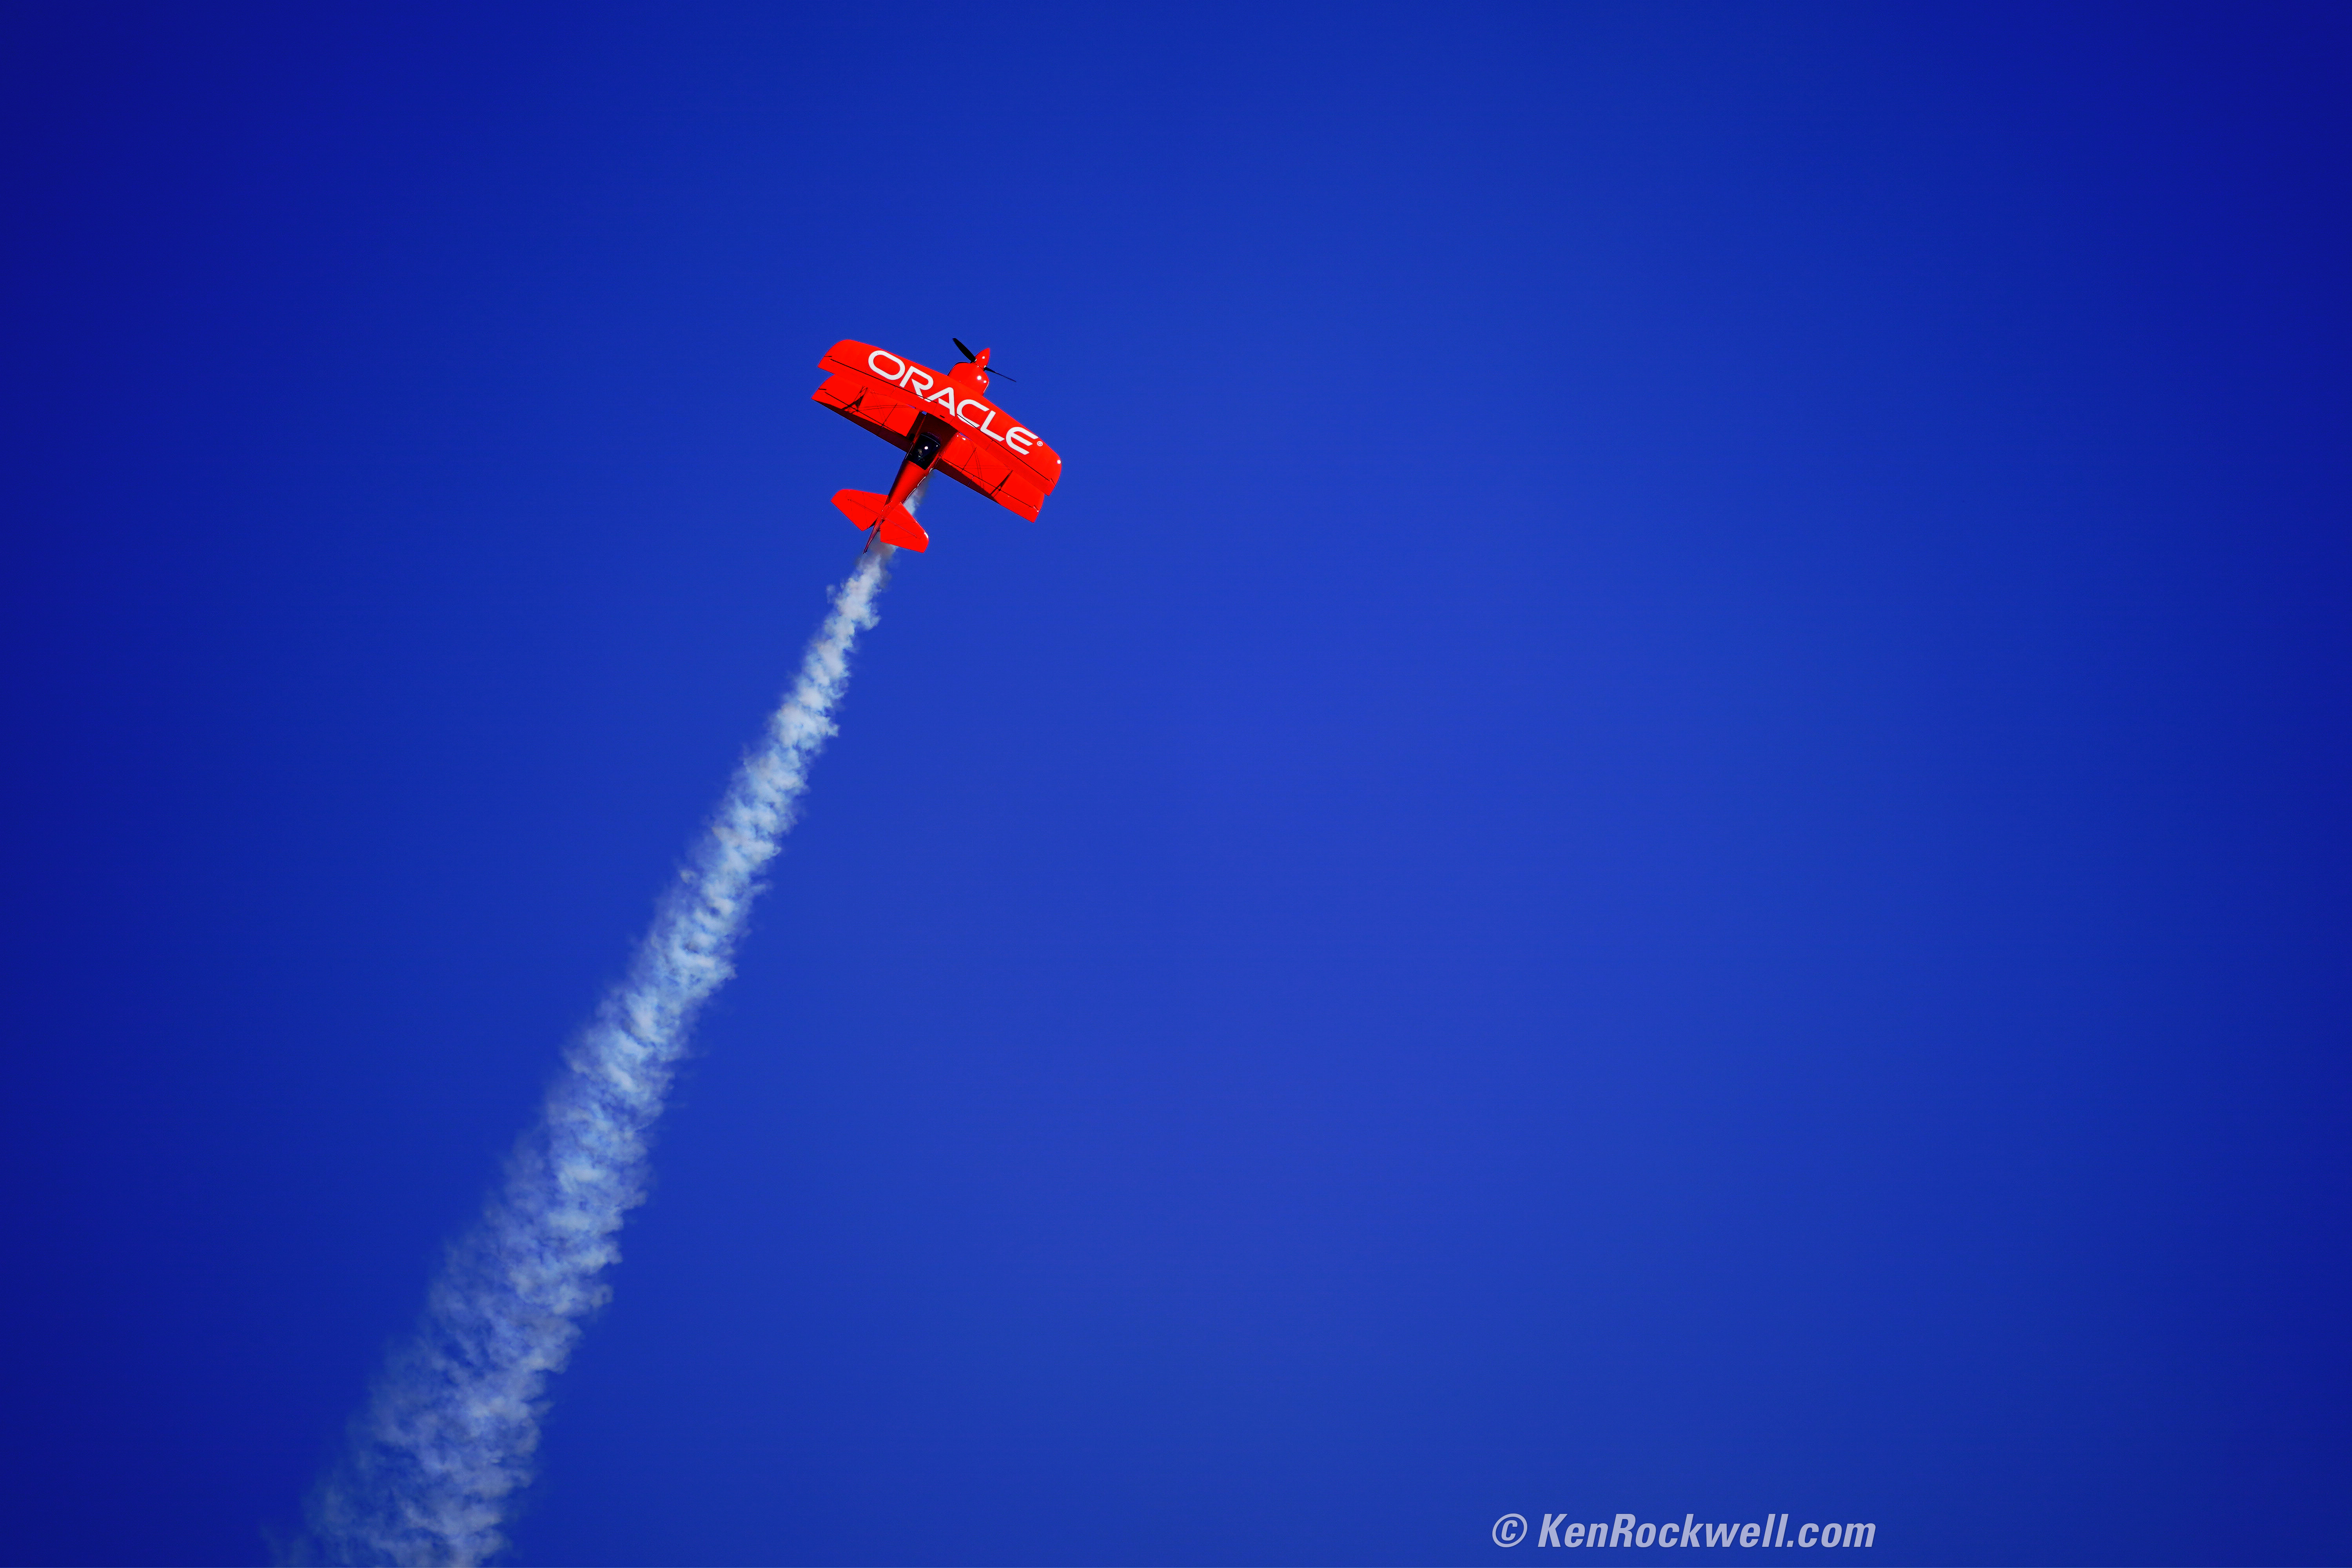
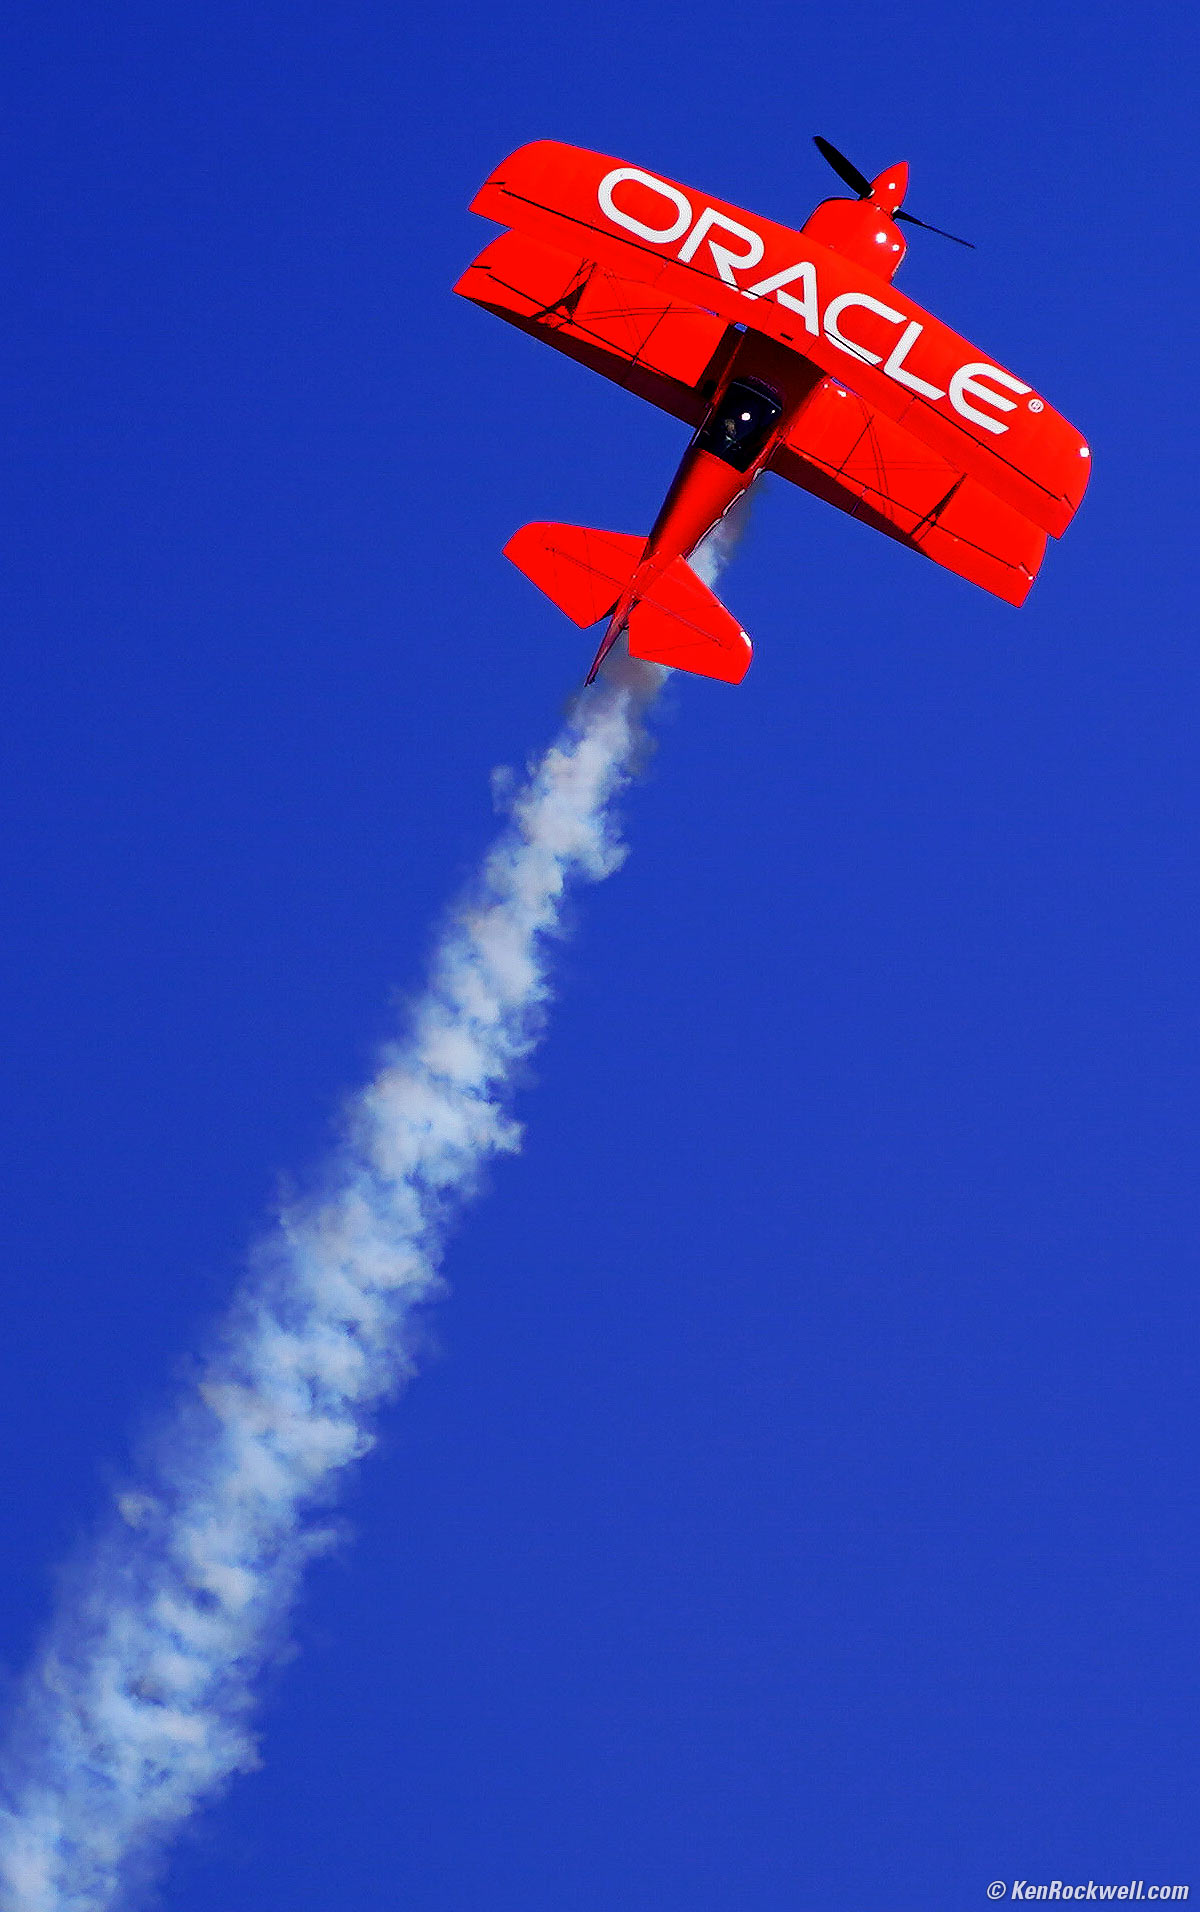
Red Biplane against Blue Sky with Smoke Trail, Miramar Air Show, 28 September 2018. Sony A9, Sony 400/2.8 on Wimberley WH-200, f/2.8 at 1/4,000 at ISO 100. bigger or full-resolution.
This guy was about a mile away! This Sony A9, Sony 400/2.8 and Wimberley WH-200 system is so sharp there's no problem cropping as needed at this distance.
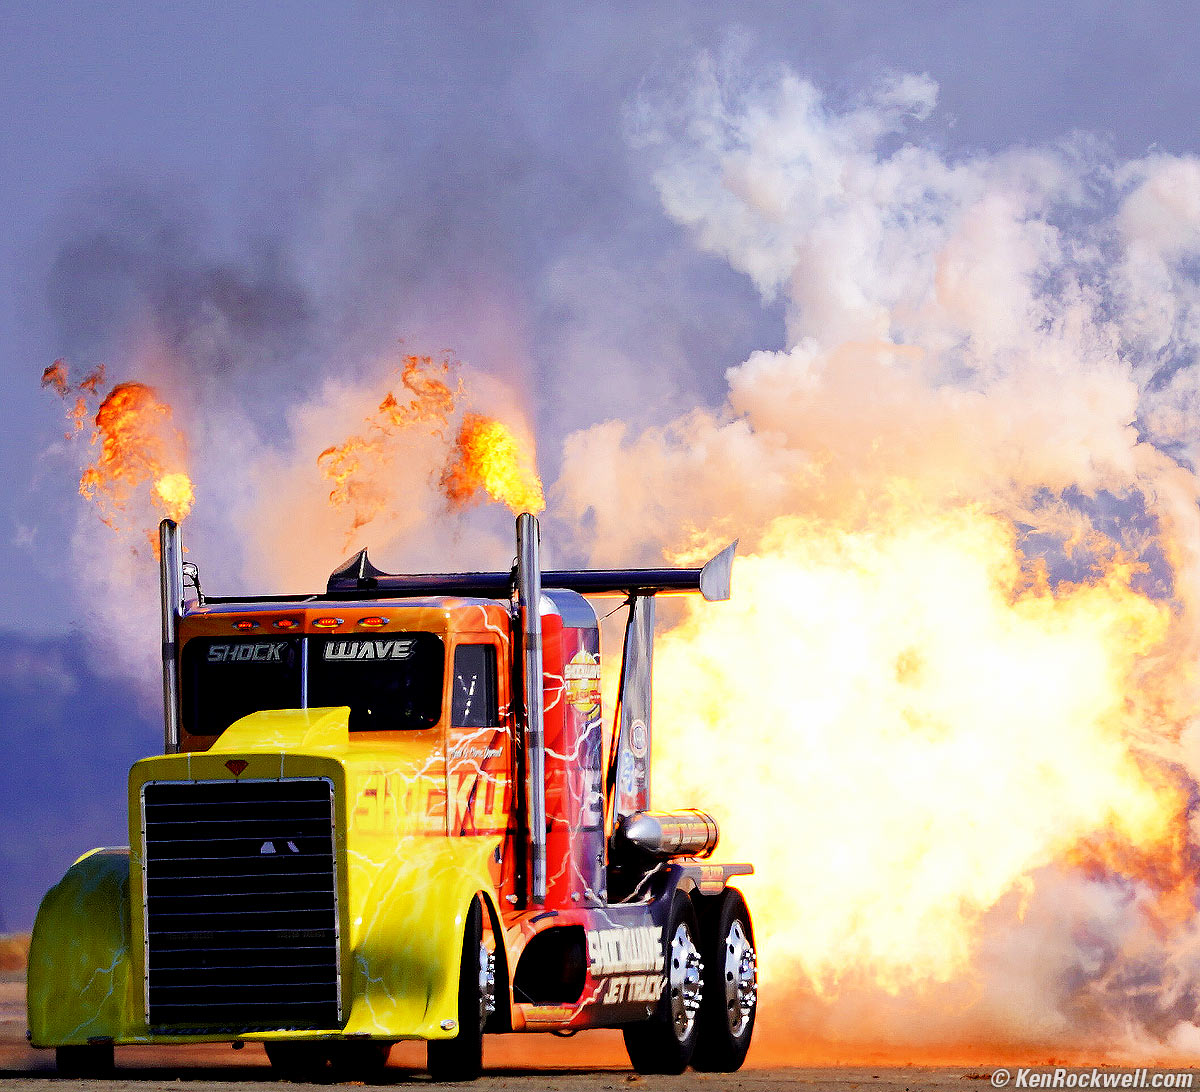
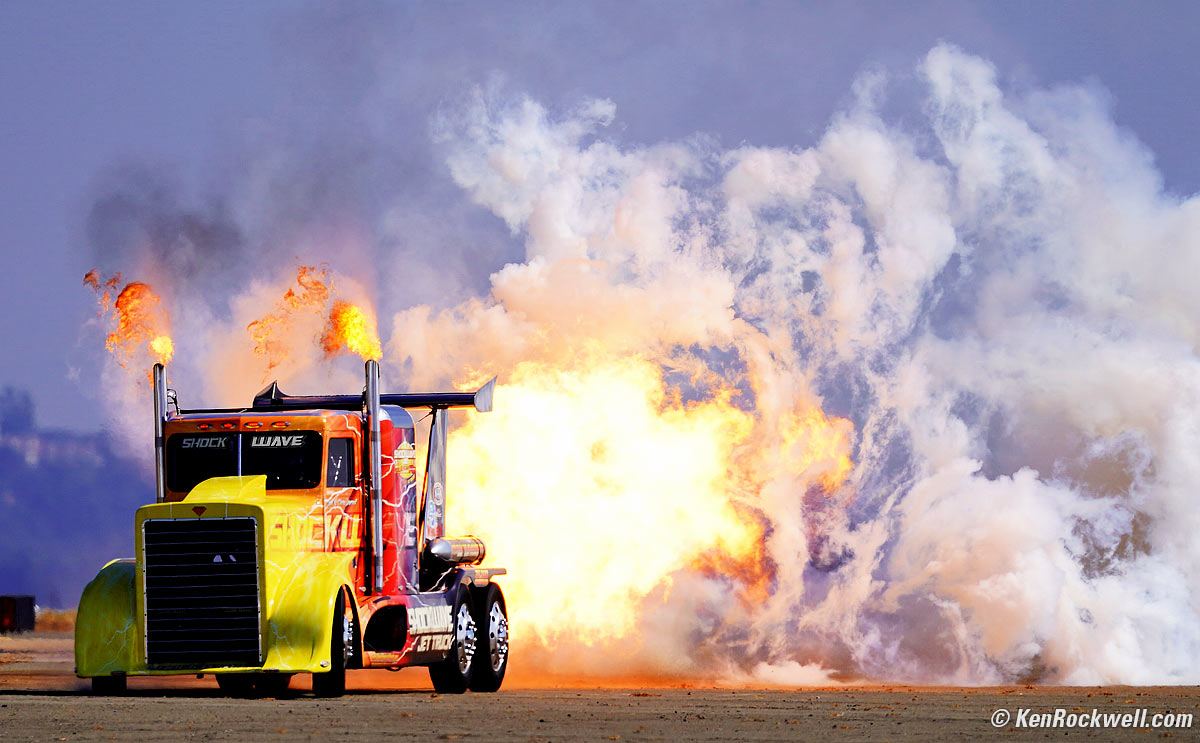
Shockwave Jet Truck, Miramar Air Show, 28 September 2018. Sony A9, Sony 400/2.8 on Wimberley WH-200, f/2.8 at 1/4,000 at ISO 100. bigger or wider.
This was a long way away and cropped. You couldn't shoot this on an iPhone because 1.) you'd be so close that you'd get sucked into the jet engine, and 2.) a closer point of view would have made the front of the truck huge and the flame tiny. By getting further away we change the relative rendering so that the truck's grille shrinks and the flames grow huge in the background.
How loud is this thing? I'm writing this two days later on Sunday from nine miles away, and I just heard it during today's show!
The sound of that jet-engined truck was so loud that one of my friend's dogs was traumatized for more than a week when he merely showed him this picture!
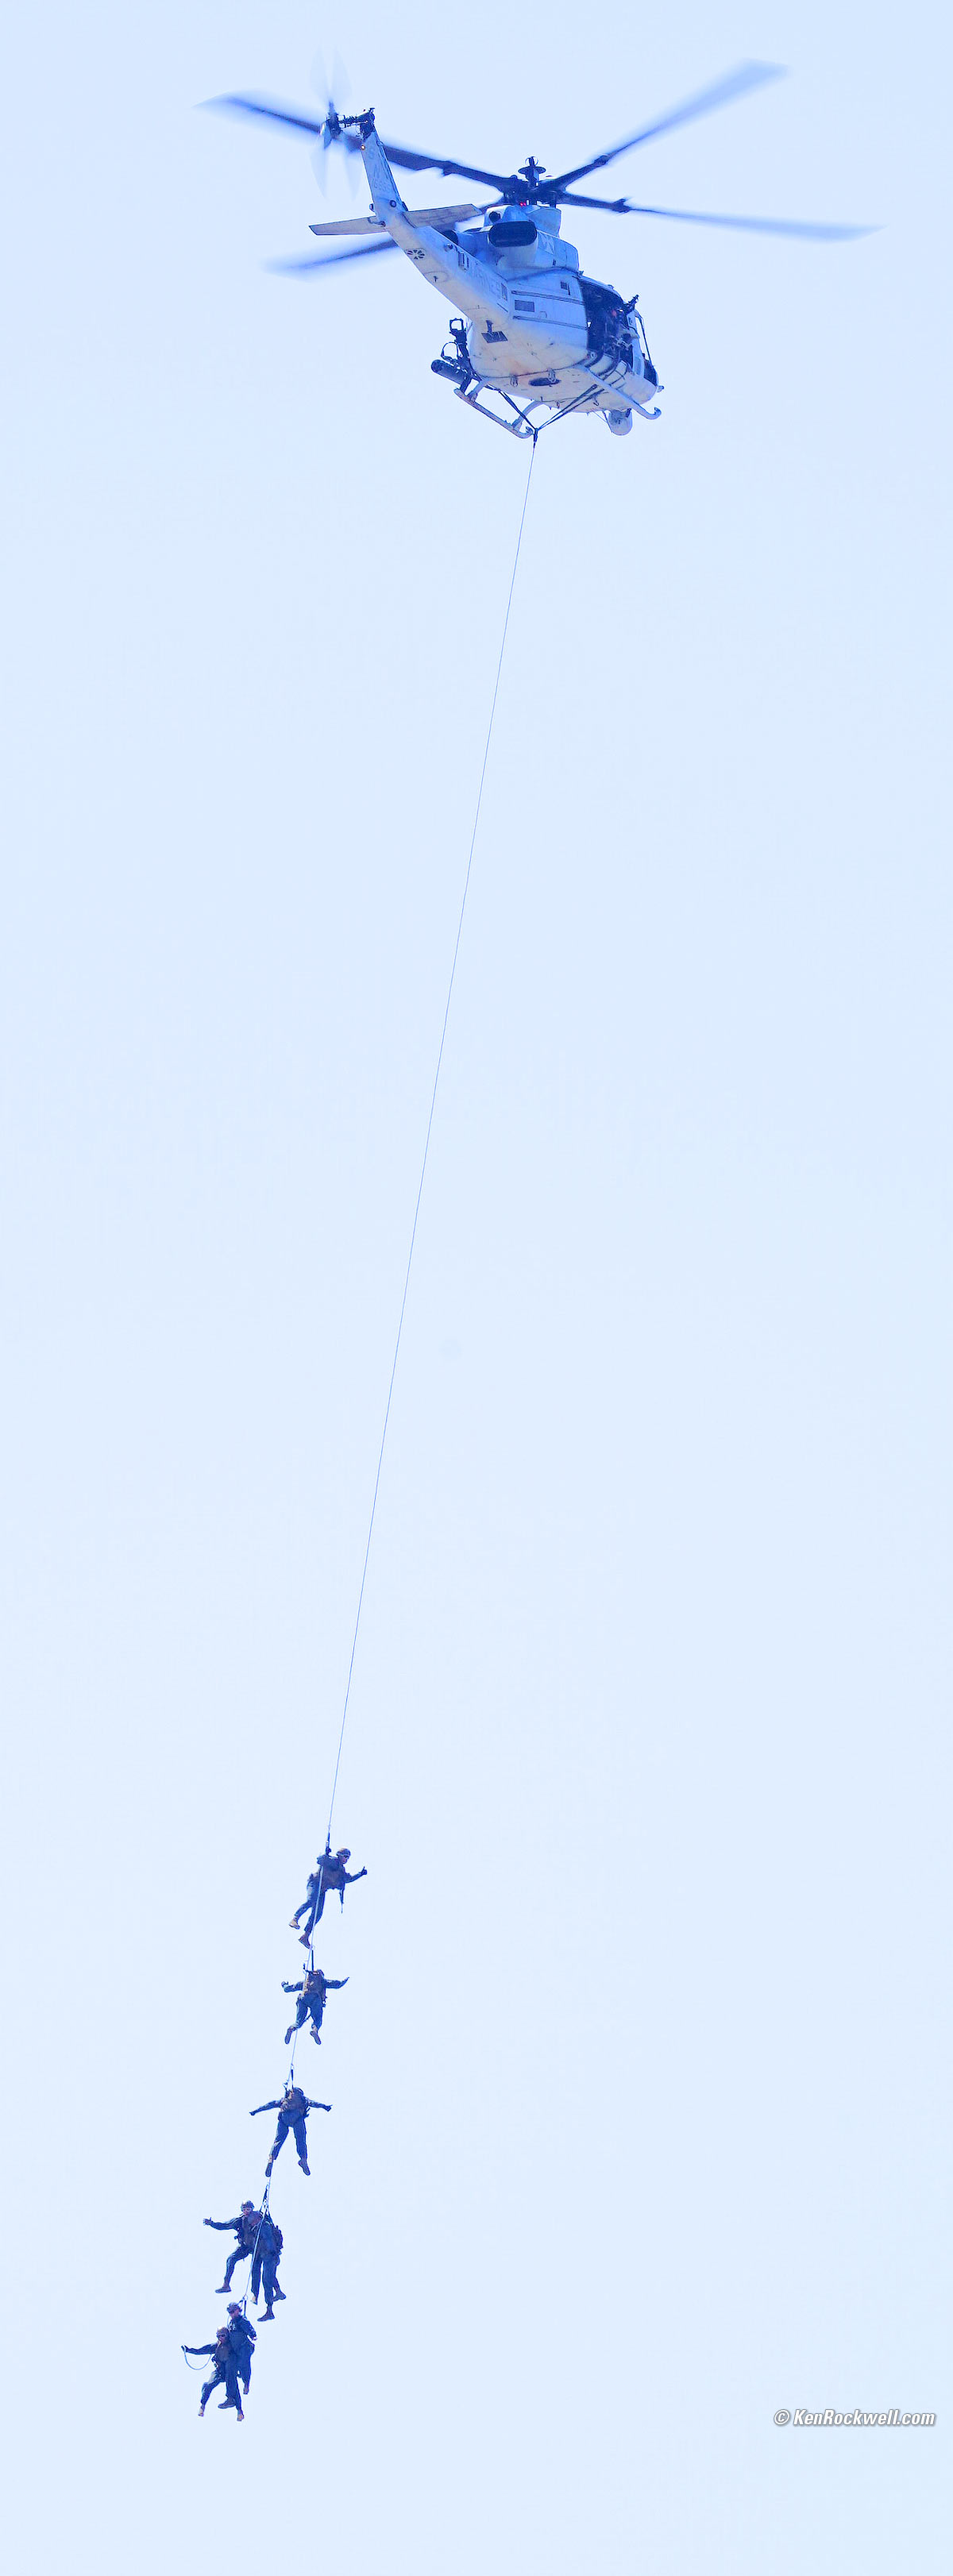
Marines dangling under a helicopter, Miramar Air Show, 28 September 2018. Sony A9, Sony 400/2.8 on Wimberley WH-200, f/2.8 at 1/2,500 at ISO 100. bigger.
With a 400mm lens I had to wait until these Marines were about a mile away until I could fit them all in one frame. They were about a thousand feet off the ground.
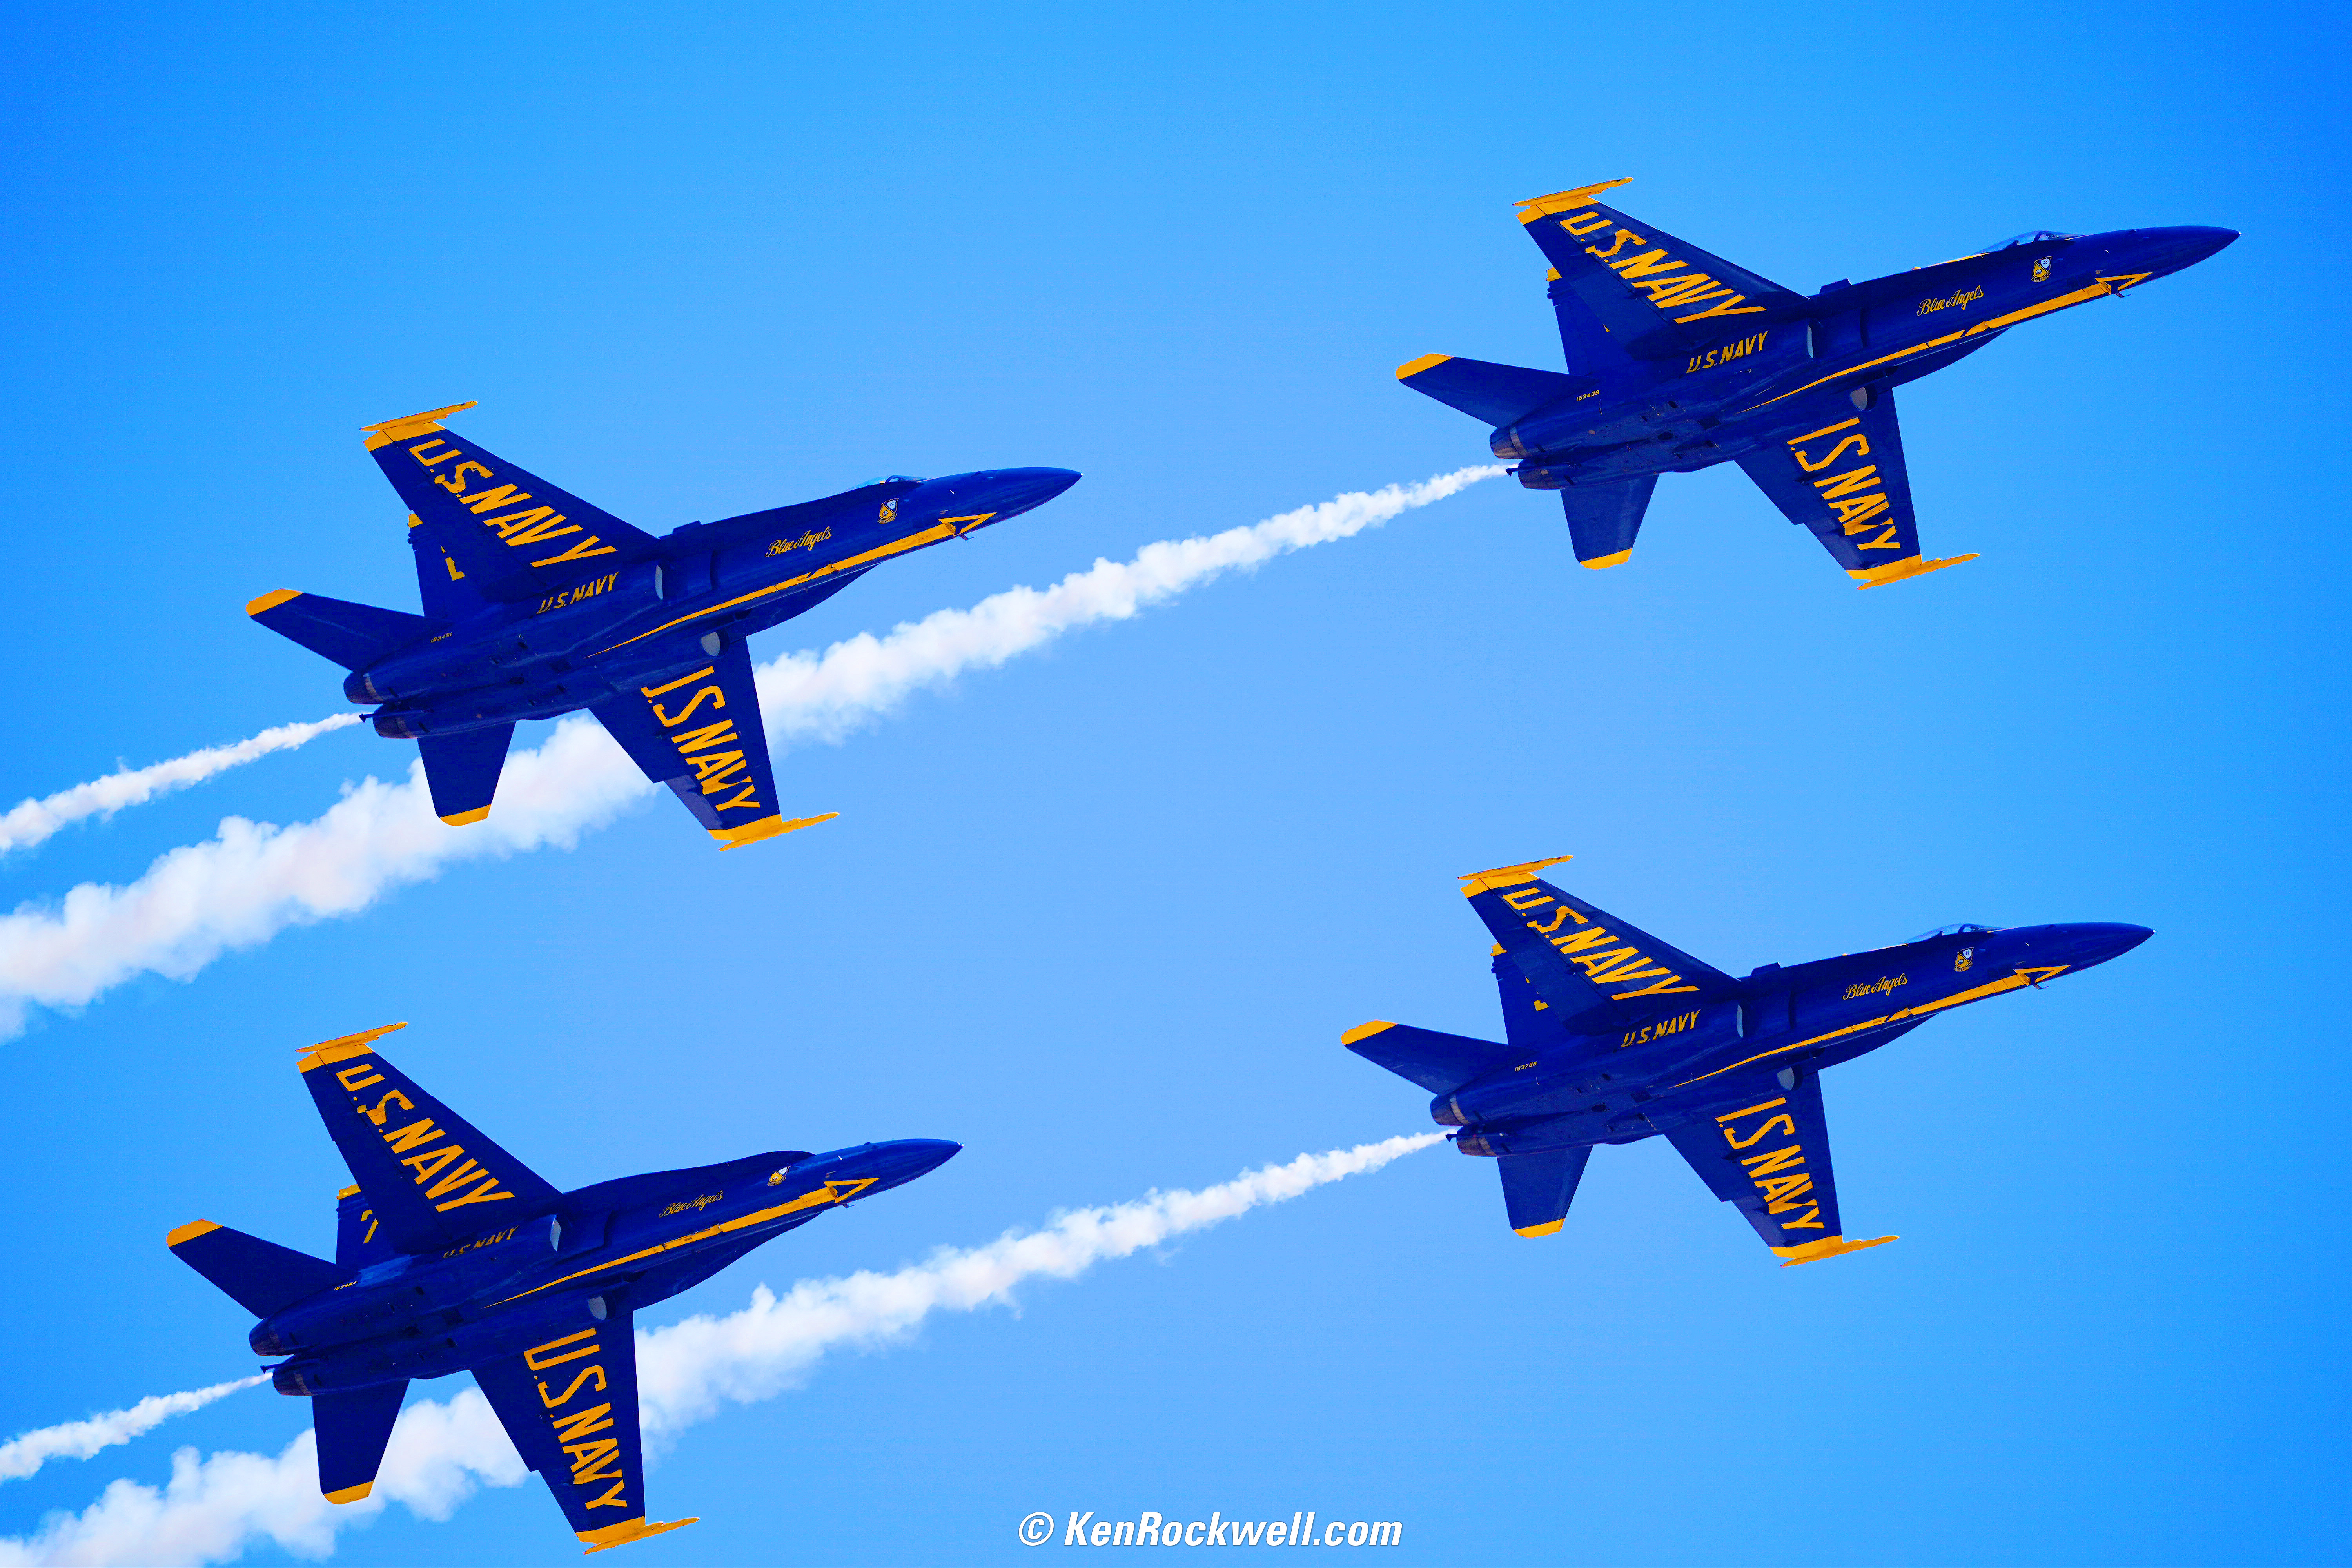
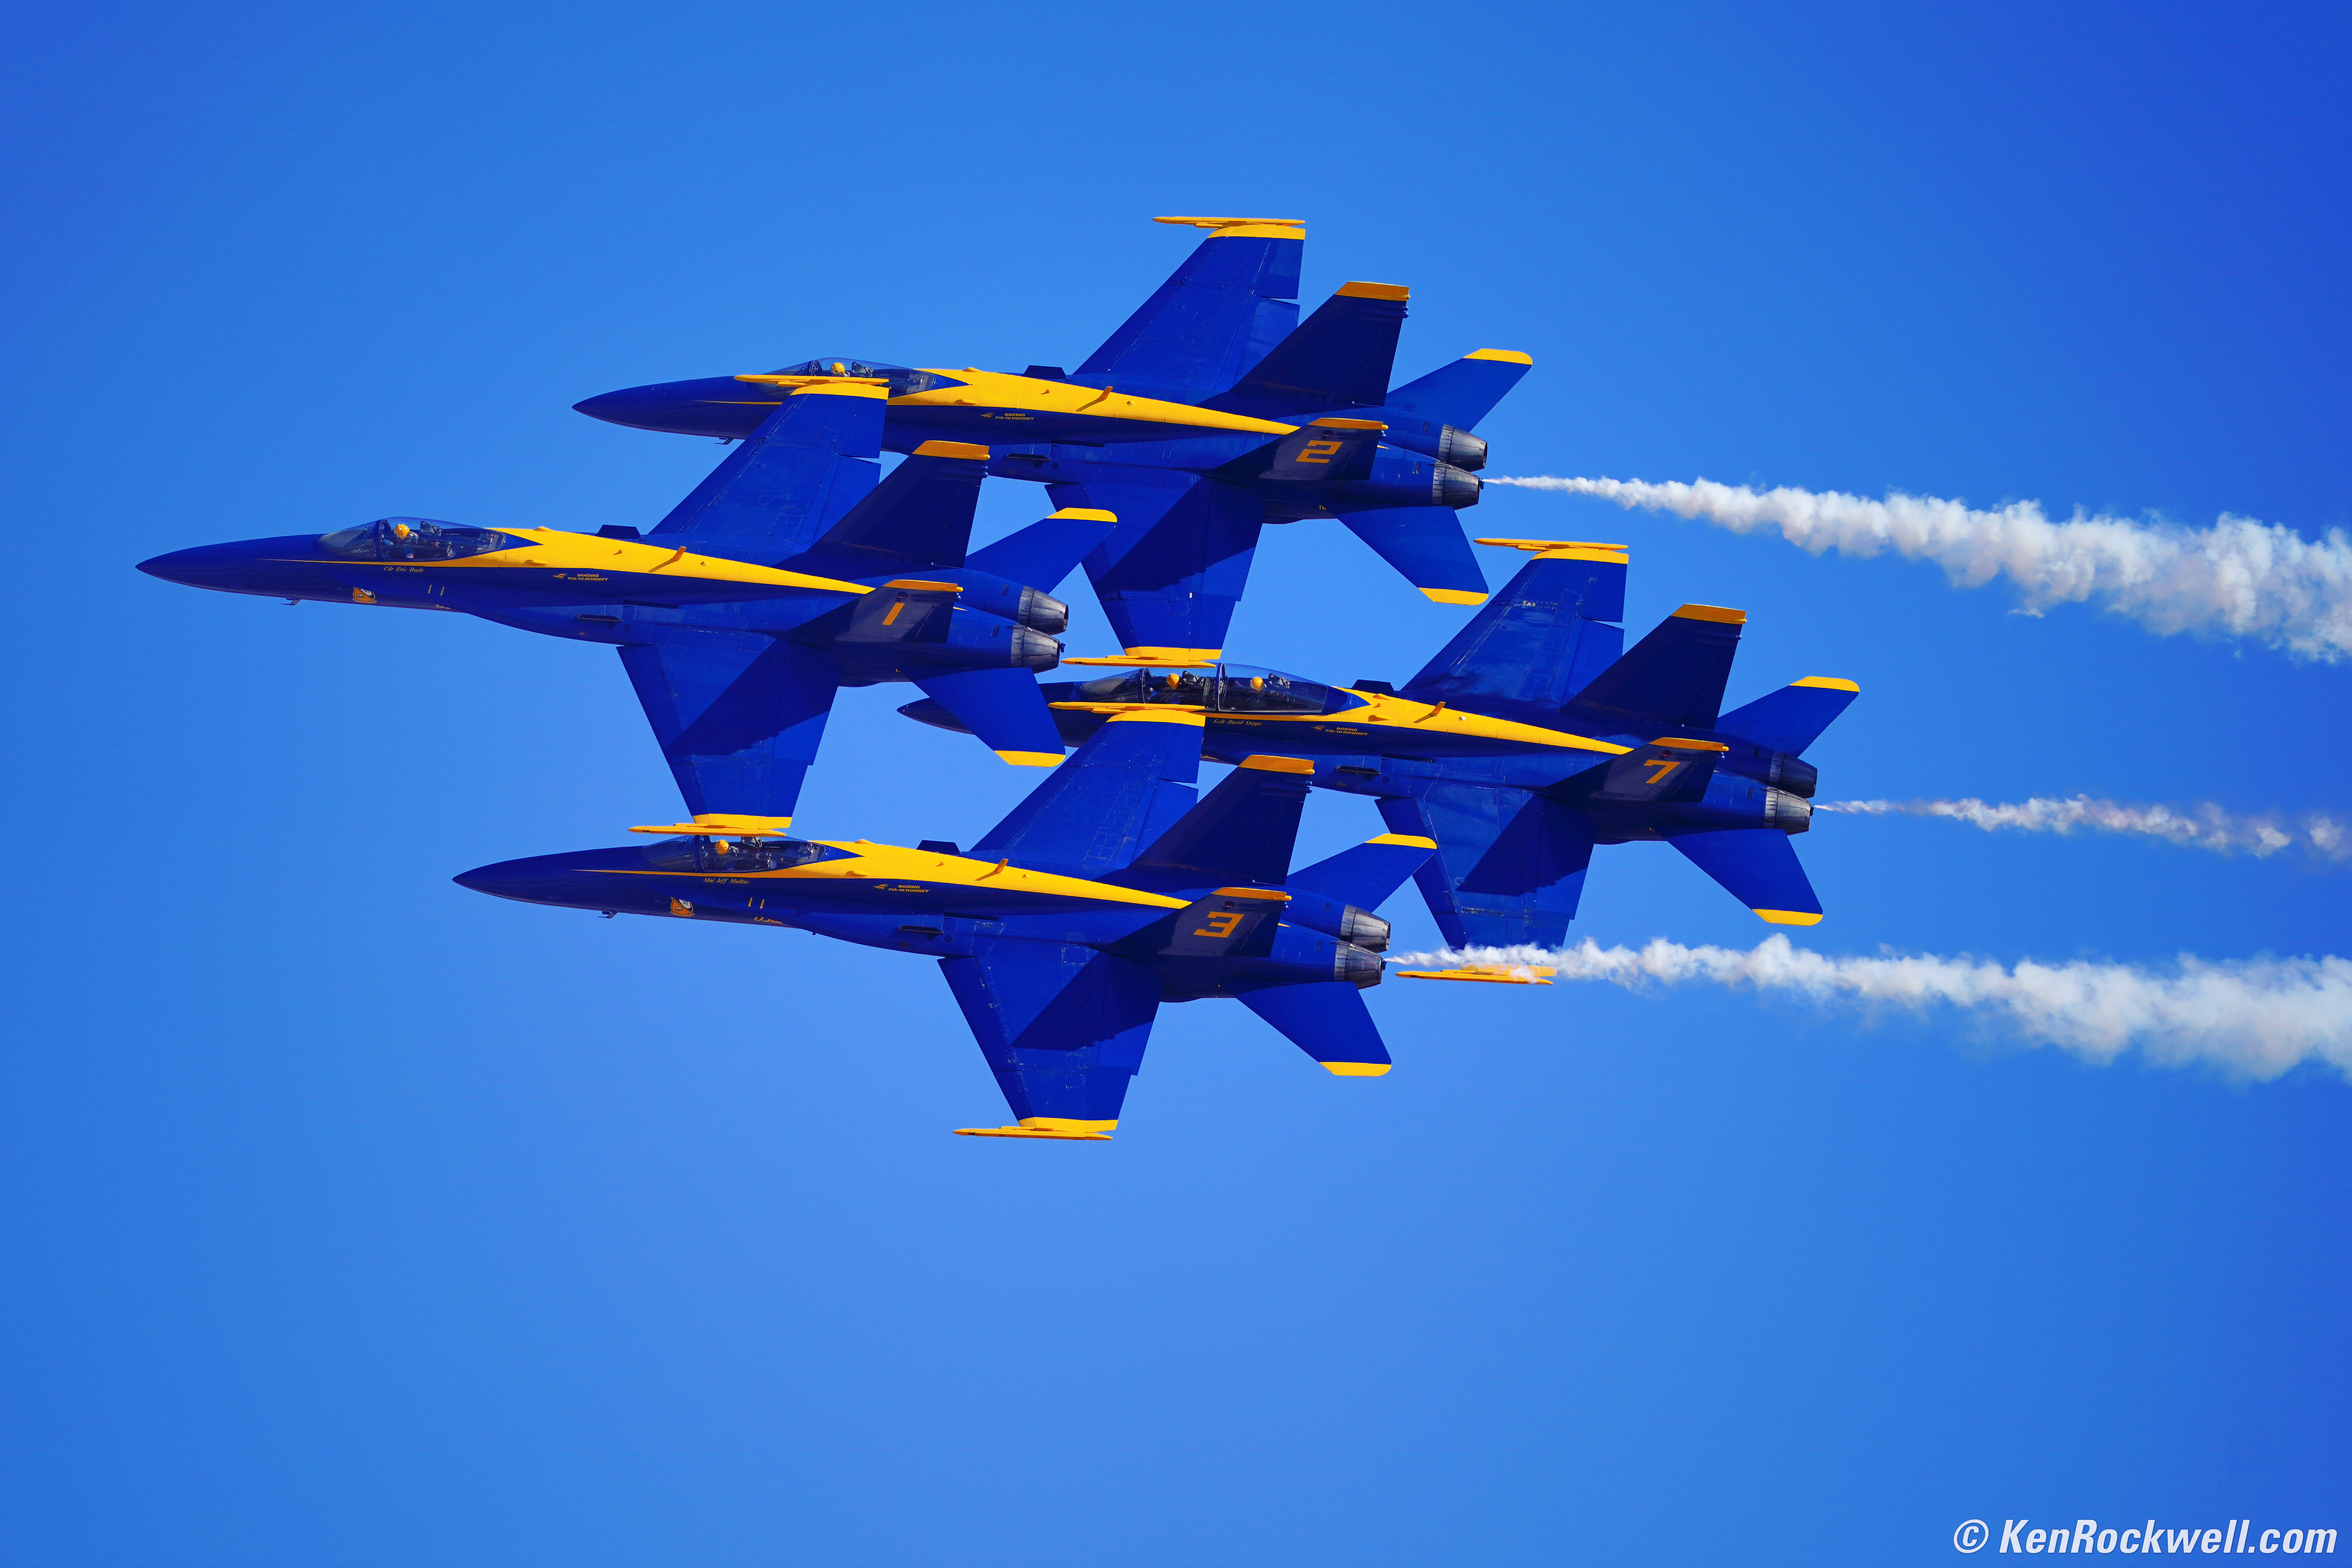
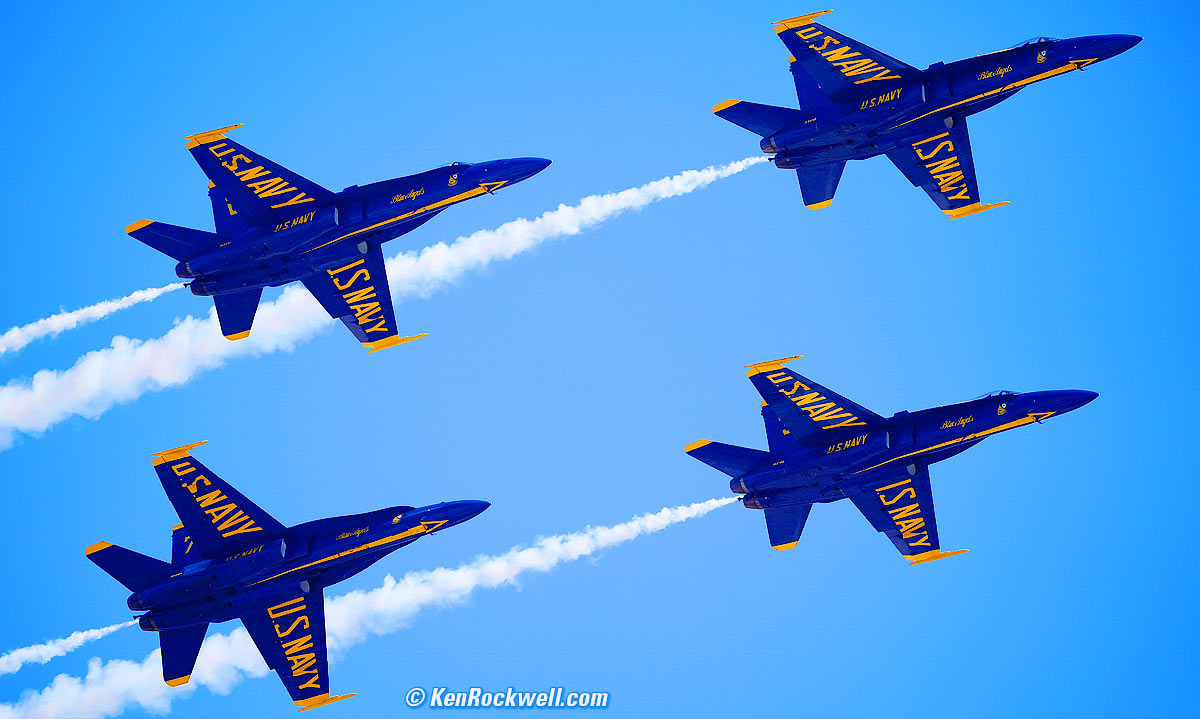
The Blue Angels, Miramar Air Show, 28 September 2018. Sony A9, Sony 400/2.8 on Wimberley WH-200, f/2.8 at 1/2,500 at ISO 100. bigger or full-resolution.
Standard shot, made trivially easy with the Wimberley WH-200 to hold my A9 and 400/2.8.
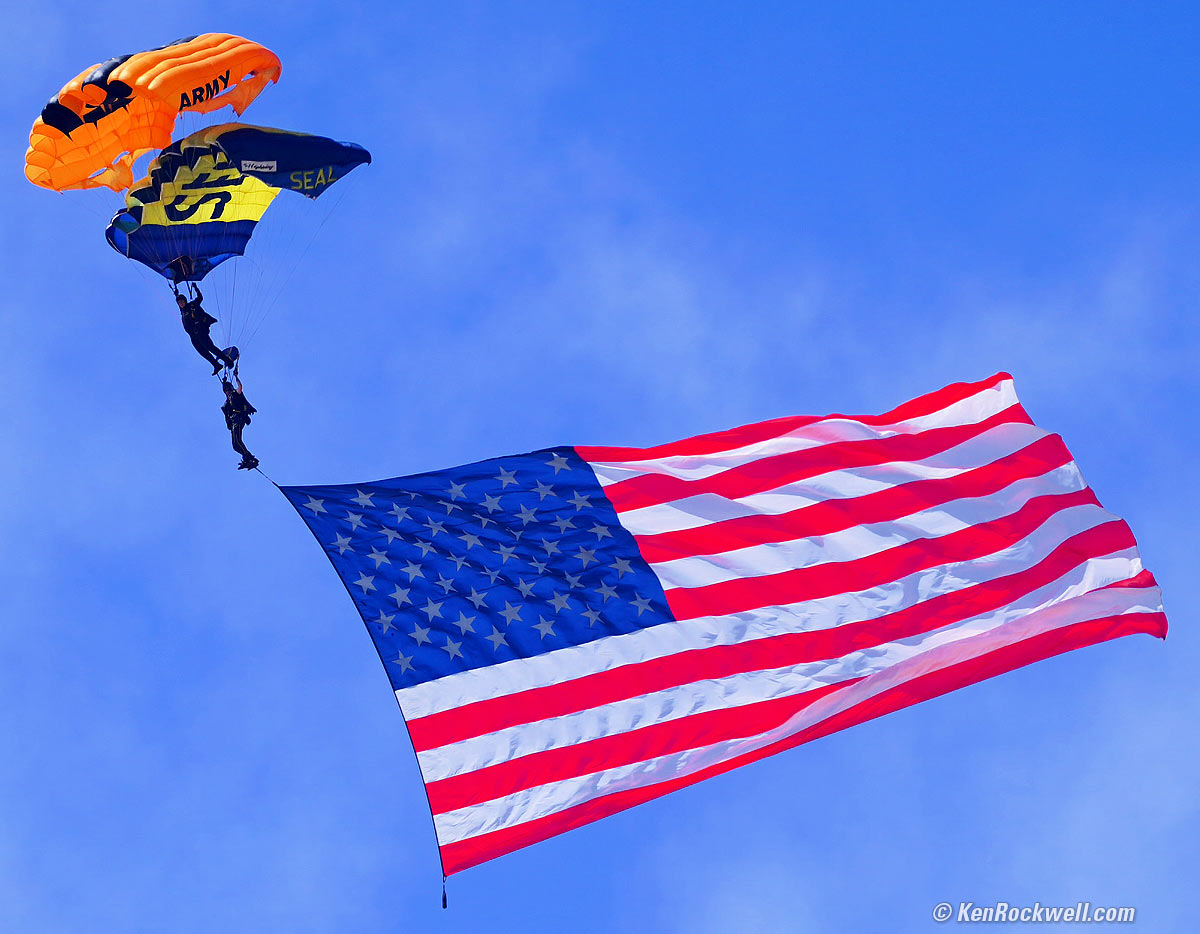
Flag and Paratroopers, Miramar Air Show, 28 September 2018. Sony A9, Sony 400/2.8 on Wimberley WH-200, f/2.8 at 1/4,000 at ISO 100. bigger.
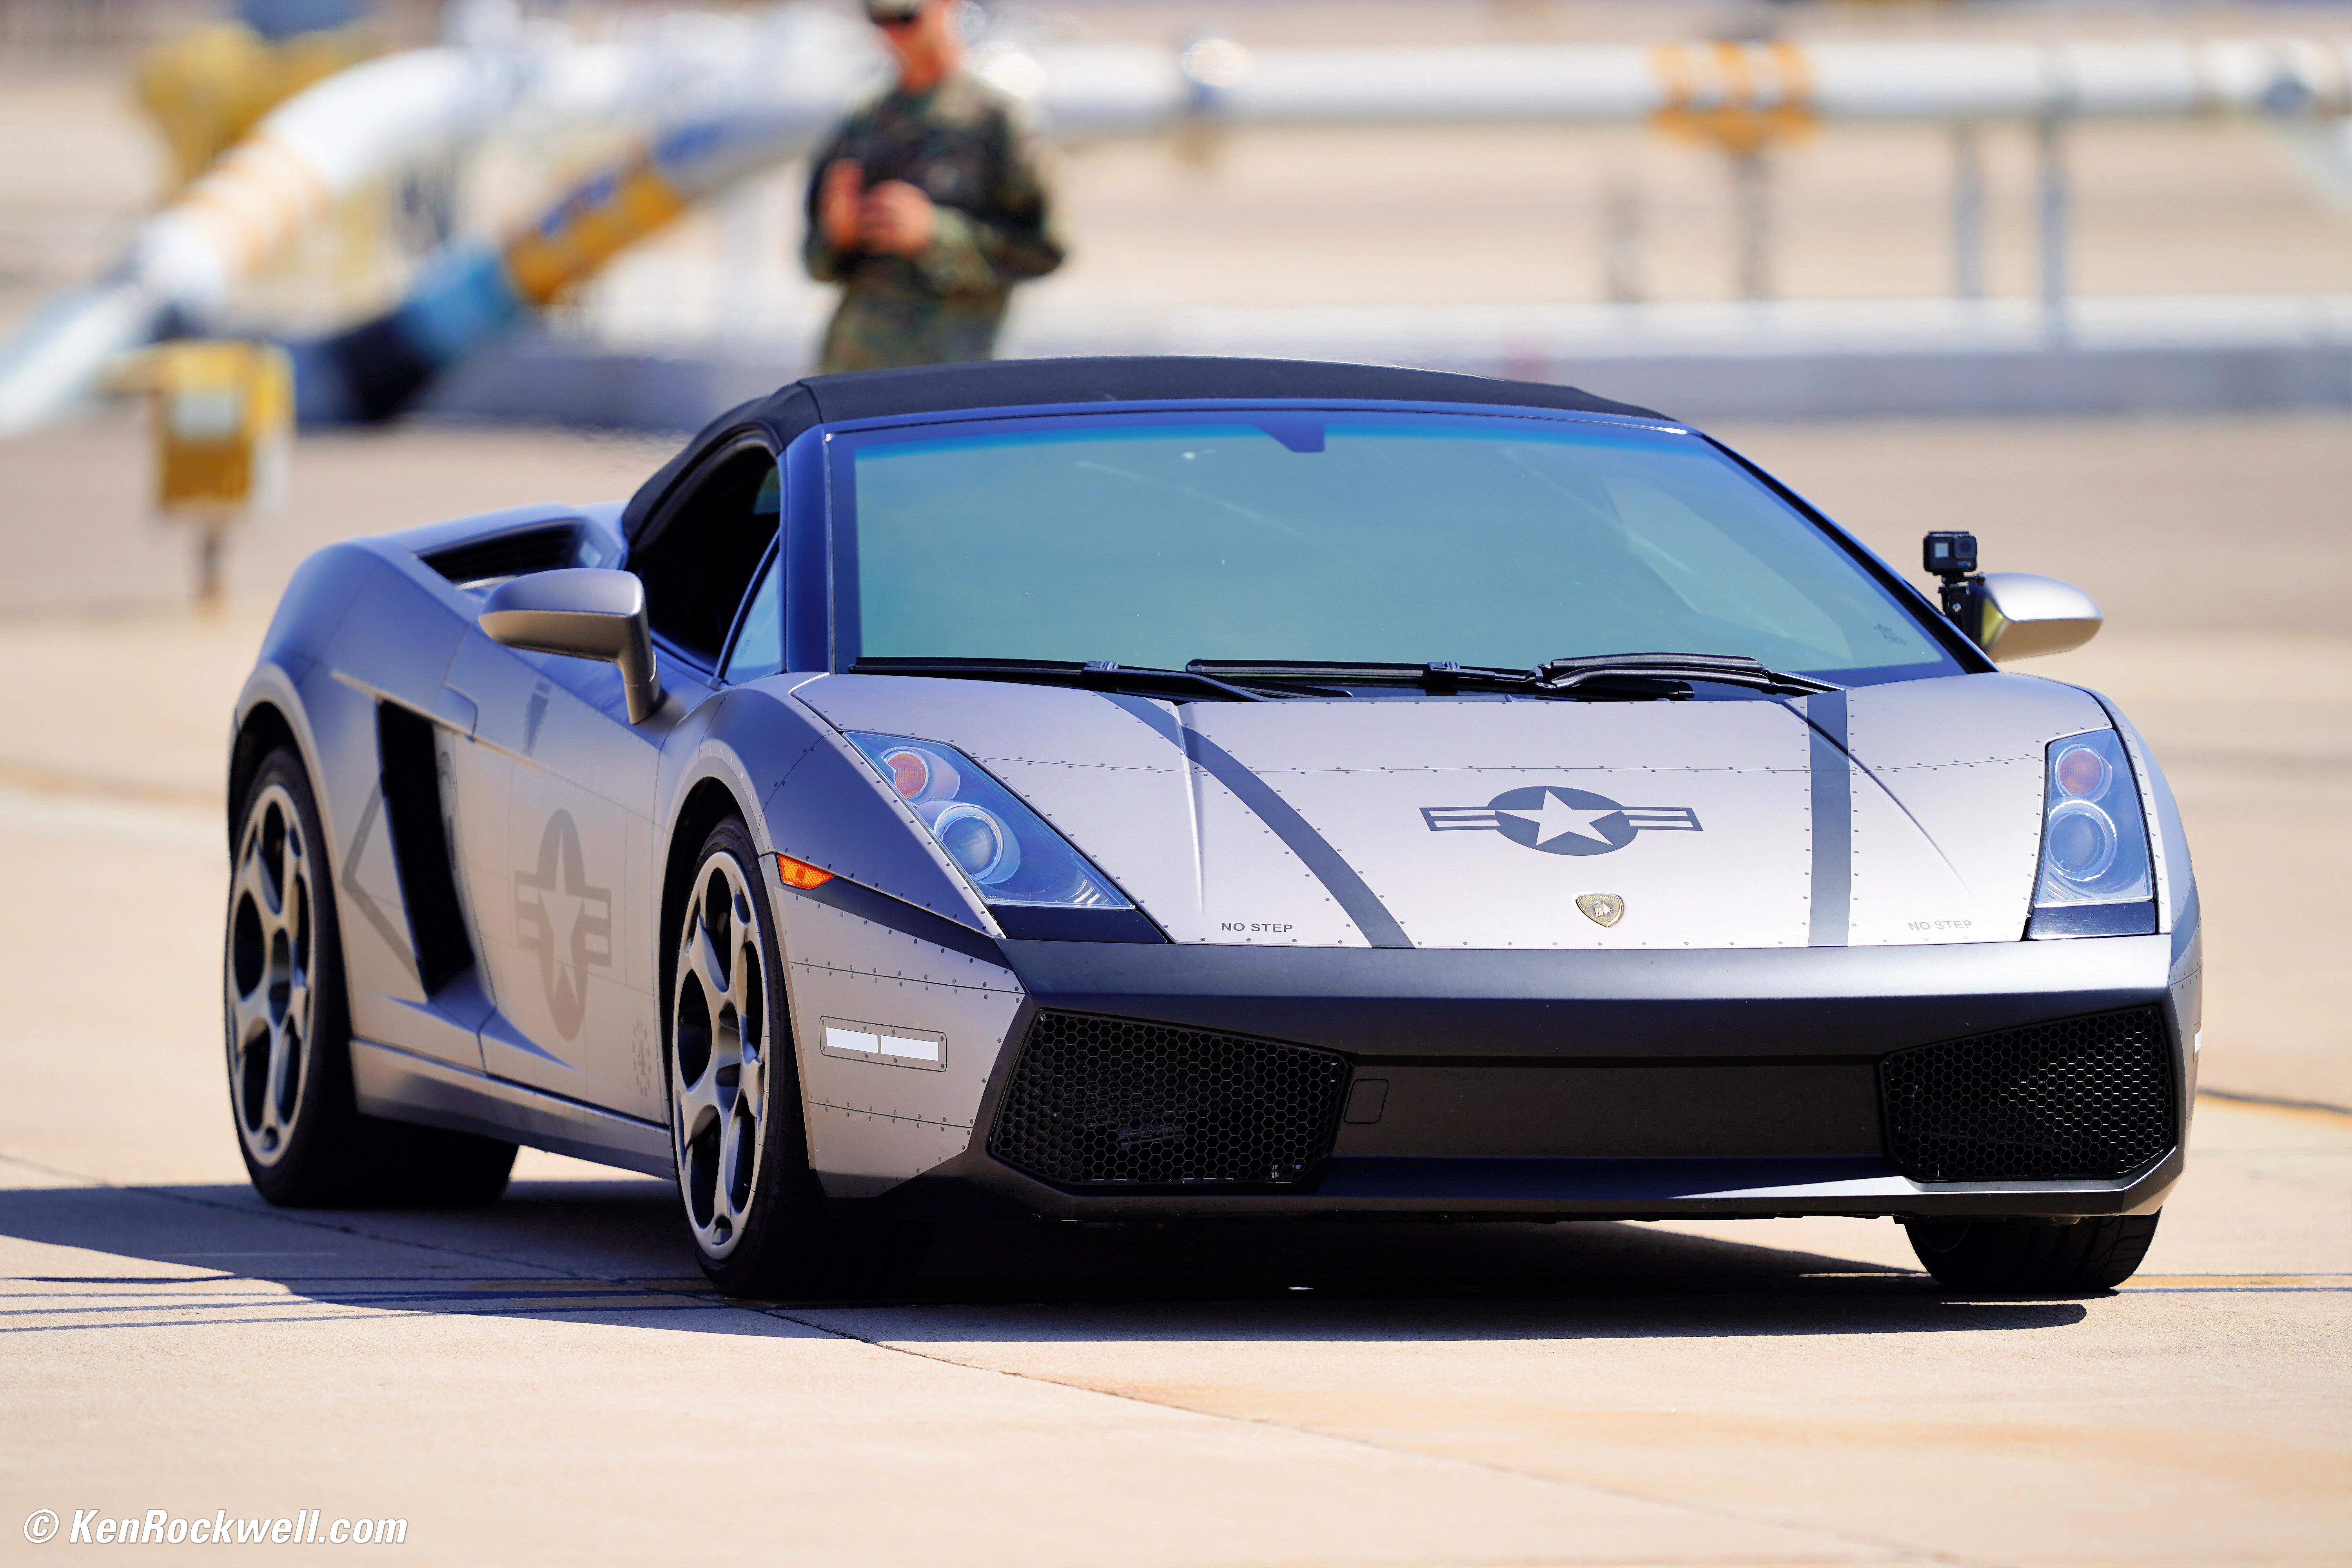
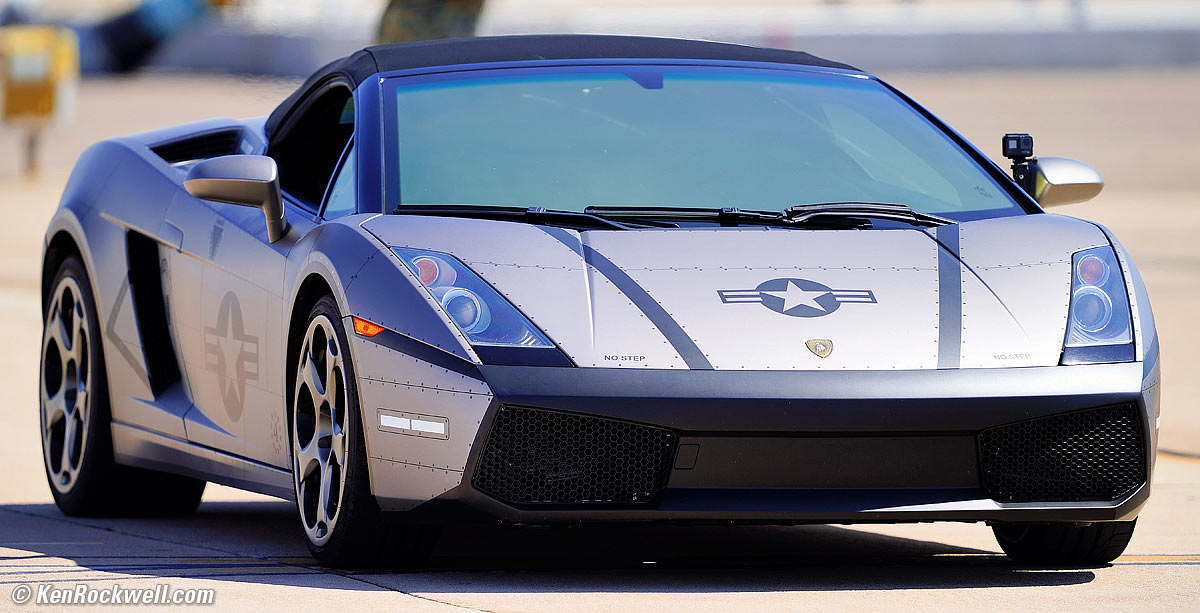
Flying Lamborghini, Miramar Air Show, 28 September 2018. Sony A9, Sony 400/2.8 on Wimberley WH-200, f/2.8 at 1/1,600 at ISO 100. bigger or full-resolution.
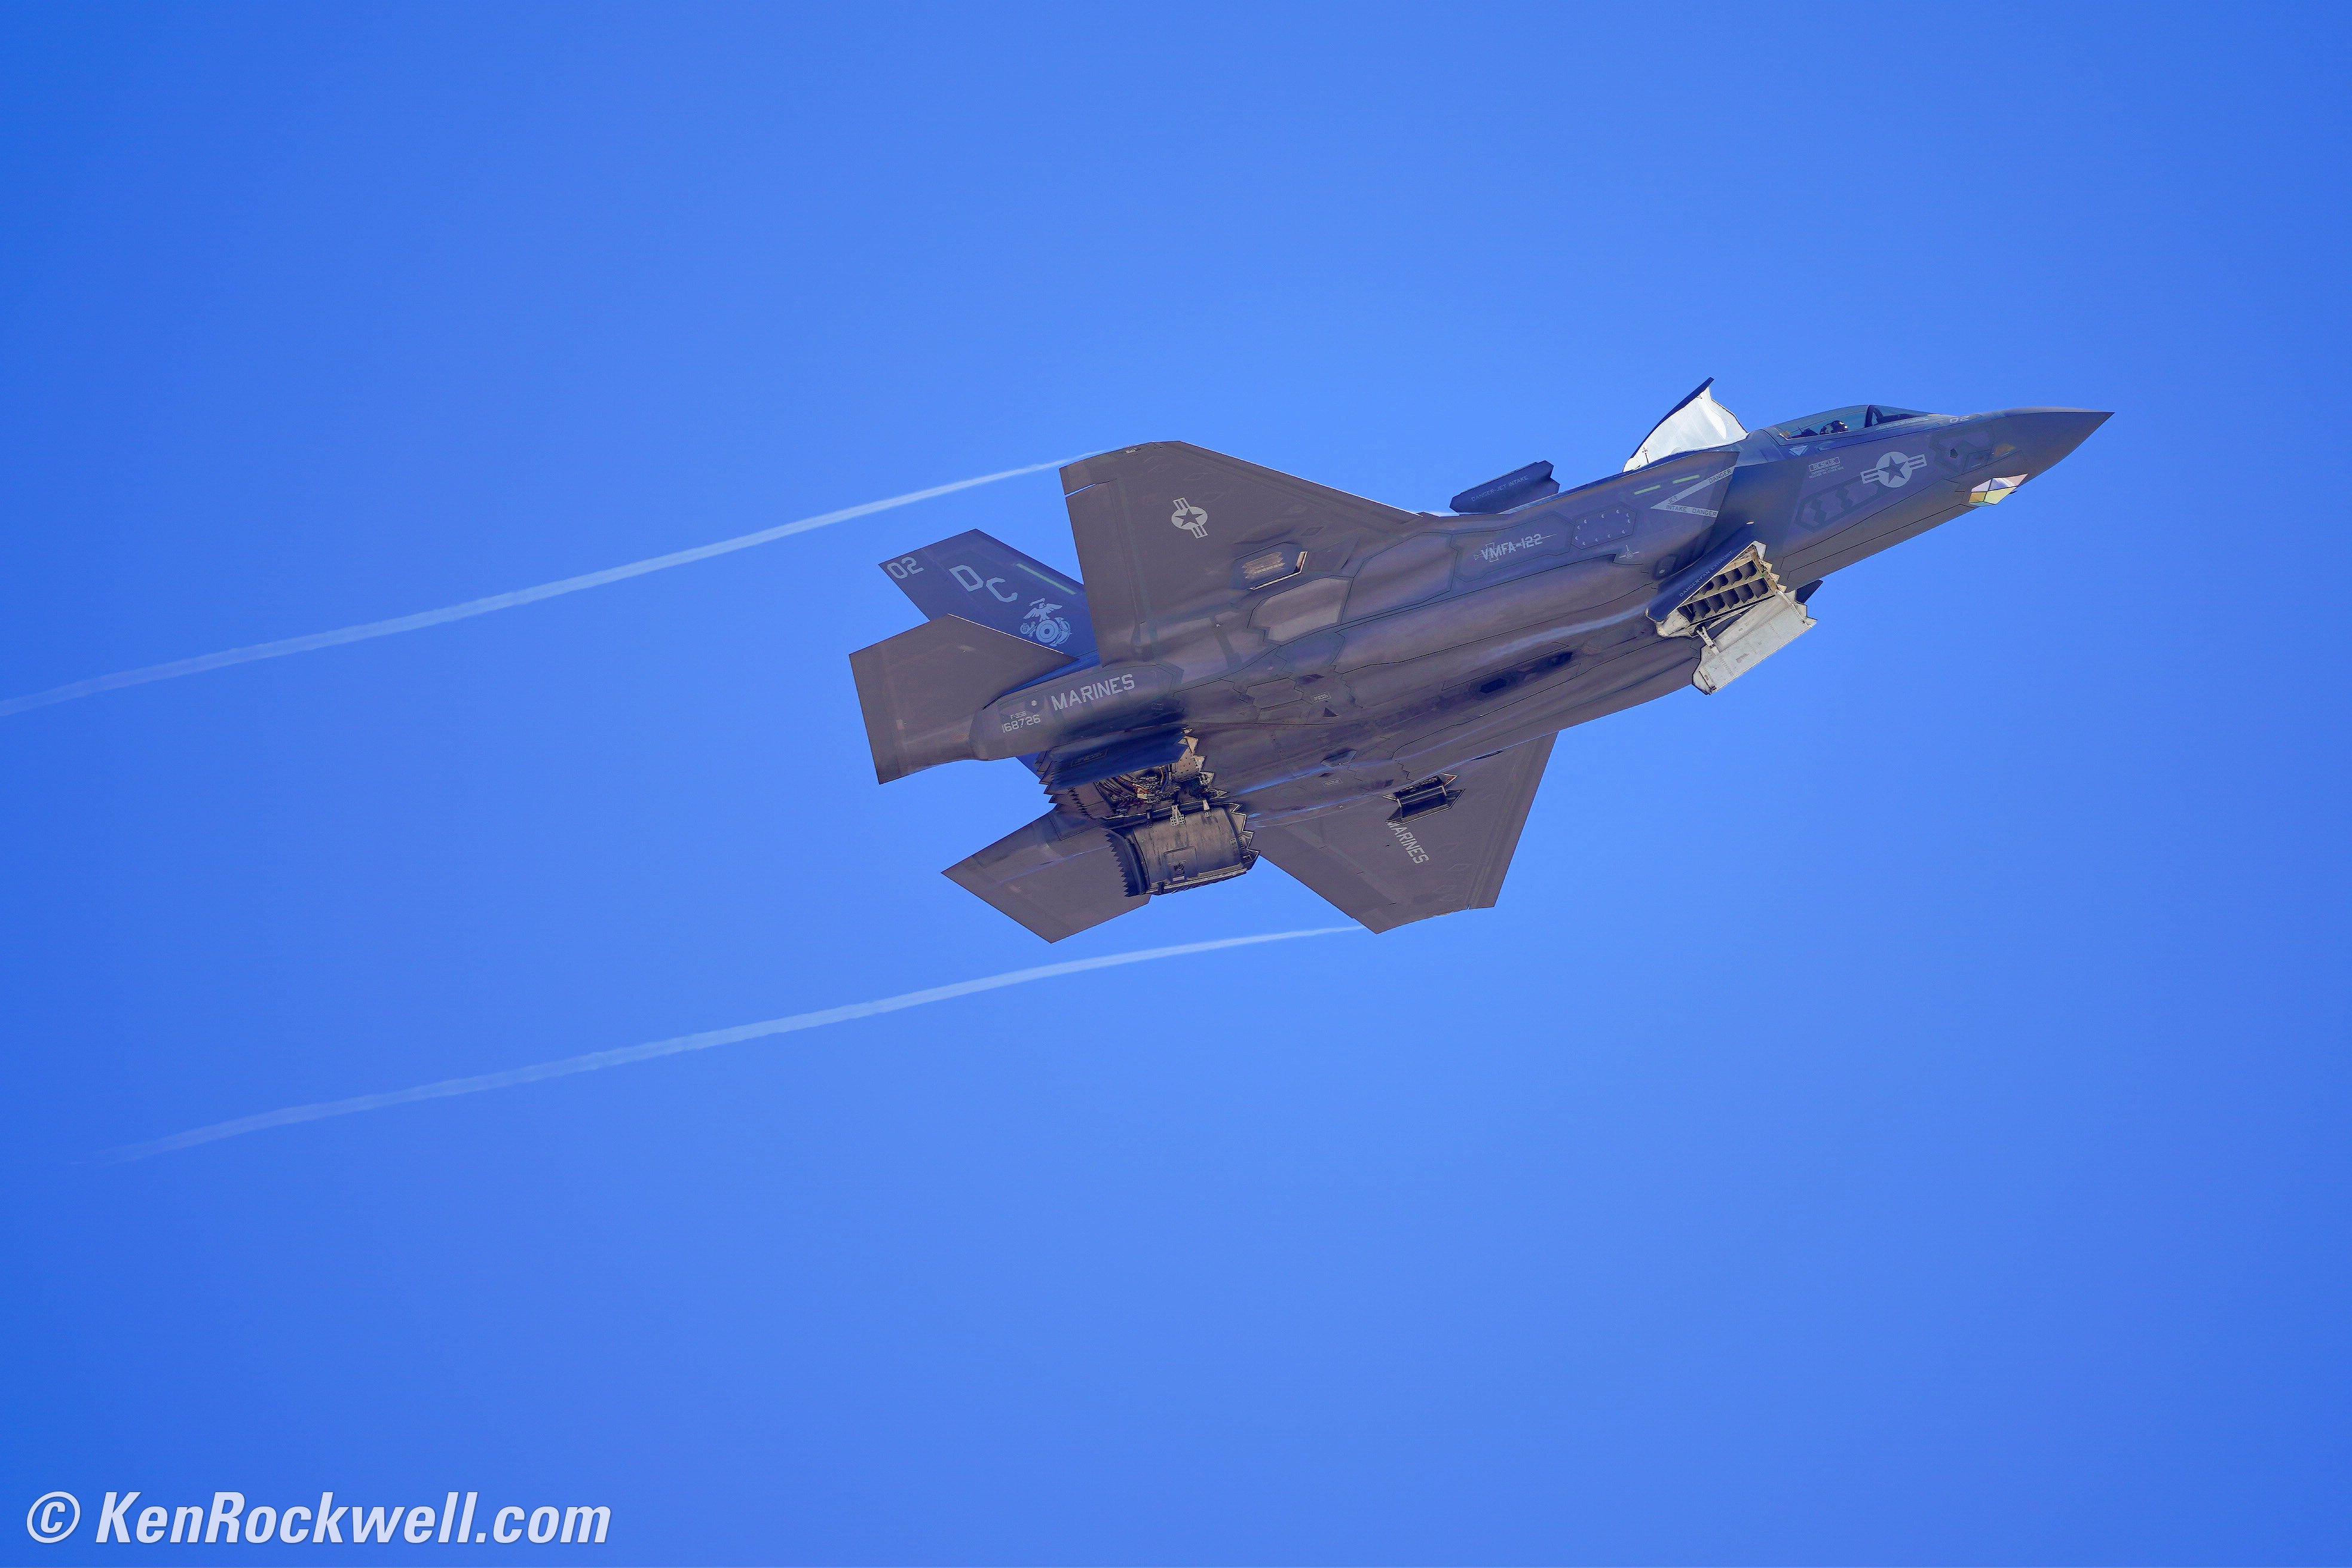
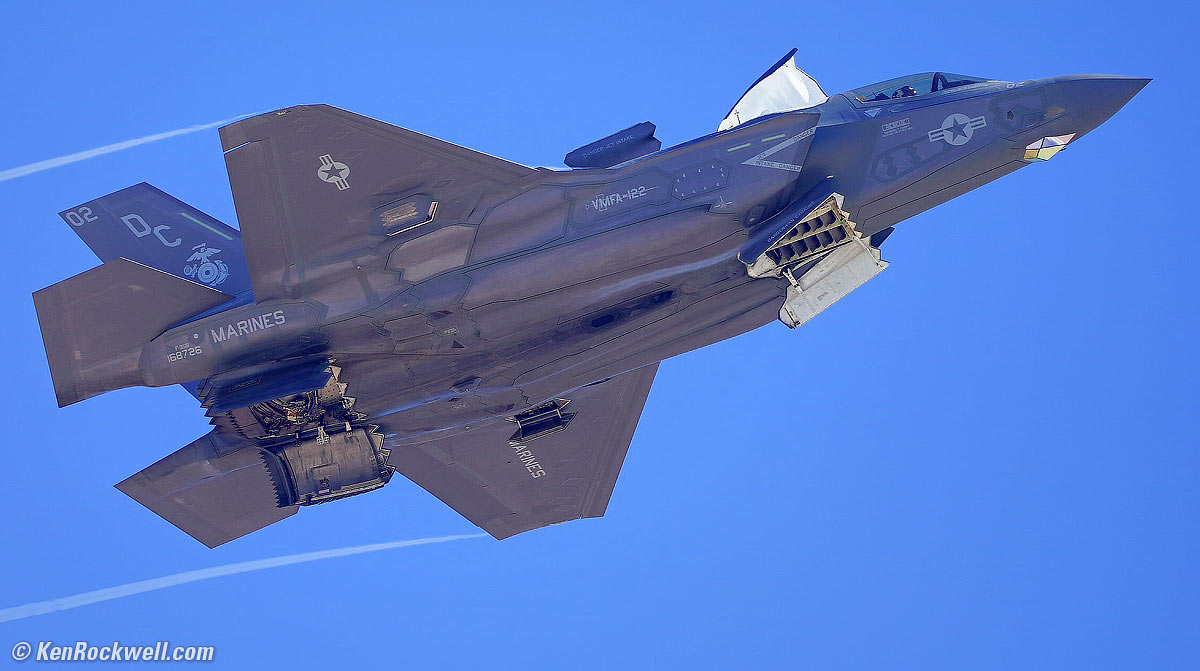
US Marines F-35B, Miramar Air Show, 28 September 2018. Sony A9, Sony 400/2.8 on Wimberley WH-200, f/2.8 at 1/1,600 at ISO 100. bigger or full-resolution.
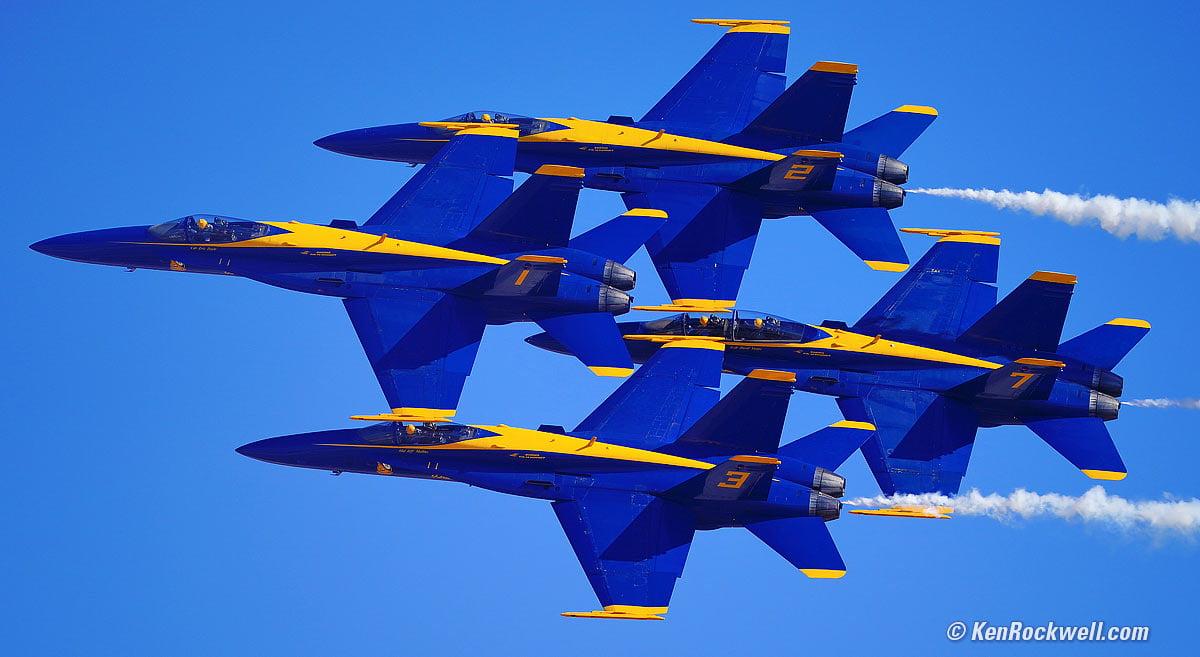
The Blue Angels, Miramar Air Show, 28 September 2018. Sony A9, Sony 400/2.8 on Wimberley WH-200, f/2.8 at 1/4,000 at ISO 100. bigger or full-resolution.
Introduction
Top Sample Shots Intro Cameras Lenses
Stabilization Filters Focus Settings Exposure
Falloff & Lens Corrections Camera Supports
JPG vs Raw Selecting & Editing More

I buy only from these approved sources. I can't vouch for ads below. |


I've been shooting airshows since I was a little kid. My mom became a pilot and flying instructrix ten years before I was born, so I've been around airplanes since back when this was difficult with film and manual focus. Today with digital, autofocus and mirrorless it's easy, so here we go.
Sharp photos of airplanes in flight need fast shutter speeds, low ISOs and fast, long lenses. The only reason to use speeds slower than 1/1,000 is if you want to show propellors or rotors in motion (more at shutter speeds).
Fast shutter speeds at low ISOs means wide apertures. Shoot your lenses wide-open, the same as we do when shooting from the air.
This means shooting your f/2.8 lenses at f/2.8 and your zooms at their maximum apertures. You don't need any depth-of-field when shooting this far away.
Too many people use ISOs above 100 or small apertures like f/11, and get blurry photos thanks to the combined effects of any or all of diffraction from small apertures, subject or camera motion amplified by long lenses or slower shutter speeds, and the blurring effects of noise reduction at ISOs above 100.
Yes, modern cameras look great at most ISOs, but for the very best professional results, shoot your lens wide-open at the lowest ISO you can. You don't need any depth-of-field when shooting things far away.
I shot 4,995 frames in a day at the Sample Images above with the Sony A9, 400/2.8 and Wimberley WH-200 system, and 4,650 of them are sharp, well-exposed and properly framed! The 345 frames I threw out either didn't have the airplane properly framed or something on the ground was in the way; with pro gear they were all in focus and well exposed.
This 100% all-content website's biggest source of support is when you use any of these links to approved sources when you get anything. If you find this as helpful as a book you'd have to buy, consider helping me with a gift of $5.00.
Cameras
Top Sample Shots Intro Cameras Lenses
Stabilization Filters Focus Settings Exposure
Falloff & Lens Corrections Camera Supports
JPG vs Raw Selecting & Editing More
While an iPhone or point-and-shoot won't do much for you for photographing planes in the air, given the right lens any advanced camera is fine. "Run what you brung," as we say in racing.
I prefer full-frame mirrorless, while APS-C cameras let you get away with shorter lenses like 300mm.
I prefer mirrorless because:
1.) Mirrorless autofocuses over the entire frame, while full-frame DSLRs only focus near the center. For shots with a plane in the corner, you're dead with a DSLR.
2.) Mirrorless finder images never black-out, jump or blur as you shoot. All DSLRs black-out as every picture is taken, and at high speeds a DSLR finder image starts to smear vertically from a mirror flapping up and down at ten frames per second or more. Only the iPhone and Sony A9 are this good today, but all mirrorless will catch up soon.
3.) When you pan past the sun with a 400mm f/2.8 lens you won't go blind as you might with a DSLR. A 6" diameter front element concentrates all that light onto a spot smaller than a pencil eraser, and that light comes out the eyepiece in a DSLR — but not out of an electronic finder.
All cameras for the past 20 years have had great autofocus tracking for speeding planes against the sky at whatever frame rate they support.
High frame rates let us get off more shots from which we can cherry-pick later, so if budget is unlimited bring a 20 FPS Sony A9, 14 FPS Canon 1DX Mk II or 12 FPS Nikon D5, but even with thumb-wound manual-focus cameras you can get good shots if you have the right lens and press the shutter at the right time. Shooting with the A9 lets me get lazier and pick out the best shots later, while with a thumb-wound film camera in the old days I just waited until the moment was right.
I'm crazy and always set my cameras to their VIVID modes and maximum saturation even for normal land-based subjects. Haze is usually a problem in aerial photography, so using your camera's VIVID mode and upping the saturation are usually good ideas even for normal people for airshows. The increased color saturation and vividness helps compensate for the dulling effects of haze, even if you're not as nuts as I am about wild colors. All the shots above are made with these settings. I wouldn't increase the contrast setting, as we often have large brightness variations between the sky and the bottom of the planes.
This 100% all-content website's biggest source of support is when you use any of these links to approved sources when you get anything. If you find this as helpful as a book you'd have to buy, consider helping me with a gift of $5.00.
Lenses
Top Sample Shots Intro Cameras Lenses
Stabilization Filters Focus Settings Exposure
Falloff & Lens Corrections Camera Supports
JPG vs Raw Selecting & Editing More
Airshows, or at least photographing airplanes in flight from the ground, demand a long lens, ideally 400mm for most airshows on full-frame or 300mm on APS-C. For most people a 100-400mm lens is ideal, while I prefer a faster, fixed ultra-telephoto so I can shoot at ISO 100 and still have super-fast shutter speeds.
Most of us already own, or should own, a 80-400mm or 100-400mm lens, so use that. If you have a 70-300mm, use that. While not quite as long as you'd like, the Canon 70-300 IS USM II and Nikon 70-300 AFP are excellent and inexpensive.
I'm not a fan of teleconverters. You could use one on a 70-200/2.8, but the results are often frustrating: a 1.4x converter on an f/2.8 lens doesn't do much, and a 2x converter on an f/2.8 lens slows down autofocus and has poor tracking ability. Don't use a teleconverter on a zoom that goes to f/5.6 as 70-300, 80-400 and 100-400 lenses do. The teleconverter will make the combination too slow for your camera to focus well.
Please get at least a modern 80-400mm or 100-400mm lens. The Tamron 100-400 is excellent at a reasonable price.
Avoid mirror lenses and manual-focus lenses; they are more frustration than they are worth when you actually get them out to the airport. Manual focus is too tedious and they are too slow, like f/8. I've gotten good pictures with them on rare occasion, but only with much practice, skill and chance. If you're reading this article, you'll be getting more fuzzy pictures than sharp ones with a manual or mirror lens.
A fast, fixed 400mm f/2.8 lens is ideal for an air show. It's fast enough to catch everything at ISO 100, and the perfect focal length most of the time. With a 80-400mm or 100-400mm I'd have to shoot at ISO 400 at f/5.6 for the same shutter speed, if I have sunlight as I do at Miramar in San Diego, California. If I'm at Paris or Berlin where the sun rarely shines, an f/2.8 400mm lens becomes more important.
Ideally use the Wimberley head and a lens with 90º tripod-collar clicks so your images will always be perfectly level.
I'd use a slower 80-400mm or 100-400mm lens over a fast 70-200/2.8. 200mm isn't what you need. Just use a higher ISO and you'll be fine with the slower 400mm lens.
The Sony 400/2.8 I used above, like all $12,000 400/2.8s, is ultrasharp, especially at f/2.8. f/2.8 lets me shoot at super-fast shutter speeds at ISO 100 for ultrasharp results. This is why we pay $12,000 for it: so we can shoot it at f/2.8 and it's always ultra-sharp. If you're going to shoot it at f/5.6, you may as well use a 80-400mm or 100-400mm instead. Paying $12,000 for a 400/2.8 is like paying $120,000 for a 500 horsepower car: if you're not going to drive it fast and use those 500 ponies or shoot your lens at 2.8 where it roars, then you're wasting your money.
This 100% all-content website's biggest source of support is when you use any of these links to approved sources when you get anything. If you find this as helpful as a book you'd have to buy, consider helping me with a gift of $5.00.
Image Stabilization
Top Sample Shots Intro Cameras Lenses
Stabilization Filters Focus Settings Exposure
Falloff & Lens Corrections Camera Supports
JPG vs Raw Selecting & Editing More
Image Stabilization is to help reduce hand-held shaking. It doesn't do much to help you get sharper photos of speeding planes.
I always leave it ON and usually set it to the mode for panning if I have it, but I wouldn't worry if a lens doesn't have it — although all the good lenses do have it today.
Filters
Top Sample Shots Intro Cameras Lenses
Stabilization Filters Focus Settings Exposure
Falloff & Lens Corrections Camera Supports
JPG vs Raw Selecting & Editing More
I don't use any filters other than clear protective filters.
Even if you love polarizers, you'll have to change the filter's orientation as you pan across the sky. Polarizers rob two stops of light, turning your $12,000 400mm f/2.8 into a $1,200 400mm f/5.6.
Focus Settings
Top Sample Shots Intro Cameras Lenses
Stabilization Filters Focus Settings Exposure
Falloff & Lens Corrections Camera Supports
JPG vs Raw Selecting & Editing More
Use your AF-C, continuous or SERVO autofocus mode, and set your camera to select automatically among all of its AF sensors. Photographing planes against a blank sky is easy for any camera to select AF areas and track; Nikon's F5 did great with this even on film as far back as 1996. Modern mirrorless cameras now can track objects all over the entire frame out to the corners.
This 100% all-content website's biggest source of support is when you use any of these links to approved sources when you get anything. If you find this as helpful as a book you'd have to buy, consider helping me with a gift of $5.00.
Exposure Settings
Top Sample Shots Intro Cameras Lenses
Stabilization Filters Focus Settings Exposure
Falloff & Lens Corrections Camera Supports
JPG vs Raw Selecting & Editing More
I shoot in aperture-preferred mode and shoot at my largest aperture with AUTO ISO. This ensures I'm usually at ISO 100 unless it's getting dark, and I'm getting the fastest possible shutter speeds.
I'll set AUTO ISO to a lowest ISO of 100 and a minimum shutter speed of 1/500. This way it shoots at ISO 100, maximum aperture and the fastest speed all day long, and only starts increasing ISO when it gets so dark that shutter speeds would go below 1/500. AUTO ISO keeps increasing ISO as needed to keep the shutter at 1/500 (or whatever you select in Auto ISO Slowest Shutter Speed) until ISO reaches the maximum you've programmed at AUTO ISO Maximum ISO in your menus.
Don't set anything other than the aperture manually. Use Aperture priority (A or Av mode) so you can fix the largest aperture, and let the camera use the fastest shutter speed it can. AUTO ISO ensures that ISO is always optimum, even as you quickly pan across the sky.
Avoid manual exposure; the necessary exposure varies wildly as you pan the camera across the sky to follow the action.
If shooting from below looking at an overcast sky, you may need to add + exposure compensation to retain detail in the bottom of planes depending on how smart is your meter and how big are the planes. Don't worry if the sky blows out; just be sure to get enough detail in the planes if the light is really awful. Presuming you're shooting mirrorless just look in your finder as you adjust exposure compensation, or look at playback if you're using a DSLR.
If the planes are tiny against an overcast sky your meter will probably miss them, but let's be honest: if you can't get big images of the planes with a long enough lens, the pictures aren't going to be very good on an overcast day.
This 100% all-content website's biggest source of support is when you use any of these links to approved sources when you get anything. If you find this as helpful as a book you'd have to buy, consider helping me with a gift of $5.00.
Shutter Speeds
Try to keep shutter speeds well above 1/1,000 if you want everything sharp.
With jets, gliders or parachutes, there's nothing we want blurred so shoot at the fastest speed you can at ISO 100, but when spinning blades enter the picture, experiment to see which give you the best combination of fuselage sharpness with blurred blades. (see also Shutter Speeds for Moving Water as an example.)
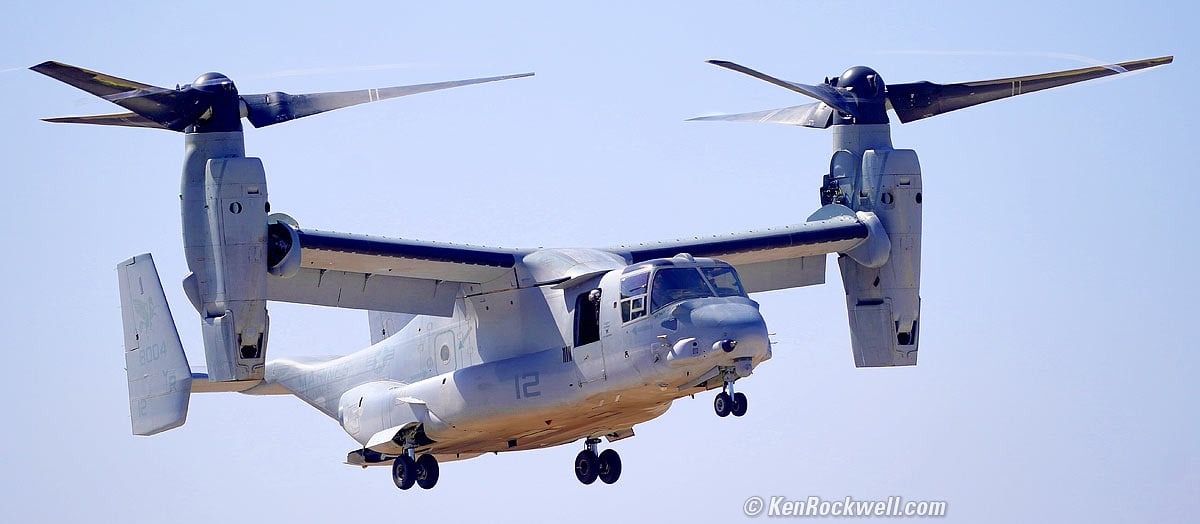
The only time you want slow shutter speeds like 1/125 or 1/250 is with propellers or rotors. Fast speeds like 1/4,000 freeze all motion, and the plane or helicopter looks like its engine has stopped:

Blue Angels' Fat Albert, Miramar Air Show, 28 September 2018. Sony A9, Sony 400/2.8 on Wimberley WH-200, f/2.8 at 1/4,000 at ISO 100. bigger or full-resolution.
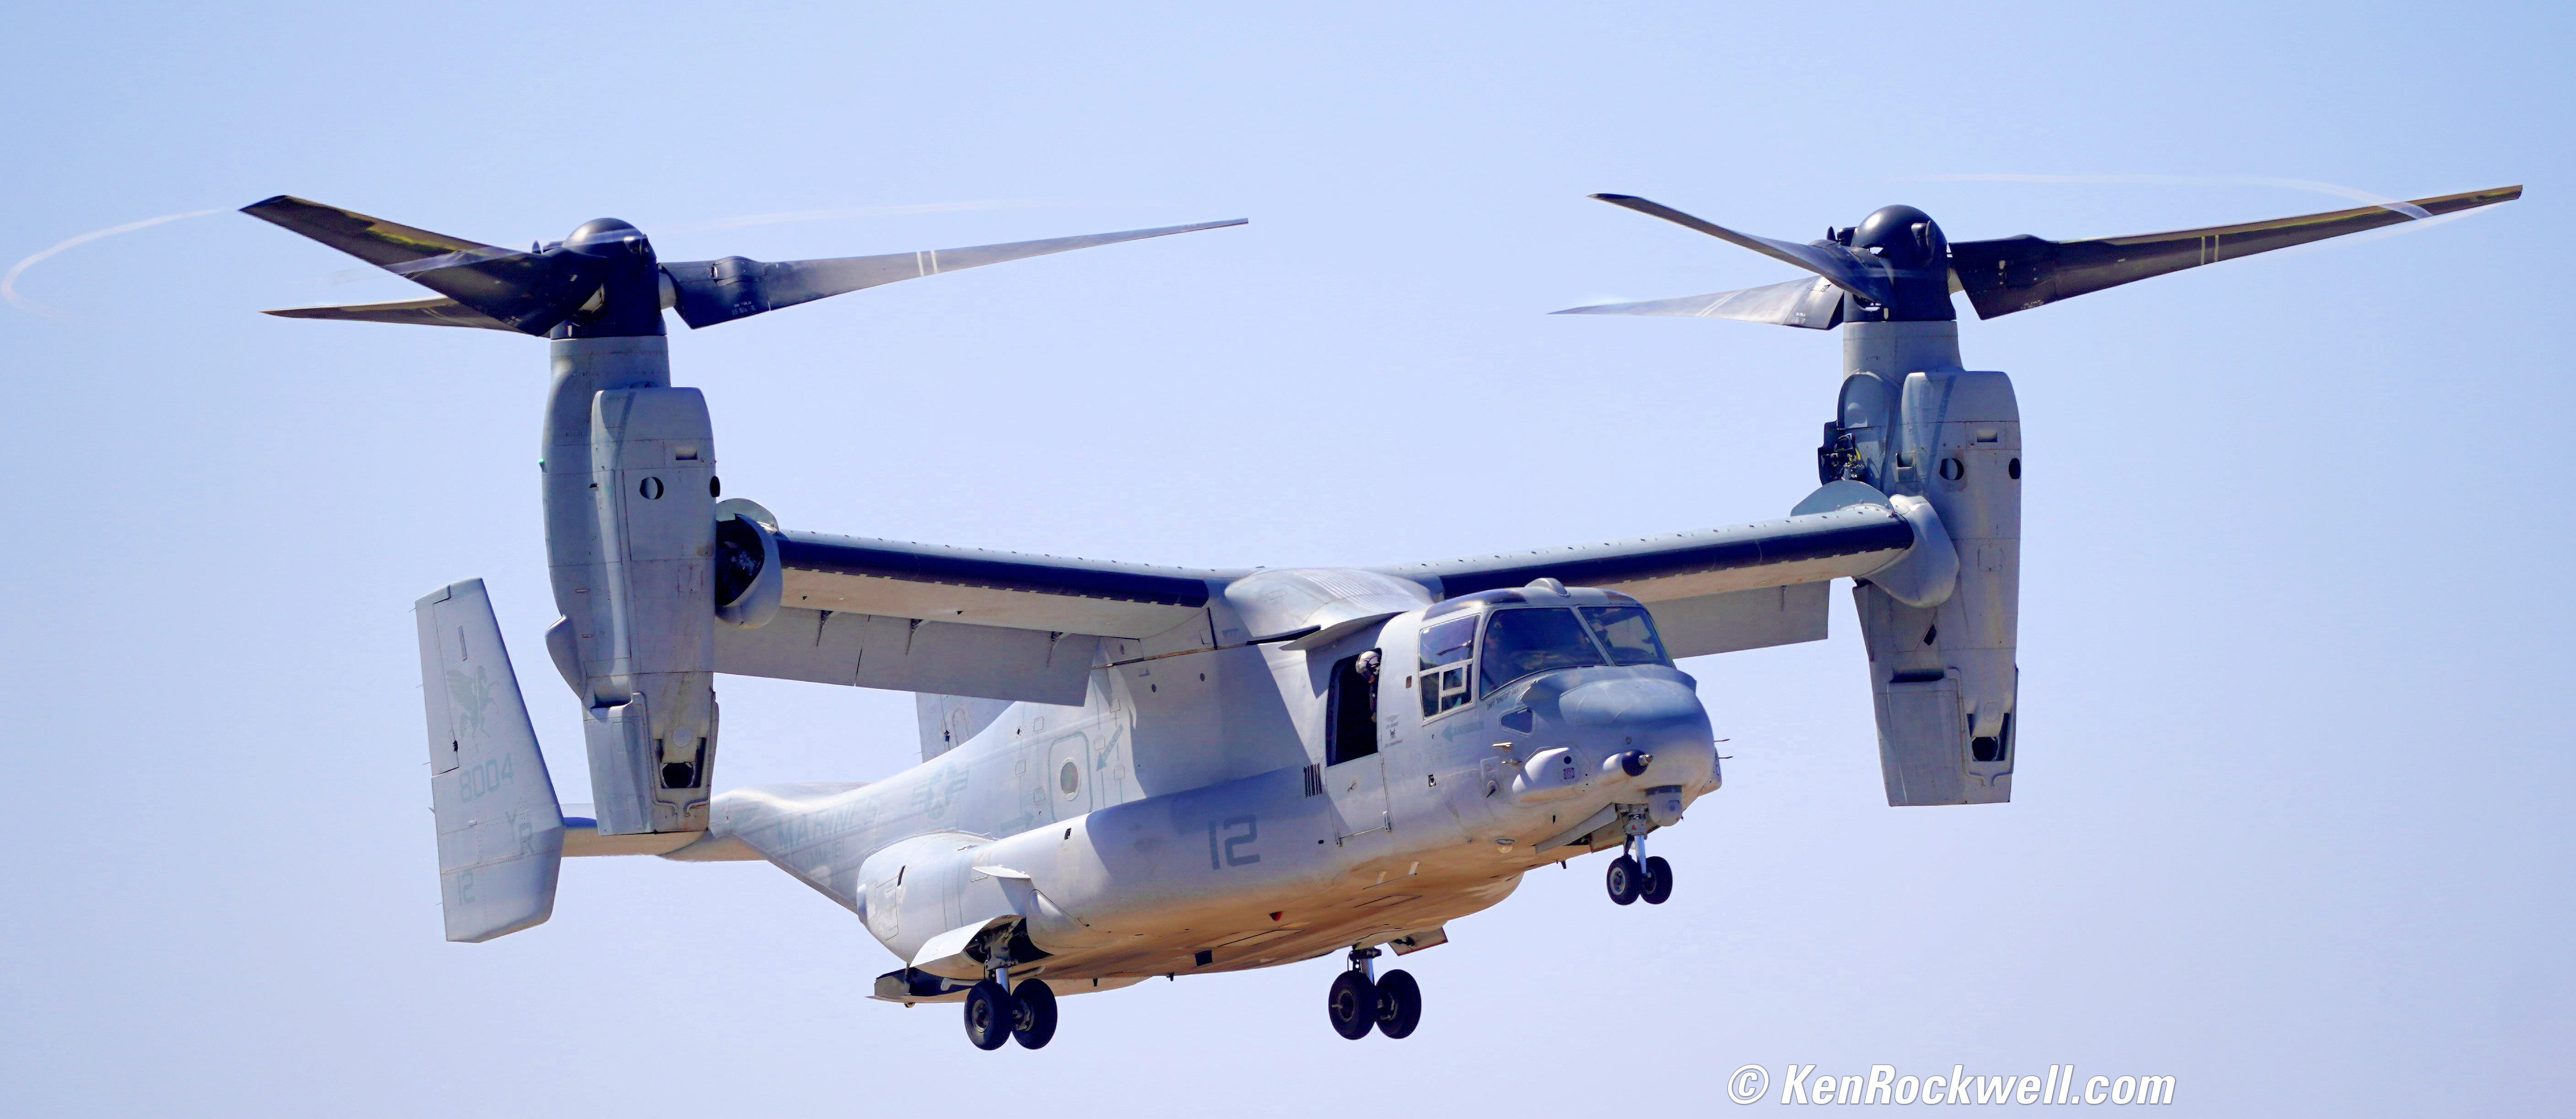
USMC V-22 Osprey, Miramar Air Show, 28 September 2018. Sony A9, Sony 400/2.8 on Wimberley WH-200, f/2.8 at 1/4,000 at ISO 100. bigger or full-resolution.
You can use the Radial Blur Filter in Photoshop to add blade blur later. I was too lazy to do that with these photos.
If you're shooting two jets flying past each other in opposite directions and want both super sharp, increase your ISO to use the fastest possible speed, especially if you have an electronic shutter that can go to 1/16,000 or 1/32,000. Even at 1/4,000, if you're tracking one Blue Angel, the one going the opposite direction will be slightly blurred. Of course this is art; you may want one or the other to have a certain amount or blur to imply speed.
Falloff & Lens Corrections
Top Sample Shots Intro Cameras Lenses
Stabilization Filters Focus Settings Exposure
Falloff & Lens Corrections Camera Supports
JPG vs Raw Selecting & Editing More
Shooting wide open you may have some minor falloff, or corner darkening. Nikon's lens correction menus call this Vignetting, Canon's call it Peripheral illumination and Sony's call it shading.
Most cameras correct for this automatically, but especially shooting against a flat sky it may be visible if you're looking for it.
I don't worry about it, and if I did, I'd use software like Photoshop's Lens correction filter to remove it. It's more important to me to shoot wide-open for the best sharpness than to worry about dimmer corners.
Corners should be darker; it keeps our eyes in the frame looking at the picture and highlights the plane.
I set the Digital Lens Optimizer and Lateral Color Correction options if I have them. I don't bother with Distortion correction with fixed lenses, which usually have no distortion. The only reason not to use any of these corrections is that they can take more in-camera-processing power and could either slow things down or use more battery power when you shoot this many frames in a day; but I've never seen them be a problem.
This 100% all-content website's biggest source of support is when you use any of these links to approved sources when you get anything. If you find this as helpful as a book you'd have to buy, consider helping me with a gift of $5.00.
Camera Supports
Top Sample Shots Intro Cameras Lenses
Stabilization Filters Focus Settings Exposure
Falloff & Lens Corrections Camera Supports
JPG vs Raw Selecting & Editing More
You all know about cameras and lenses, but you probably don't know about the Wimberley WH-200 gimbal head. The Wimberley is an industry-standard American-made device that balances our entire camera and lens assembly so we can point it and track moving objects like jets or birds with a single fingertip:
![]()
Live Video: The Wimberley WH-200 Head in Action.
Not only does the Wimberley WH-200 make it trivial to track moving planes smoothly, it also holds our rig for us so we never get a tired arm.
Level your tripod, and the Wimberley ensures that every shot is perfectly level if you have a lens with a tripod collar with 90º clicks.
Monopods are OK for sports where everything is on a level field, but planes are up in the air. I'd hold my lens freehand rather than use a monopod if I didn't have my Wimberley head.
With full-sized lenses the Wimberley can't point straight-up because the camera body interferes with the rig. If you need to look straight up, hand-hold, or slide the bottom support up towards the top pivot — but watch the balance.
I'm credentialed media registered in advance for these shows and can bring all this in. You always want to check in advance that it's OK for you to bring whatever you're planning to bring before you show up.
This 100% all-content website's biggest source of support is when you use any of these links to approved sources when you get anything. If you find this as helpful as a book you'd have to buy, consider helping me with a gift of $5.00.
JPG or Raw?
Top Sample Shots Intro Cameras Lenses
Stabilization Filters Focus Settings Exposure
Falloff & Lens Corrections Camera Supports
JPG vs Raw Selecting & Editing More
I only shoot JPG if you're asking, but you can do whatever you want.
Especially for events where I'm coming home with 5,000 shots, I don't have time to wait even for raw files to download from a card. I have other jobs to shoot. 5,000 25MB raw files takes 125 GB, which takes too long even to transfer from a card.
It's easy to process JPGs to change color balance and exposure and everything else people do with raw; just that amateurs never seem to learn that. Raw is a format for beginners who worry that they will screw up royally, but today with mirrorless where we can see exposure and everything as we shoot, raw is dead.
See also JPG vs raw, and again as a religious issue I won't tell you what to do if you have your own ways.
This 100% all-content website's biggest source of support is when you use any of these links to approved sources when you get anything. If you find this as helpful as a book you'd have to buy, consider helping me with a gift of $5.00.
Selecting & Editing
Top Sample Shots Intro Cameras Lenses
Stabilization Filters Focus Settings Exposure
Falloff & Lens Corrections Camera Supports
JPG vs Raw Selecting & Editing More
I use a card reader and drag everything into my Mac Pro using its Finder.
I catalog what I shot with Phase One Media Pro.
I use a 55" UHD 4K TV so I have a huge four-foot-wide screen on my desk to sort and select which are the best images.
Once selected, I drag them into Photoshop CS 6 to optimize them.
I usually use the Perfectly Clear plug-in to improve each photo.
Especially if shooting on a hazy day (and most days are hazy when you're shooting through at least a half mile of atmosphere), I'll use whatever tools I need to remove the haze. The Levels or Curves adjustments are handy to force dark hazy grays into sharp blacks, and Perfectly Clear often helps, too.
This 100% all-content website's biggest source of support is when you use any of these links to approved sources when you get anything. If you find this as helpful as a book you'd have to buy, consider helping me with a gift of $5.00.
Thanks!
This 100% all-content website's biggest source of support is when you use any of these links to approved sources when you get anything, regardless of the country in which you live. I use the stores I do because they ship from secure remote warehouses where no one gets to touch your new camera before you do. Buy only from the approved sources I use myself for the best prices, service, return policies and selection.
Thanks for helping me help you!
Ken, Mrs. Rockwell, Ryan and Katie.
More Information
Top Sample Shots Intro Cameras Lenses
Stabilization Filters Focus Settings Exposure
Falloff & Lens Corrections Camera Supports
JPG vs Raw Selecting & Editing More
© Ken Rockwell. All rights reserved. Tous droits réservés. Alle Rechte vorbehalten.
Help Me Help You
I support my growing family through this website, as crazy as it might seem.
The biggest help is when you use any of these links when you get anything. It costs you nothing, and is this site's, and thus my family's, biggest source of support. These places always have the best prices and service, which is why I've used them since before this website existed. I recommend them all personally.
If you find this page as helpful as a book you might have had to buy or a workshop you may have had to take, feel free to help me continue helping everyone.
If you've gotten your gear through one of my links or helped otherwise, you're family. It's great people like you who allow me to keep adding to this site full-time. Thanks!
If you haven't helped yet, please do, and consider helping me with a gift of $5.00.
As this page is copyrighted and formally registered, it is unlawful to make copies, especially in the form of printouts for personal use. If you wish to make a printout for personal use, you are granted one-time permission only if you PayPal me $5.00 per printout or part thereof. Thank you!
Thanks for reading!
Mr. & Mrs. Ken Rockwell, Ryan and Katie.