Home Donate New Search Gallery Reviews How-To Books Links Workshops About Contact
Contax G2 User's Guide
© 2014 KenRockwell.com. All rights reserved.
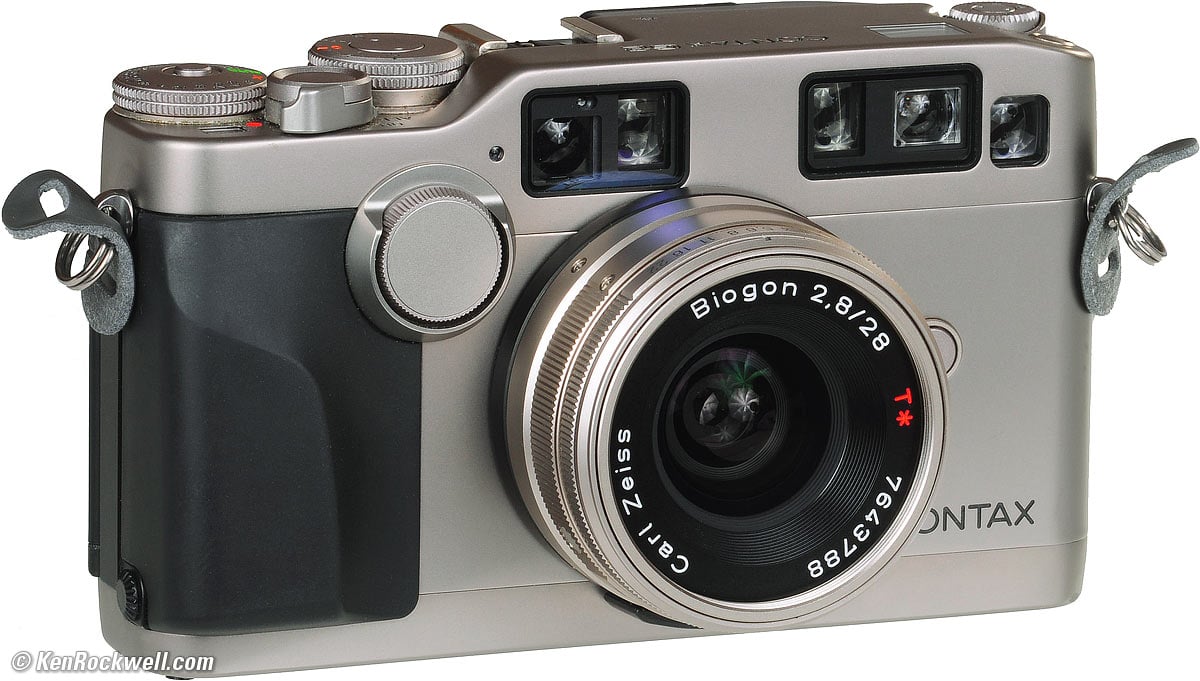
Contax G2 and Zeiss 28mm f/2.8 in titanium (Contax G mount, 21.4 oz./605g with two CR2 cells and film, but no lens, body only about $400 used. It also comes in black). enlarge. I bought mine at this link directly to them at eBay (see How to Win at eBay).
This free website's biggest source of support is when you use any of these links to approved sources when you get anything, regardless of the country in which you live — but I receive nothing for my efforts if you take a chance and buy elsewhere. I get no government hand-outs and run no pledge drives to support my research, so please always use any of these links to approved sources for the best prices, service and selection whenever you get anything. Thanks for helping me help you! Ken.
March 2014 Contax Reviews LEICA Fuji Better Pictures All Reviews
The Contax G2 Compared to the Leica M7
Shooting the Contax G2 Digitally
Rangefinder versus SLR cameras

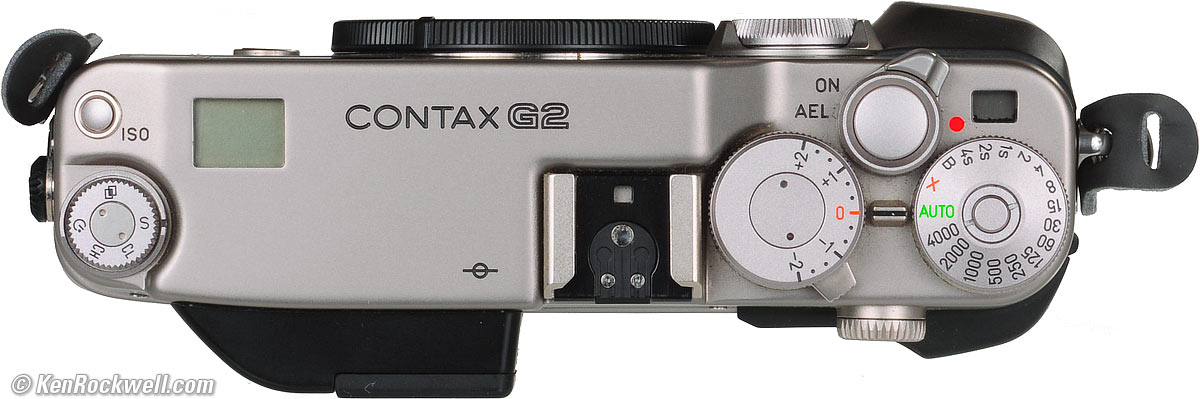
Top, Contax G2. enlarge.
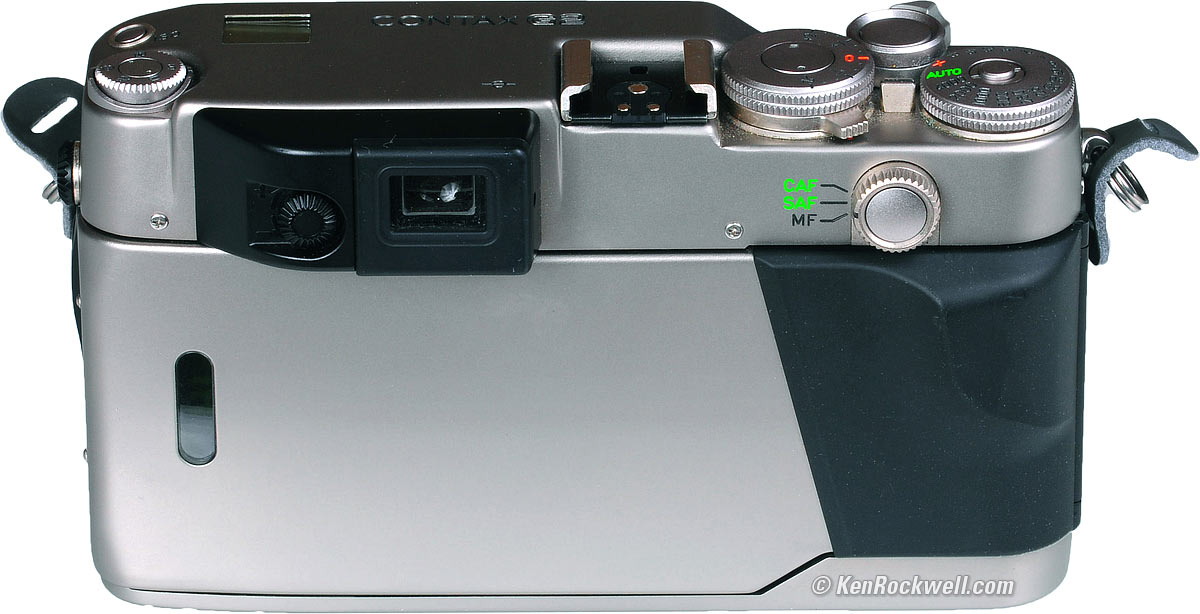
Rear, Showing AF Mode Selector, Contax G2. enlarge.
The Contax G2 is a joy to use.
Green means go, so set AF to SAF and and the shutter dial AUTO, and you're good to go. Oddly, 0 on the exposure compensation dial is painted red.
If I need AE Lock, I invoke it before focus.
In SAF, single autofocus, the G2 acquires and then locks AF as long as you hold the shutter. Since the G2 has a hair-trigger between its half-pressed and fire positions, a better way to hold a locked autofocus distance is to press and hold the unmarked AF button in the middle of the AF Mode Selector on the top right of the back of the G2.
(In CAF, continuous AF, the G2 keeps trying to track focus. CAF isn't that useful, unless you want to keep your subject in the middle of the frame.)
All the details below are just details. If you're shooting a G2, you already know the basics, and there are no surprises in the G2.
Loading

Adorama pays top dollar for your used gear.
|
Flip and turn the little key on the left to open the back.
Draw the film all the way to the red mark at the far right, and close the back.
It advances automatically even with the power off. You don't have to press anything to get it to advance; just close the back and you're done.
Rewind is automatic. After the film has rewound, but before the back has been opened, the frame counter blinks "00." It keeps blinking "00" with the power on or off, and the meter won't respond until you open the back.
Film speed read via DX, but I prefer a little less exposure than the G2 wants to give.
To set ISO manually, hold ISO a few seconds until ISO blinks. Release the ISO button, and spin the front dial to change the setting. Yes, the ISO setting continues to blink as you try to set it, which can be annoying.
To lock the setting, tap the shutter or just ignore it for a while. (Holding ISO again doesn't exit the setting mode.)
Lens Mounting
The G2 uses a bayonet system similar to Leica, Canon and Nikon, but with a twist.
Only the middle of the lens rotates. The front and back don't move. Be sure to grab the lens by the grips in the middle of each lens.
The lens aperture index mark also moves as the lens is mounted or unmounted. When a lens is unmounted, the aperture index moves over by about five stops. Don't let this scare you, especially when receiving a new lens, which will seem like its aperture ring is misadjusted until you actually mount it on a camera.
Exposure
Easy!
The apertures are always set manually. The G2 has no control over them.
Set AUTO, and the G2 chooses the shutter speed.
Set a manual speed, and look for the over and under arrows in the finder. At perfect exposure, both arrows show.
Trick: There are no manual half-stop settings, but use the X setting to get a 1/180 manual speed halfway between 1/125 and 1/250. The exposure meter works perfectly at this half-way setting.
X reads 1/200 for marketing purposes; the service manual confirms that this is really 1/180 if you're counting your sixth-stops.
Bracketing changes the manual speeds, so the ±0.5 bracketing setting will get you those half-stops. (bracketing does not work at X.)
In manual, bracketing will also get you to 8s, 6s or 1/6,000 sec. if it needs them, even though you can't set them manually yourself.
AEL is set with the power switch. enlarge.
The lens aperture is not coupled into the Contax G2, so the G2 never has any idea of the lens' aperture setting. It doesn't known and it doesn't care.
Therefore, AE Lock is really only a metered exposure-time lock. AEL isn't the right name for it. It really should be called "Metered Exposure-Time Lock," but that label wouldn't fit the top of the camera.
AEL is simple, but very different from other cameras.
AEL is a separate hard position on the power button. When you want to lock an exposure, move the power switch from ON to AEL.
The compensation dial works during AEL, making it easy to dial-in zone placements.
Since the camera meters through the lens, and you're viewing through a separate peephole, be careful when you think you're shielding the sun while taking a meter reading.
The metered shutter speed will stay locked forever until you move the switch away from AEL.
The shutter speed blinks in the finder to warn you that the exposure is locked. Look out if you're using the 16mm or 21mm lenses with external finders; you'd never know.
The camera shuts off after 16 seconds, but doesn't reset the locked speed. Wake it back up after being left in AEL after six months, and that same speed will still be blinking at you.
There is never any question about the exposure-time reading being locked, but likewise, if you forget to unlock it and don't notice the blinking shutter speed display, you could shoot for a month at the same setting.
In AEL, the shutter speed varies as you change the exposure compensation or if you use bracketing.
Since the G2 has no idea of your aperture setting, changing the aperture also changes the exposure.
AEL in manual exposure mode
Not that you'd care, but here's what it does if you're interested.
Since AEL is really a metered exposure-time lock, it still works in manual exposure mode. All it does is lock the camera's suggested shutter speed setting.
If you're in a manual shutter speed, the metered value will remain constant as you select shutter speeds. This isn't very useful, but the up and down metering arrows in the finder will null only if you select the exposure time measured when you selected AEL. (In AEL, the G2 doesn't care what happens to the light or to the aperture set on the lens.)
If you go from AUTO to a manual shutter speed in AEL, the meter arrows will null at the stored auto shutter speed. If the G2 measured an incremental speed, since you can't set them manually, you'll never get a null. (The G2 ignores the set aperture.)
If you go from any manual setting to AUTO in AEL, the camera will set itself to the metered value measured when you set AEL, regardless of the setting of the shutter dial.
Once locked, bracketing will not change the shutter speed if you've selected it manually. For bracketing to change shutter speeds with manual shutter settings, take the G2 out of AEL.
Exposure compensation will not change a manually selected shutter speed in AEL. (It will in AUTO.)
Bracketing
Bracketing lever, under compensation dial (above AF mode switch). enlarge.
Bracketing is easy!
Simply slide the thumb lever left to ±0.5 or ±1.
Set advance mode on the top left dial to Ch or Cs, and hold the shutter button. The G2 fires off three shots, and stops. If you let go before all three are done, the next shot(s) will be bracketed.
To cancel the rest of the brackets, just slide the bracketing lever back to off.
In Single-shot mode, the G2 fires these one at a time. You'll see a blinking + or - and the actual speed that will be used in the finder.
On a tripod, set the self timer, and the G2 shoots all three shots after waiting 10 seconds!
Bracketing works in both AUTO and manual modes.
If you set a manual speed, the G2 is smart enough to use 1/6,000, 8 seconds or 6 seconds if it needs to, even though there are no manual settings for those speeds.
Unless you set AEL, each exposure is measured anew as you bracket.
The G2 has no control over apertures.
Flash exposure isn't changed.
The exposure compensation knob works along with bracketing. For instance, if you want a set of exposures at +, ++ and normal, set the compensation to +. This is so much easier than a DSLR; no menus are needed.
In bracketing, both digits of the frame counter blink on the top LCD before your first shot. Before the second + shot, only the left digit blinks, and the right digit blinks before the last shot in a set. This way you can see what's happening without looking through the finder.
Change manual speeds in middle of a sequence, and the G2 simply brackets from the new setting.
+ or - blinks in the finder before that bracket is about to happen. Normally you get a solid + or - in the finder with compensation, but if a zero bracket is about to happen, the + or - display is cancelled even if compensation is set.
Bracketing does not work at X.
AF
The AF system uses an active infrared beam to get approximate focus instantly. It also can see in the dark out to about 10 feet (3m).
An instant later, so long as there is at least a little bit of light, a second very precise passive rangefinder system gets (we hope) exact focus. The passive rangefinder simply looks at the details of the image without shooting any beams.
This all happens automatically; we never realize that two different systems are working one after the other.
We have the best of both worlds: the speed and no-light performance of the active IR-beam AF, and the precision of passive AF which also can see through glass.
In total darkness, the active IR beam focuses best on flat surfaces, like a wall or face, while the passive AF system only sees vertical lines.
AF Mode Switch (top right), Contax G2. enlarge.
AF locks when you half-press the shutter.
Always check the analog focus indicator in the finder to be sure that the distance makes sense. The G2 can make mistakes, which will be obvious if you check the distance.
The G2 works only in meters.
Focus is critical with the 90mm lens at f/2.8. Since the fast AF system of the G2 reads about 5% differently every time, I'll press the focus button a few times if focus is critical and shoot when I get a middle reading among the distances it measures.
Since the G2's shutter button makes it hard to hold halfway, I prefer instead to press and hold the AF-L focus button with my thumb. In either of the AF positions, this button focuses, locks and holds for as long as you wish.
Trick: In AF-S and AF-C, if you hold the AF-L button while you rotate the selector counter-clockwise to MF, the measured distance locks, digitally displays in the finder and stays set as your manual focus distance.
Manual Focus
Contax intends you to select "MF" and turn the front dial as you look at a bar graph in the finder. As you adjust focus, the set distance is displayed numerically on the top LCD.
The Manual Focus bar graph is awful. It is not precise enough to work well. It was only added as a marketing tool.
If you want a quick demonstration of how bad it is, set the focus with the bar graph and look on the top LCD to read the distance. Now turn the knob to the nearest and farthest points which still indicate OK on the bar graph, and you'll see a huge variation in the actual focused distance as displayed on the top LCD.
For instance, for a subject at 3.2m, the MF bar graph indicated "perfect" even as I turned the front knob from distances between 5m and 2.5m!
It is OK to use the manual mode to dial-in an exact distance, or to measure and read precise distances digitally if you start in AF and rotate the mode dial counterclockwise to read and lock it manually, however the bar graph display lacks enough precision to be used by itself.
Always let the AF system measure the distance; never trust the bar graph.
If you leave the manual mode, the same distance is remembered when you return (unless you return to the manual mode while holding a distance measured in AF with a rotating thumb.)
If your focus is a little off with the 90mm lens at f/2.8, you may want to lock the focus as above, and touch it up a few clicks with the MF wheel, as based on your previous tests (or just lock focus on something a little closer or farther).
Flash
The system, when used with any Contax TLA-series flash, has full TTL control.
Contax' users' manual assures perfect TTL fill-flash in daylight, but it works poorly. It usually overexposes, suggesting that the G2 is ignoring the ambient light in its overall exposure calculations. Contax also claims that the compensation dial affects flash as well, so maybe in manual mode could let you control ambient light exposure manually and dial-down the flash with the compensation dial.
For decent results for fill-flash with slides, I'd calculate it manually, or give up and use a white card as a reflector — or shoot a Nikon SLR instead.
There is no automatic slow sync setting. In AUTO, all you'll get is 1/60 ~1/200 as the G2 deems appropriate. For slower sync speeds, select a slower manual shutter speed.
In AUTO, the G2 won't go faster than 1/200, so if the light demands a faster speed, too bad, you'll get overexposure!
The G2 is smart enough to know if the flash is charged or not, so if you shoot before the ready light comes on, the G2 exposes as would be needed without the flash. In other words, the AUTO shutter speed range is 1/60 ~ 1/200 with the ready light ON, but 16s ~ 1/6,000 if the ready light is off.
The X manual setting sets 1/200, and the manual exposure meter works.
Totally opposite from Nikon, a good exposure gets you two seconds of blinking bolt in the finder.
If you want second (rear) curtain sync, you'll have to set it on the more advanced flashes. The G2 itself can't set this.
The multiple pins of the hot shoe are similar enough to the contact positions on Nikon cameras that my Nikon SC-17 flash extension cord works with the G2 and the TLA flashes!
Self Timer
Set the clock icon on the top left advance dial.
Tap the shutter, and the frame counter counts down.
It give you 10 seconds, only.
Hit the shutter again to restart from 10, which you can confirm on the frame counter LCD.
To cancel, turn OFF the G2, or change the setting on the advance wheel.
An LED on the front flashes slowly for the first 8 seconds, fast for the last 2.
Once set, the self timer is on for good. You have to remember to turn it off manually, otherwise you'll be taking pictures of your nose as you try to figure out why your G2 doesn't fire when you first use it again tomorrow.
Double Exposures
Do I care?
If you insist, you set this as the mating rectangles on the top left advance dial.
Once set, you only get one extra exposure per frame. It resets after the second exposure.
If you want to make another exposure on the same frame, spin the advance mode dial back to S and back to the mating rectangles for each extra shot. If you want unlimited multiple exposures, instead of just double exposures, you can set this in a custom function.
It remembers, even if you turn off the G2.
You're committed if you pressed the shutter in the double exposure mode. If you change your mind, reset it back to a normal mode, cap the lens, set a fast manual speed, and click the shutter to advance to the next frame.
The G2 only has 5 custom functions, and most people don't know they exit, so I won't take off any points for having them. CFNs seem to be nonvolatile if you take out the CR2 batteries.
These are the easiest to set of any camera.
Hold both the ISO and Focus Lock buttons down for a second or two.
You'll see two digits blinking on the top left LCD.
The first digit is the function, and 0 or 1 is how it's set.
Turn the focus knob to select the function, and hit the Focus Lock button to change its setting.
Tap the shutter to save and exit.
If you get scared and just leave it alone without saving the changes, it will remember them anyway.
CFN |
0 (default) |
1 (option) |
| 1. AEL | Normal (locked by power switch) |
Also locked with half-press of shutter. |
| 2. Bracket Order | 0, +, - |
+, 0, - |
| 3. Film rewind | Leader in |
Leader out |
| 4. To focus in manual mode | Just turn knob |
Also have to hold AF-lock button (Prevents accidental changes) |
| 5. Multiple Exposure Mode | Cancels after second exposure for your own good. |
Lets you make as many exposures as you like, but remember to spin the advance dial back to normal when you're done! |
| CLE | Resets all functions if you exit with CLE selected |
resets all functions if you exit with CLE selected |
Now that you know this; you won't have to memorize this table: it's on a sticker that should be on the bottom of your G2!
Contax G2 Custom Function Sticker. print.
Hint: On an iPod Touch or iPhone, save this image to your iPhone photo library by holding the main button on the front, then tapping the "power off" button at the top of your iPhone. The image will fade for a moment to let you know the iPod recorded the image. You now can recall this at PHOTOS > SAVED PHOTOS.
Help me help you top
I support my growing family through this website, as crazy as it might seem.
If you find this as helpful as a book you might have had to buy or a workshop you may have had to take, feel free to help me continue helping everyone.
If you've gotten your gear through one of my links or helped otherwise, you're family. It's great people like you who allow me to keep adding to this site full-time. Thanks!
If you haven't helped yet, please do, and consider helping me with a gift of $5.00.
The biggest help is when you use any of these links when you get anything. It costs you nothing, and is this site's, and thus my family's, biggest source of support. These places always have the best prices and service, which is why I've used them since before this website existed. I recommend them all personally.
Thanks for reading!
Ken
Home Donate New Search Gallery How-To Books Links Workshops About Contact