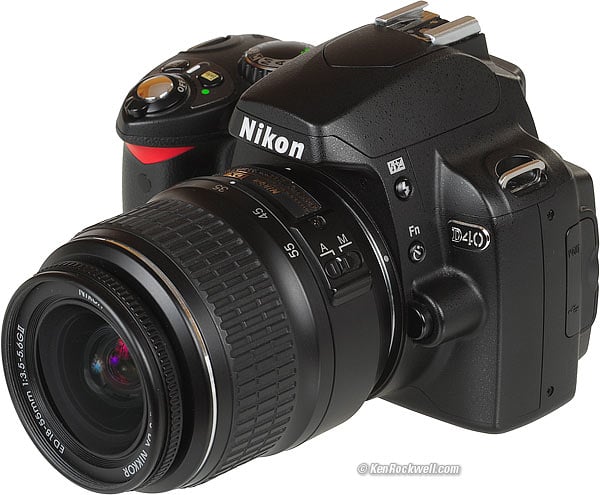
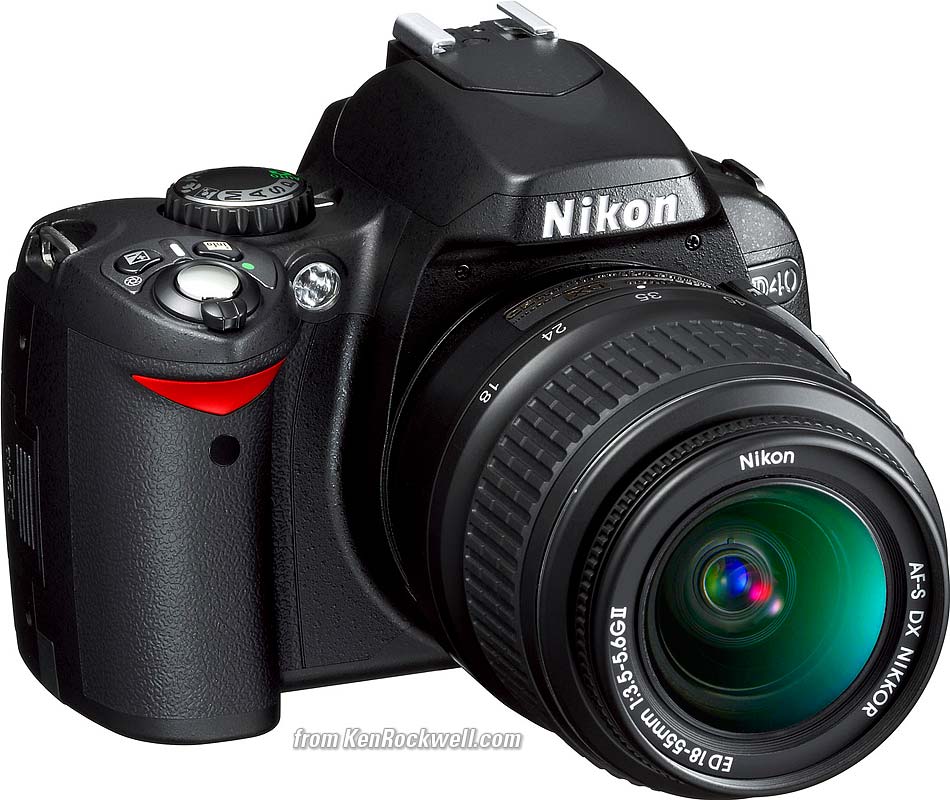
Nikon
D40 Custom Settings
© 2007 KenRockwell.com

NEW: Nikon D40 Guide iPod and iPhone App 08 July 2009
Back to top of D40 User's Guide.
Back to D40 User's Guide page index.
CUSTOM
SETTING MENU
(Pencil icon)
I personally buy from Ritz, Adorama and Amazon. I can't vouch for any other ads.
|


Want free live phone support? In the USA, call (800) NIKON-UX, 24 hours a day, 365 days a year.
Many of these menu options are shown only after you select the FULL MENUS option in the Setup Menu and are often deactivated in anything except the P, S, A and M modes.
This menu really should be called the camera menu and shown with an icon of a camera, except that Nikon used the Camera icon for the shooting menu, which really should be called the Film menu. Camera settings, like focus, flash and timers, are set here in the Custom Settings Menu, shown by a pencil. This is Nikon's mistake; don't penalize yourself if it makes little sense.
How to Get Here
Press MENU, go to the left and select up and down to the pencil icon. You'll see CUSTOM SETTING MENU on the top of the color LCD.
What it Does
This menu sets many things related to the camera and taking pictures, like autofocus, exposure, timers, flash and more.
What I Change
I change a lot here, so read on.
[R] Reset
This resets everything in this menu to its defaults. I don't use this, unless my camera was loaned out.
Turn this OFF!!!
This is the idiotic and annoying focus confirmation beep. Turn it off!
The beep annoys others and is very rude. Focus confirmation is indicated by a dot in the lower left of the finder.
This sets the autofocus mode for still or moving subjects.
AF-A, the default I use, magically selects between the next two modes.
AF-S stands for AF-Single. The D40 focuses once, then locks AF for you to recompose and shoot.
AF-C stands for AF-Continuous. The D40 keeps focusing as the subject moves. Use this for sports and vehicles in motion, like cars, birds and aircraft.
MF Is manual focus. I'm unsure why'd you'd use this setting, since lenses that autofocus on the D40 (AF-S and AF-I) have these switches on the lenses, and older AF lenses that can't autofocus on the D40 default to manual focus whether you want them to or not.. I suspect this option is here because it isn't anyplace else on the D40, and there probably is, or will be, lenses that need this to revert to manual focus.
This selects how the D40 uses its three AF sensors.
You'll want to change this for action, still subjects or handing your camera to a non-photographer. I wish my D40 had a dedicated switch as my D200 does. On the D40 we need to go into this menu every time our subject matter changes.
[xxx] Closest Subject selects the closest AF area by magic, which just happens to be the right one every time. Use this when you hand your camera to a non-photographer, if things are moving too fast for you to do your own AF selection, or if you're holding your D40 in your arm pointed back at yourself for a self portrait.
This feature works great. I'm always surprised at the great results I get in this mode.
[ x ] Dynamic Area lets my D40 automatically select which sensor to use as a subject moves around the frame. It really works! I use this for sports, running animals and birds in flight.
[ o ] Single Area is used for still subjects. I use this most of the time. My D40 uses whichever area I select with the rear Up/Down/Left/Right selector. Of course with only three sensors only the left and right buttons do anything.
The D40 first uses whichever area you select with the rear Up/Down/Left/Right selector, and proceeds to select other areas automatically if the subject moves. You won't see which area is selected in the finder, but you can see it on playback if you use the right software.
This selects the shutter advance mode.
[S], single frame mode, means the D40 takes one picture each time you press the shutter, regardless of how long you hold it. This is the default.
Bearded Rectangle (continuous advance mode) takes one picture if you press and release the shutter. If you keep the shutter pressed, the D40 takes pictures continuously at 2.5 frames per second for as long as you hold the shutter.
I use this mode. I can take one picture with one press. If I want several, as I do in dim light or people pictures so I can choose the best later, I keep the button pressed.
10s Self Timer takes a picture 10 seconds after you press the shutter.
Remote 2s Delayed Mode takes a picture 2 seconds after you press the optional $20 ML-L3 remote control. If you don't select this or the next mode the D40 will ignore the remote control.
Remote Quick Response Mode takes a picture when you press the excellent ML-L3 remote control. The D40 This is the mode I use for serious self-portraits like this:

Trick Self Portrait. My ML-L3 is in my other hand out of the picture.
Hint: Be sure to select a long enough Remote ON Time time in Custom Function 17. The D40 ignores the remote after the length of time set in Custom Function 17.
This selects Matrix, Center-Weighted or Spot.
I always use Matrix, shown by an icon which looks like a weird rectangle with cross and circle in it.
Matrix, in other Nikons, was an almost perfect meter. In the D40 and D80 it's defective and instead of giving correct exposures it exposes for the darkest part of the image. It often requires a lot of Exposure Compensation to get the correct exposure, especially with contrasty subjects. This Matrix meter is designed for dingbat photographers who shoot heavily backlit subjects without flash. Nikon succumbed to the lowest common denominator who would shoot in awful light without knowing it, get dark images, and then blame it on the camera.
The default Matrix meter of the D80 and D40 ensure no image is ever too dark. Sadly it usually ensures images are too light.
Center Weighted (a dot with a ring around it) pays attention to the middle of the frame. It's the old-style meter that Nikon used since 1959. I may have to try using this, since it might give more consistent results, presuming you are fluent in the Zone System, than the botched Matrix meter.
Spot (a small dot), reads only from the small spot of the selected AF zone. If you've chosen Closest Subject AF, it reads from the center one. I never use this.
06 No Memory Card?
I leave mine at LOCK. If I have no memory card it won't let me take pictures.
Don't set it to OK. If you do, you could have no memory card and be shooting all day, thinking you're making pictures when you really aren't. Shoot one wedding without a card and this set to OK and you'll see how stupid you'll feel.
Only set this to OK if you want to demonstrate the D40 in a camera store with no card.
ON plays the picture after you take it. OFF leaves the screen dark.
When the image pops on the screen, even if the D40 is still at your eye, spinning the command dials will change the playback, not the shooting settings like apertures. While shooting you might want not to use this, or remember that you must wait a moment and tap the shutter release to reset the D40 to interpret the command dials for changing shooting settings instead of playback screens.
You can ignore this menu, because it's much easier to adjust this with the Flash Button. Hold the Flash Button and the +/- Compensation Button and spin the dial. You will see the flash brightness value in the finder without ever needing to take your eye away. This is much easier than it sounds.
I have no ideas why Nikon added this as a menu option, except to match Canon which has some cameras so clumsy that the only way to adjust them is through the menus. Maybe Nikon is pandering to Canon users; I don't know.
09 AF Assist
I leave this at ON.
Turning this OFF disables the bright white light that shines in the dark to help you focus. I turn this off if I'm shooting where I don't want to disturb people, or be identified as photographing.
This is one of the strongest reasons I prefer my Nikons to my Canons. Canons lack this critical feature.
ISO Auto Increases sensitivity (ISO) in dim light automatically to prevent blur from slow shutter speeds.
I use this all of the time, unless I'm using manual exposure mode. Auto ISO is a crucial component of Modern Exposure Technique.
Today I adjust the Auto ISO's minimum shutter speed as I change lenses and conditions. I no longer adjust ISO directly, as we did in the old days before 2004. This is a time-saving step towards the future, just as program exposure was a step ahead of aperture priority in the 1970s.
You can choose the highest ISO to which the Auto ISO will go (Max sensitivity). I let my D40 go all the way to ISO 1,600, since it looks fine at ISO 1,600 and any small amount of grain is better than a blurry photo. If you prefer blur to grain, feel free to limit the D40 to ISO 800 or 400. Try ISO 1,600: the D40 is better at high ISOs than film ever was, and far better than any compact digital camera at these speeds.
You also may set the minimum shutter speed (Min Shutter Speed) below which the D40 starts raising the ISO. Select the slowest shutter speed at which you'll get sharp images under your present shooting conditions.
I wish this function was smart enough to recognize which lens I'm using and adjust accordingly, but it's not.
HINT: You set the lowest ISO used in Auto ISO with the ISO button, of course.
Nice Touch #1: My Nikon D40 is so smart that if I shoot before the flash recycles, presuming I have Auto ISO activated, my D40 automatically pulls the ISO up to 1,600 (or as needed) to get the one frame where the flash doesn't fire. Wow: it shoots the whole sequence at ISO 200, and the one frame with a flash misfire due to shooting before it recycled shoots at ISO 1,600 as I wanted. Thank you Nikon!
Nice Touch #2: unlike my other Nikons, you can set ISO 3,200 manually in the ISO menu without having to deactivate Auto ISO first. When you set a more reasonable ISO, Auto ISO again becomes active. You used to have to turn Auto ISO on and off the hard way coming in and out of ISO 3,200. Thank you Nikon!
Firmware Defect #1: Nikon's firmware leaves Auto ISO active even in manual exposure mode. This makes the D40 change the ISO automatically and defeat the purpose of manual exposure. Remember to deactivate Auto ISO when using Manual exposure mode.
Firmware Defect #2: The Auto setting in the ISO menu section of the Shooting Menu refers to something completely unrelated, even though it has the same name. The AUTO setting in the ISO menu instead lets the D40 preset a fixed ISO it expects to be relevant for a selected scene mode, like sports, portrait, macro, etc. This Auto setting isn't Auto ISO, and it isn't available in the P, S A and M modes I use.
This selects the function of this button, which is located on the side of the D40 just below the flash button.
Self Timer: In this default setting, press the Fn button to set or unset the self timer.
Shooting Mode: Press and hold the Fn button while turning the rear dial, slowly. You'll cycle through the shooting (shutter advance) modes.
QUAL: Press and hold the Fn button while turning the rear dial, slowly. You'll cycle through all the File Type and Quality and Image Size modes.
ISO: Press and hold the Fn button while turning the rear dial, slowly. You'll cycle through all the ISO Settings. . An added nicety lacking on more expensive Nikons is that you have full ability to go to and from ISO 3,200 (HI 1) without needing to turn off Auto ISO.
WB: I use this option, since I change my WB more often than any of the other options.
Press and hold the Fn button while turning the rear dial, slowly. You'll cycle through all the WB Settings. An added nicety is that you can set a manual preset (white or gray card) white balance by holding down the Fn button again after selecting PRE. More at my D40 WB section.
This selects what AE-L/AF-L button does.
AE/AF lock (default) locks both for as long as you hold the button. You'll see "EL" in the bottom left of the finder when it's locked. There is no AF-L finder indication.
AE Lock only holds the measured exposure for as long as I hold the button. I use this setting. You'll see "EL" in the bottom left of the finder when it's locked. I usually shoot in Single or Auto AF mode (AF-S or AF-A), which locks the focus separately.
AF Lock only locks the autofocus. This is handy if you want the lens to stop focusing, for instance, if reframing a portrait or if you're panning while a target goes behind a tree. There is no AF-L finder indication.
AE Lock Hold requires just a tap, after which the D40 holds the exposure until you tap it again. You'll see "EL" in the bottom left of the finder when it's locked. This eliminates the need to hold the button, but also requires you to remember to press the button again to unlock, and press a third time to lock again.
AF ON focuses the D40 when the AE-L/AF-L button is pressed. This deactivates the normal AF action of the shutter button. The only way to autofocus with this selection is to press the AE-L AF-L button.
13 AE Lock
This lets you lock the exposure when the shutter is pressed.
The default is off, which I use. The shutter button doesn't lock exposure.
I prefer to use the AE-L button to lock exposure.
This lets you set the function of the excellent built-in flash.
TTL (default) lets the flash work normally and give great exposures all by itself.
M (manual) lets you force the flash to one brightness value. It adjusts in full stops from full power down to seven stops below, shown as 1/128 power.
I use manual if I'm using the built-in flash to trigger my studio strobes or if I'm trying to set up something tricky which isn't working in the usually perfect TTL mode. The manual mode also cancels the preflashes for photographing people with REAR flash sync or to eliminate blinking.
The D40 lacks wireless control and Flash Exposure lock of more expensive Nikons. If you want to uses these features, get a D80 or D200. I explain these at D80 Built-in Flash Modes.
This changes the time delays of the various battery-saving timers that turn off the D40 and its LCD when you ignore it.
This setting is more advanced than more expensive Nikons, for example, there's no way on my D80 to extend how long an image stays on in Image Review to other than 4 seconds. When making self portraits with a tripod my D80 tauntingly shut off its Image Review the moment I get back to the tripod, and there's no way around that.
On my D40 I can choose to have the Image Review hang for as long as I want.
The settings are:
SHORT: Everything turns of more quickly to extend battery life.
NORM: Default.
LONG: Everything stays on longer so it's less likely you'll have to wake up the D40 in the middle of something.
CUSTOM: I use this. You may set the time individually for each of:
Playback/Menus: How long the monitor stays lit for most uses.
Image Review: How long the just-shot image stays up after you shoot it. Of course pressing any other button lets the D40 immediately change to whatever more you want.
Auto Meter Off: How long the D40 and it's meters stay on before you take a picture. The meter turns on when you tap the shutter. The meter turns off after you take a picture, or after the time you set here.
In the old days (2002) my Nikon D1H and D1X sucked through batteries and we did everything we could to get more than 200 or 300 shots on a charge of the huge Ni-Cd batteries. Today battery life is so long I'd select whatever value you find the most convenient. I've played with my D40 menus for hours at a sitting with no complaints.
For those of you counting Custom Settings as if more were better, please note that the D40 intelligently has this one Custom Setting controlling what takes two custom settings in the D80 (Custom Setting 27 and Custom Setting 28), and adds a third setting, Image Review Time-Out, not available in the D80 at any price. HA! (The D80 always has image review at 4 seconds, while the D200 keeps image review on for the same time chosen in Custom Setting c5.
16 Self Timer
This selects the time, presuming you have the self timer active, between pressing the shutter and the shutter firing.
I leave this at 2 seconds, since I use the self timer only if I forgot my ML-L3 remote control.
I use my ML-L3 remote, not the self timer, if I'm taking pictures of myself.
This selects how long the D40 stays awake waiting to be released by the ML-L3 remote control, presuming you've set it to work via remote control.
The default is one minute, which is silly, since when I'm using my remote I don't want to have to take a picture every minute or have to reset my D40 to pay attention again.
I set mine to 15 minutes.
back to top of page back to top of Nikon D40 User's Guide
MENUS
SETUP MENU < NEXT
PLUG
I support my growing family through this website.
If you find this as helpful as a book you might have had to buy or a workshop you may have had to take, feel free to help me continue helping everyone.
If you've gotten your gear through one of my links or helped otherwise, you're family. It's great people like you who allow me to keep adding to this site full-time. Thanks!
If you haven't helped yet, please do, and consider helping me with a gift of $5.00.
It also helps me keep adding to this site when you get your goodies through these links to Adorama, Amazon, B&H, Ritz, and J&R. I use them and recommend them all personally.
Thanks for reading!
Ken