Nikon
D300 User's Guide:
Shooting
(Film) Menu
© 2008 KenRockwell.com. All rights reserved.

August 2008 Top of D300 Users Guide D300 Review More Nikon Reviews
NEW: Nikon D300 User's Guide for iPhone and iPod. 12 December 2009
Want free live phone support? In the USA, call (800) NIKON-UX, 24 hours a day, 365 days a year.
How to Get There
Press MENU, click left and then up and down to select the camera (shooting) menu. You'll then see "SHOOTING MENU" on the top of the screen.
What it Sets
It sets parameters related to what film used to do. The Shooting Menu sets ISO, grain, contrast, color and a zillion other critical things that set the look of your images.
The shooting menu would make more sense if it were called the Film menu, since many other menus also affect shooting.
What I Change
I change a lot here. This is where I make the D300 give me the wild colors I love.
Clarification and Complaints
Nikon let the people who wrote the instruction manual design the menus.
A more sensible icon would have been a piece of film since the Custom Setting Menu (pencil menu) has more to do with shooting and camera mechanical settings than the Shooting Menu does.
Don't worry about what's in what menu. It doesn't make complete sense and you'll forget where things are, but that's why there's the My Menu menu. It's not you, it's the camera.
Shooting Menu Bank (A, B, C and D) top
Menu banks seem like memories, but they aren't. You can't save or recall them. All they do is return you the settings you had when you last changed to another one.
For instance, if you change things in A, and go to B, you'll be in whatever settings you last had when you were in B. If you change some things and go back to A, you'll be back where you were when you left A. If you go back to B, you'll be where you were when you last left B.
There is no way to lock or save these. The best way to deal with them is consciously make an effort to shift into each as you enter an assignment to which they apply, and deliberately change out of them when you're done that assignment.
For instance, I use my A bank for normal shooting, and my B bank in my studio. When I walk into the studio, I deliberately shift to B, When I walk out, I always try to remember to shift back to A. If I forget, I'll start changing settings in the wrong bank!
These would make more sense if they were called "Film Settings" instead of Shooting Settings. Don't complain to me, but these Shooting Menu Banks don't store everything I'd like them to. They aren't Shooting Settings; they are FIlm settings. Drive and focus modes aren't remembered with them.
You have four memory positions: A, B C, and D. Nikon was stupid enough to use the same names, A, B, C and D, instead of 1, 2, 3, and 4, for the Custom Setting Menu Banks! These confuse me, and I have an engineering degree for these things.
You can add a name to each one. I set my A bank for normal operation with the settings I described on page one, and don't name it.
I set my second bank, B, to what I use in my studio. I name it STUDIO.
I set my third, C, for comparing lenses. I call it COMPARISON. I also use this if shooting for time lapse or stitching. I deactivated the default automatic contrast, automatic white balance, automatic dynamic range and auto everything so that these wouldn't change between shots. Don't use this for normal photography - you want the D300 to adjust these for you.
Want to know what bank you used to make a shot? Each bank recalls your file naming convention, so you can use different file names for each bank.
How to Recall a Setting top
Easy: MENU > SHOOTING MENU > Shooting Menu Bank > (select one) > OK.
You'll see SHOOT and A, B, C or D on the top LCD, and on the read LCD if you tap INFO.
How to Save a Setting top
You can't save or lock any of these settings. This is a design defect and confused me at first.
The D300 continuously alters whichever Shooting Menu Bank is selected. Choose a different Menu Bank and you're changing that Menu Bank as you're shooting.
Menu Banks are confusing because all they do is return you to where you were when you last left them.
If you haven't selected a bank, the D300 defaults to Shooting Menu Bank A. You see that on the top LCD as "SHOOT A."
As you tweak settings, these are updated for the currently selected Shooting Menu Bank.
If you choose Shooting Menu Bank B, the settings for A are saved until you select Bank A again. Bank B is then modified as you work the camera.
When you switch to a different Menu Bank, the D300 recalls whatever settings you had when you left that Menu Bank for a different one.
This is retarded, but it's the way the D300 works. I only figured this out by having to explain it. This is why my settings were always changing all by themselves. If you are using a bank and change your WB, you just changed that bank. Sorry. If you change a setting and then realized you were in the wrong bank, sorry again. You just screwed up the wrong bank. There is no "back" button.
If you want to reset a bank to its defaults, select it, then use the next menu item to reset it.
I suggest Nikon fix this by treating these Menu Banks as they treat preset White Balances. They should have one Bank which changes as you shoot, as they all do today. The other banks should be memory locations which only change if you save to them deliberately.
How to Name a Setting top
You can save a name for the setting, even if you can't save the setting itself.
Choose MENU > SHOOTING MENU > Shooting Menu Bank > Rename. Select the bank you want to rename. Enter the name, and remember to press OK when done. If you forget to press OK, it forgets the name and you have to start over!
Hint: there's no obvious way to delete a character if you make a mistake. Use the Trash button to delete characters.
Reset Shooting Menu top
This resets everything in the selected Shooting Menu Bank (just explained above) to the defaults. You reset only the bank in which you're working.
As soon as you select "Menu Reset" and "Yes" it resets. It doesn't ask "Are you sure?" first. Be careful!
Play with everything to your heart's content, since if you do screw anything up this reset will fix it. Choose a bank you don't use and you won't change the bank you do use.
Active Folder top
You can create, name and rename folders on your CF card. They are named with a 3-digit number from 100 through 999.
New Folder Number
This is self explanatory. Choose a number, which creates a new folder, and go.
Select Folder
This selects the folder into which new photos are put. You use this to record images into a previous folder.
You might want to use Select Folder if you shot one event or subject, went on to a second and made a new folder for it, and then returned to the previous subject.
File Naming top
Fun! You can choose the first three letters or numbers which will be used to name all of your files! I use KEN, or 300 for my D300. If I had four letters I'd use ROCK.
You can select different letters for each Shooting Menu Bank, making it easy to swap among four sets of letters. Maybe you share a camera and want to know which shots you made.
The D300 always begins Adobe RGB file names with an underscore. You choose the three letters and the D300 chooses where they go.
Tip: You can't delete as you enter characters. Since you only have three, change a bad one by moving the cursor over it and entering the correct character.
Image Quality top
Image Quality duplicates half of the QUAL button. It chooses JPG, raw or both and the JPG compression level.
Whether you use the QUAL button or this menu you're also changing your Shooting Menu Bank.
See my discussion of the QUAL button for details.
Image Size top
Image Size duplicates the other half of the QUAL button. It chooses the JPG image size in pixels. It does not directly choose the size of the file in bytes.
See my discussion of the QUAL button for details.
JPEG Compression top
This is an important but obscure menu choice. It chooses the algorithm used to generate the JPGs. It works in addition to the BASIC, NORMAL and FINE choices, giving you a total six different JPG settings for every image size.
Size Priority is the default. It was the only option in older cameras like the D1X, D50 and D70s. Since it was the only option in those cameras, they had no menu option for it.
JPGs need more data (file size) to maintain quality as the subject's contrast and complexity climbs. A blank sky is easy for a JPG, and a busy tree with a zillion branches requires a much bigger file to retain quality as a JPG.
Size Priority keeps the file size constant regardless of image detail or subject complexity. This is bad because quality will get worse (add artifacts) as detail goes up.
Optimal Quality lets the file size grow if needed to maintain quality, and otherwise keeps it smaller. I use only this option.
The Optimal Quality option lets the camera allocate bits intelligently based on the subject, instead of making big files when they aren't needed for flat subjects like blank skies.
Using the Optimal Quality option in BASIC JPG lets the file size grow to the same size as JPG NORMAL if the subject needs it, and lets the file size shrink back to JPG BASIC when it's not.
Firmware Defect: Nikon accidentally reversed the two icons! The icon which shows an arrow from above directing all the little identical images to fit next to each other in the same space, which means "same size," is used for Optimal Quality. The icon showing little images of different sizes working together is used for Size Priority. Ignore these icons because they are reversed.
NEF (RAW) recording top
This lets you chose many raw options.
Type
Lossless Compressed
I don't use this, which is the default.
Compressed
I use "Compressed." You get full raw quality, range and options, however the file sizes are kept much smaller with no visible loss.
Uncompressed
Forget this. You get the same data and image quality as the other options, but with many times the file size. This option exists only for conspiracists who thought Nikon was cheating them when this option wasn't on other cameras. Ask your math professor; you get exactly the same data in Lossless Compressed and exactly the same images and adjustments in Compressed, but with none of the bloat.
NEF (RAW) Bit Depth
I use 12 bit. I can't see any difference with 14-bit, but 14-bit wastes my valuable time and file space which I can see.
Bit depth refers only to the precision, not range or accuracy, with which brightness levels are defined. The number of bits is completely unrelated to the brightness range described by these digital values.
JPG is log, not linear, so its 8 bits perfectly render the entire visual range from bright to dark.
NEF is a linear, not log, format. Because the levels (quantization steps) between digital values are the same at bright and dark, we have to use a lot of bits to get enough precession at the dark end. The log nature of JPG means that the q-steps become far finer at the dark end, so 8 bits is plenty.
Since NEF can't tailor the q-steps with brightness, we need to use 12 bits so that we have enough precision in the darks. This leaves us wasting bits at the bright end, where 12 bits gives far more precision than needed.
With 14-bit systems, it helps in the dark end, but is a complete waste at the bright end of the range.
When you select 12-bit, you're still getting 14-bit performance in the dark where you need it. All that changes is that the 12-bit position merely uses a look-up-table to skip between values at the bright end, where we far more precision than needed anyway.
Few photographers have Ph.Ds in mathematics, so they understand none of this, and waste valuable time and disc space by shooting in the more bloated modes like 14-bit, lossless or uncompressed, or shooting raw in the first place.
Photo books are written by laypeople who have forgotten anything past 9th grade math, so they misinterpret this to imply that 14-bit covers a wider range. Nope, it's just more precision where we don't need it.
White Balance top
This duplicates the WB button, and adds even more features.
I use AUTO. See my explanations of the WB settings, my Examples of D300 WB Settings and my page on Setting White Balance.
A huge advantage of Nikon over Canon is that we can set just about everything about WB right on the camera without needing to navigate menus. We still need these menus for some more tricks that few people will need.
Multiple Fluorescent options
Unlike tungsten lights, fluorescent lights have awful color balance, and each bulb type and brand is completely different than the next.
Once you've selected Florescent, Nikon provides seven different settings for different types of bulbs!
To select among these, just click right once you've selected Fluorescent
Hint: These types of bulbs always look awful. I never use these options since they never match the bulb anyway. If I have to shoot under them, I use the PRESET option as described at the WB button.
Green/Magenta bias
I never use this.
To add or remove a little green or magenta to your photos, simply click right once you've selected any of the WB settings in this menu. You'll get a chart on which you can adjust both green/magenta and amber/blue bias.
The D300 is awesome in that you can set different biases for each WB setting. Last I tried, a severe limitation of Canon DSLRs is that this adjustment affects every setting. IN other words, the D300 has nine different WB settings, each of which will remember its own G/M and A/B tweak, while with Canon, the one G/M and A/B setting affects them all. Worse, you have to use a menu to set any of this, while on Nikon, the far more important A/B setting is at your fingertips without menus.
Managing the Preset White Card Settings
Well hidden, you also can set the green/magenta and amber/blue bias for white-card preset WB. Since the front dial selects among the five memorized settings, you have to use the menus even to set A/B bias.
To do this in the menus, MENU > SHOOTING > White balance > PRESET and click right. Select one of them, then hit OK, or hit SELECT (center of Big Thumb Button) and SET.
This is also the menu in which you can save, move and name your various preset white card WBs. This is another big advantage with Nikon: I save these and call them up using only the dials for various difficult conditions, like indoor home lighting. To save and rename, select one and hit the center thumb button.
Each time you hold down the WB button in PRE, get it to blink and press the shutter, you store that value in d-0. To save it, MENU > SHOOTING > White Balance > Preset > (click right) > Select a location (d-1 through d-4) into which you want to store it, press the center of the Big Thumb Button, select Copy d-0, OK. YOu just saved that setting into d-1, d-2, d-3 or d-4, and can call it up with the front dial when you've selected PRE with the rear dial.
You do the same thing to edit the comment (name). If you've shot a blank card, you really do need to add comments, since there's no way the little thumbnail will mean anything.
Set Picture Control top
This is where you set the important things, like contrast and saturation.
Picture Controls are so critical to getting the pictures you that I have a complete page on Picture Controls.
These work the same, and give the same look, among the D300, D700 and D3.
Manage Picture Control top
This is where you save and recall Picture Control settings. I have an entire page about this at Picture Controls.
Color Space top
Don't touch this unless you really know what you're doing and print your own work.
sRGB is default. It's the world standard for digital images, printing and the Internet. Use it and you'll get great, accurate colors everywhere, all the time. Like what you see in my Gallery? That's all coming to you in sRGB. Use it and you'll automatically get great, saturated and accurate color everywhere. See Color Management is for Wimps for examples.
sRGB is specified in IEC 61966-2.1, which you may also see when examining color profiles. That gobbledygook means the same thing as sRGB.
Adobe RGB should never be used unless you really know what you're doing and do all your printing yourself. If you use Adobe RGB you'll have to remember to convert back to sRGB for sending your prints out or sharing them on the Internet. Otherwise they look duller than sRGB!
Adobe RGB squeezes colors into a smaller range (makes them duller) before recording them to your file. Special smart software is then needed to expand the colors back to where they should be when opening the file.
If you have the right software to re-expand the colors you theoretically might have a slightly broader range of colors. However, if at any point in the chain you don't have the right software and haven't attached the Adobe RGB profile you'll get the duller colors as recorded!
Web browsers don't have, and print labs rarely have, the right software to read Adobe RGB. This is why people who shoot it are so often disappointed. Even if a place has the right software, if you forget to add the Adobe RGB profiles to your files these places still won't read them correctly and you'll get dull colors.
Adobe RGB may be able to represent a slightly larger range of colors, but no screen or print material I've used can show this broader range, so why cause yourself all the trouble? I've experimented with 100% saturated grads in these two color spaces and never seen any broader range from Adobe RGB either on my screen or on SuperGloss Light jet prints.
Worse, if you're the sort of vacuum-operating geek who wants to shoot Adobe RGB because you read about it in a magazine article, did you realize that because the colors are compressed into a smaller range that there is more chroma quantization noise when the file is opened again? Ha!
See more at Adobe RGB.
Active D-Lighting top
This is Nikon's mis-naming of the Automatic Dynamic Range Control.
It is a very important part of why the D300's images can look so great.
I always leave it set to NORM, which magically optimizes highlights and shadows to look great.
This is so important that I have a complete ADR page all about it.
Long Exp. NR top
This is Long Exposure Dark-Frame Subtraction Noise Reduction
OFF
Default. Leave it here.
ON
Don't use this. If you do, the D300 will double the amount of time you have to wait around for longer time exposures. The D300 is so good you don't need this. Nikon only includes this because old-timers would get peeved if it was missing.
High ISO NR (High ISO Noise Reduction) top
This lets you control the strength of the noise reduction (smudging) applied at high ISOs.
I find the NORMal (default) position optimum.
You can set it higher, but it removes fine details and texture.
You can set it lower and get more noise.
ISO sensitivity settings top
ISO sensitivity
This duplicates the ISO button. I use ISO 200.
ISO sensitivity auto control
This is where we set the AUTO ISO feature ON or OFF. Auto ISO magically bumps up the ISO as the light gets weaker, saving you a lot of time since you no longer need to watch your lighting or shutter speeds. Set this and just shoot, from daylight to moonlight.
Auto ISO leaves the ISO alone until the shutter speed would get slower then the Minimum shutter speed set below. If the light (or your camera settings) would cause a slower speed, Auto ISO increases the ISO so the shutter speed remains at the slowest setting below.
Auto ISO keeps increasing the ISO as the light dims until it hits the Maximum sensitivity you've set, after which the shutter speed will be allowed to get longer than what you've set.
Maximum sensitivity
This is the highest ISO that AUTO ISO will use before lowering the shutter speed. ISO 6,400 looks great, so I set ISO 6,400 here.
Minimum Shutter Speed
This should be set to the slowest speed at which you won't get any subject or camera motion. I hope Nikon some day offers automatic tracking of this based on a selectable fraction of lens focal length, but for now, this is one of the settings I change as I change lenses or subjects.
I set 1/80 or 1/100 for people photos. For a 300mm telephoto lens, I might choose 1/250. For a wide angle lens for dim landscapes, I might choose 1/8.
Live view top
Live view lets you set how Lv works.
Live View Mode
Hand-held
This lets you press the shutter once for Live View. As you're viewing, jam the shutter all the way down a second time and hold it. The D300 makes a bunch of noise, and gets off one shot. If you only daintily press the shutter when Lv is active, the D300 makes no photo and just pulls you out of Lv.
Tripod mode
This lets you fiddle with precise focus. I'll not try to explain how to use it; press the "?" button on the D300 as you set this and the D300 tells you how to use it.
Release Mode
This is where you select single or continuous shooting, since you had to use that control to select Live view. This is a design flaw; Live view and the self timer should not be on a rotary dial.
Multiple Exposure top
This is silly. It lets you do what we did back on film.
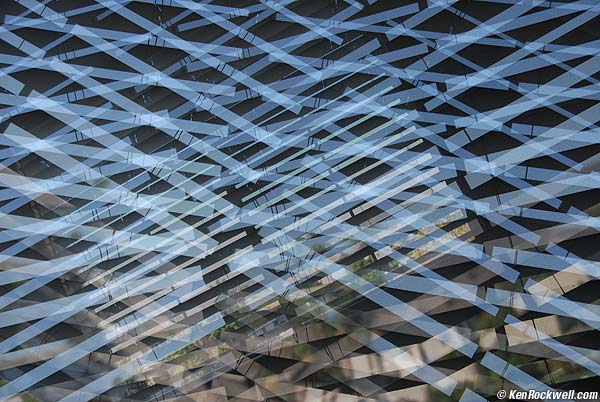
Easy example: The Blinds in My Office. (5 exposures.)
This works and it's easy to use.
Unlike film, it's smart enough to compensate the exposures so they add together without overexposure.
To use it:
1.) Choose the number of shots to combine (2 - 10).
2.) Hit OK.
3.) Go up to DONE.
4.) Hit OK. It only works if you remember to scroll up and hit OK.
You'll see a tiny icon on the top right of the top LCD that looks like two rectangles mating.
Make your shots. You'll see each on the color LCD as you make it. You'll also see the mating rectangle icon on the color LCD.
You'll keep seeing the flashing mating rectangles icon on the top LCD until you complete all the exposures for which you asked in step 1.).
The D300 won't tell you how many you've made until you're done. You can cancel it in the same menu if you want. Choose RESET.
When you've made the last shot the D300 shows it as it did for the other shots for a moment, then goes off and adds them all together. After the CF light blinks a few times you'll see the composite image on the color LCD. The intermediate single images are not saved.
It works with JPGs and NEFs.
Don't turn off the automatic exposure compensation, called Auto Gain. If you do you'll get at least a stop of overexposure.
Interval timer shooting (intervalometer) top
This works and it's fun. This lets you set the D300 to fire automatically at preset intervals.
The D300 is better than a video security camera because it has so much more resolution. You can point this outside, cover a wide angle and have more than enough resolution to read the plates off a perp's car. You'll even be able to read the titles off your DVDs that they're hauling away.
I tried it and busted a pair of cute bunnies who spent all night eating grass and hanging out in the middle of our street.
The basics are easier to figure out on your own than for me to explain here, so I'll only cover some specifics below.
Calculations top
You tell the D300 the interval between shots and how many shots to take.
The D300 doesn't calculate how long the series will take.
You can't tell the D300 to run for a certain period and make so many shots. You have to do the math yourself and tell the D300 how many shots and how much time between them.
Battery top
It's easy to run down the D300 battery since you can program it to make so many shots. Long night exposures will kill the battery, too. You'll wake up and wonder why it stopped halfway through.
You may want to get an AC adapter if you really get into this, or be clever and optimize your ISO to keep exposures shorter.
Be sure to turn off the LCD review.
Select Intvl*Shots Menu (Intervalometer) top
The D300 does more than a regular intervalometer. The D300 lets you shoot one shot at each interval, or a burst of them. The interval is set in another menu. The default interval is a minute and can be set from one second to many hours.
The Select Intvl*Shots menu is as clear as a lens cap. The Select Intvl*Shots menu is in the format of 001 x 1 = 0001.
The first 001 number sets the total number of intervals at which shots are made. If you set "060" and a one minute interval, the D300 shoots each minute for an hour (60 x 1 minute = 60 minutes).
The second single digit is how many rapid-fire shots are fired at each interval. Set it to one and you get the usual one shot at each interval. Set it to several and you'll make several rapid shots at each interval. You'd do this if you intend to cherry pick one shot from each burst, for instance, to recover if someone walks in front of your camera at one interval.
The last number is the total number of shots. This is calculated by the D300. You don't enter it. It's the number of bursts (the 001 part) multiplied by the number per burst.
Time Lapse top
Want to see some intensely cool stuff? Check out Thomas Kranzle's time lapse reels. He makes a shot about every 4 seconds, runs for about 640 shots, and assembles them in a film editing program at 24 fps for motion pictures. I saw his work when he showed our photo club. Also see more time-lapse magic here.
To do cool stuff like this you need to:
1.) Turn off every auto anything, including auto contrast and auto saturation. If you don't, your sequences will flicker from the auto WB or auto sharpening or auto anything from frame-to-frame.
2.) Import all your shots to your Mac.
3.) Open iMovie or Final Cut.
4.) Create a new project. Thomas selects HD to get good enough resolution for film-out.
5.) Select all the stills and drag them into the clips pane.
6.) Find the command to sequence them together in the timeline as independent frames, one frame each. I forget where this command is and will vary with your software.
7.) Hit go and voila! Time lapse!
8.) Save it as you prefer. Thomas saves them as .MOV files and outputs to 35mm movie film, although more and more clients are asking for the files instead.
Of course you can do this down at video resolution, but using HD resolution (1,920 x 1080 24p) looks incredible and is easy from a digital still camera. This looks insane when projected digitally from a computer, since video by comparison is only 720 x 483i. My old iBook laptop can do this and output in HD easily with the software that came with it for free; good luck in Windows. I have an article on Why Video Looks Crappy, and thus why you should do this in HD. HD has two-megapixel resolution while video has only 1/3 of a megapixel.
Exposure is set manually and left alone. For sunrises and sunsets it looks much better to have it fade to or from black than to twiddle the exposure frame-to-frame.
You can cheat and shoot bracketed bursts and import each set of shots as its own parallel timeline. You can crossfade between them as the sun comes up or down. Thomas found all this effort didn't have much benefit. (Beats me how to shoot bracketed bursts on the D300, I haven't tried. Thomas shot what you see with a Canon 20D. He wears out a lot of them!)
My D300 User's Guide continues below.
I support my growing family through this website.
This guide is free to read online, but copyrighted and formally registered. If you haven't helped yet and would like to save or make a printed copy of this article for your camera bag, please send me $5.00 for each complete or partial copy that you print or save, for personal use only. Others charge $29.99 for crappier information, and with your honesty I can continue to offer these guides online for less.
If you bought your D300 by clicking through my links, then you've saved money and also helped me write this guide. Thank you and please enjoy it. It's great people like you, and those who help me otherwise, who allow me to keep adding to this site for everyone's benefit.
The biggest help is to use these links to Adorama, Amazon, B&H, Ritz and J&R when you get your goodies. It saves you money and is a huge help to me. These places have the best prices and service, which is why I've used them since before this website existed. I recommend them all personally.
Thanks for reading!
Ken
Back to Top of D300 User's Guide or Top of Nikon D300 Review
KNOBS and BUTTONS
MENUS
CUSTOM SETTING MENU < < NEXT