Home Search Gallery How-To Books Links Workshops About Contact
|
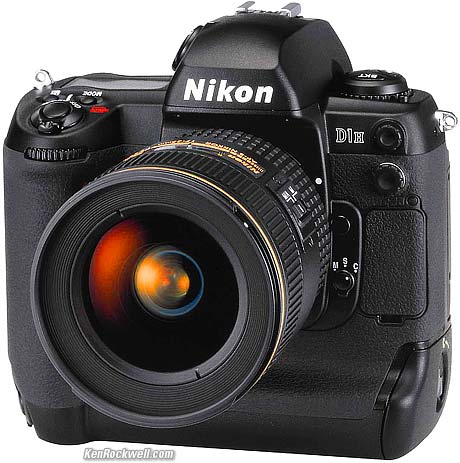
Film vs. Digital About these reviews
get the D1X here or here and D1H here or here. There are five required accessories you must buy separately to use this camera properly: 1.) A spare battery pack ($100). The camera comes with one battery. You need the second in your bag to swap when the other dies. Each charge is good for about 250 shots, or about two to three hours of continuous shooting. You cannot get by (and it is bad for the battery) to try to charge just one before each job and hope it lasts you. The good news is that they charge fully in less than an hour, so so long as you are not too far away from the charger you can have continuous power with just two batteries total. There also is a Polaroid brand battery made to replace the Nikon brand battery. It costs less than the Nikon brand. The Polaroid brand sometimes has problems with the mechanics fitting properly to the camera, so if you have this problem just get a dead Nikon brand battery and the mechanics can be screwed onto the Polaroid brand battery just fine. I have used the Polaroid brand battery and it gives the same number of shots as the Nikon brand. 2.) Throw away the translucent soft-plastic Nikon LCD cover and replace it with the perfectly clear Hoodman cover ($20). 3.) Media. The camera comes with no memory card. Expect to drop a few hundred dollars on at least 512MB worth of cards or card on which to record images. No, you don't need film, but you do need to buy memory and it is expensive. See my media page. 4.) Some sort of card reader so you don't have to run down the batteries in the camera while you transfer files into your computer. A $30 USB reader is all you need. I have a Memorex which works great. For a laptop computer get a PCMCIA card adapter; I got mine free when I bought my microdrive. 5). DX-series Nikon flash. No other flashes, except for the DX versions, work on the camera except in the most basic non-TTL modes. On the other hand, the "advanced" TTL flash modes are poor and you may just want to use the old non-TTL A modes instead, in which case other flashes probably work. Flash exposure control is the weakest point of these cameras. 6.) Software to manage all the hundreds of images you'll make each day. I use iView Media Pro for the Macintosh; amateurs on PC use BreezeBrowser. Each sells for about $50 as a download off the Internet. Watch it; there are many things called iView; I'm talking about the one from England that only runs on Mac at the link above. iView is pretty standard in the pro publishing and newspaper world. Either of these programs lets you quickly sort through hundreds of images full screen and delete and organize them. They each also allow you to make web galleries and automatically. They can make all the web pages and index pages and resize all the images etc. You just point them at a folder of images and let them have at it. My galleries are made by hand the hard way, however when I shoot an event and need to throw hundreds of images on a CD or on my site for review I use the automation. OPERATING HINTS: Forget reading this or any reviews. Go rent or borrow a camera since that's the only way to appreciate it. Now that you own one, here's how I set mine up. Actually you may ignore this, the camera comes defaulted to the settings you really want to use. Here are the settings I prefer and why: CSM SETTINGS: (Orange menu) Leave as is, or change: 1: Image review: Setting to ON means the LCD comes on after every shot; OFF saves the battery. 9: Dynamic AF in S mode: Leave off. Set this to ON if you give your camera to someone to take your photo; since this mode just focuses on whatever is closest in the scene it's most likely to give better results with a non-photographer. Remember to turn this off when you get your camera back. 20: ISO Steps: set to one stop steps, not the 1/3 stop steps default. This way you can change effective film speeds three times as fast as default. There is no need to set finer values, and with full stop clicks you can change the film speeds without looking by counting the clicks. 21: AE-L AF-L Button: I prefer to set it to AE Lock only, since when I point the camera down to lock the exposure on the darker part of the image I don't want is focusing there, too! 23: Sharpening: Leave in NORMAL for D1X and LOW for D1H. The sharpening of the D1X is ideal in the NORM mode. Unfortunately, the sharpening radius of the D1H is too large, so the NORM setting gives artificial halos. Therefore you need to use LOW and add about 150% @ 0.3 radius in Photoshop after the fact. If you are shooting in any of the TIFF or RAW of NEF modes (explained below) then use NONE for sharpening and add 400% @ 0.3 radius for the D1H. There's no need for the RAW or TIFF modes on the D1X since the JPG images are perfect right out of the camera. 24: Tone Compensation: Setting to + More Contrast gives a vivid Fuji Velvia-like image (with the shadows and highlights subject to evaporating), and - Less Contrast is more like Fuji Reala. The color saturation also changes wildly with these settings, something Nikon doesn't realize. Use LESS for people and indoors under available light, and MORE for vivid landscape colors. The AUTO setting is fun, but often goes on it's own way from shot to shot and gives inconsistent results. Of course the NORM position isn't a bad idea, either. This setting has a huge effect on your image, so play with it and see. Heck, that's why you bought a digital camera! If anyone asks me about this I'm going to vomit; just play with it and see which settings work for you. Today I shoot everything in LOW mode and use Photoshop's curve commands to pump it up later. 27 Display Mode: I used set mine to BOTH Histogram and blinking HIGHLIGHTS since I'm a curious sort, but guess what: these two modes are worse than useless. The histogram is awful because it only reads the green channel, and in most cases your red (or sometimes blue) channel will be off the scale and you won't know it by allowing yourself to be misled by the camera's defective green-only histogram. Likewise, the blinking HIGHLIGHTS warning is also less than useless, since it is defective and does not respond to clipping in each and any of the R, G or B channels. It appears to respond to the Y (luma) channel, which means again that you can be completely saturated in one channel (most often the red) and not even know it. You need to look at the picture itself as a much better indication of overexposure. Today I do enable the histogram, but only use it to look for underexposure. The blinking highlight display and histogram are useless for detecting overexposure. Looking at the image on the LCD is more helpful to a skilled eye. 28 NEF (RAW) Image: I set mine to COMPRESSED. This means that the camera takes 8 seconds to write each image instead of just 4 seconds. In exchange for this increased write time and battery drain, the compressed files take up about half the space on your card. Compressed RAW images are 4.0/2.0MB; uncompressed RAW images are 8.0/4.0MB at 2000 x 3000 / 1312 x 2000 resolution. The reason the smaller files take longer to write is because the camera's computer has to do a lot of math to compress them. This long compression time only means the batteries wear down faster; remember your camera always allow you to blast away like a maniac on coke since the camera is doing all the writing on its own without you having to worry about it. The image quality is identical in both modes; it just doubles the amount of photos you can fit on a card. The remaining exposures indicator in compressed mode is wrong. The remaining shots indicator always reads the same in either compressed or uncompressed mode. You need to double the reading when using compressed mode. File Number Sequence: ON. This means the camera names shots from DSC_ 0001 to DSC_9999, even if you format the cards and change cards. The default of OFF means every time you pop in a new card or format one that it starts off from DSC_ 0001 again. If you leave it in the default of OFF you will never be able to search your computer for a certain shot, since you will eventually have a hundred files named DSC_0025. Also you may not even be able to file all the shots from the same shoot in the same folder on your computer, since you'll have duplicate file names! 32 Color Mode: Leave it in sRGB. If you set to to Adobe RGB you'll always have to convert color spaces for any Internet, email or web page use, or even to look correct when opening in Photoshop!!!! Anyone else who sees your image files will probably see them as very dull if you use Adobe RGB since they will most likely presume them to be in sRGB. Nikon does NOT add the color profile to its files, so unless you are in a color managed workflow for publishing and remember to add the Adobe RGB profile manually you are asking for trouble, since the colors will be dull when read by all software which of course will presume it to be sRGB. HINT: If you have images shot on a Nikon D1 series camera in Adobe RGB mode you can use iVIEW MediaPro to add the correct color profiles. The thumbnails will still not look correct, but the full screen views will, however, be correct once you add the correct color profile and the images will read correctly in Photoshop. If you have no idea what I'm talking about then by all means leave the camera in Mode I, sRGB color mode. Guess what? I've tried the sRGB vs. Adobe RGB spaces on my CRT monitor and EPSON inkjet printer in a properly color managed work flow and the two look identical. Therefore, even though I can tell you exactly why the Adobe RGB space might have some theoretical advantages in some very limited places, in real use the quality is identical but requires a lot of fooling around and manual handling just to look OK, and in most practical cases will look worse because of the far greater chances for screw ups. If you don't understand color management (very few people do) then don't even try playing with this, since you'll have dull colors and not know why. I have heard if your output is for a printing press (CMYK) then maybe Adobe RGB will have advantages; I no longer shoot for print. 33 Hue Adjustment. Don't screw with this; leave it at 3. This is a fine-tuning adjustment for blue/yellow bias. It is not a saturation adjustment; that's the tone compensation setting #20. 34 No CF Card: leave this at ON. This prevents the camera from shooting with no card in the camera. Otherwise the camera would allow you to shoot away with no card, making you look like a total idiot when you realize you were not recording your images if you had no card in the camera! QUALITY MODES: You adjust these by pressing FUNC and rotating the dial. Use NORM JPG. This gives a swell image at 640kb (1.2MB on D1X 2,000 x 3,008 mode). I use this for almost everything. BASIC JPEG (320KB; 640KB on D1X 2,000 x 3,008 mode) looks fine if you want smaller files when you are shooting something like a party and want the increased speed you'll get in downloading and processing a lot of files for uncritical use. It looks almost as good as NORM. Use it only if you need to cram a lot of images on a card. Avoid BASIC if your scene has a lot of contrasty detail like a backlit tree; BASIC can look fine for shots that are very smooth. You pay a lot of money for a D1; go buy a bigger card instead of using this setting. These images do look perfectly fine for most uses. Friends of mine have rented the use of BASIC JPG images made in the lowest resolution mode of their D1x for over thousand dollars, and the images look fine printed on posters at 12 x 18," so don't lose too much sleep over this. FINE JPG (1.2MB, 2.4MB on D1X 2,000 x 3,008 mode) retains a little more fine texture in fabrics and eliminates JPG edge artifacts. It looks very little better than NORM but takes up twice the space. Use it if you have loads of space, just remember it also takes up twice as much space on your hard drive, CD backups and takes twice as long to download for an almost invisible quality improvement. TIFF: Skip these unless you are working in a studio and don't care about longer download times and getting very few images on a card. You cold slow down the camera, too, if you are shooting fast and it can't write the files fast enough to your card. The quality improvement is visible only to scientists looking at test patterns. If your client needs TIFFs you can just save in that format from Photoshop after downloading the JPGs from the camera above. Hey, if you have the space and time feel free to shoot in TIFF, just that if you're the sort of bonehead who puts more weight in what you read off the Internet than you do by trying it yourself, pass on this mode. The photos look THE SAME. RAW (NEF): "Non-Exchangeable Format" These files can only be read on your computer, and only if you have the special Nikon software that came with your camera or have the special Photoshop plug-in to be able to read these screwy formats. Do not expect your clients or anyone to be able to do anything with these files unless they mess with installing the special NEF reader software on their computers. This format is elegant because it has excellent quality in a small file size, but you have to realize that they really slow down your work flow since you will have to convert every single one of them to standard JPG, PSD or TIF formats in Photoshop before you can expect anyone else to see them. Also even if you are as clever as I am getting with batch processing, these files still take a while to be decoded and opened in Photoshop. CAUTION: You are screwed if you do what you normally should do in Nikon View 4, which is to rotate your vertical NEF images in the Nikon View software before downloading them to your computer. When you open these NEF files in Photoshop after they have been rotated in NV4 they still open in a horizontal format, but the PIXELS ARE NOW STRETCHED HORIZONTALLY. You're screwed; you'll have to do an anamorphic conversion in Photoshop and lose half your resolution in the process. This is a defect in the Nikon software. Because of this, in addition to having to wait an average of 25 seconds for Photoshop to open any of these files, you also have to rotate each of them every time you open them in Photoshop because you cannot download them properly rotated. This problem seems fixed with the NEF reader that comes with the NV5 software. I do use NEF if I am shooting something for which I need maximum quality and intend to spend a lot of time tweaking the image. On the D1X the excellent in-camera sharpening means the NORM JPGs are fine with normal sharpening and there is no need for the difficult NEF mode. If I am shooting with NO SHARPENING on the D1H (due to the less than optimal in-camera sharpening) I prefer the RAW mode since JPG artifacts become accentuated when adding sharpening to unsharpened D1H images. If you are shooting a subject with sharp transitions between different vivid colors then then NEF mode may be better than JPG modes. There is some weird color sub-sampling and jaggies in the chroma subchannels that becomes apparent with sharpening in the JPG images that is absent in the NEF images. Most people won't notice this. B/W modes: Skip these unless you just want fast B/W images. They take up the same amount of space on the drive as color. In addition, by using the standard color modes you can get even better B/W images by starting with color and using the channel mixer in Photoshop after you made the photo. WHITE BALANCE ("WB" button behind the little cover on the left back of the D1 series): I have a page about setting WB here. I use the FLASH white balance mode for almost everything on the D1H. I see no difference between the FLASH and CLOUDY modes. I use the AUTO white balance mode for under weird mixed artificial lighting without flash, however under normal lighting the AUTO mode is often inconsistent from shot-to-shot. When shooting people indoors for parties etc. I suggest you use the flash on-camera, point it up, use the bounce card, use SLOW REAR sync, choose a wide aperture, use ISO800 and set white balance to match the ambient light. You might want to gel (filter) your flash to match the ambient light, especially if you prefer a lot of fill. In typical tungsten indoor light I use an orange gel over the flash and set the camera to tungsten and it looks superb. Adjusting the WB is a complex bit of art. Just set it to whatever looks good. Forget about degrees Kelvin and all that other baloney others want you to worry about. It's nice to understand the science, but all you really need to know is that all the adjustments are just different ways of making the image warmer or cooler and the only thing that matters is making it look good. I find the screen on the camera is just fine for making this adjustment in the field. Yes, every time the light changes you need to twiddle with this. It can be a pain and it is important to set. The WB is not set along with the preset memories on the D1H, so it's one more thing to have to mess with. AUTO mode always selects FLASH WB whenever the flash is on, even though it does not tell you this! This is bad for use with fill flash indoors since if you are shooting under artificial light you'll want a different setting. Flash Sync Overt flash sync is specified up to 1/500, and with shoe-mount Nikon speedlights, the D1 series limits you to 1/500. However, if you're using studio strobes with the PC terminal you can set speeds up to the full 1/16,000. You lose light, but it works fine. You don't need these speeds, but it is a clever way to use larger apertures at close distances with powerful strobes. You can do this with the D1 series because they use an electronic shutter at those speeds, so the usual 1/250 limitation all focal plane film SLRs and amateur cameras like the $7,000 Contax N Digital does not apply. Heck, the only real reason the D1 series sync is limited to 1/500 is because you'll start to lose some of your light with some strobes at full output, since the strobe duration can be longer than 1/1,000. NEW FOLDER CREATION Here's the only thing you'll learn by reading the manual: hold down the button with the picture of the key on it while turning on the camera to create a new folder. You want to do this every time you start a new subject on a big card. This way when you go to download you'll already have things partly organized, and can download just what you need. By all means, make a new folder if you start a new job on the same card. WORK FLOW So how to I get all those images into my machine and manage them? As of March 2003 I use: Mac OSX: I use none of the Nikon software. NV5 works very poorly on OSX and you don't need it anyway. I use a Memorex card reader and copy entire folders to my hard drive. I then rename that folder to what the job was. I then drag that folder into iView Media Pro which catalogs it for me. I then select all my vertical images, choose JPEG ROTATE in iView and walk away while it crunches on them. I then save the iView catalog and I'm all done. The camera data is already in the JPGs as EXIF data. Windows 2000: I use a PCMCIA card reader in my laptop. I call up Nikon View 4.3.1 (much preferred over Nikon View 5) and then select the folder in which I'm interested. I wait for NV4 to open all the thumbnails. (I set the thumbnail size to the biggest 256 size.) I then select all the verticals and hit the ROTATE button at the top of the screen. This is the biggest reason to use NV4: the rotation happens INSTANTLY! I now hit SELECT ALL and then TRANSFER AT SAME SIZE. I wait for them all to copy into my computer. Remember to set up the preferences in NV4 and it will both copy all the camera settings into captions in the image file, and even add your copyright, phone number name and address into other data in each JPG file that anyone can read in Photoshop by going to FILE > FILE INFO. To catalog I use BreezeBrowser. ahead
to RECOMMENDATIONS > > |