Home Search Gallery How-To Books Links Workshops About Contact
Epson
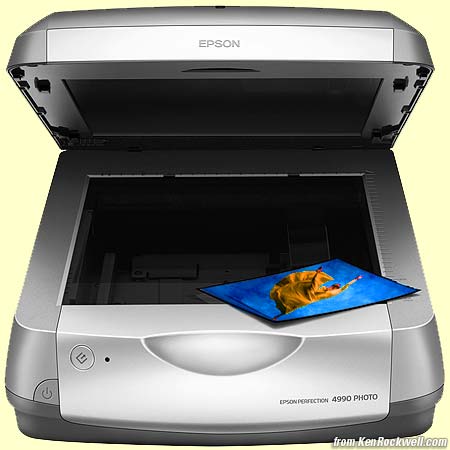
4990 Scanner Epson 4990 Photo Scanner. Introduction This review is from 2005. The 4990 is an excellent scanner regardless of year, however if buying a scanner in 2008, I'd look at the current Epson V700, V750 and V500, which replace it. Please treat the rest of this review as an historic piece from 2005 since you can't get the 4990 new anymore, and be rest assured that the 4990 is a superb scanner regardless of age. The EPSON 4990 is a dream to install and use and easily gives great film scans, especially from hard-to-scan Fuji Velvia 50. It scans so well that when I have time to use it I'd rather be scanning my film than running comparisons to my more expensive film scanners. It's 99% as good, and maybe better, than my $3,000 Minolta Multi-PRO scanner. See an example scan from a 6x12cm transparency here. See an example of its color accuracy here. There's nothing I can find to fault the 4990. It just makes great scans of anything, and makes it fast and easy. As of 2006 Epson announced a more expensive and better V700 / V750 scanner you might want to investigate. The 4990 sold for around $400 and the 4990 PRO for about $550 in 2005. I've always bought these online since if I hate them I can easily return them for a refund. Here's an example here's the first image I scanned from the 4990 (huge 1MB file). The colors are exactly what was on my 4 x 5" transparency. Of course I had to reduce the resolution to one-tenth (one-hundredth of the total pixel count) to fit your screen. The EPSON 4990 underscores how scanners get better and better every year. It's almost as good (maybe better than) my dedicated Minolta Multi-PRO film scanner for which I spent $3,000 five years ago. I got only the basic $400 PHOTO model since I already have the color calibration software and targets that come included with the $599 PRO model. Guess what? Even without color calibration the color accuracy of the basic 4990 PHOTO is the best I've ever seen from any scanner, and that's right out of the box without doing anything! I LOVE this! Caveat and Applications General If you shoot panoramic, medium or large format film then the 4990 may be the only scanner you ever need. I shoot all these formats and that's why I got a 4990. I shoot Fuji Velvia transparencies. Different film scans differently. I hear Velvia is the toughest, thus if I like it on Velvia it ought to be even better with other film. I don't shoot color negatives. This is because there is no standard for color rendition with negative film and I usually get awful colors every time I try to scan or print it. The great news is the three color negatives I scanned on the 4990 actually looked great; better than any other film scanner I've used. Color rendition with negatives is hit-and-miss depending on what film you use. 35 mm If you only shoot ordinary 35 mm film, slides or prints your money probably will be better spent on a dedicated 35 mm film scanner which I cover here. Then again, the 4990 is so ridiculously good, and gave the best color I've ever gotten on a scan of a color negative, that as I get more familiar with the 4990 that it just may be better than a dedicated film scanner. EPSON makes no dedicated film scanners. I find EPSON scanners the most fun to use because their software is the best. The software behind the Nikon and Minolta scanners is never really that easy or smooth to use. Prints For prints the 4990 is more than you need. Any inexpensive flatbed scanner will do a great job for prints. I still love my EPSON 1640 I bought as a refurbished unit for $50 five years ago. For prints I suggest getting the least expensive EPSON you can find. They're all great. You only need a maximum of 300 DPI for scanning prints, and even the crummiest scanners do 600 DPI. The only reason to scan prints at higher resolutions is if you are scanning an optically printed print and intend to enlarge it. Almost all prints made today are printed digitally, especially at 1 hour labs. These digitally made prints are only printed at 300 DPI, so there is no more detail to be enlarged beyond scanning at 300 DPI. BASICS Introduced February 2005, this scanner and it's brethren are so good that Minolta stopped making my Multi PRO film scanner. There are two versions: The Epson Perfection 4990 PHOTO for $449 and the Epson Perfection 4990 PRO for $599. The only difference is that the PRO version includes color calibration software and targets as well as some other software. They both include Photoshop Elements 2.0, a great program for almost anything. The Epson 4990 scans any size film or file pages up to 8 x 10." The 4990's film adaptor (TPU) is much more than most scanners' simple light box; the 4990 has a lamp above that scans along with the sensors below. This helps to give it it's 4.0 DMax spec. It has ICE for both reflective prints and for film. ICE for film removes dust and scratches while ICE for prints removes surface defects like folds and creases. ICE works on everything, but you have to use the film holders for film scans. ICE doesn't work on 8x10" film. COMPARISONS I'm working on comparisons to the Microtek 1800f and Minolta Multi-PRO. All these scans take a lot of time to make. I'll make a dangerous guesstimate, based on only a few scans, that the 4990 is much better than the 1800f and about as good as my Multi-PRO. You can see a quick comparison between the 1800f and 4990 here. These make the 1800f look so bad that I need to make two new scans at the same time and see if the difference is really that great. First results show the 4990 much easier to use than the Multi-PRO, but that the Multi-PRO is, as expected, sharper. Then I discovered that the default USM in the EPSON 4990 is at too large a radius and that at high resolutions the 4990 gives better results applying a correct USM in Photoshop. I'll let you know as I learn this. Surprisingly, the 4990 seems to have the same or better dynamic range than the Multi-PRO! More to follow. Specifications Scan Area: 8 x 10" for film, 8.5 x 11.7" for prints Film Holders a.) Eight mounted 35mm slides b.) Four six-frame strips of 35mm (24 frames total) c.) Three 120 strips, 6 x 12 cm max. each strip d.) Two 4 x 5" sheets Even more fun is the 4990's 120 strip holders are 12 cm wide, so 6 x 12 cm panoramics can be scanned easily in one step. Actual aperture is a rather generous 56 x 121 mm; the standard 6 x 12 format is really 56 x 112 mm. It also has an 8” x 10” guide for transparencies and proof sheets without film holders for scanning film mounted in file pages. It focuses just above the glass platen so if you're making or buying holders for odd sizes it works perfectly; just don't put the film directly on the platen for best focus. Look around on the internet since there are garage shops that make custom film holders for weird size film for the Epsons. Resolution: 4,800 DPI DMax: 4.0 Interfaces: USB 2.0 and Firewire IEEE 1394 Size and Weight: 12" wide by 18.7"deep by 5.3" tall. 14.8 pounds. Hardware Dirt Removal ICE dirt and scratch removal for film (except in 8 x 10" size) ICE dirt, scratch, tear and bend removal for prints Software The included software is the difference between the two versions. Both the 4990 PHOTO ($449) and 4990 PRO ($599) include Adobe Photoshop Elements 2.0, ABBYY FineReader Sprint Optical Character Recognition software and EPSON Scan with Easy Photo Fix, the basic scanning software. Additionally each version includes: Epson
Perfection 4990 PHOTO ($449) Epson
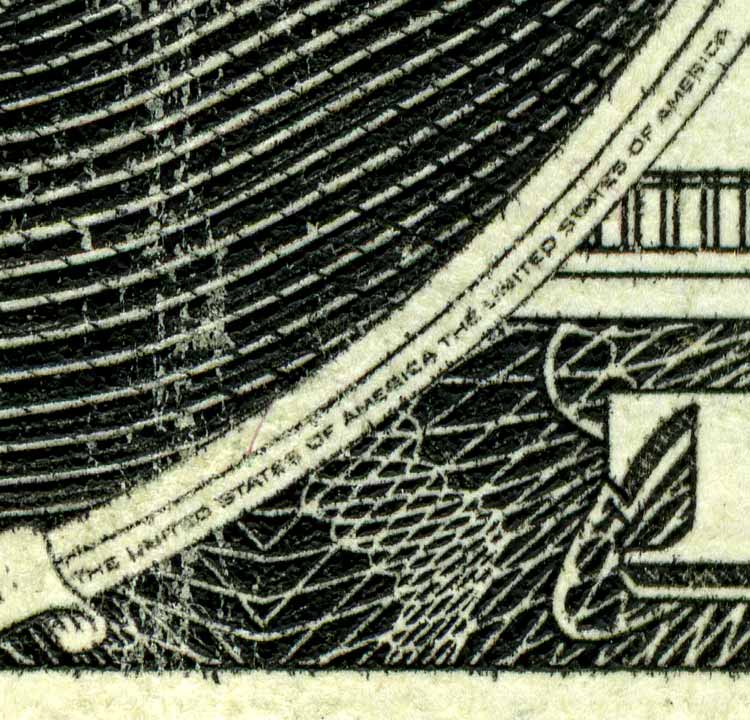
Perfection 4990 PRO ($599) Performance Installation Installation is trivial. Put the CD in your drive and keep clicking OK. Even better, it automatically installed the plug in for direct scanning into Photoshop CS2, which is how I prefer to use it. I'm on Mac OS 10.3.9. Like most good installations, it took me longer to read the directions than just to plug it in and go. The directions, which I followed, are very picky that you only unlock the carriage and plug in the transparency top only after you install the software. I have no idea why, and I didn't try doing it the wrong way just to see. Not only did it automatically install itself as a Photoshop plugin (accessed via FILE > IMPORT > EPSON 4990), it did this for all my Photoshop versions (7, CS and CS2) on my Mac simultaneously! Interface I use the Firewire connection with my 800 MHz / 1GB RAM 12" Apple Mac iBook laptop, my primary machine on which I do all my work today. The USB 2 connection ought to work as well. Sadly there is only one Firewire (IEEE 1394) connection on the scanner. That's great if you have no other Firewire devices or plenty of connections on your computer. Personally all my other Firewire devices have TWO firewire connections each, so it's trivial to use just one Firewire connection at the computer and then string the connection from device to device. Personally I have a couple of external hard drives, a CD burner, a DVD/CD burner, a Microtek 1800f and Minolta Multi PRO scanners all plugged into one firewire connection this way. They all work great together even doing things like copying or burning from one drive to another at the same time. Every device I use except this EPSON 4990 has two connections making it easy to share. It's unfortunate that this EPSON only has one connection, which means it rudely has to be connected at the end of the line, and makes it impossible for me to connect any other device also rude enough to have only one Firewire connection at the same time. Mechanical Construction Quality It's exactly what I expect from Epson: it's very well made and expertly packed. Yes, it has a lot of plastic, and it's extremely well made and precise plastic. Made in Indonesia, a great surfing area. Oddly I see some haze on the inside of the bottom glass, inside the scanner. Mechanical Design The top cover is only held up by friction. This means it can fall down when left open, and also means that it may not choose to maintain any force on flat art being scanned. For flat art you might want to put a heavy book on it. Audible Noise It's the quietest scanner I've ever used. It's almost too quiet. Scanning is a very manual and involved process, so I like to be able to hear what it's doing so I know when it's done. It makes the most delicate and precise, soft sounds as it scans. I have to listen carefully on my desk. I can't hear it across the room like my other scanners. Software I got Epson Scan 2.61A with the scanner and use that to scan directly into Photoshop CS2 via FILE > IMPORT > EPSON 4990. This option installed automatically with the standard installation. SCAN QUALITY Note: I clock scan time from when I hit the SCAN button until the image pops up in Photoshop. It doesn't include the time taken by the Photoshop plugin to open or the time for the preview scan and for me to select the settings. I'm using a Firewire connection to my 800 MHz Apple G4 12" iBook laptop with 1.1 GB RAM and OS 10.3.9. I'm also running several other programs while the scanner runs in the background. I'm scanning as a plugin to Photoshop CS2. I have Photoshop set to use only 50% of available memory, which works out to be about 350 MB of real memory and 630MB of virtual memory. Therefore if you have a hotter computer set to do nothing but scan you'll probably get faster times. I have other work to do on my computer while it scans. Flat Art Flat art, always easy to scan even on a $30 scanner, scans great. It scans fast and well. I can't really say anything better about it, it works great for scanning prints. Pushed to the insane limit of 4800 DPI it gets a little soft, but realize the only flat art scanned at 4800 DPI would be for very special purposes, like forgery of intaglio printed stock certificates, which are obsolete anyway. Here you can see a segment of a US $20 bill at 1600 DPI, which you can compare to the scan I got from the 1600 DPI EPSON 1640 here. The scan from the 1640 was done at its native 1600 DPI. The 4990 has no direct 1600 DPI setting, so I scanned at 4800 DPI, applied some USM and resized to 1600 DPI for comparison. The USM gave an unfair advantage to the 4990, but tough. Oddly these were scanned from different $20 bills four years apart, yet each bill has similar wear. Curious. I had to revert to Photoshop 7, since the US Treasury gets notified when you use CS or CS2 to do the same thing, and unless you have clearance you actually get a warning box that prevents you from continuing! Anyway, any scanner has more than enough resolution for prints, which normally are scanned at not more than 300 DPI. The default USM at 300 DPI looks insanely sharp. At 600 DPI it also looks great. At higher resolutions it's better to scan without USM and add it later, since the default USM is it too great a radius for my taste. For scanning other people's copyrighted items, like magazines and manuals, it seems a little less good than my EPSON 1640 since it seems to be more sensitive to wrinkles and folds. The folds that pop up away from the scanning bed get darker than other scanners as the material gets further away from the light. I was hoping ICE would address this. It doesn't. To address this you'll want to try to put weight on the top or something to put more pressure on flattening the original. You shouldn't be scanning printed material unless you created it, anyway. ICE with flat art I'd pass on ICE for scanning flat art. Don't use ICE when scanning ordinary dull document paper or currency. The rough surfaces of these papers drives ICE bananas and it completely blurs and obliterates your scan. This was in normal mode; I didn't dare try heavy mode. I was hoping ICE would solve my most common issue with scanning documents, which is fixing minor folds and unevenness. Nope, all ICE does with regular dull paper is completely obliterate the document. Sorry. For scanning glossy prints it took forever to scan a print with ICE and didn't do much to fix my most common flaw: dust. The manual says it's not really supposed to clean dust. I have to try it with the DUST option checked and will let you know. Oddly one gets a "scanner is warming up" notice after the scan is made. I suspect it may be a misnomer, and really is the computer doing the math behind ICE. Scan Times It tells you, in EPSON Scan's progress bar, how much time is remaining. A preview of the entire scanner bed takes 10 seconds. A 4x6" print at 300 DPI takes 21 seconds. It takes two minutes longer, 2:18, with ICE. This is from hitting the SCAN button after preview and cropping to when the image is open and ready to edit in Photoshop. A printed page (8 x 10.5") takes 17 seconds to scan at 96 DPI. Color Negatives My first try with color negatives looked GREAT! My peeve with all negative film is that the colors, when scanned or printed, are always arbitrary. There is no standard, other than your eye, to get it right. Thankfully the scans I tried were right on, a first in my experience scanning negatives. Your results will probably vary with subject and film type. The preview scan takes a long time. Then magic happens: it automatically comes up with thumbnails for each and every one of your negatives! Make your selections for each, hit the all button and it start scanning. The magic happens when you select "Thumbnails" as the preview mode with the little up/down arrow button next to the preview button. Oddly it chose image areas of 35.64 x 21.51 mm for each negative. Catch: After it dropped the first image into Photoshop it needed me to click on the grayed-out progress bar to get it going on the next scan. Oddlier still after the second image it got started on the third all by itself. Oddness continues since it got hung up after scanning three images. It returned to the prescan panels. I had to click CLOSE which then returned me to Photoshop and my ready-to-edit images. Color Slides and Transparencies Preview takes 30 seconds to cover the entire scanning bed. Mark your image and hit zoom. 25 seconds later you have just your image in the preview (OK, zoom) window. SCAN TIMES 35 mm Slides I threw up 5 slides on the 8 slide holder. I hit PREVIEW and it automatically identified which five slots had slides and automatically cropped to them. I hit SCAN and it started scanning them all. In 35 minutes I had five 2400 DPI scans, with ICE, open in PhotoShop ready for me to edit. Actually the auto crop wasn't always perfect. Next time I'll be sure to correct any on the preview first. This is fantastic! 7 minutes per slide is about right at high resolution and with ICE. Scanners always print specifications at lower resolutions and without ICE, which run much faster. I usually budget 10 minutes per scan, so seven is great. Yo may need a high horsepower computer to have all these open themselves at high resolution (350 MB per image). it used up all of my 8 GB of RAM in my Mac for PhotoShop's scratch space. 6
x 7 cm transparency, 800 DPI: 51 seconds, no ICE. (My Minolta Multi PRO took 5 minutes, much slower) 8 minutes and 28 seconds with ICE. 6x7
cm transparency, 2400 DPI: 2 minutes, 52 seconds, no ICE. One hour, 38 minutes with ICE. The estimate by the software was 19 minutes and eventually increased after the actual scan. The scan was about 10 minutes and the rest seems to have been number crunching. (My Minolta Multi PRO took 11 minutes, 15 seconds, much, much faster) 6 x 9 cm transparency, 1200 DPI One Minute, USM, no ICE 6 x 12 cm transparency, 800 DPI 53 seconds, no ICE, USM OFF 6 x 12 cm transparency, 2400 DPI 5 minutes, 40 seconds no ICE. (3:27 or 3:18 with USM OFF) 4 x 5" Transparency, 1200 DPI 1 minute, 48 seconds, no ICE ICE ICE works magnificently well. It removes none of the image; just the dust. This is better than my stock Minolta Multi PRO at lower resolutions like 800 DPI. The Minolta requires the Scanhancer for ICE to work well at low resolutions. On the other hand, the Minolta is much faster. DMax Hallelujah! It sees right into the darkest black of a Velvia 50 border and clearly distinguishes between black of the Velvia border and the opaque plastic film holder frame. This is extraordinary; I can't recall my Multi-PRO being able to do this. Yes, it's a bit noisy at d=4.0 if you lighten it enough to see and sharpen at 1,000% @ r=0.3. If that bothers you then I'd suggest using the included Silverfast software for multiple pass scanning. I'm happy enough with the results not to want to bother with installing more software, but will eventually try it and let you know. Recommendations This review is from 2005. The 4990 is an excellent scanner regardless of year, however if buying a scanner today, I'd look at the current Epson V700, V750 and V500 instead. The 4990 scans everything well. If I only was allowed one scanner this could be it. Of course your needs will differ; I shoot large format film. 2008's Epson V700 and V750 scan large format as well as medium format and 35mm. 2008's V500 scans only 35mm and medium format. They all have digital ICE automatic dirt removal. If you only need to scan 35 mm film or prints then see my recommendations here. You might be able to get a better scanner for 35 mm film for less money. |

