How to Find the Stitch Assist Mode
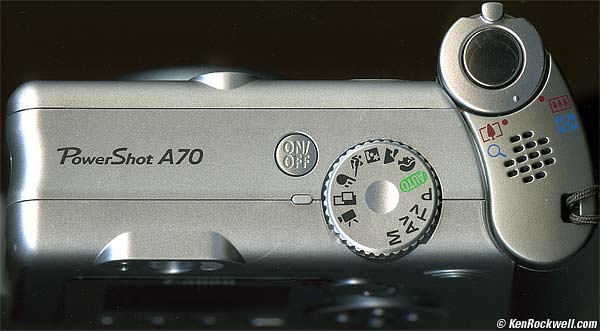
Stitch Assist mode on an A70.
Some Canons make it easy and have it right on the mode dial. This camera is set to it already. The icon is two overlapping rectangles.
Newer, smaller cameras hide it in a menu. Be sure the M mode is set on the mode dial, since other modes may lock it out. Press FUNC SET, click up/down to get to the M at the top left if it's not already highlighted, click right to get to the same two overlapping frames icon. Press FUNC SET to lock it in. Usually the icon has an arrow; newer cameras let you shoot clockwise or counterclockwise.
Now your screen will have a small, live image overlapping a gray rectangle. Take your first shot. If it looks good, tap the shutter and it will move and the live image is shown to one side. Move the camera to get the two to line up, make the next shot. Keep repeating until you're done. When done, tap SET.
This can vary with camera. See your manual, or call Canon for free phone support in the USA at (800) OK-CANON.
File Names
Canon names the series of files as STA_0001.jpg, STB_0002.jpg, etc. The number increments, as does the third letter. The third letter always starts at A, while the numbers start wherever the last shot left off. The ST comes from "Stitch."
This drives me nuts in filing, since my alphabetical sorts put these at the end of the list. I usually put each panoramic sequence in its own folder to preserve my sanity.
Lighting, Contrast and Exposure
The lighting varies wildly outdoors as you look into or away from the sun.
The camera locks exposure on the first shot, or locks it wherever you half-press the shutter. Therefore, point the camera at the brightest part you need correctly exposed, hold the shutter, then point it to the location you want as the beginning of the series.
It can help to use a lower contrast image setting. I always use Vivid (under FUNC > (click down and to the right to) V, Vivid) for normal shots, which increases the contrast. For some pans it may be helpful to use NORMAL, or under MY COLORS (same area in the menus) set contrast to LOW. From the USA, phone (800) OK-CANON for help if you need it.
You may wind up twiddling later in PhotoShop with the Shadow/Highlight tool (Image > Adjustments > Shadow/Highlight). Go easy with this tool, not more than about 7 on the shadows. Most people screw up and use the default of 50, which looks awful. Go easy, or it looks fake because it is.
I see overuse of the Shadow/Highlight tool in almost every real estate magazine and local newspaper. It's scary. Go easy!
Combination Modes
Most of us make a series of horizontal shots.
You can get even bigger outputs (and larger vertical angles) by shooting a series of vertical shots.
I haven't figured out how to get the cameras' stitch assist mode to rotate to help, but the software switches just fine. The software probably will presume you made a vertical (up-down) panorama, but you can reset it to make them horizontal.
You can shoot a short series, or go for a full 360 degrees.
You also can shoot up and down and left and right, and stitch it all together like a quilt.
You tell PhotoStitch what you want to do under "1. Selection and Arrangement" > Arrange.
Stuck? Call Canon for free phone support in the USA at (800) OK-CANON.
Versions
It seems PhotoStitch version 3.1 has been shipping for years, and is still shipping with the SD800 that started shipping in October 2006.
Computer Requirements
It runs on Mac and Windows.
It takes a while to do its business, especially if you're not running a hot machine.
PhotoStitch ran fine on my 2004 800MHz G4 iBook, but took so long to run that I didn't use it often.
It runs much faster on my Quad 2.5 GHz G5, fast enough to want to use it often.
Of course the resulting image files can be huge. It's common to get outputs 10,000 pixels on a side. Remember you're crunching on not one image, but a slew of them at full resolution.
Software Installation and Operation
Installation
I stuck the CD that came with the camera in my drive and it was obvious, both on my PC and my Macs.
Operation
Likewise, operation is obvious. Open the program (which oddly comes from opening Canon's PhotoStitch Launcher and then clicking on Photostitch) and under "1. Selection and Arrangement" click OPEN. Select the shots you wish to merge.
Click the "2. Merge" tab. Hit Start.
Click the "3. Save" tab. Hit save.
Duh.
Tweak any of these commands as needed and as explained above.
Stuck? Call (800) OK-CANON for free support in the USA.
MORE FUN
It turns out that PhotoStitch.biz is a place that creates sewing patterns to let you cross stitch a pattern in cloth to match a photo. It's unrelated to Canon's software.
PLUG
If you find this
as helpful as a book you might have had to buy or a workshop you may
have had to take, feel free to help me write more.
Thanks for reading!
Ken |