Autumn Color from California's Eastern Sierra
12, 13, 14 & 15 October 2023
How I Created These Pictures
Introduction
I made these photos on a trip I helped lead with Dave Wyman to California's Eastern Sierra.
We were outside shooting from well before dawn until long after dark, shooting all day, every day. This wasn't a nerd-a-thon locked in a motel room fiddling on computers; we were outside hiking around the whole time.
Viewing top
Everyone's screens, from iPhones held vertically to computers with squinty 16:9 monitors, have different shapes. I can't make my differently-shaped shots fill everyone's screen at the same time.
On iPhone and iPad, everything changes size and gets bigger when you rotate from vertical to horizontal.
Click or tap any image to make it fit your screen. On Mac Safari, command ⌘ and + or - will change the size of the page or image, and command ⌘ + 0 brings it back to normal.
Turn up your screen brightness for best results.
These are 1,920 pixel-wide images; the originals are much higher resolution. These images will fill your screen horizontally, up to 1,920 pixels wide (3,840 pixels wide on Mac Retina displays). The vertical size will vary with each image.
Enjoy!
12 October 2023, Thursday top
12, 13, 14 & 15 October 2023 How I Created These Pictures
I got up at 4AM, left my house at 5:23 AM and arrived at my friend Dave's house at 8:27 AM. We packed our gear and headed out at 9:10 AM.
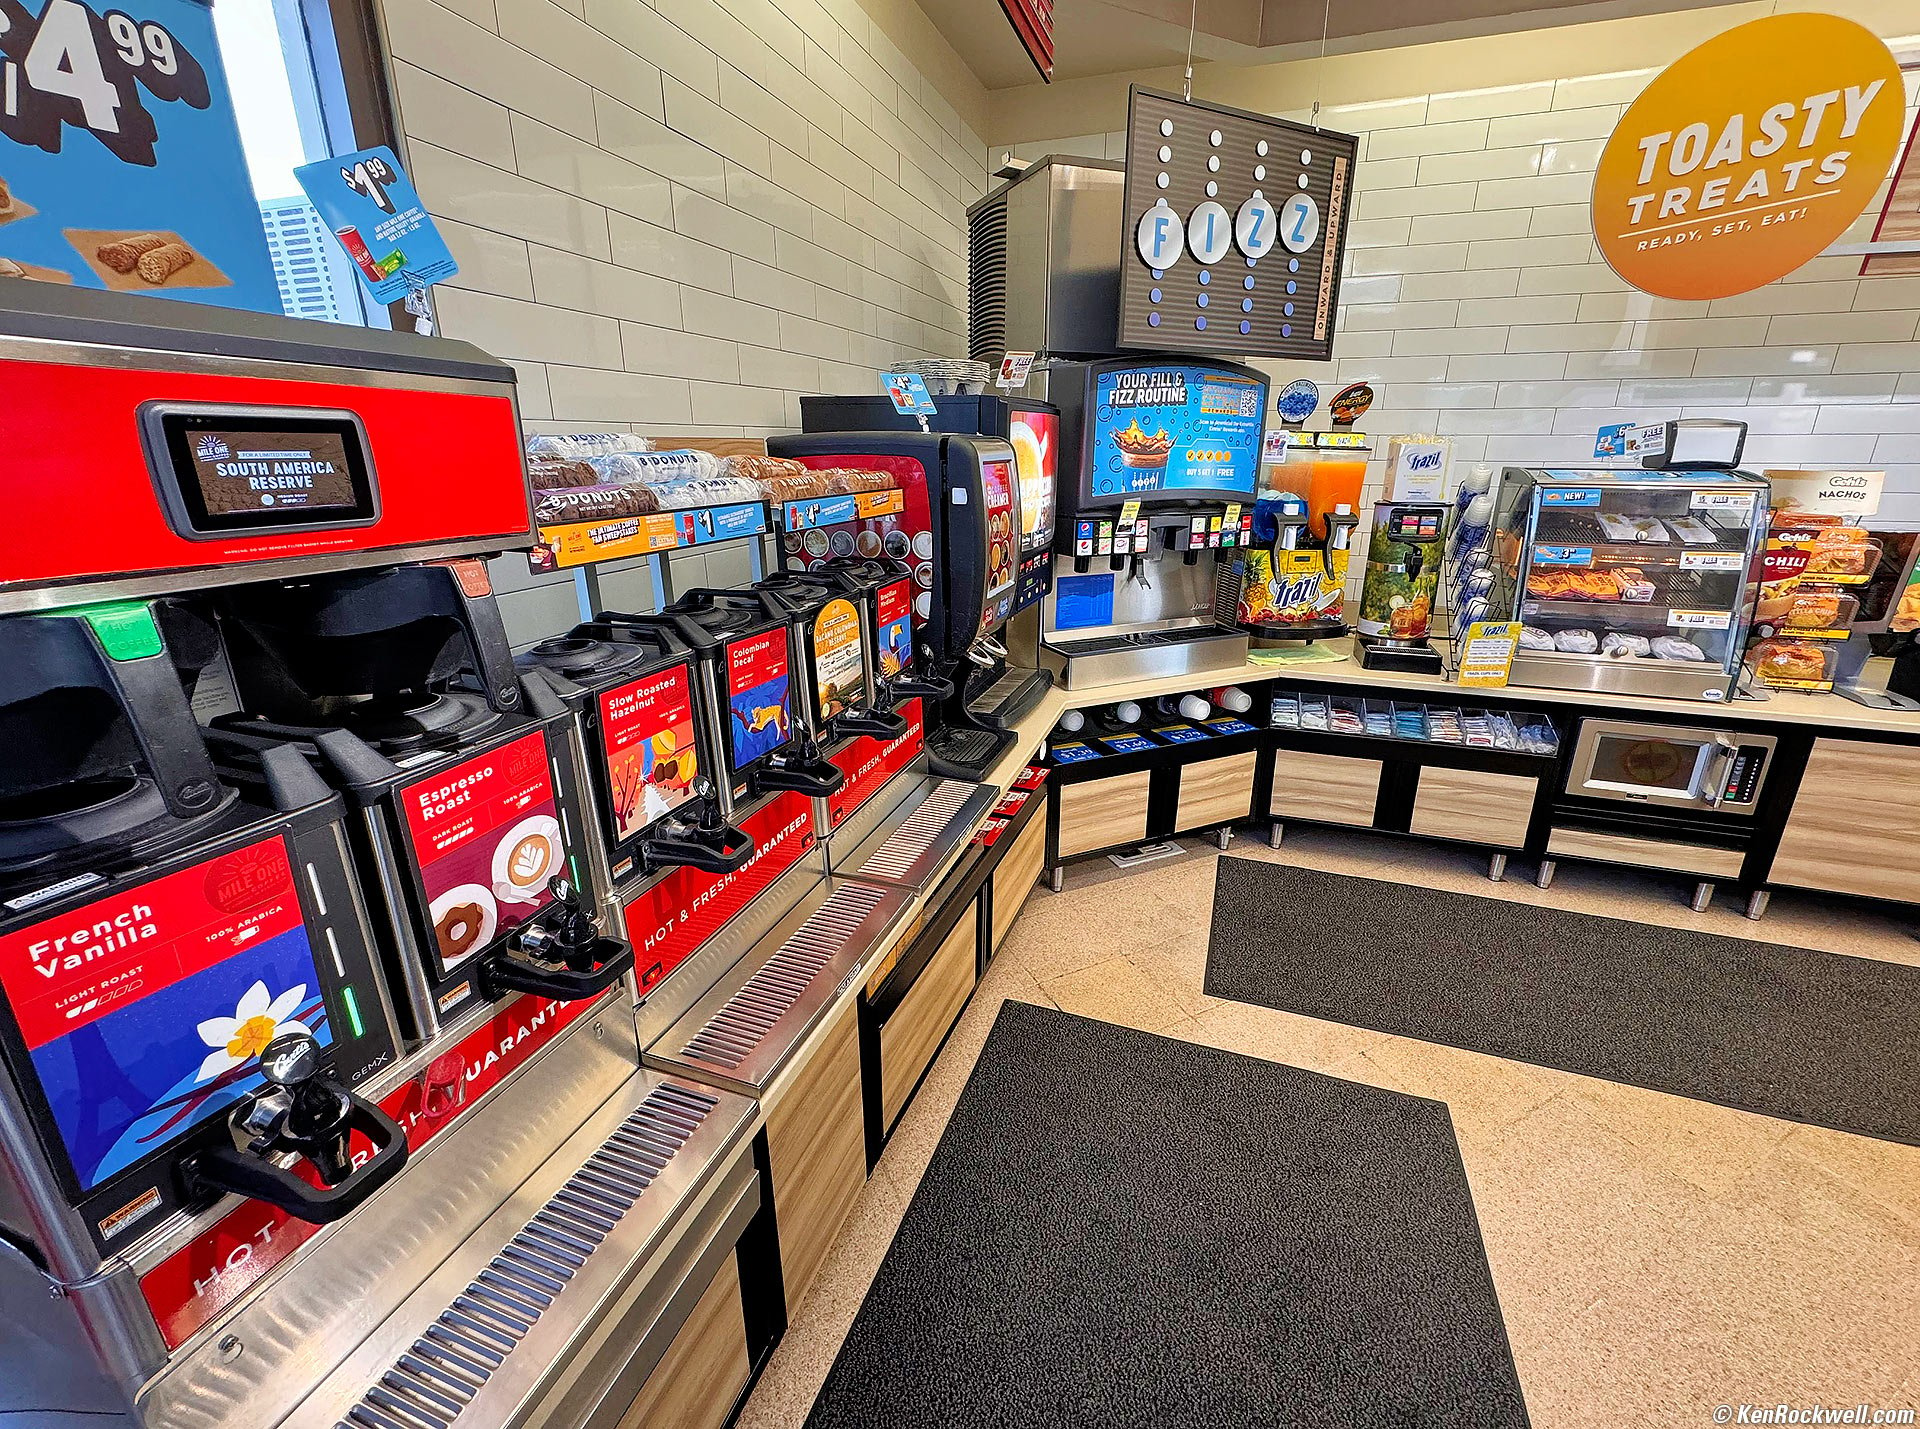
We stopped in Mojave to take on fuel:
![]()
Chevron Extra Mile Store Interior, Mojave, California, 11:01 A.M. Apple iPhone 15 Pro Max 0.5× (2.2mm actual or 13mm eq.) camera at f/2.2 at 1/120 at Auto ISO 250 (LV 7.9), Perfectly Clear (now sold as Radiant Photo). More tech details. bigger or fit-to-screen.
We arrived at the motel at 3:18 PM, met the group, and headed out to the mine, arriving at 4:38 PM:
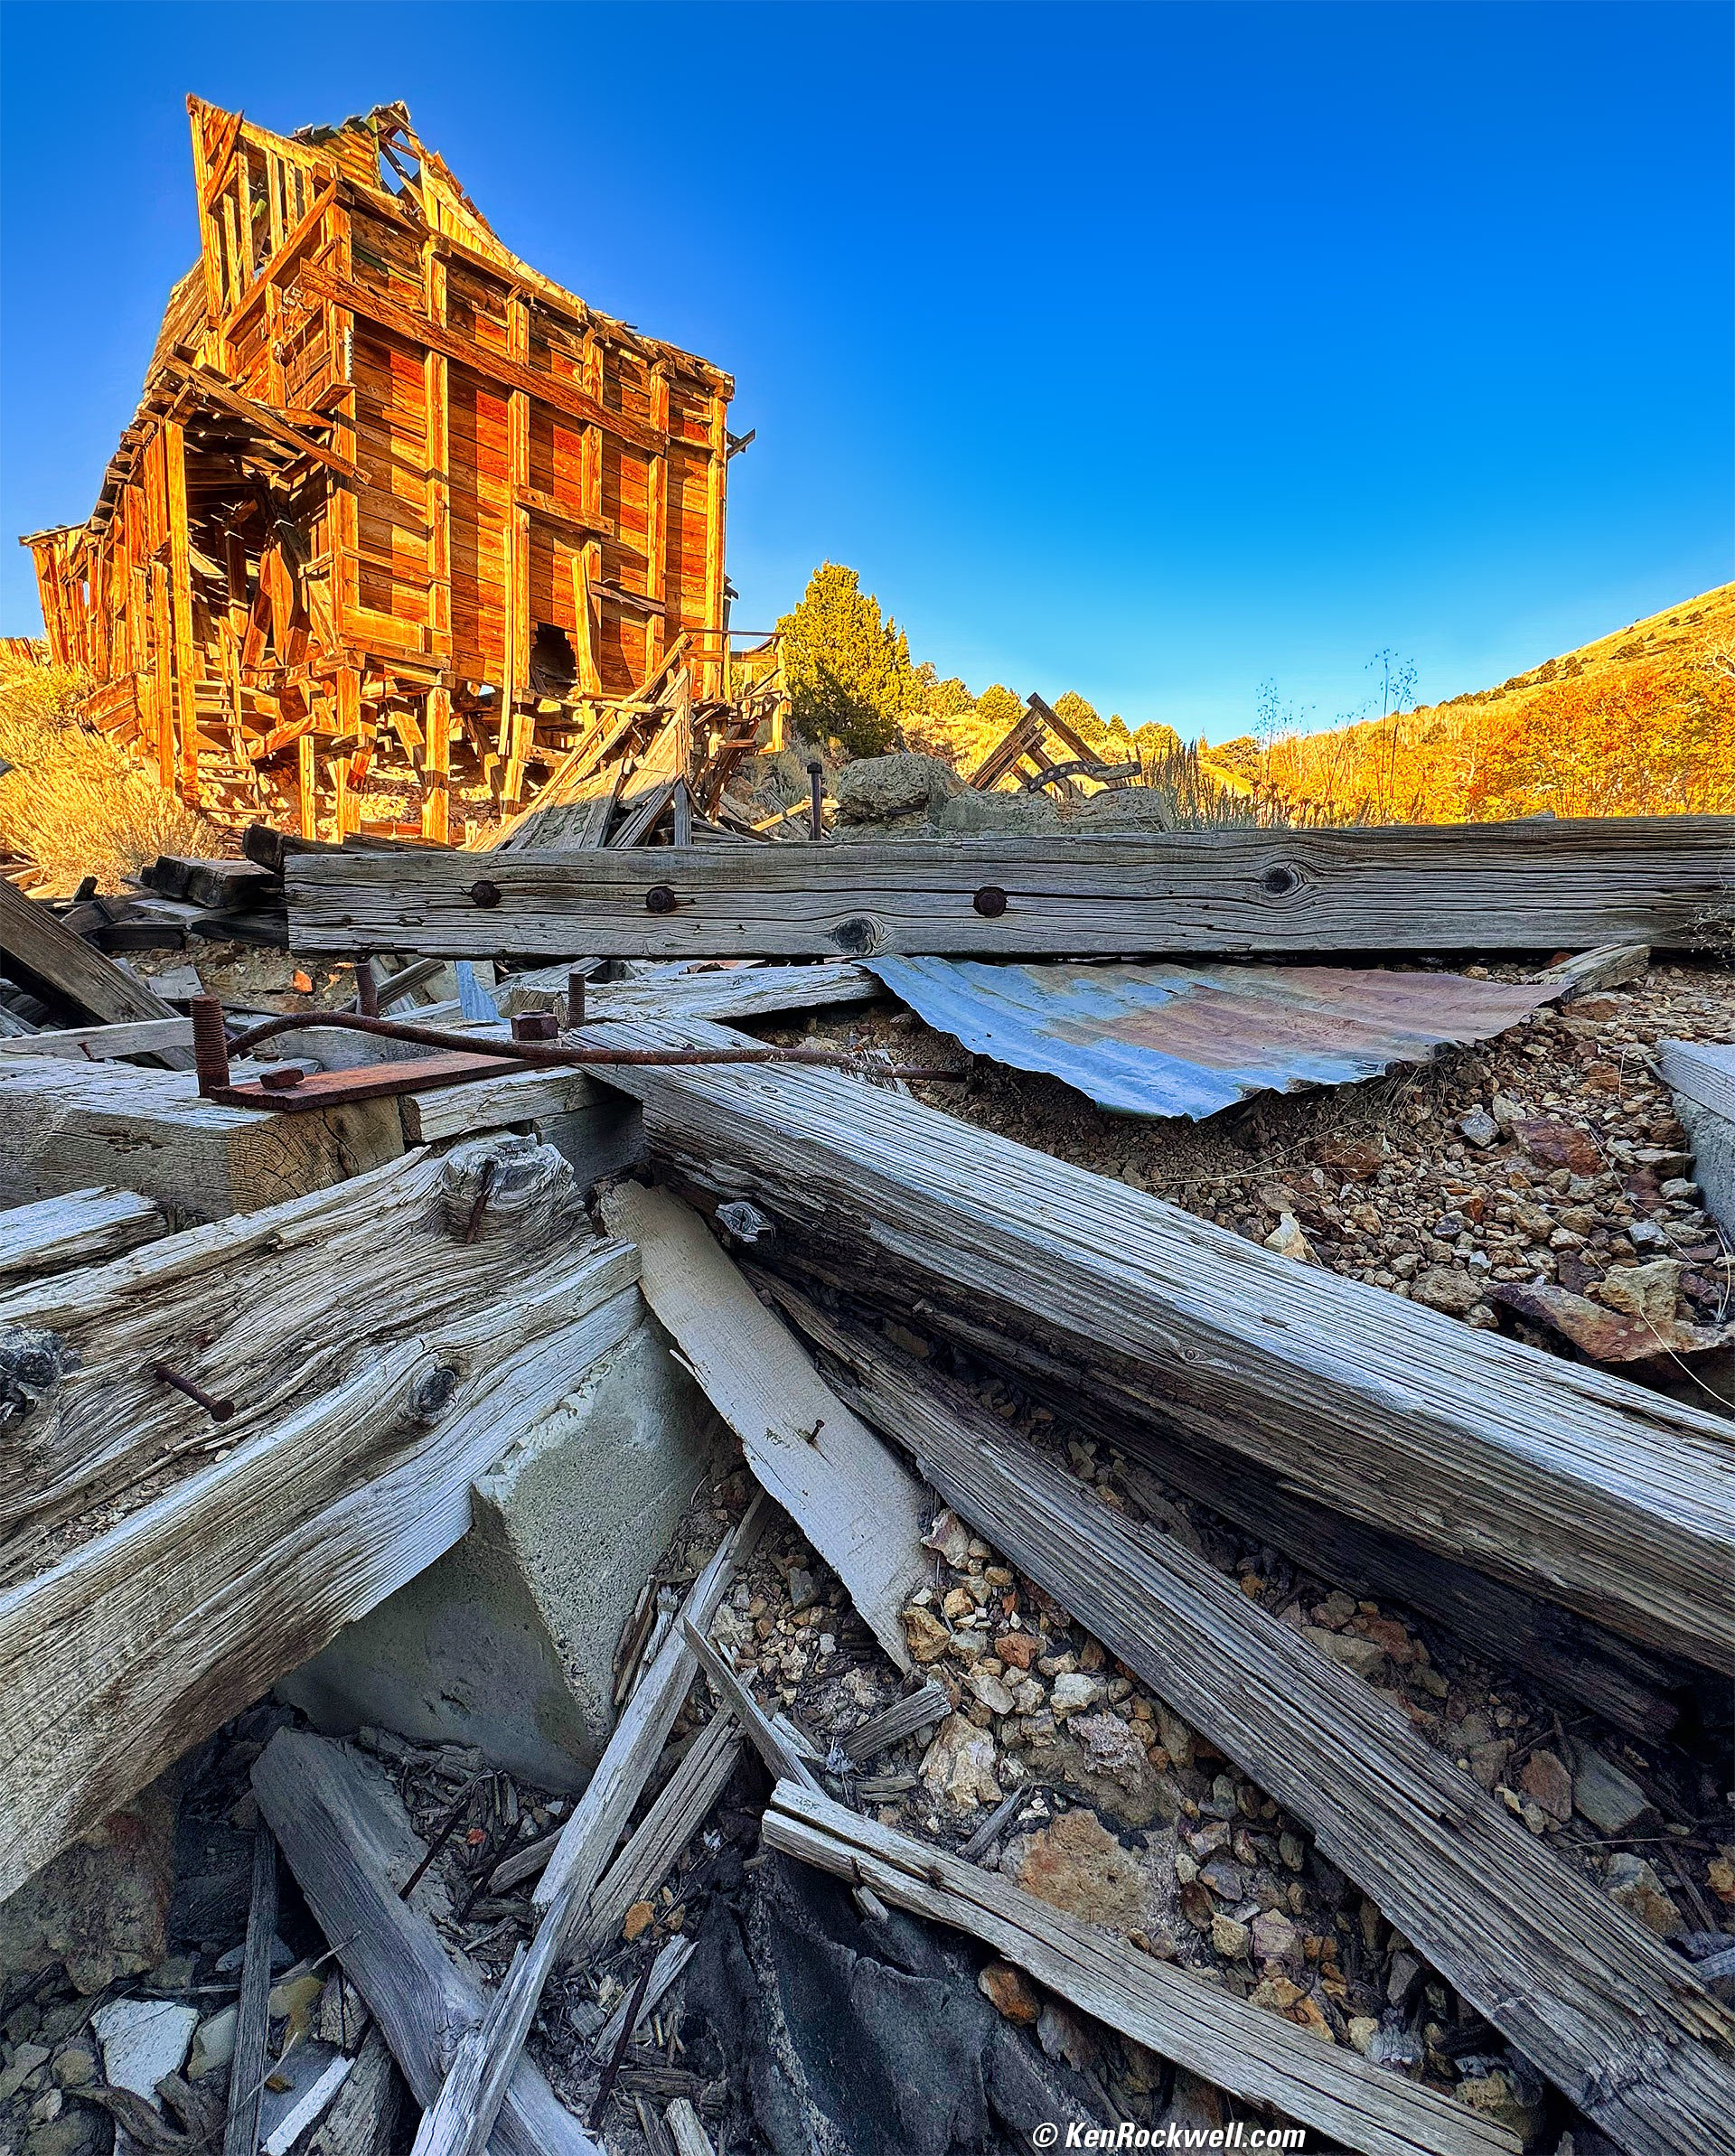
Abandoned Mine, Bridgeport, California, 5:12 P.M. Apple iPhone 15 Pro Max 0.5× (2.2mm actual or 13mm eq.) camera at f/2.2 at 1/144 at Auto ISO 40 (LV 10¾), Snapseed app in-phone and then Skylum Luminar Neo. More tech details. bigger or fit-to-screen.
We returned from the mine and relaxed for a moment.
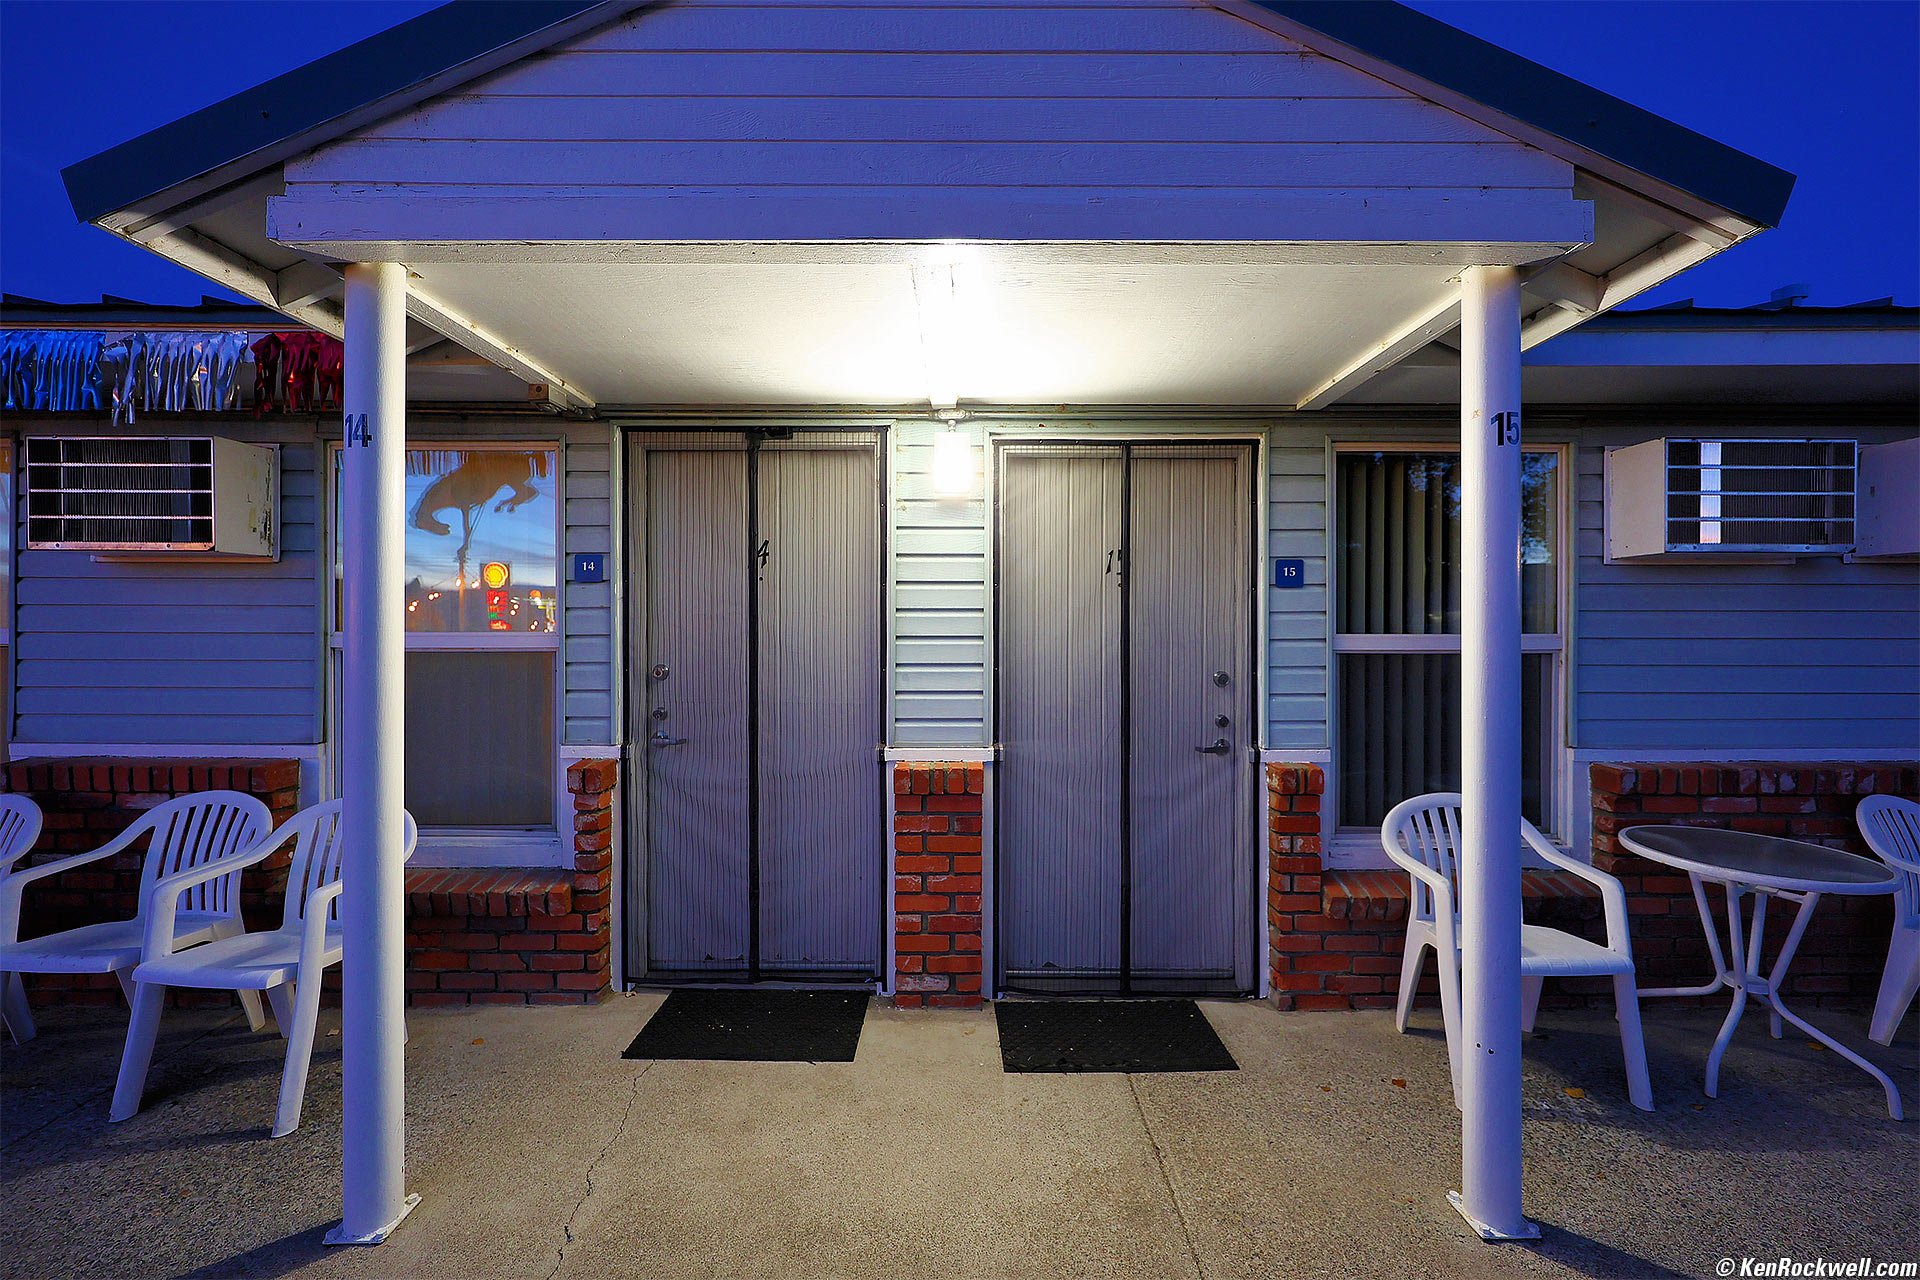
Rooms 14 and 15, Redwood Motel, Bridgeport, California, 6:46 P.M.Canon EOS R6 II, RF 14-35mm f/4 L IS USM at 14mm, f/4 hand-held at 1/8 at Auto ISO 400 (LV 5.0), minor perspective correction in Photoshop CS6 (from 2012), Perfectly Clear (now sold as Radiant Photo). More tech details. bigger or fit-to-screen.
I had to soften this shot by defocusing my lens slightly because it was so sharp, even wide-open, that the threads of the bug screens were aliasing (causing moiré) that looked like weird colored patterns. With enough defocus to lose the threads the aliasing went away, as seen above.
We walked to Rhino's for dinner with the group.
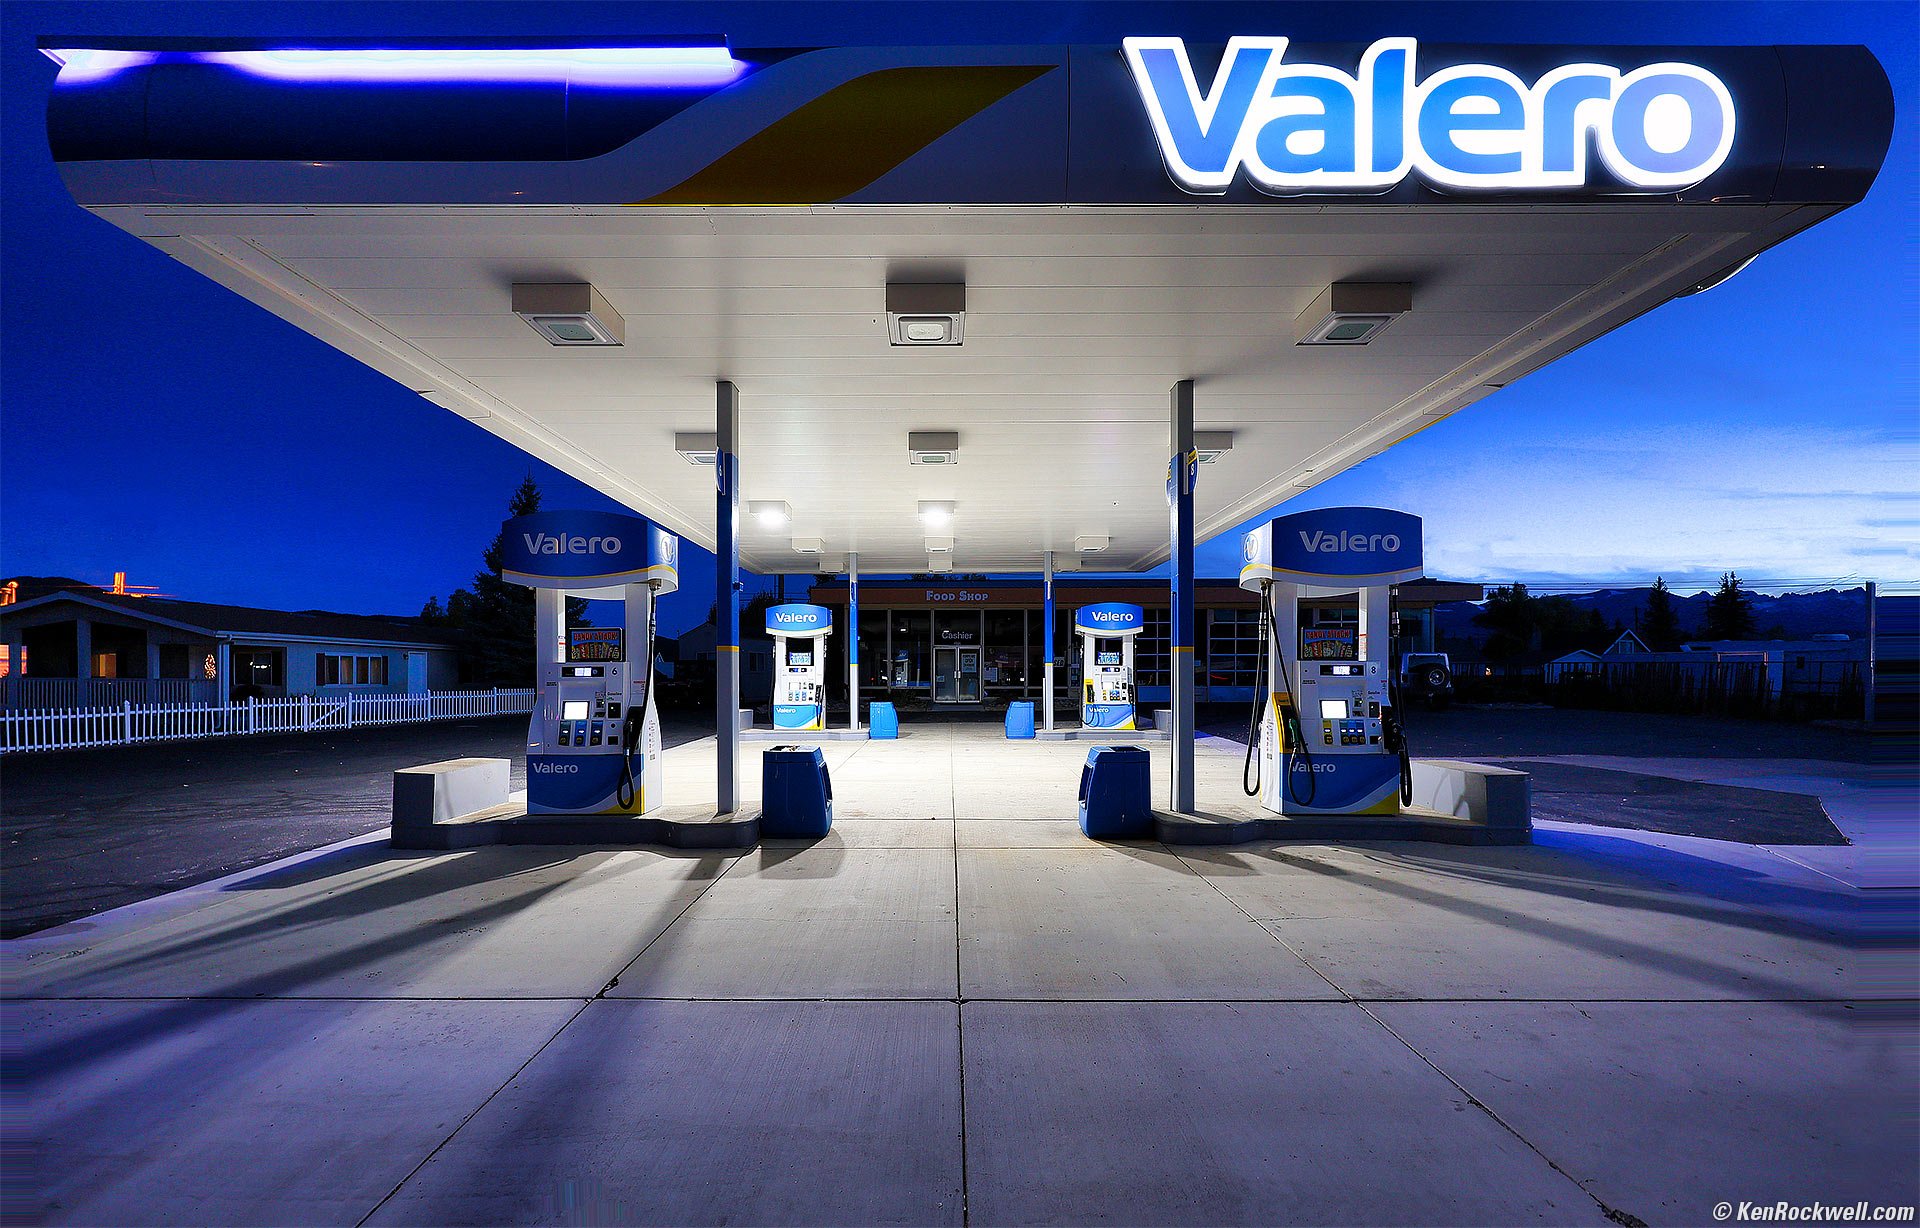
Valero Station, Bridgeport, California, 5:12 P.M. Canon EOS R6 II, RF 14-35mm f/4 L IS USM at 14mm, f/4 at 1/8 at Auto ISO 320 (LV5.3), Skylum Luminar Neo. More tech details. bigger or fit-to-screen.
Skylum Luminar Neo was especially awesome here because its Erase tool made it trivially easy to erase power poles and lines, and fix numerous cracks and oil spots on the concrete. It also was a huge help in putting detail back in my shadows, easy for Neo to do from JPGs.
Here's the original shot:
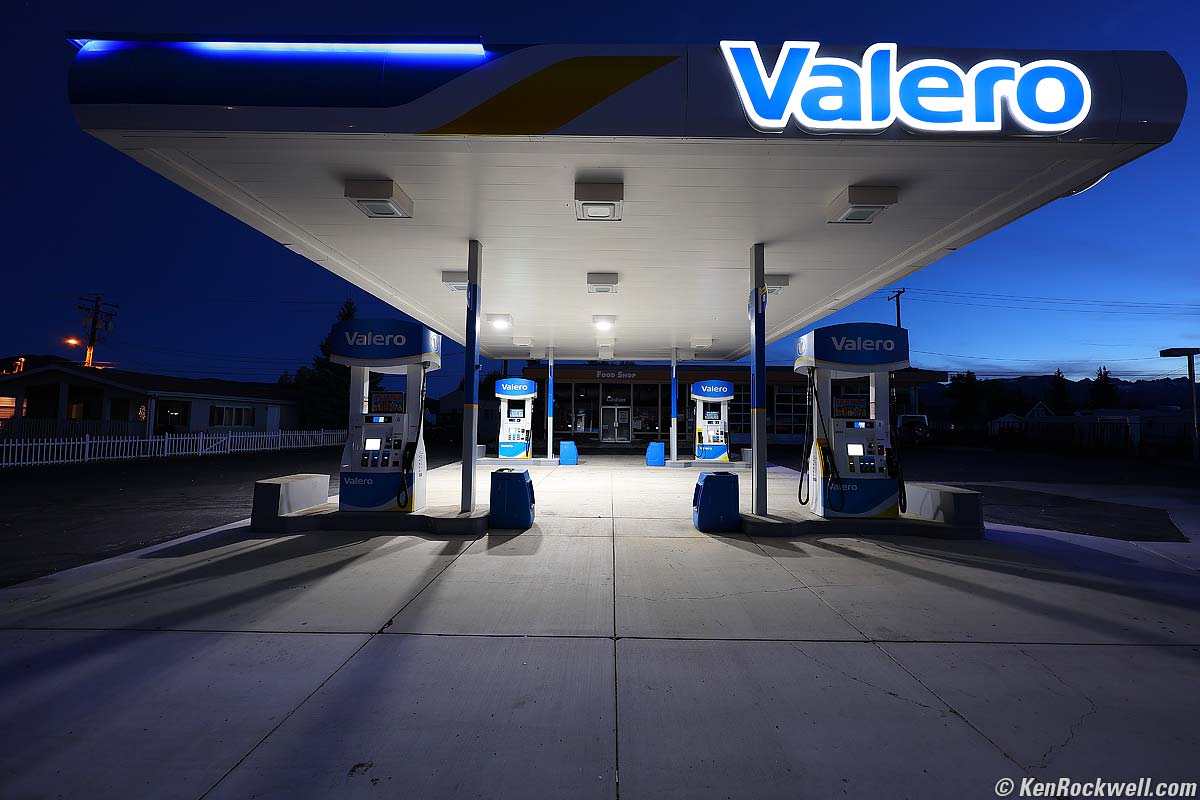
As shot. bigger.
We had dinner at Rhino's and walked back to our motel:
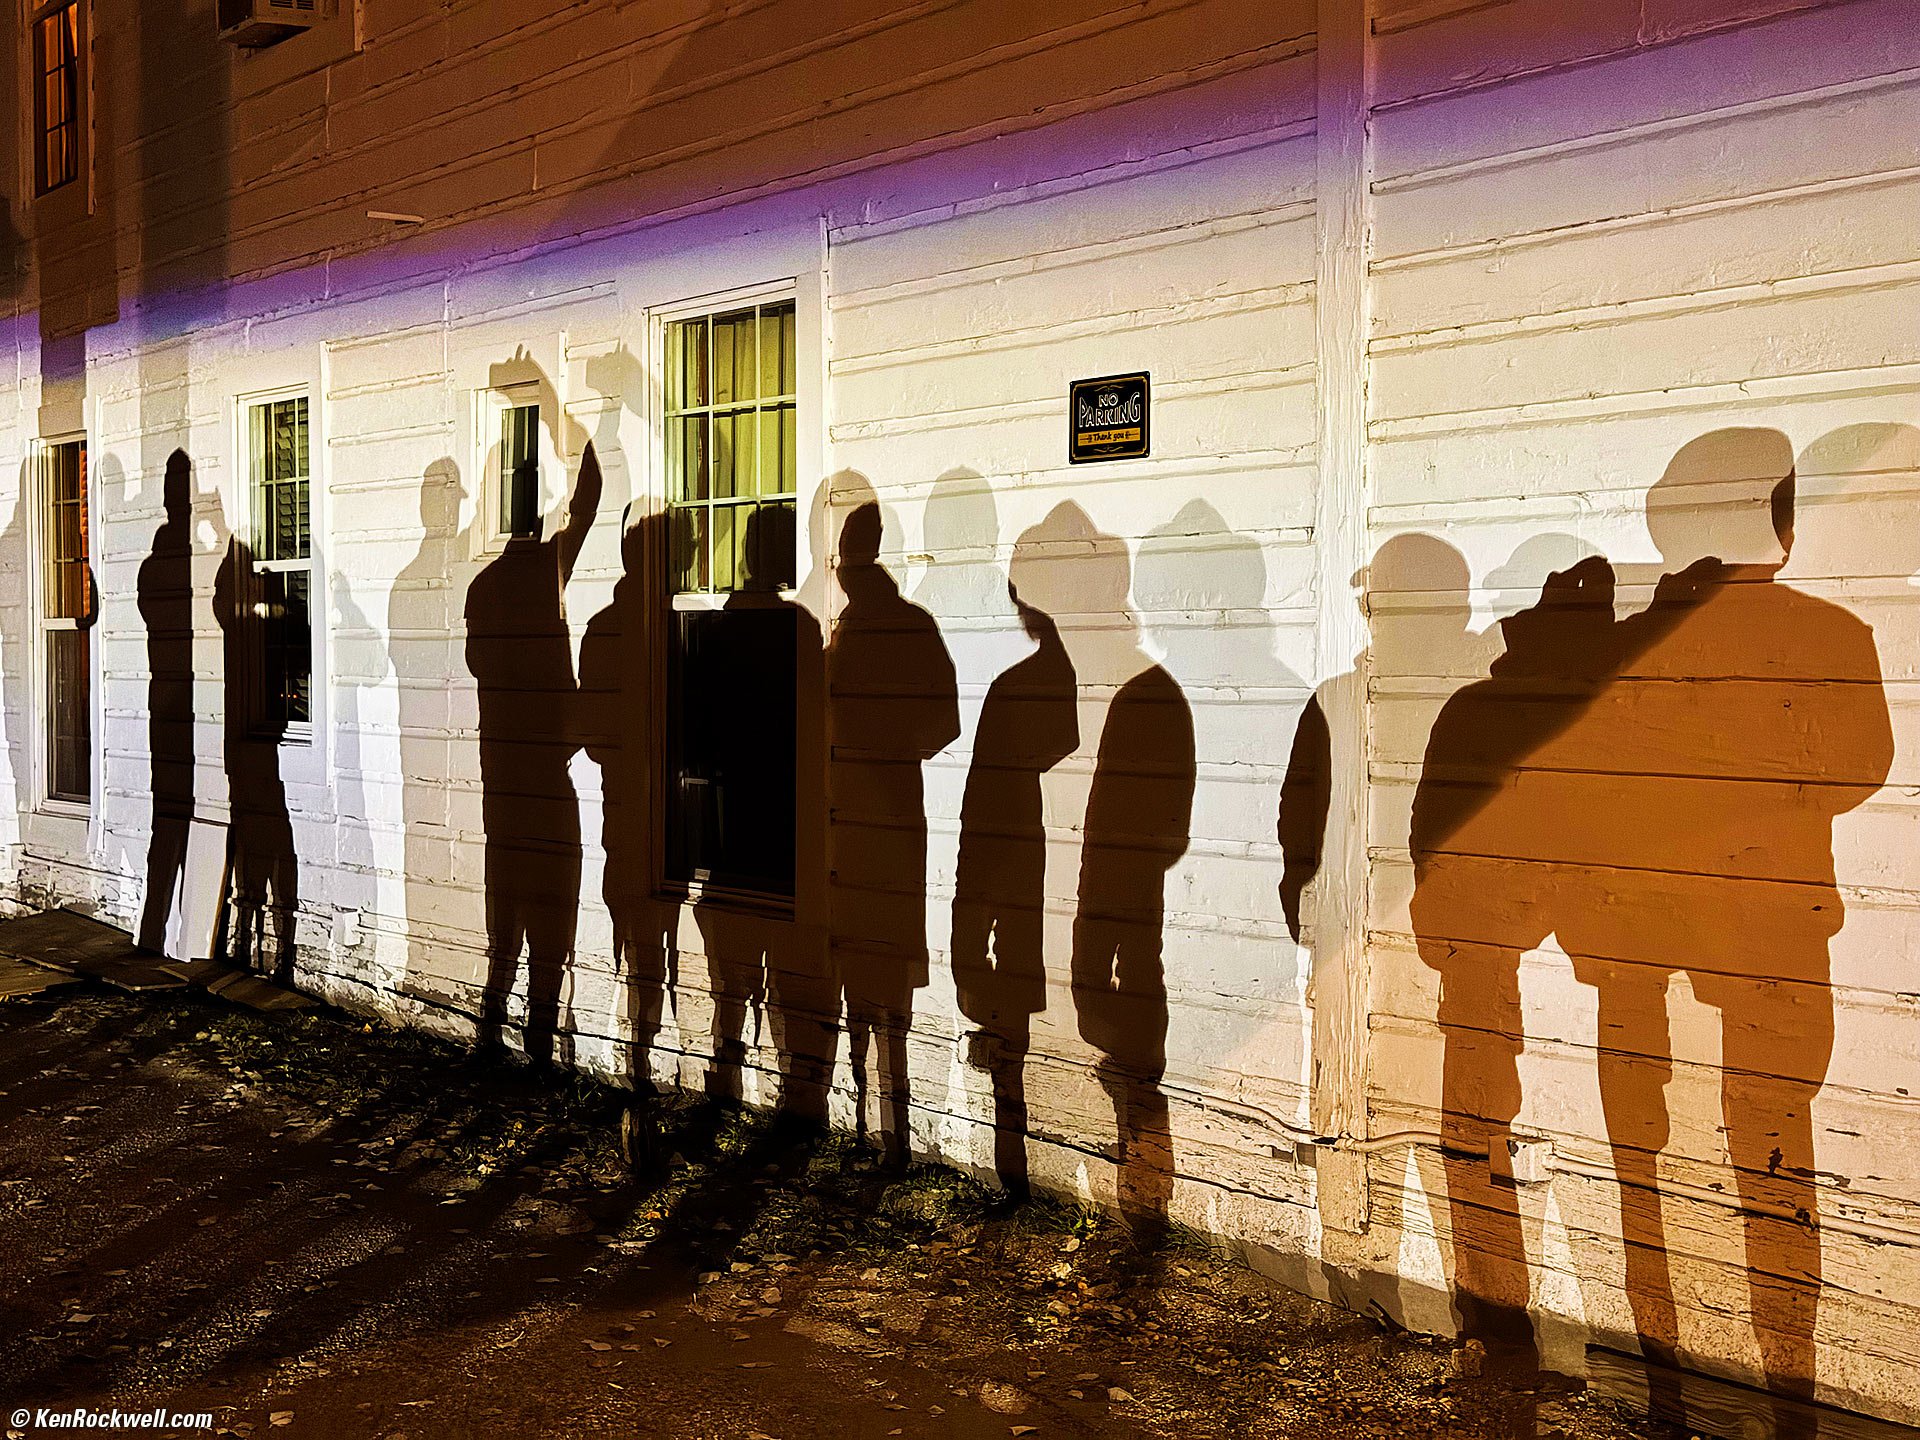
The Boys on the Wall, Bridgeport, California, 8:25 P.M. Apple iPhone 15 Pro Max 2× (6.89mm actual, cropped to 48mm eq.) camera at f/1.8 hand-held at 1/9 at Auto ISO 500 (LV 2.6), Perfectly Clear (now sold as Radiant Photo). More tech details. bigger or fit-to-screen.
iPhone rules for this. We were walking back from Rhino's and a car suddenly lit up and was driving out of its parking space across the street, painting us all with light. We had to turn and fire immediately, as a second later the car had left and this picture was gone, leaving us all in the dark.
The violet band across the top is a chromatic aberration from the car's headlight projector's simple optics, adding a cool accent.
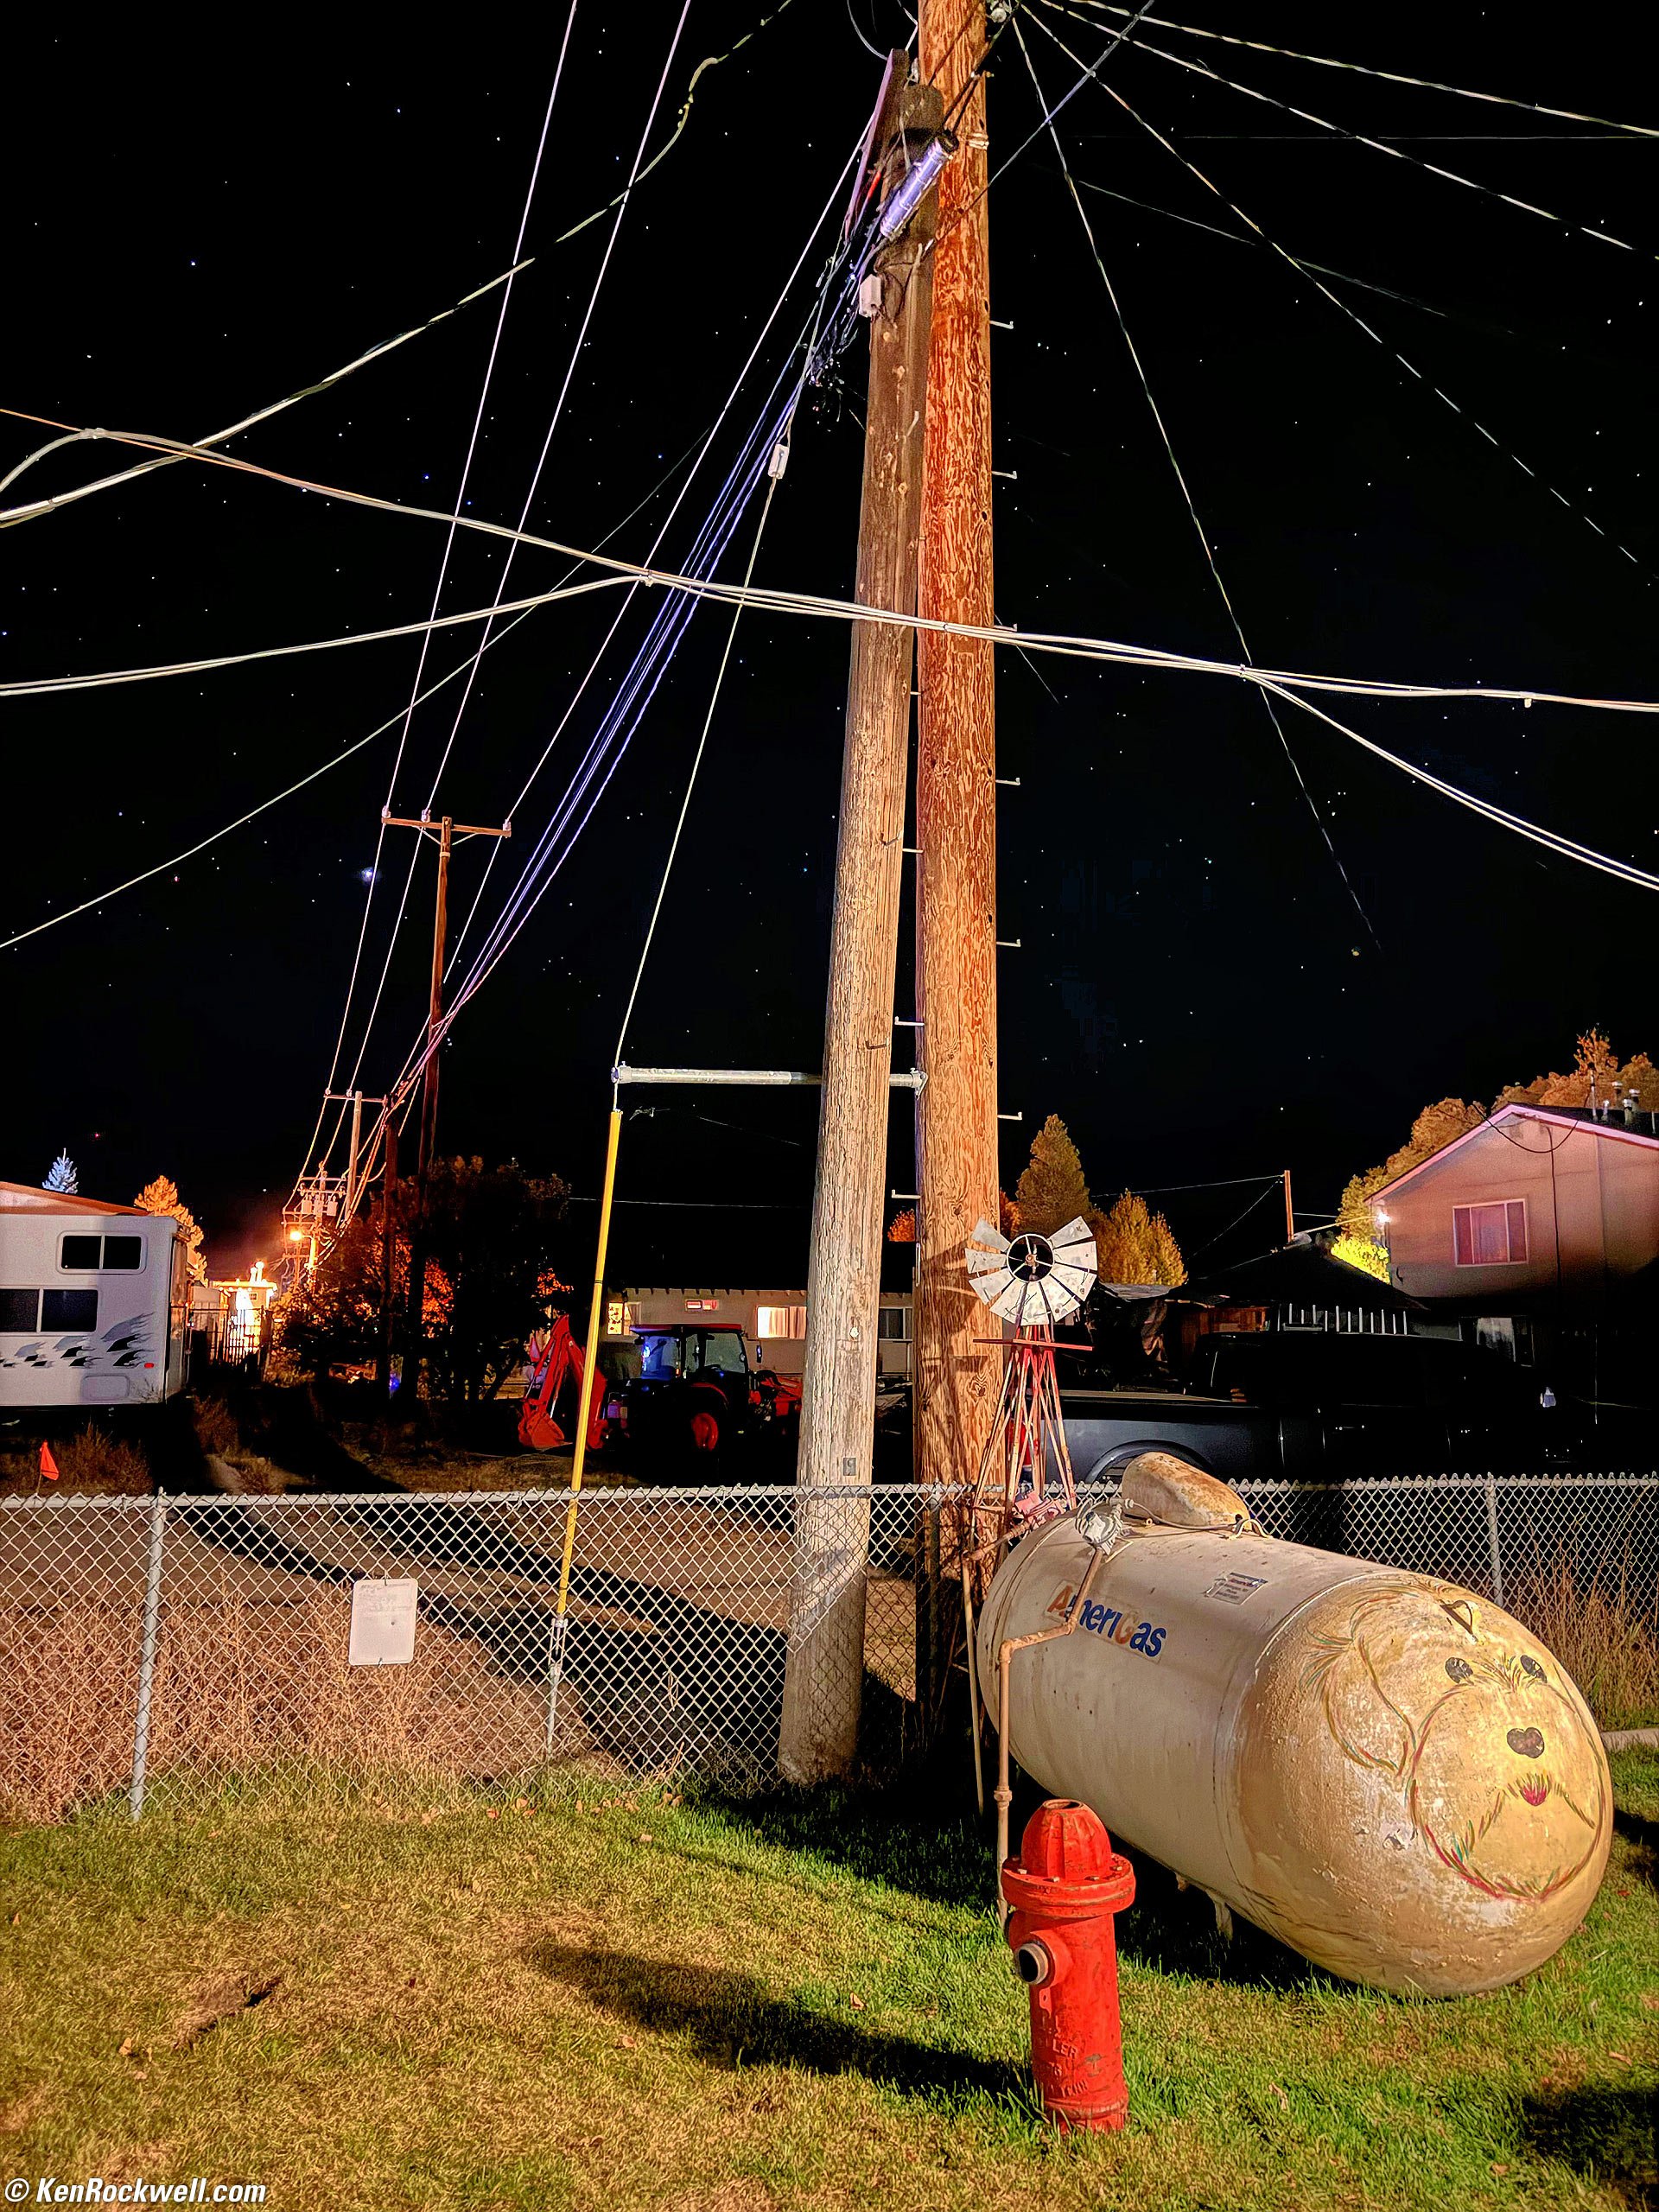
Starry Night, Bridgeport, California, 8:54 P.M. Apple iPhone 15 Pro Max 1× (6.89mm actual or 24mm eq.) camera at f/1.8 handheld at 1/2 second at Auto ISO 4,000 (LV -2.4 — minus 2.4!), Perfectly Clear (now sold as Radiant Photo), and HDR Merge in Skylum Luminar Neo. More tech details. bigger or fit-to-screen.
HDR Merge in Skylum Luminar Neo used but one JPG image and put detail back into the well-lit dog propane tank, while Perfectly Clear (now sold as Radiant Photo) helped lighten up the stars.
The iPhone 15 Pro Max has no problem seeing all this dynamic range, and JPGs likewise easily capture it all in this grab shot coming back from dinner.
13 October 2023, Friday top
12, 13, 14 & 15 October 2023 How I Created These Pictures
I got up around 5:15 AM and we rolled out at 6:24 AM.
Just for grins on the ride up to Conway Summit in the blackness before sunrise, I pointed my iPhone 15 Pro Max out the tinted window of our car to see what would happen. It was so dark I couldn't see anything, but wanted to see what my iPhone saw:
Jupiter the Morning Star, Bridgeport, California, 6:29 A.M. Apple iPhone 15 Pro Max 1× (6.89mm actual or 24mm eq.) camera at f/1.8 at 1/5 of a second (actually the time exposure Night mode) at Auto ISO 1,600 (LV -0.1), Skylum Luminar Neo. More tech details. bigger or fit-to-screen.
The iPhone image was amazing at the time, since it saw more details than my eyes.
The bottom of the image is soft because we were blasting along at 60 MPH and so of course it's motion blurred! We were bouncing around, and the iPhone is so smart it aligned all the frames it captured in Night Mode to keep Jupiter and distant hills sharp. Amazing!
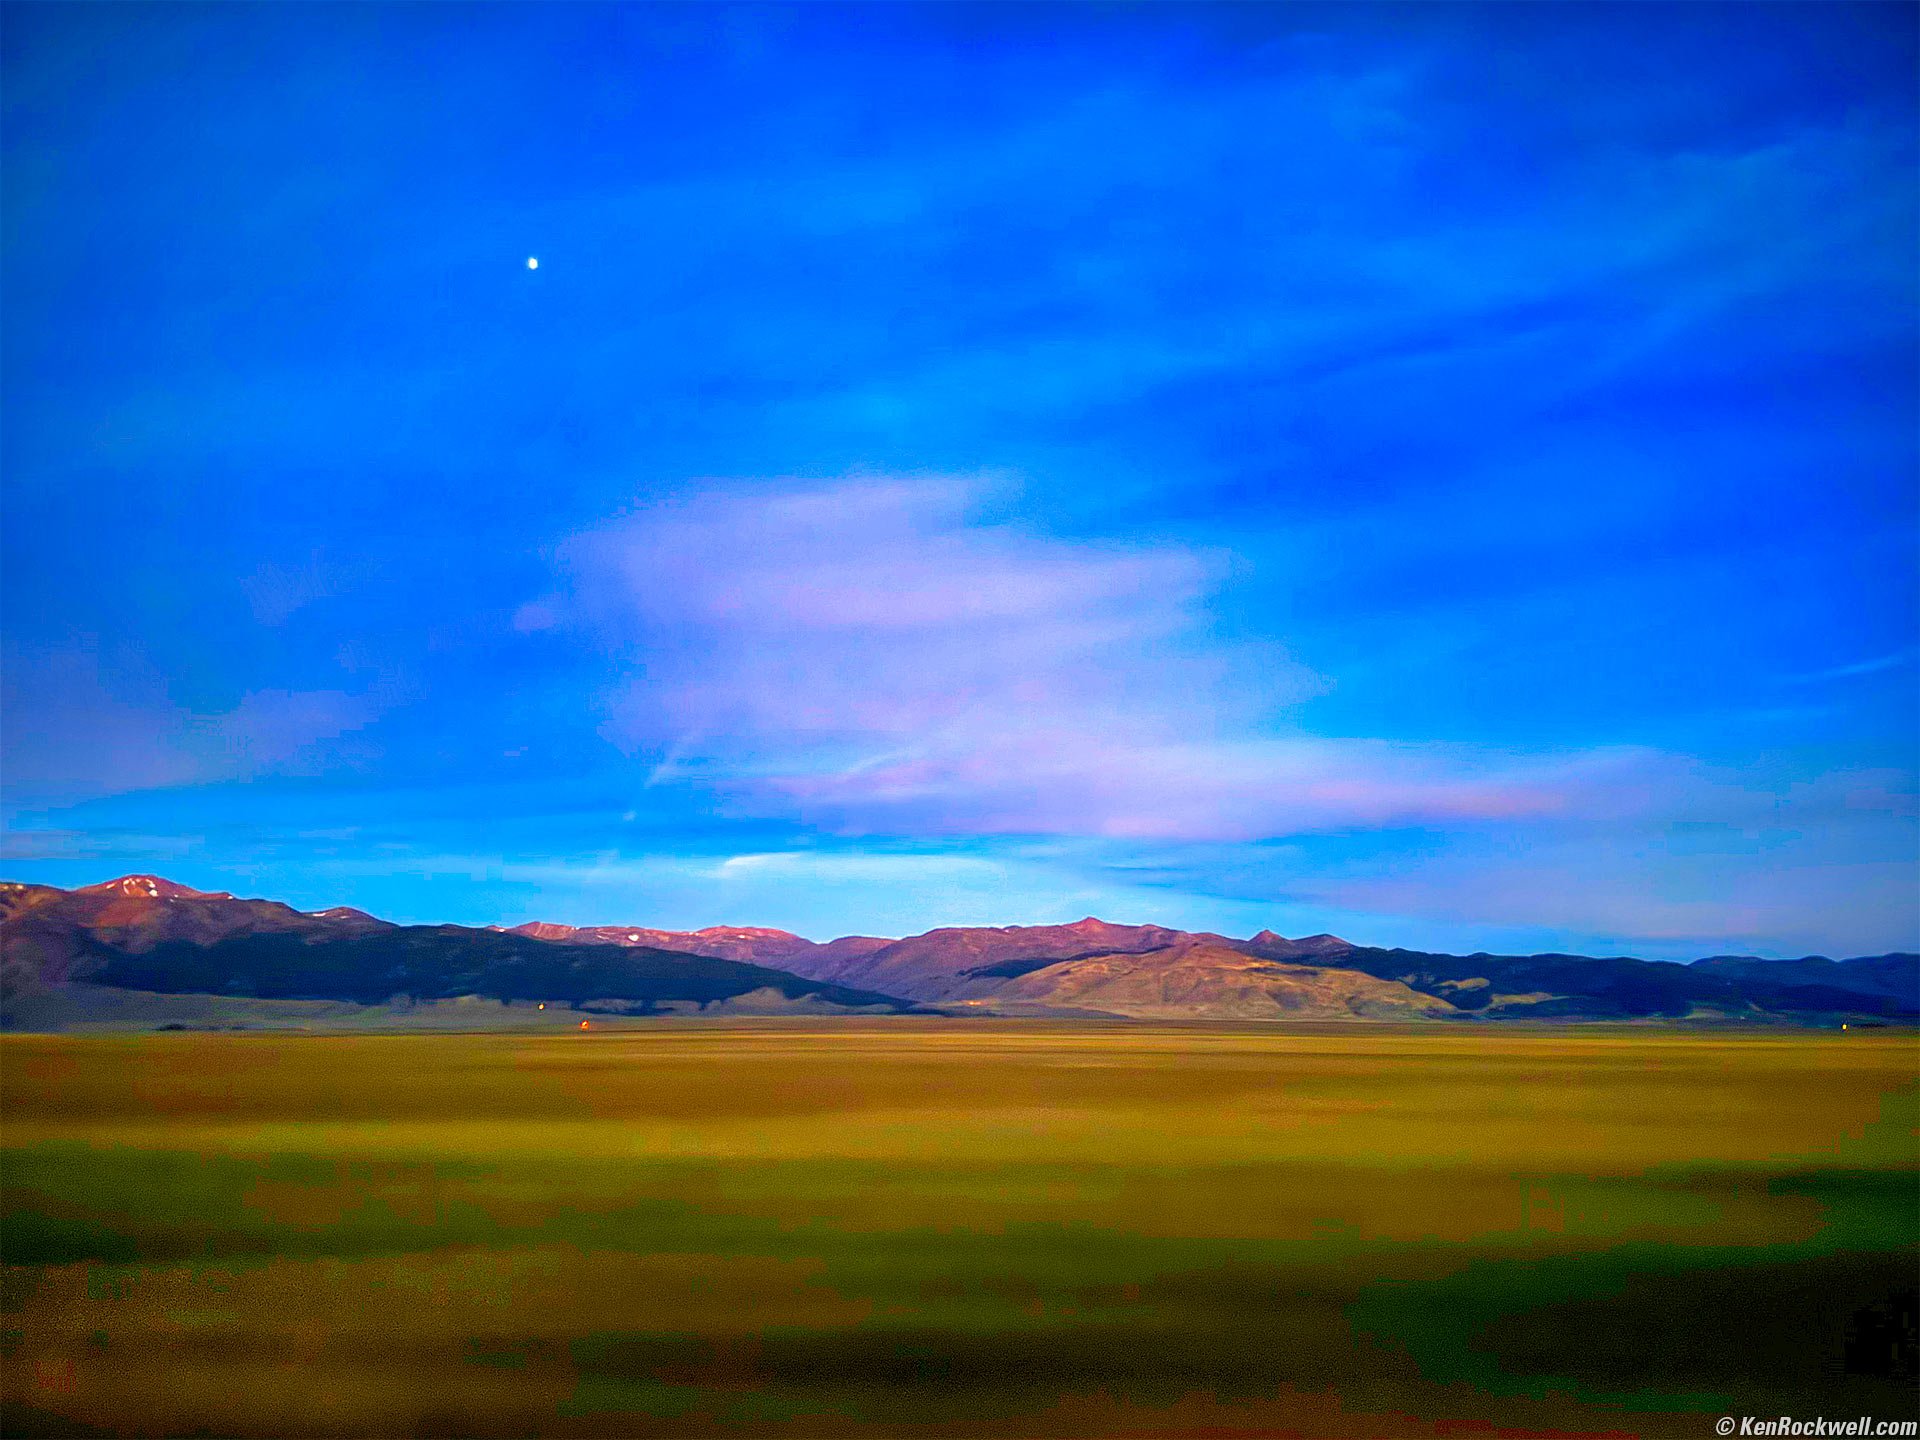
I worked it in Neo to bring out all these colors. Remember it was totally dark at the time, yet the camera saw these colors the eye can't. Here's how it looked as-shot, which was still much more vivid than the inky blackness I saw through the tinted window:
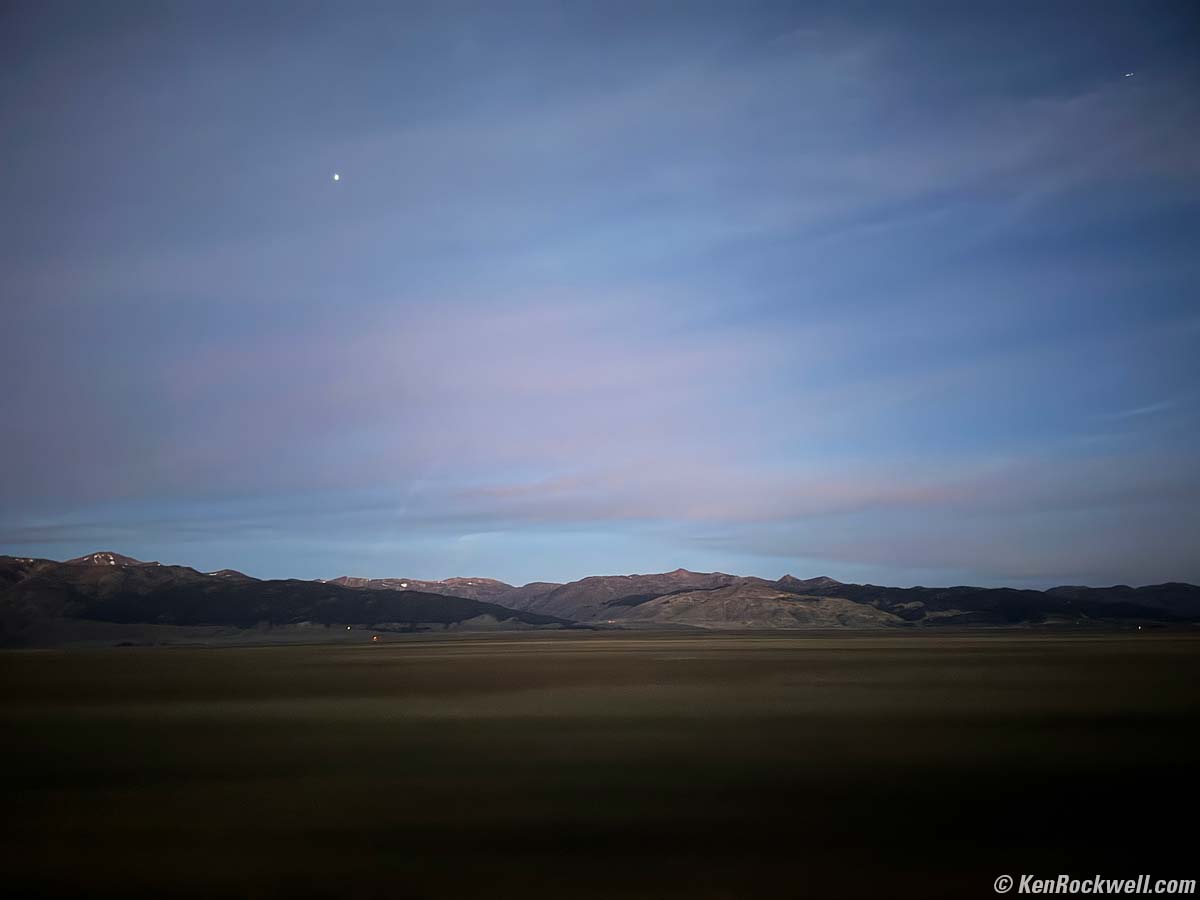
As shot. bigger.
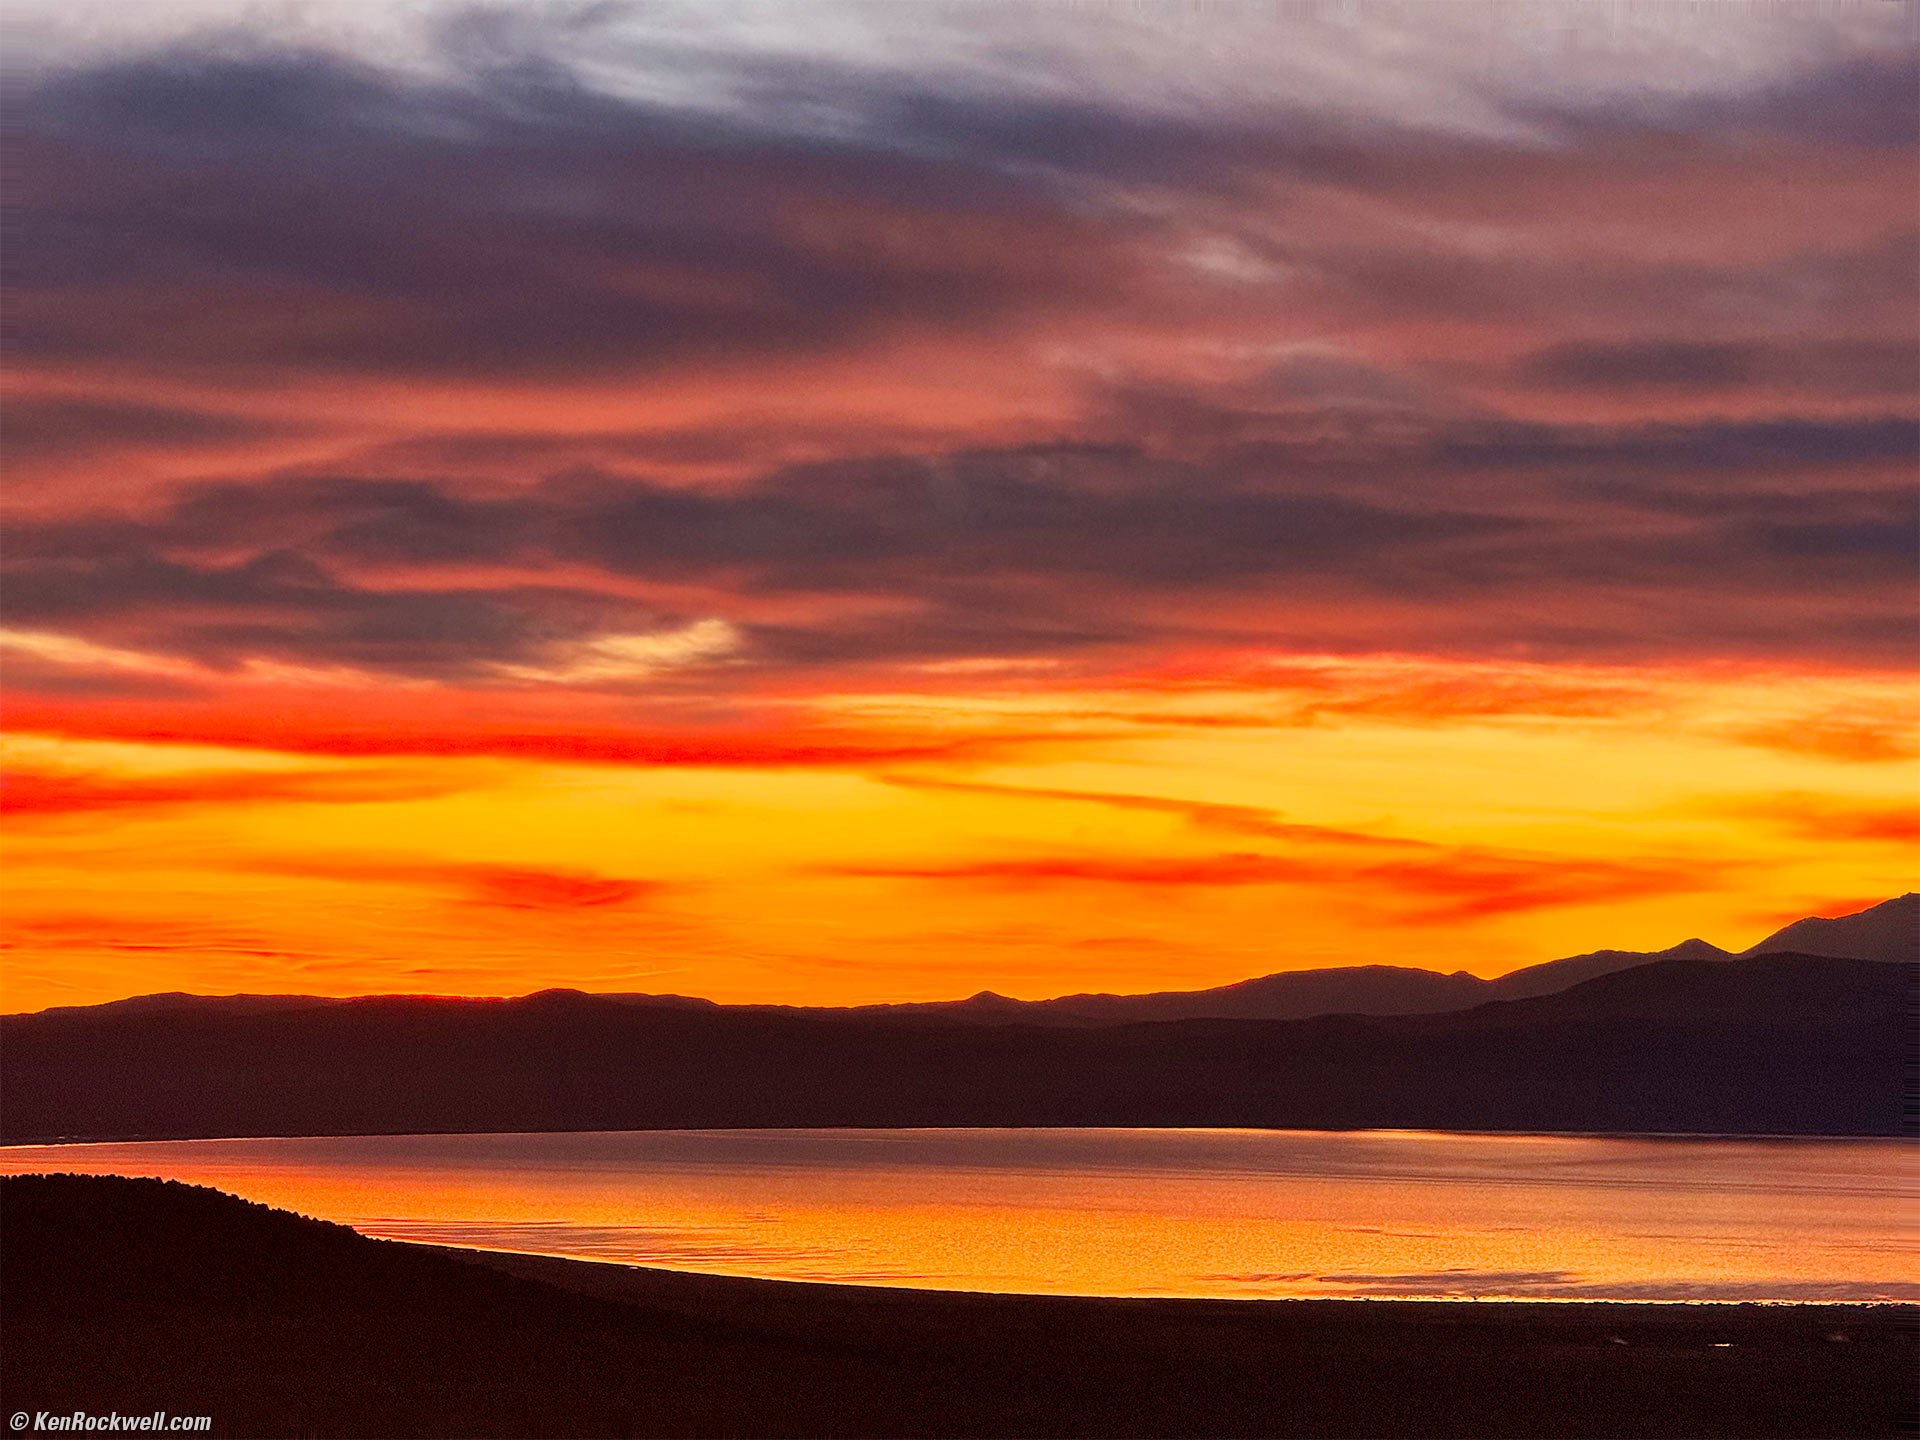
Dawn over Mono Lake as seen from Conway Summit, California, 6:45 A.M. Apple iPhone 15 Pro Max 5× (15.7mm actual or 120mm eq.) camera at f/2.8 handheld at 1/99 at Auto ISO 100 (LV9.6), Skylum Luminar Neo. More tech details. bigger or fit-to-screen.
Look south toward Lee Vining and there are different colors:
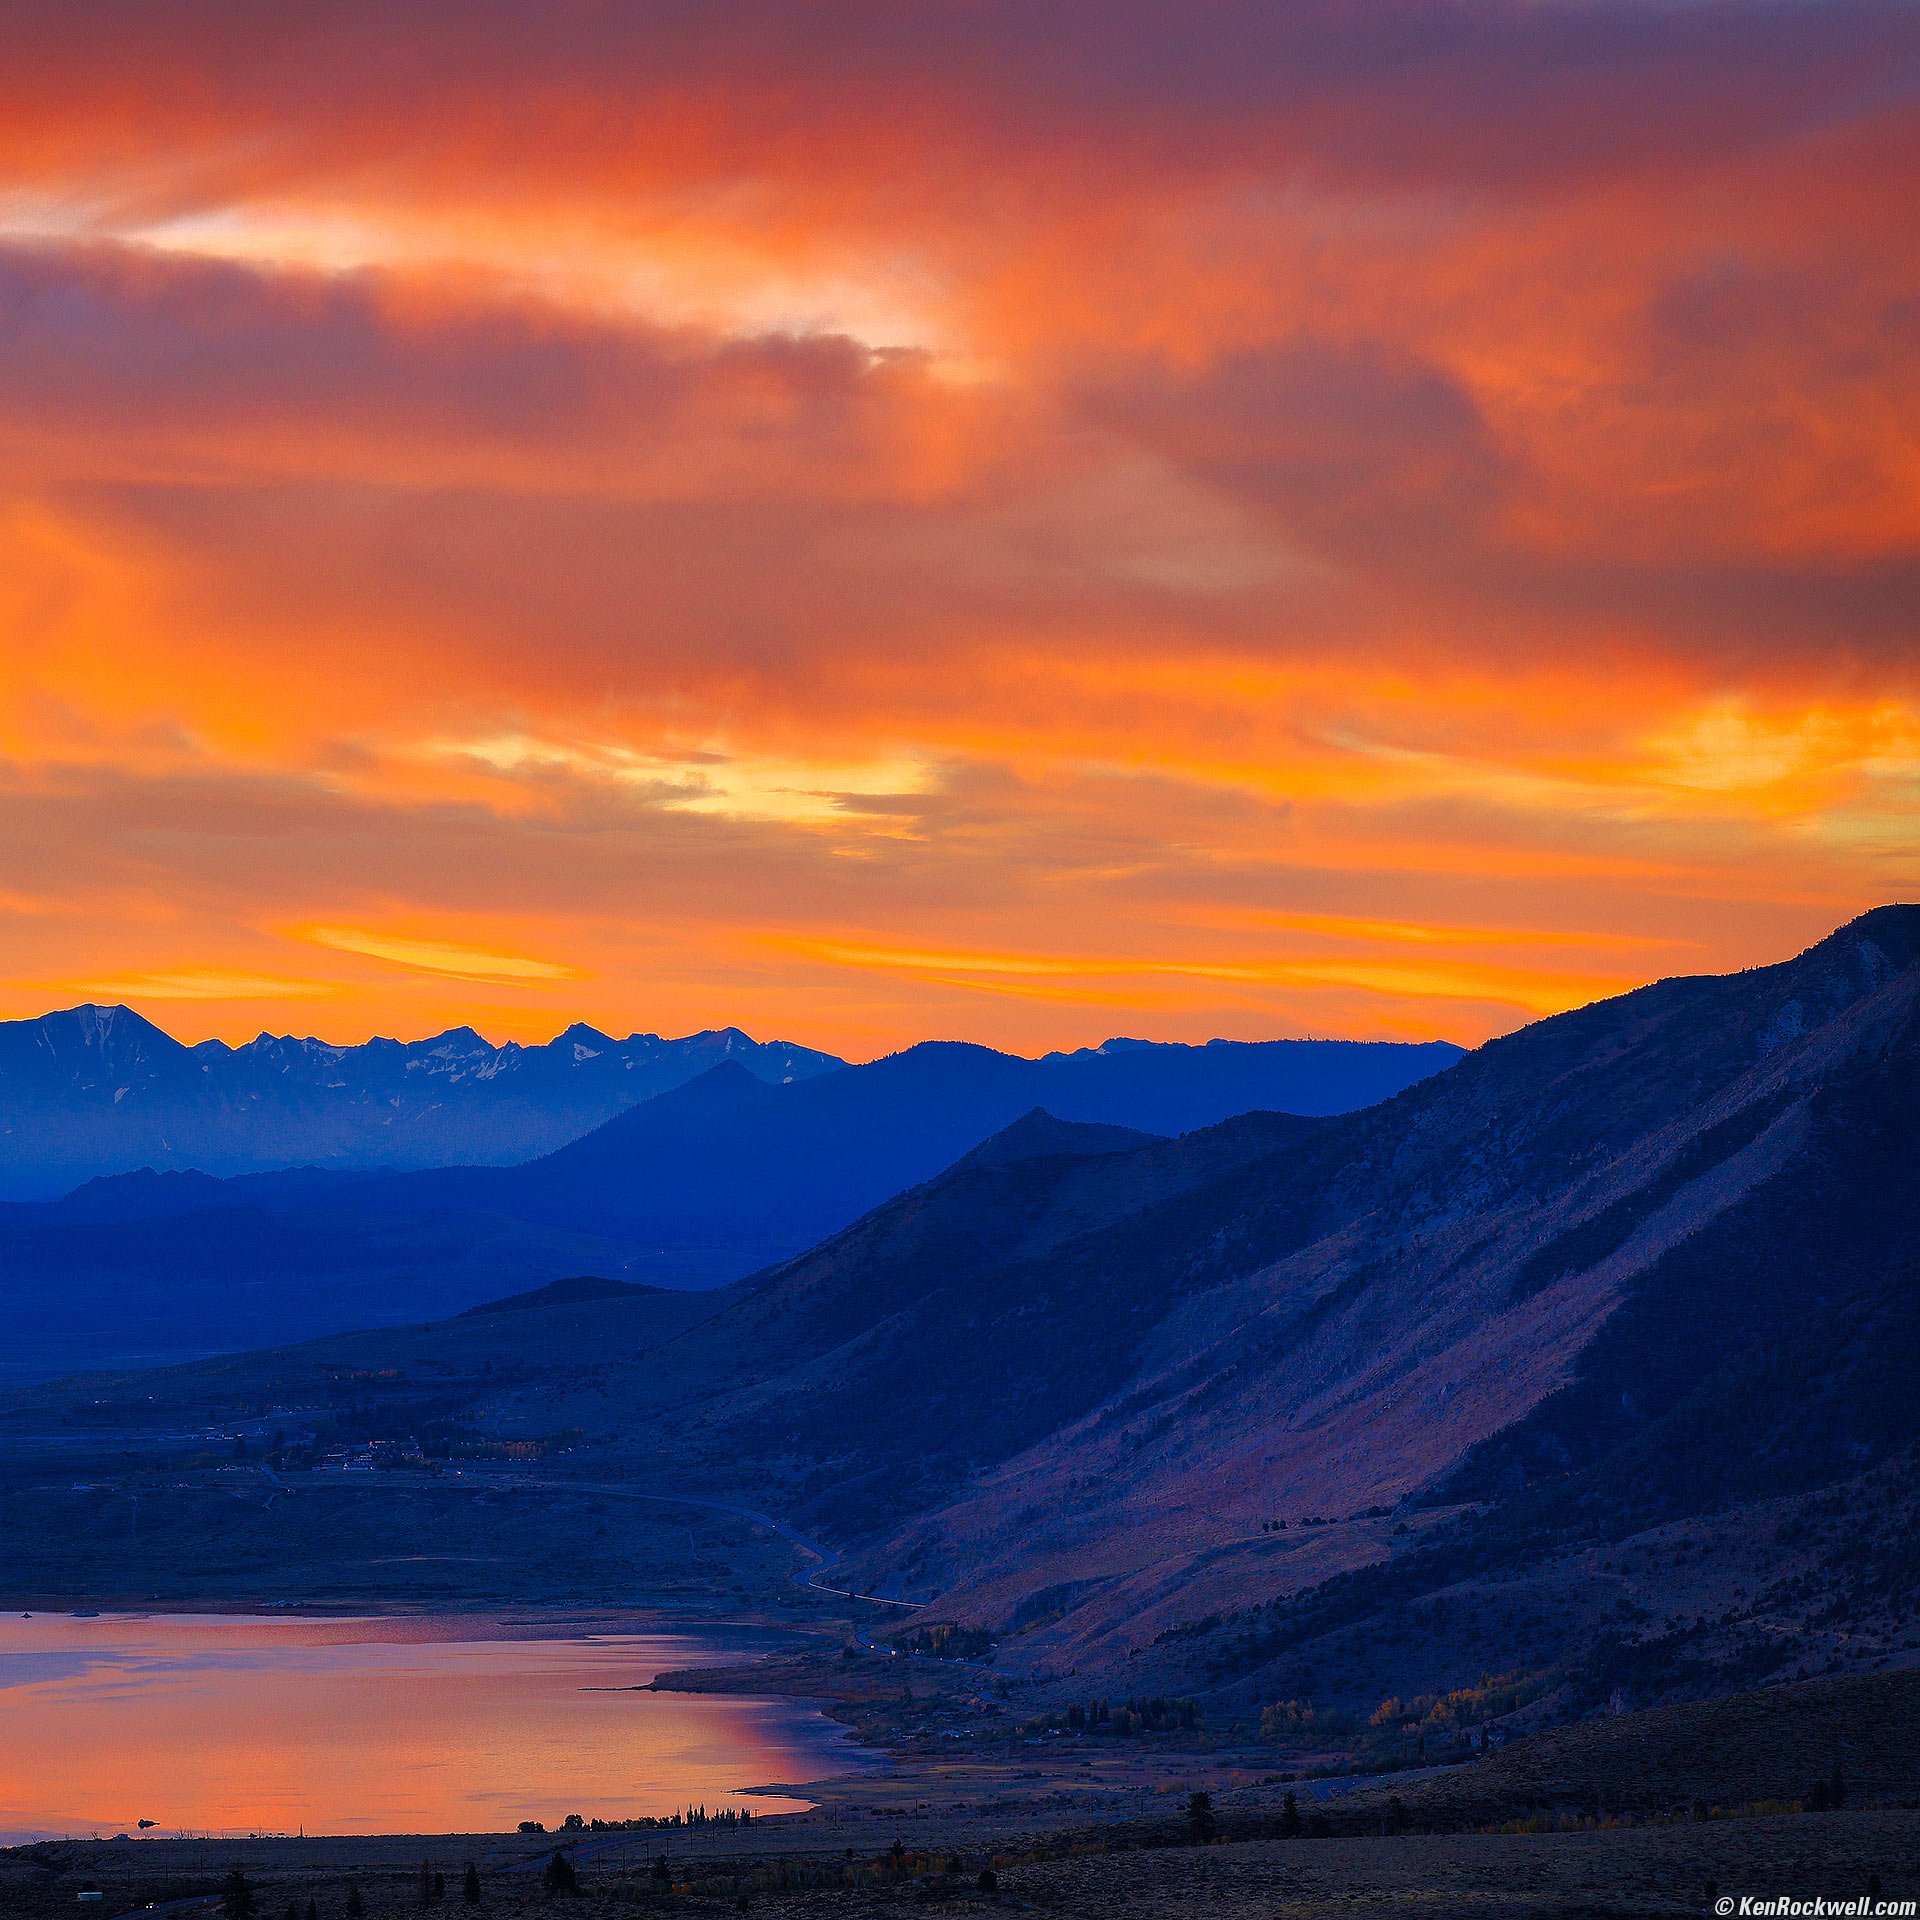
Dawn over Lee Vining and Mono Lake as seen from Conway Summit, California, 7:02 A.M. Canon EOS R6 II, EF 100-400mm L II IS USM on EF to RF Ring adapter at 135mm, f/5 at 1/100 at ISO 100 (LV 11¼), Skylum Luminar Neo. More tech details. bigger or fit-to-screen.
Neo was a huge help in making this shot explode by bringing up the blue foreground without losing the sky, easily done from my JPG source image:
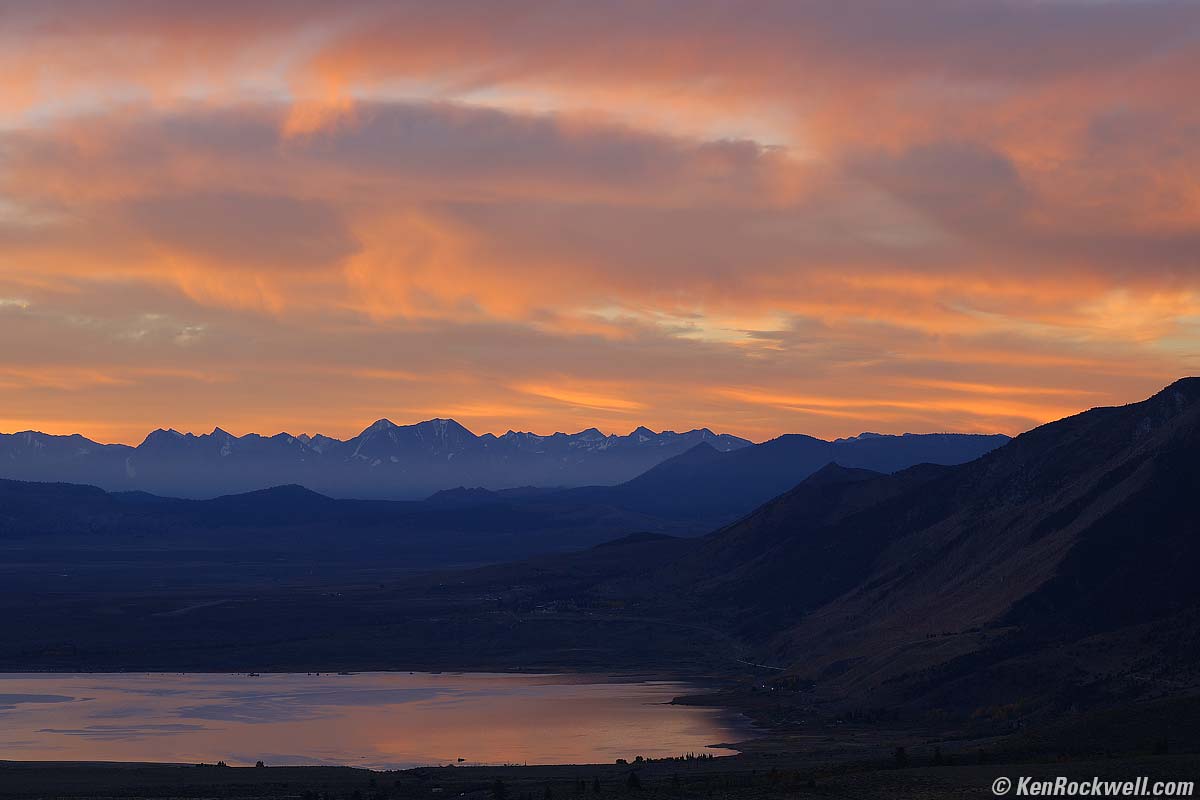
As shot. bigger.
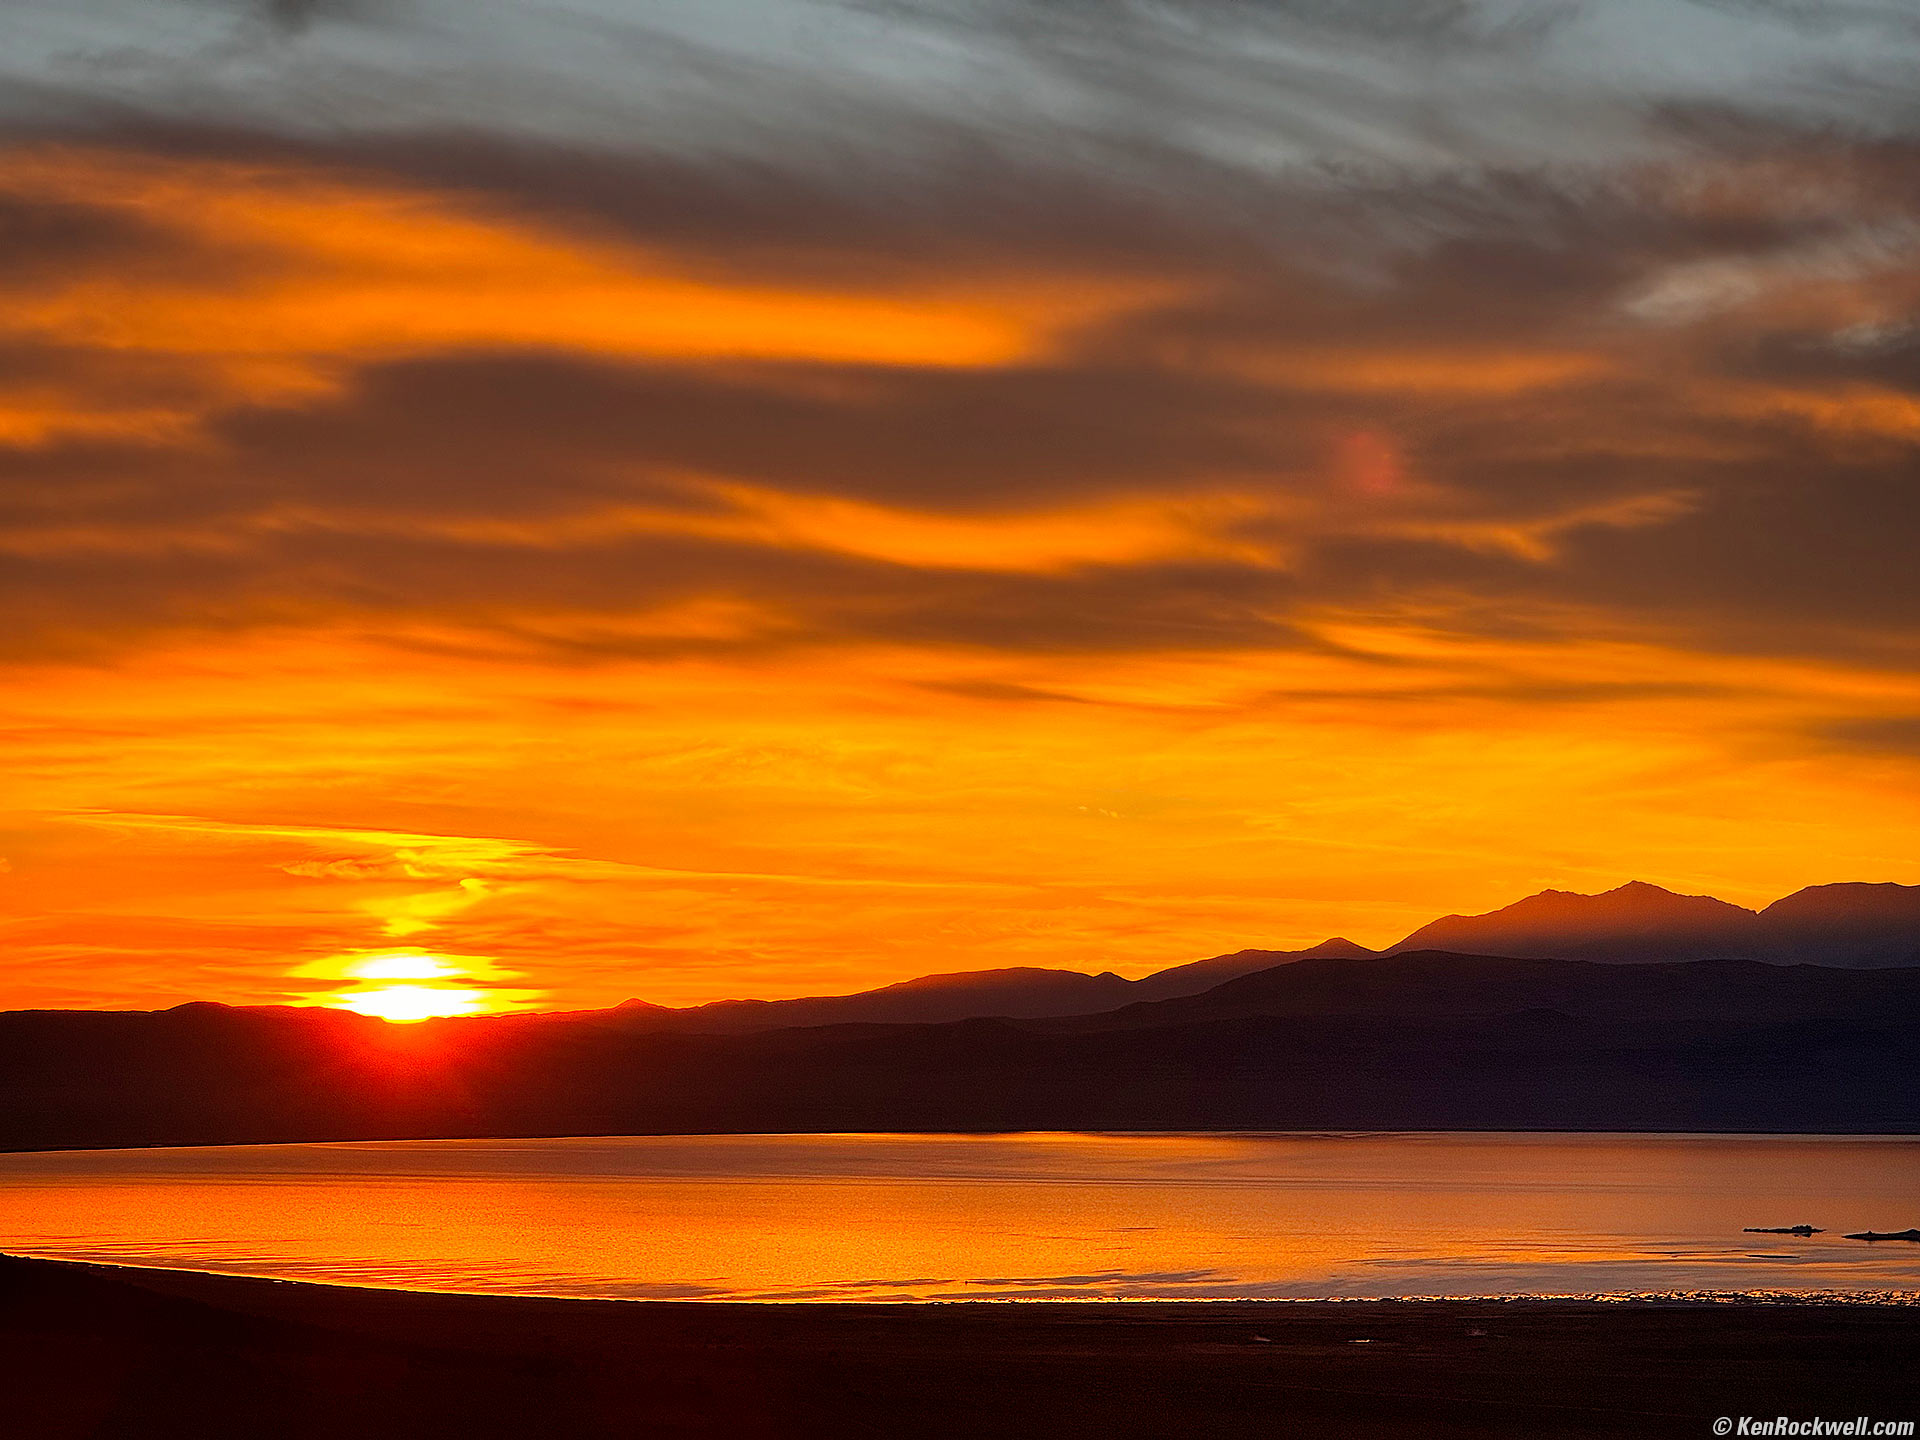
Sunrise over Mono Lake as seen from Conway Summit, California, 7:03 A.M. Apple iPhone 15 Pro Max 5× (15.7mm actual or 120mm eq.) camera at f/2.8 at 1/687 at Auto ISO 50 (LV 13.4), Skylum Luminar Neo. More tech details. bigger or fit-to-screen.

Our Group at Conway Summit, California, 7:07 A.M. Apple iPhone 15 Pro Max 1.5× (6.89mm actual, cropped to 35mm eq.) camera at f/1.8 at 1/562 at Auto ISO 50 (LV 11.1), Perfectly Clear (now sold as Radiant Photo). More tech details. bigger or fit-to-screen.
I've always loved how iPhone magically captures light and life as it happens, intuitively dealing with insane dynamic range and difficult white balances and just gets the shot we want on the first try. This was an unusually glorious sunrise.
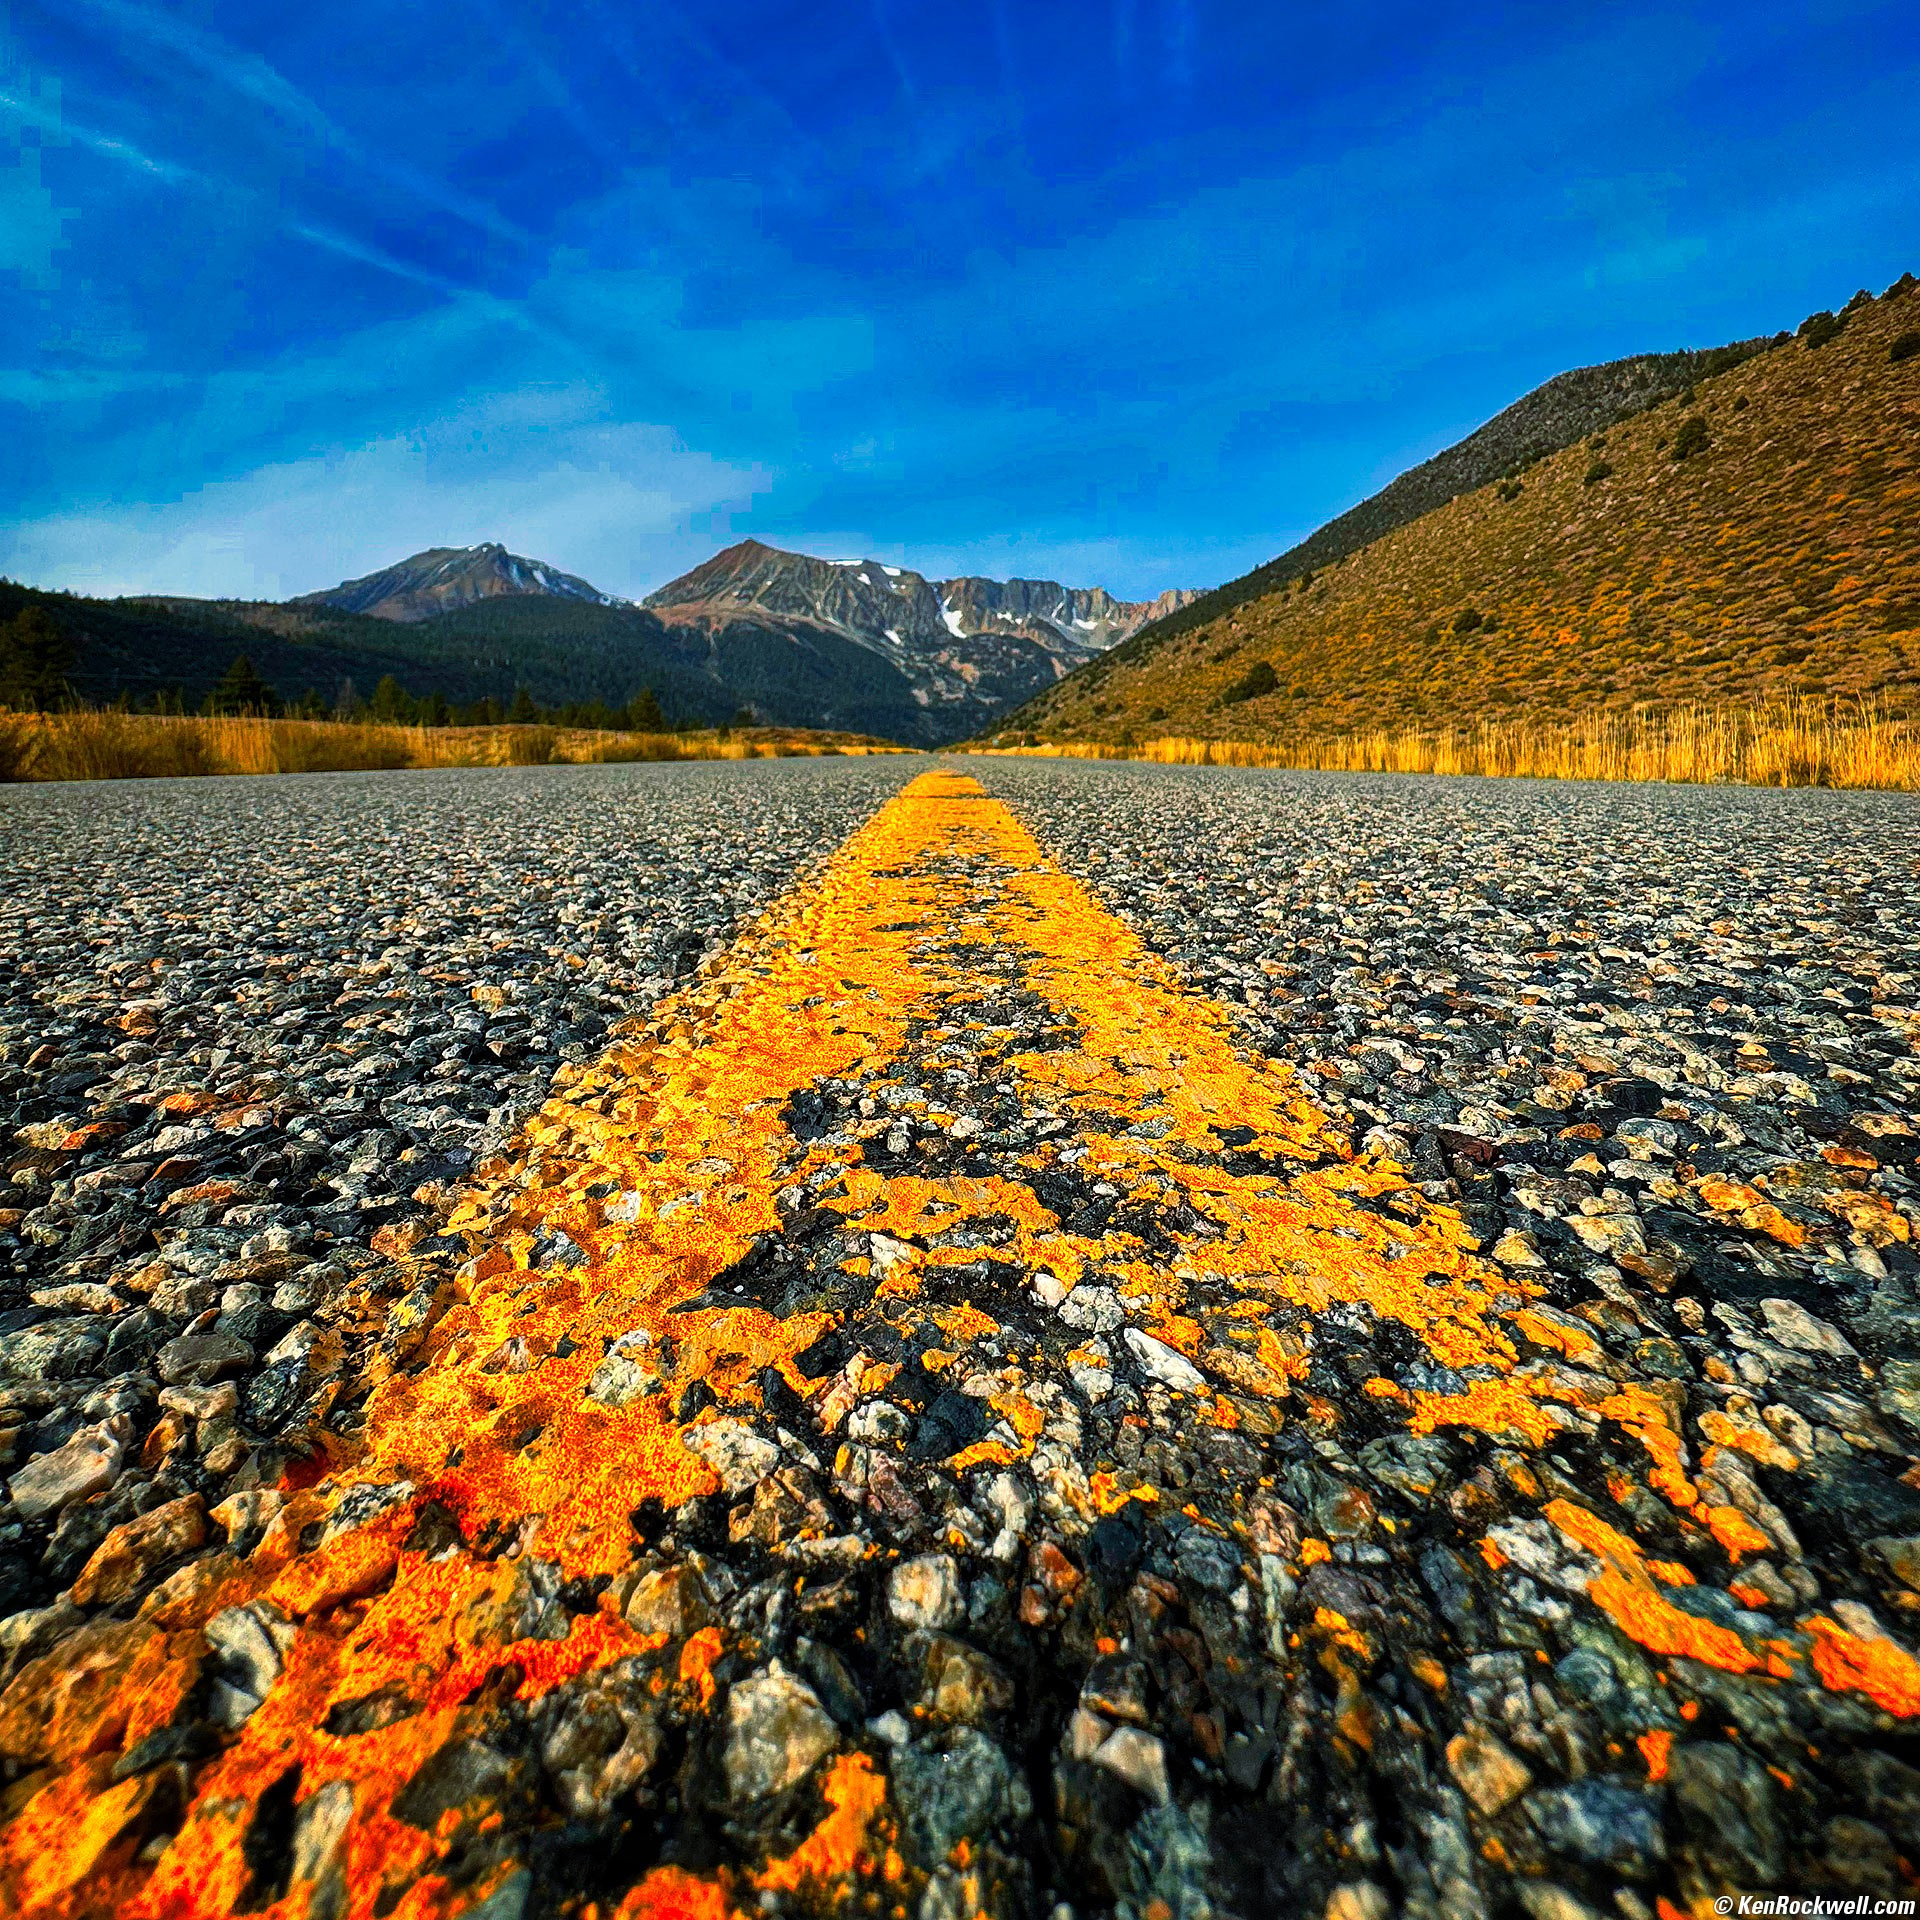
Low Shot along Route 120, Lee Vining, California, 9:16 A.M. Apple iPhone 15 Pro Max 0.5× (2.2mm actual or 13mm eq.) camera at f/2.2 at 1/1,927 at Auto ISO 50 (LV 14.2), Snapseed app and Skylum Luminar Neo. More tech details. bigger or fit-to-screen.
This was shot with my iPhone upside-down to stick its tiny lenses just about in the tarmac. I can't do this with a camera with big lenses, and likewise only the iPhone has enough depth of field to get this all reasonably in focus from a half inch (1 cm) to infinity.
I cropped this to a square, roughly equivalent to a ZEISS BIOGON 38mm f/4.5 T✻ on the HASSELBLAD 903 SWC in 6×6 format.
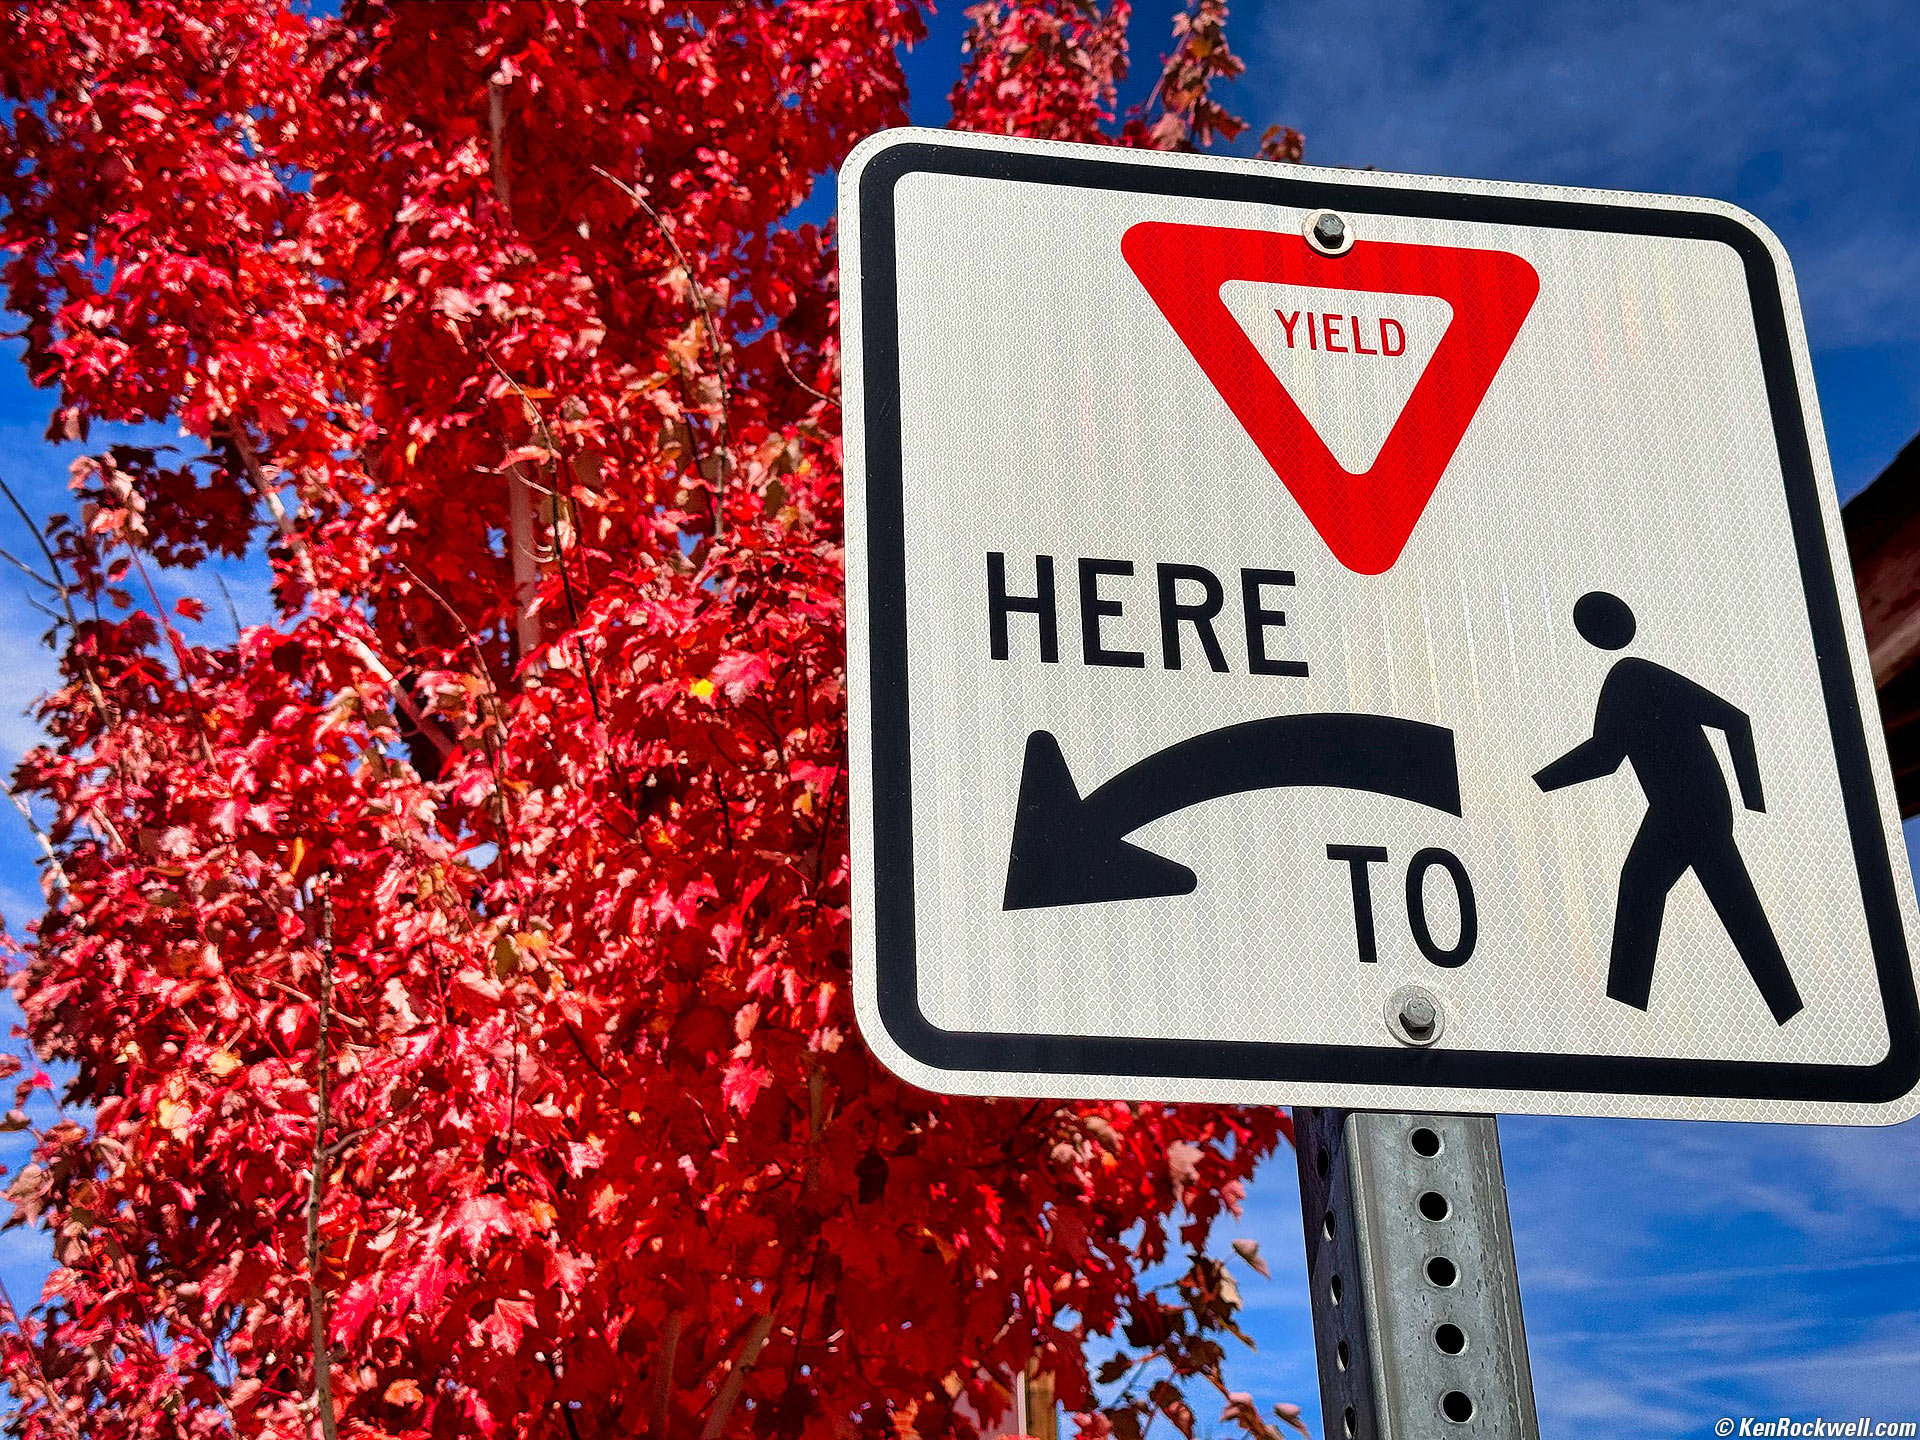
Red Sign and Tree, Lee Vining, California, 11:46 A.M. Apple iPhone 15 Pro Max 2× (6.89mm actual cropped to 48mm eq.) camera at f/1.8 at 1/10,526 at Auto ISO 64 (LV 15⅔), Skylum Luminar Neo. More tech details. bigger or fit-to-screen.
I love how easy it is to make snaps like this sing by using Skylum Luminar Neo.
We had lunch in Lee Vining, and headed to Lundy Lake afterwards.
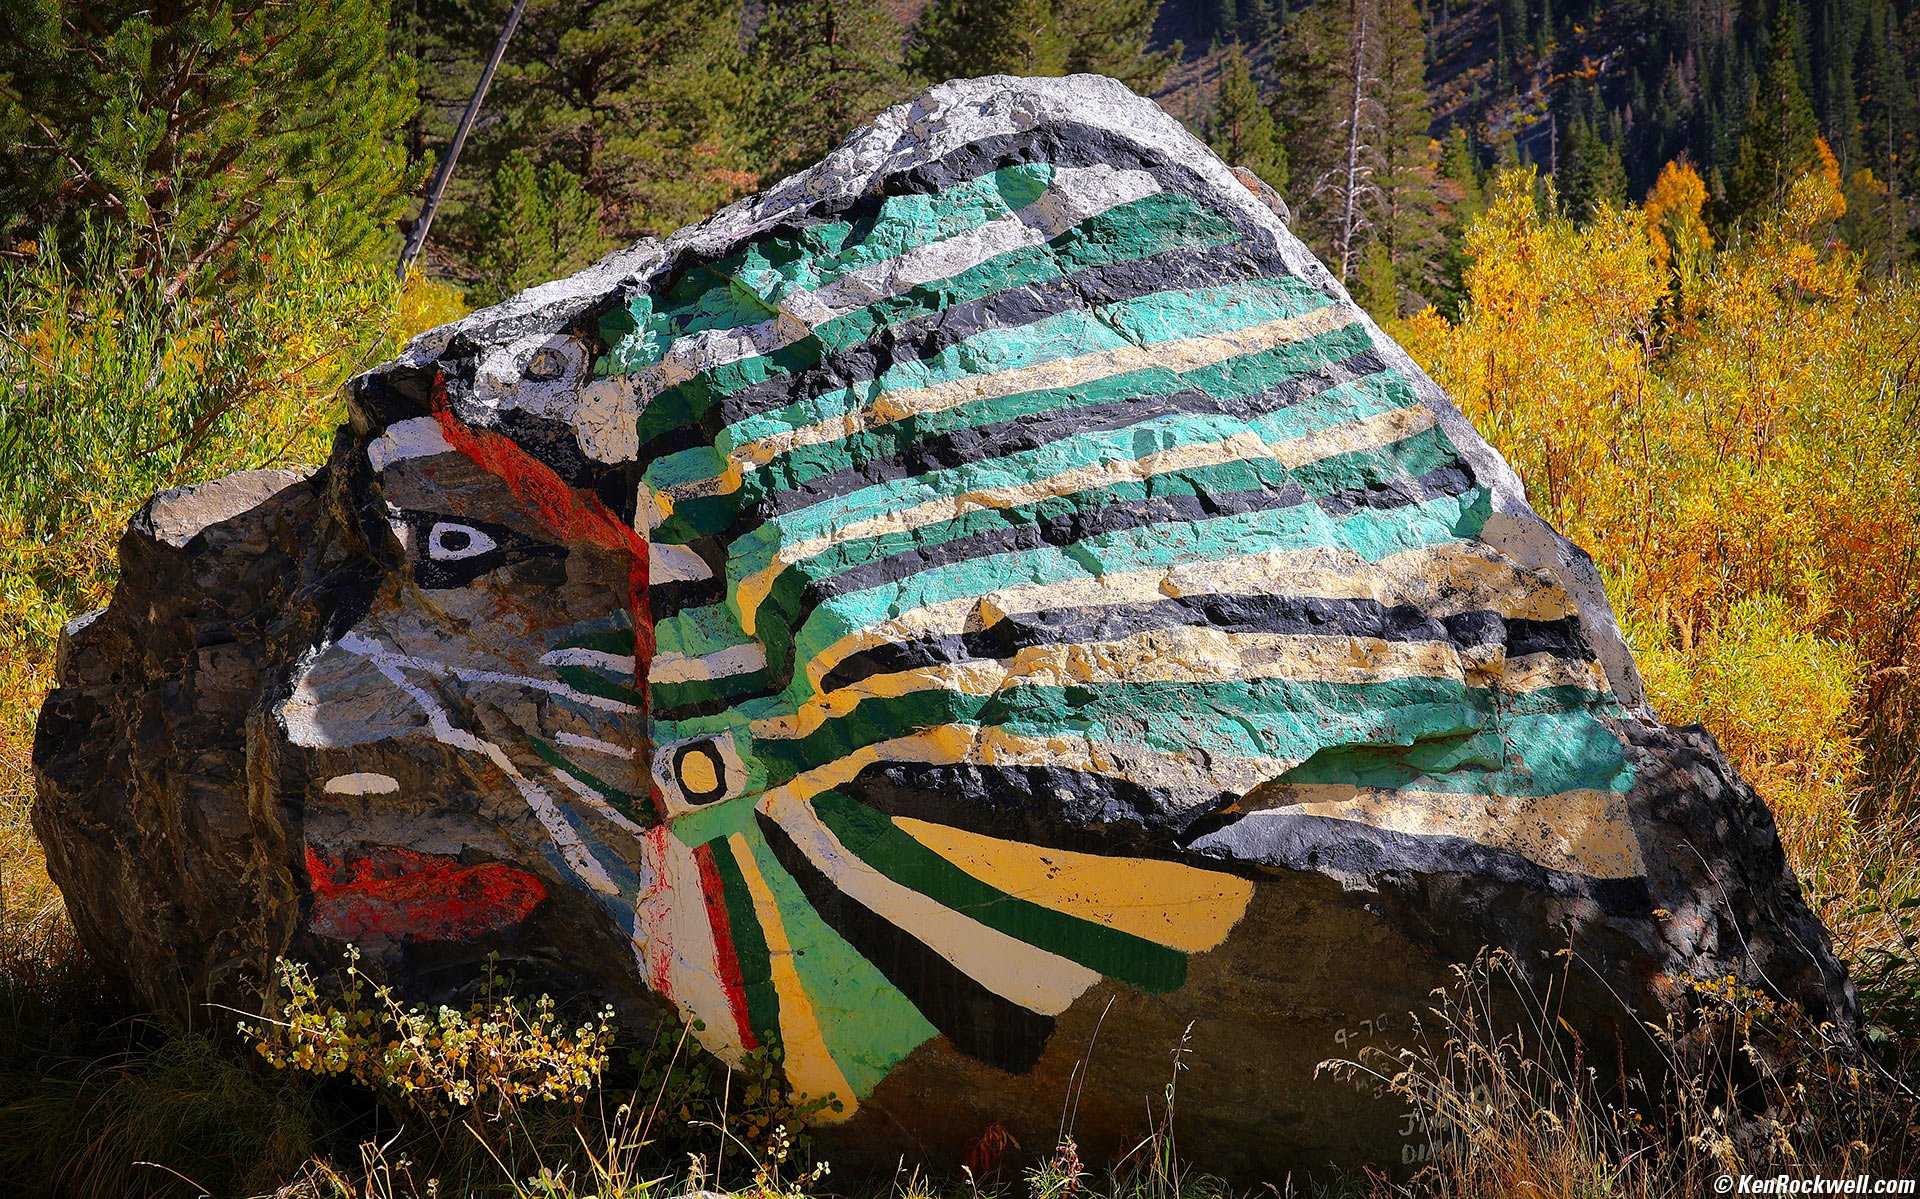
The Chief, Lundy Lake, California, 1:49 P.M. Canon EOS R6 II, RF 24-240mm IS USM at 55mm, f/8 at 1/160 at Auto ISO 100, -0.7 stops exposure compensation (LV 13.4), Skylum Luminar Neo. More tech details. bigger or fit-to-screen.
Skylum Luminar Neo's Supercontrast tool made it simple to put light in the chief's shadowed face and restore detail to the almost blown-out highlights.
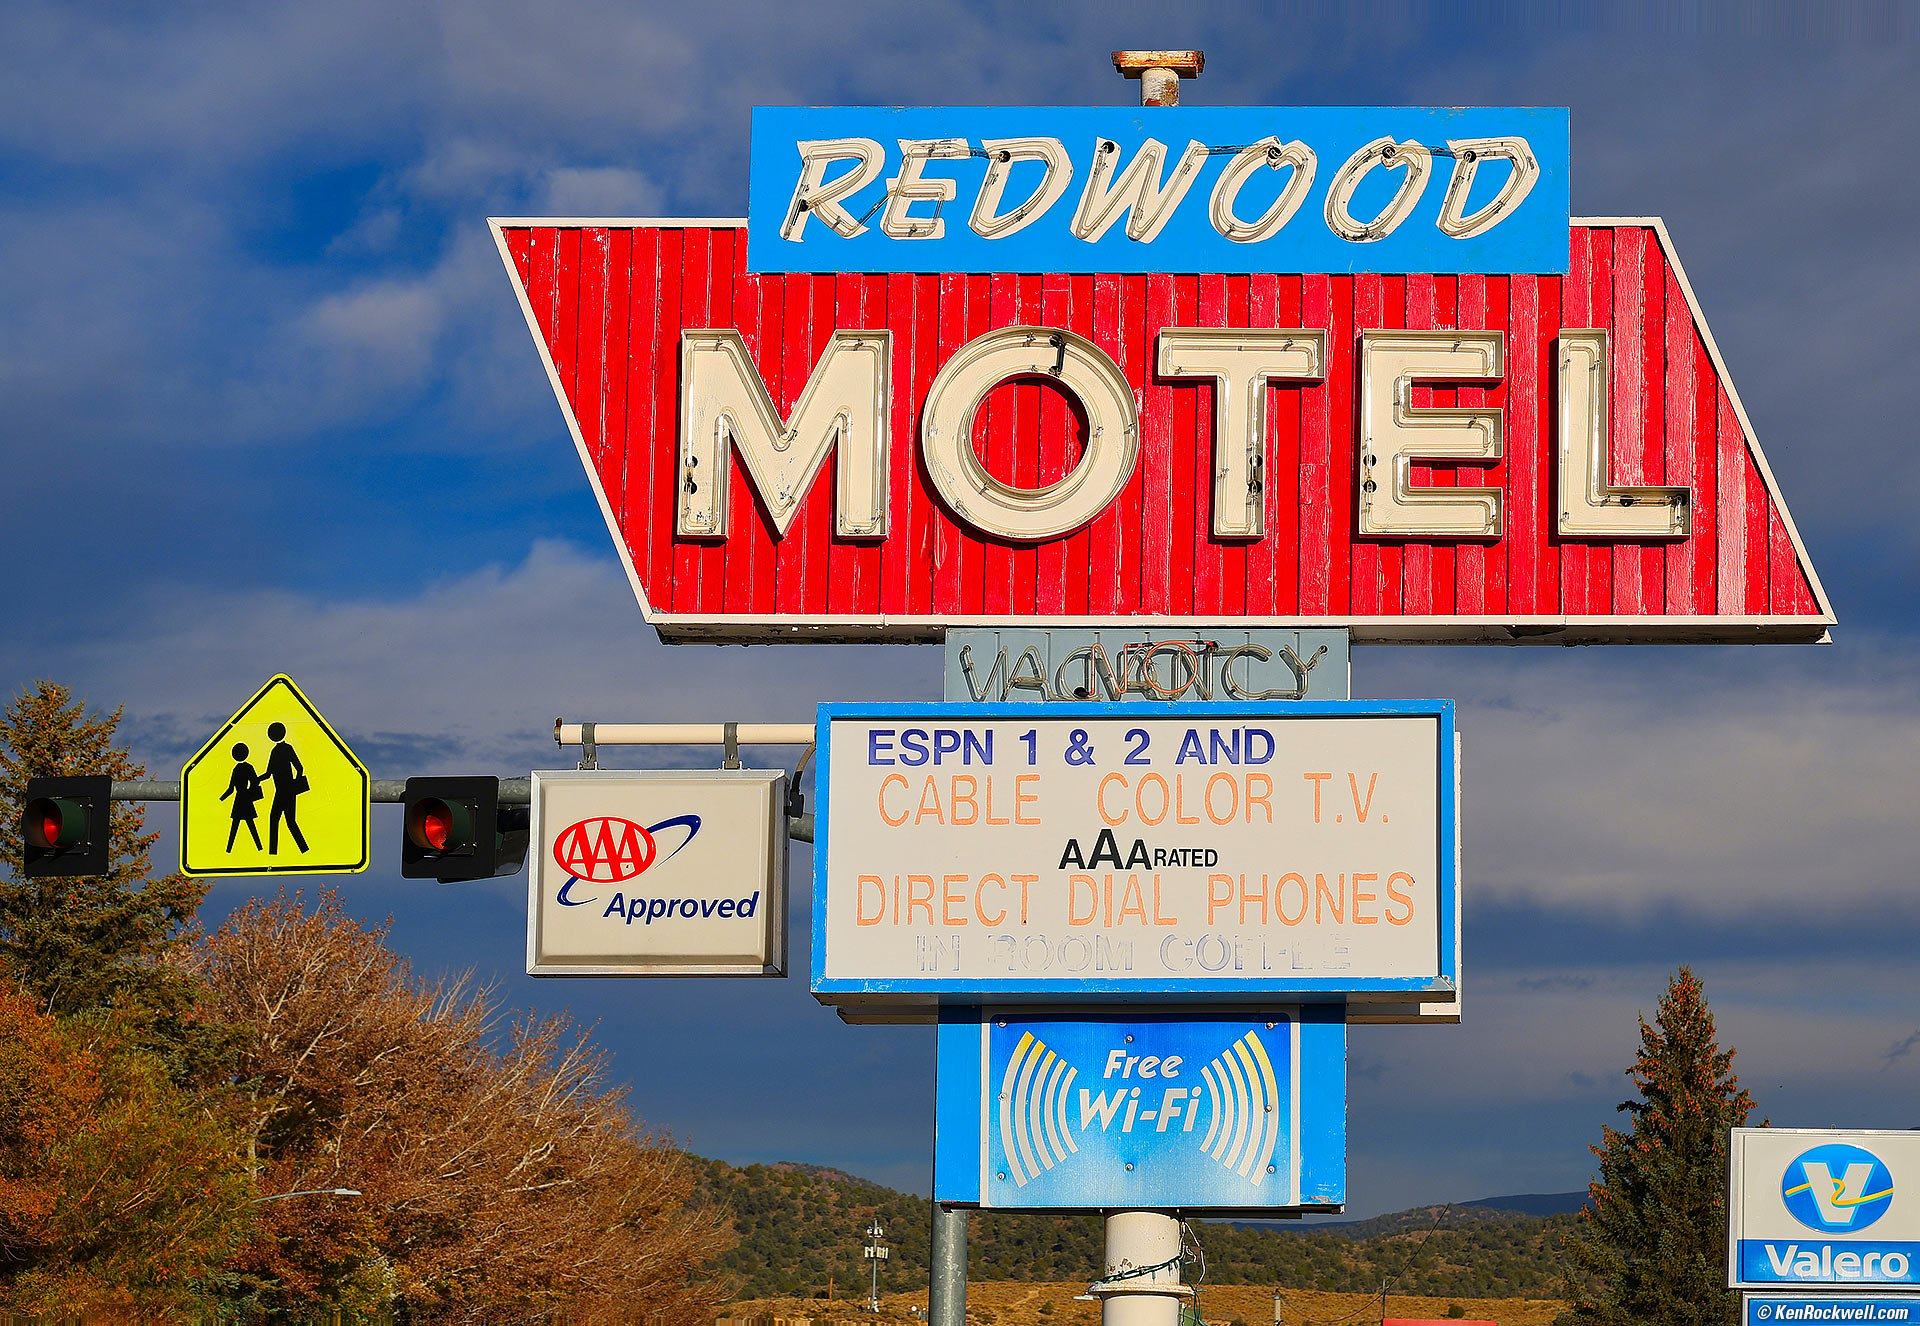
Redwood Motel Sign, Bridgeport, California, 5:04 P.M. Canon EOS R6 II, RF 24-240mm IS USM at 94mm, f/11 at 1/400 at Auto ISO 100, -0.3 stops exposure compensation (LV 15.6), Skylum Luminar Neo. More tech details. bigger or fit-to-screen.
Skylum Luminar Neo made this sing. Of course I bumped up the color from what was already good in-camera, but really fun was how easily I was able to fix all the peeling paint with Neo's Erase tool. I simply erased the defects in the paint!
Just for laughs we had a few minutes before dinner, so we headed out Twin Lakes Road in the daylight to scope out locations for tomorrow night's Milky Way shots. We didn't want to fall in any holes in the pitch dark later.
We were rewarded with some great clouds:
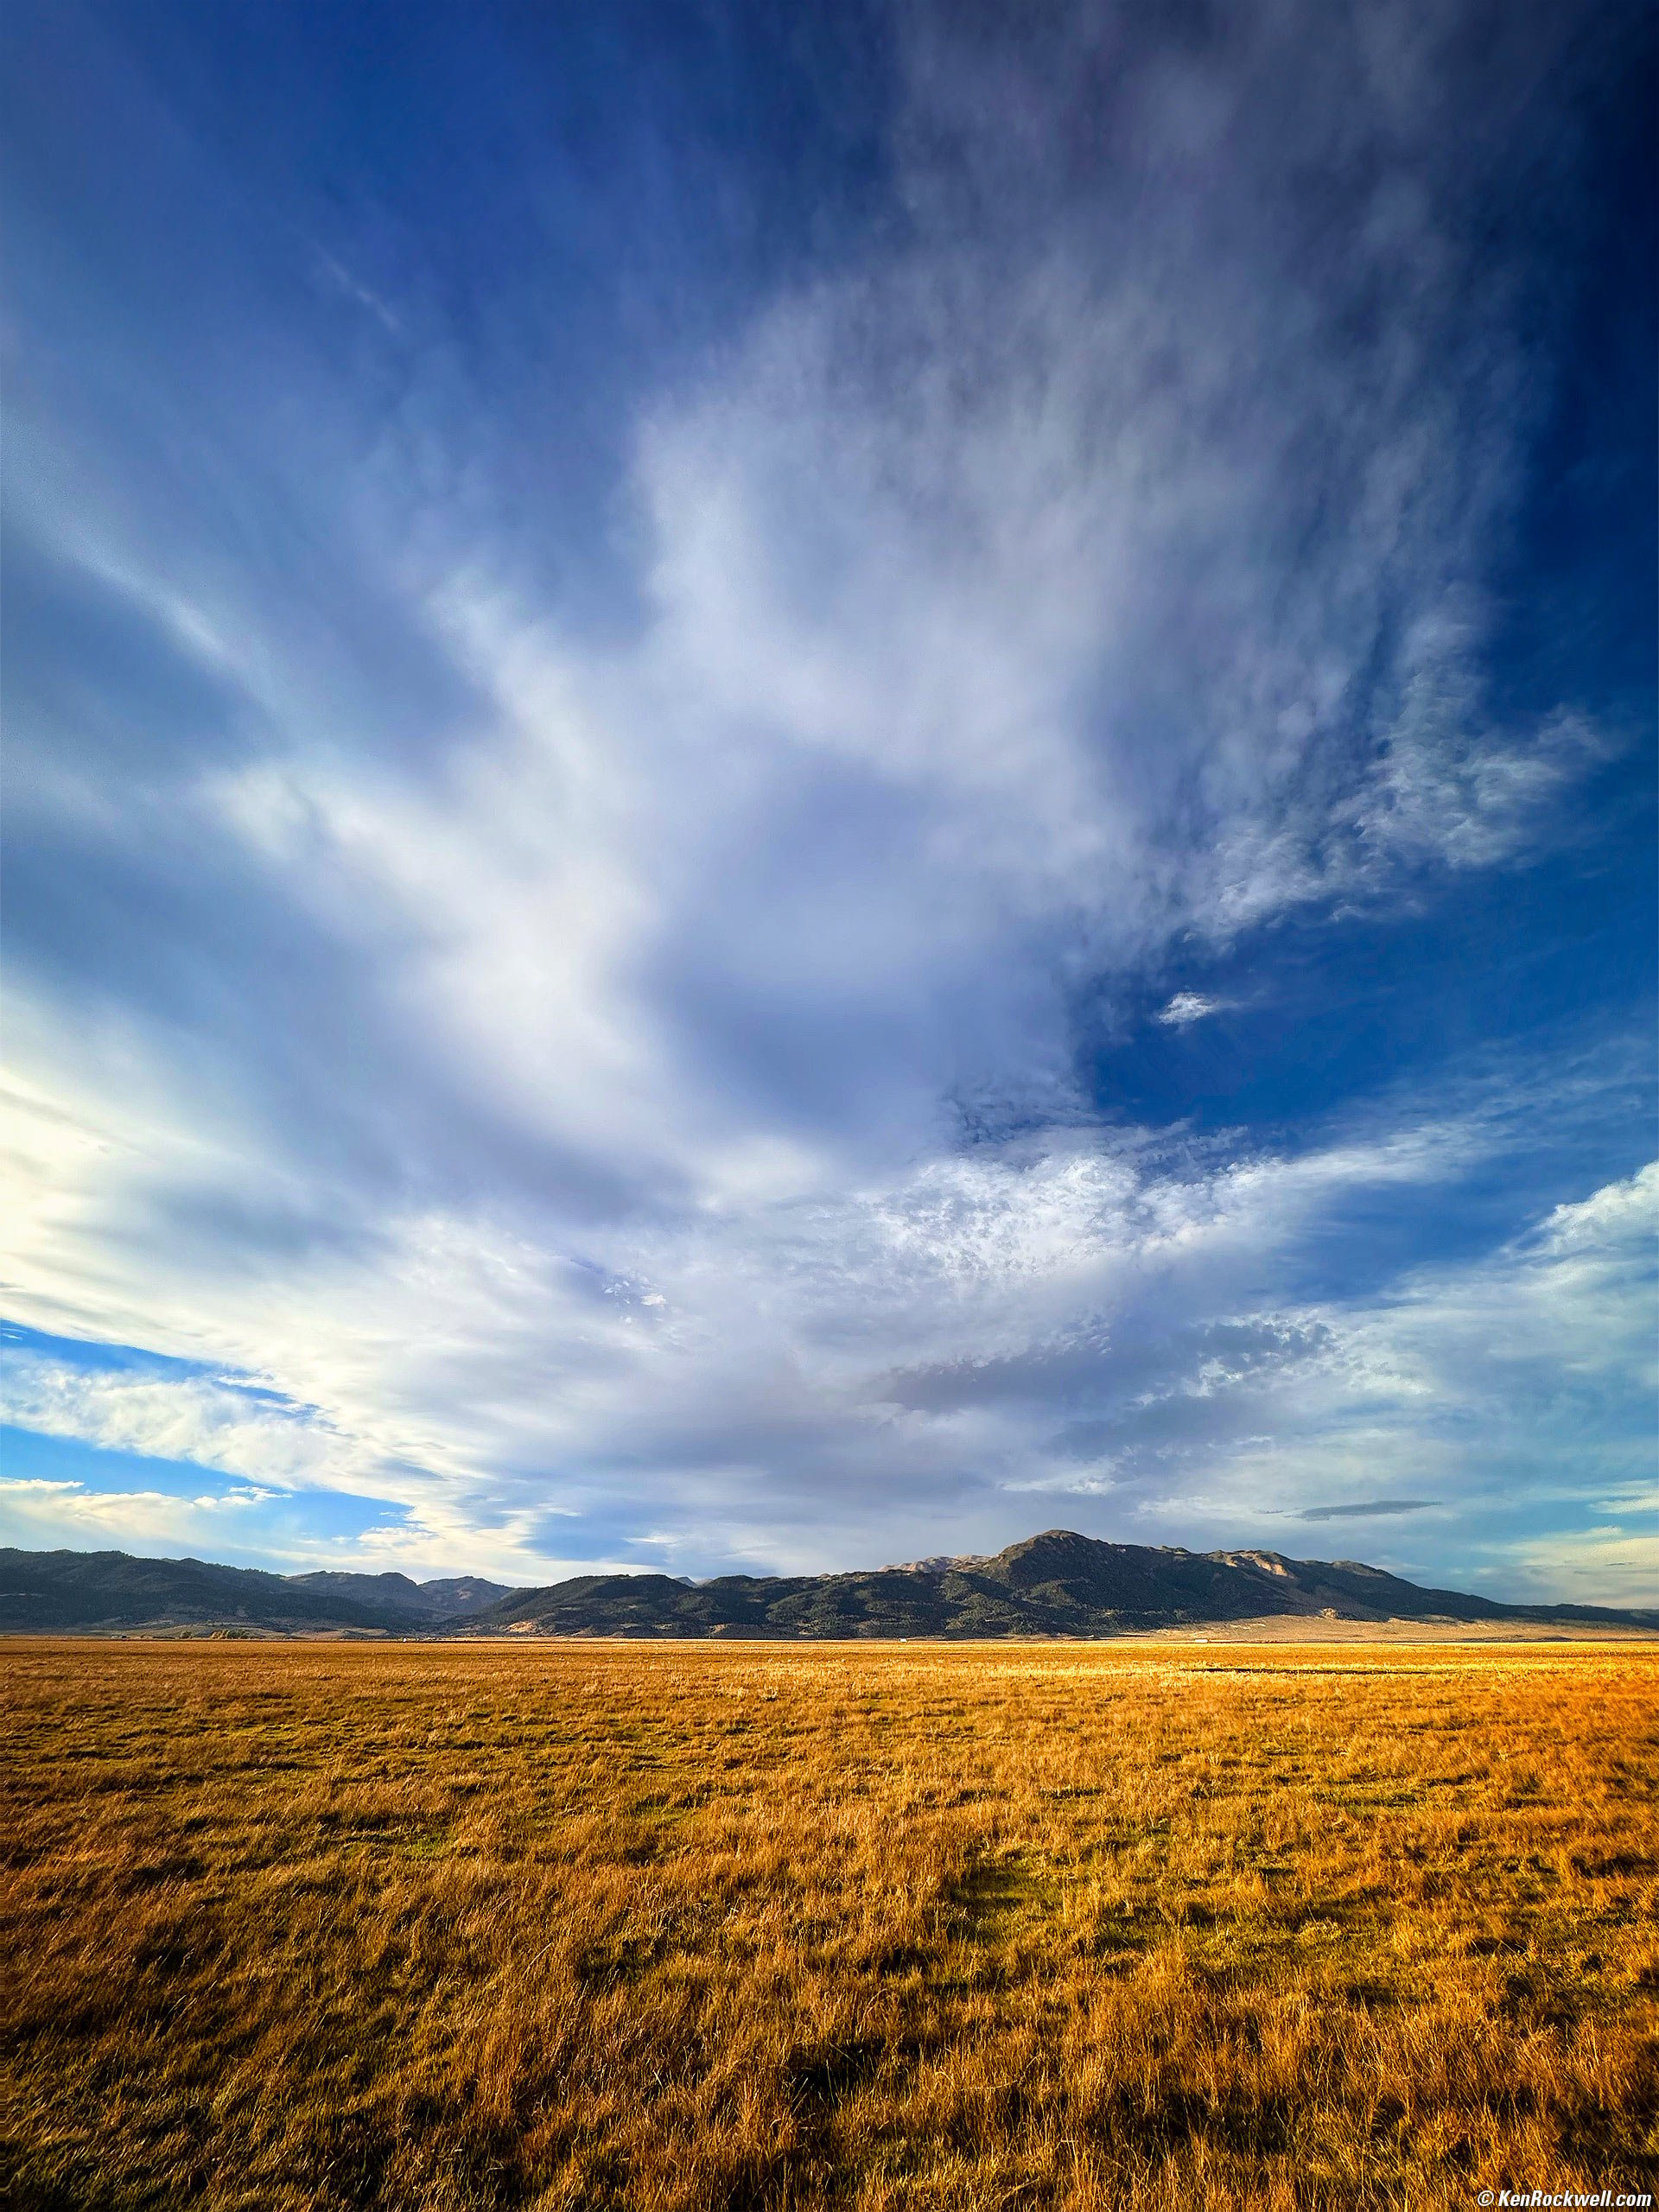
Huge Clouds in the Sky, Bridgeport, California, 5:30 P.M. Apple iPhone 15 Pro Max 0.5× (2.2mm actual or 13mm eq.) camera at f/2.2 at 1/414 at Auto ISO 40 (LV 12.3), Skylum Luminar Neo. More tech details. bigger or fit-to-screen.
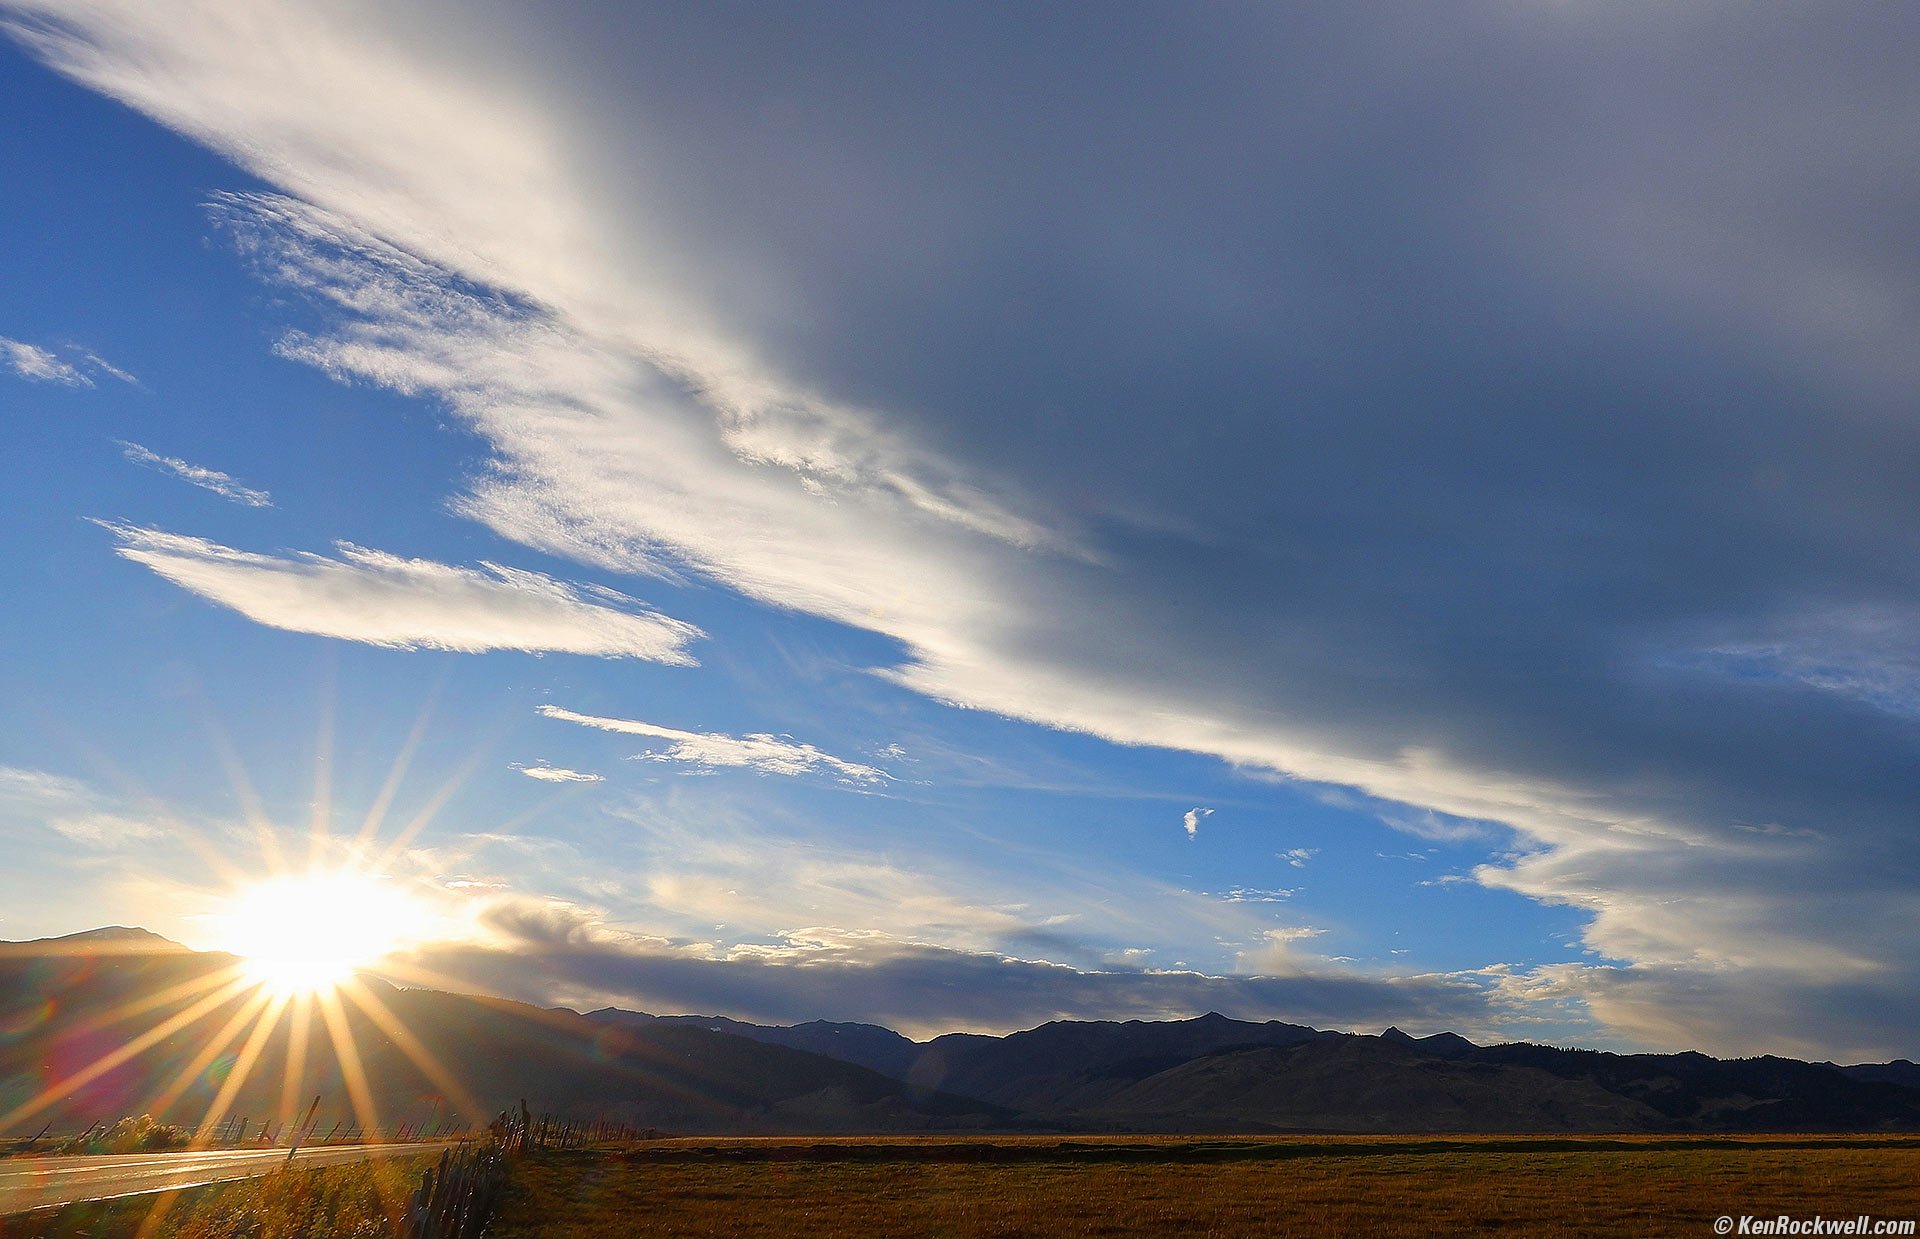
Huge Cloud, Bridgeport, California, 5:46 P.M. Canon EOS R6 II, cropped somewhat from RF 14-35mm f/4 L IS USM at 14mm, f/22 at 1/60 at Auto ISO 100 (LV 15.0) Skylum Luminar Neo. More tech details. bigger or fit-to-screen.
Skylum Luminar Neo made it easy to put just the right amount of light into the otherwise dark foreground grass, as well as get the overall look I wanted.
I shot at f/22 specifically to get the big sunstar.
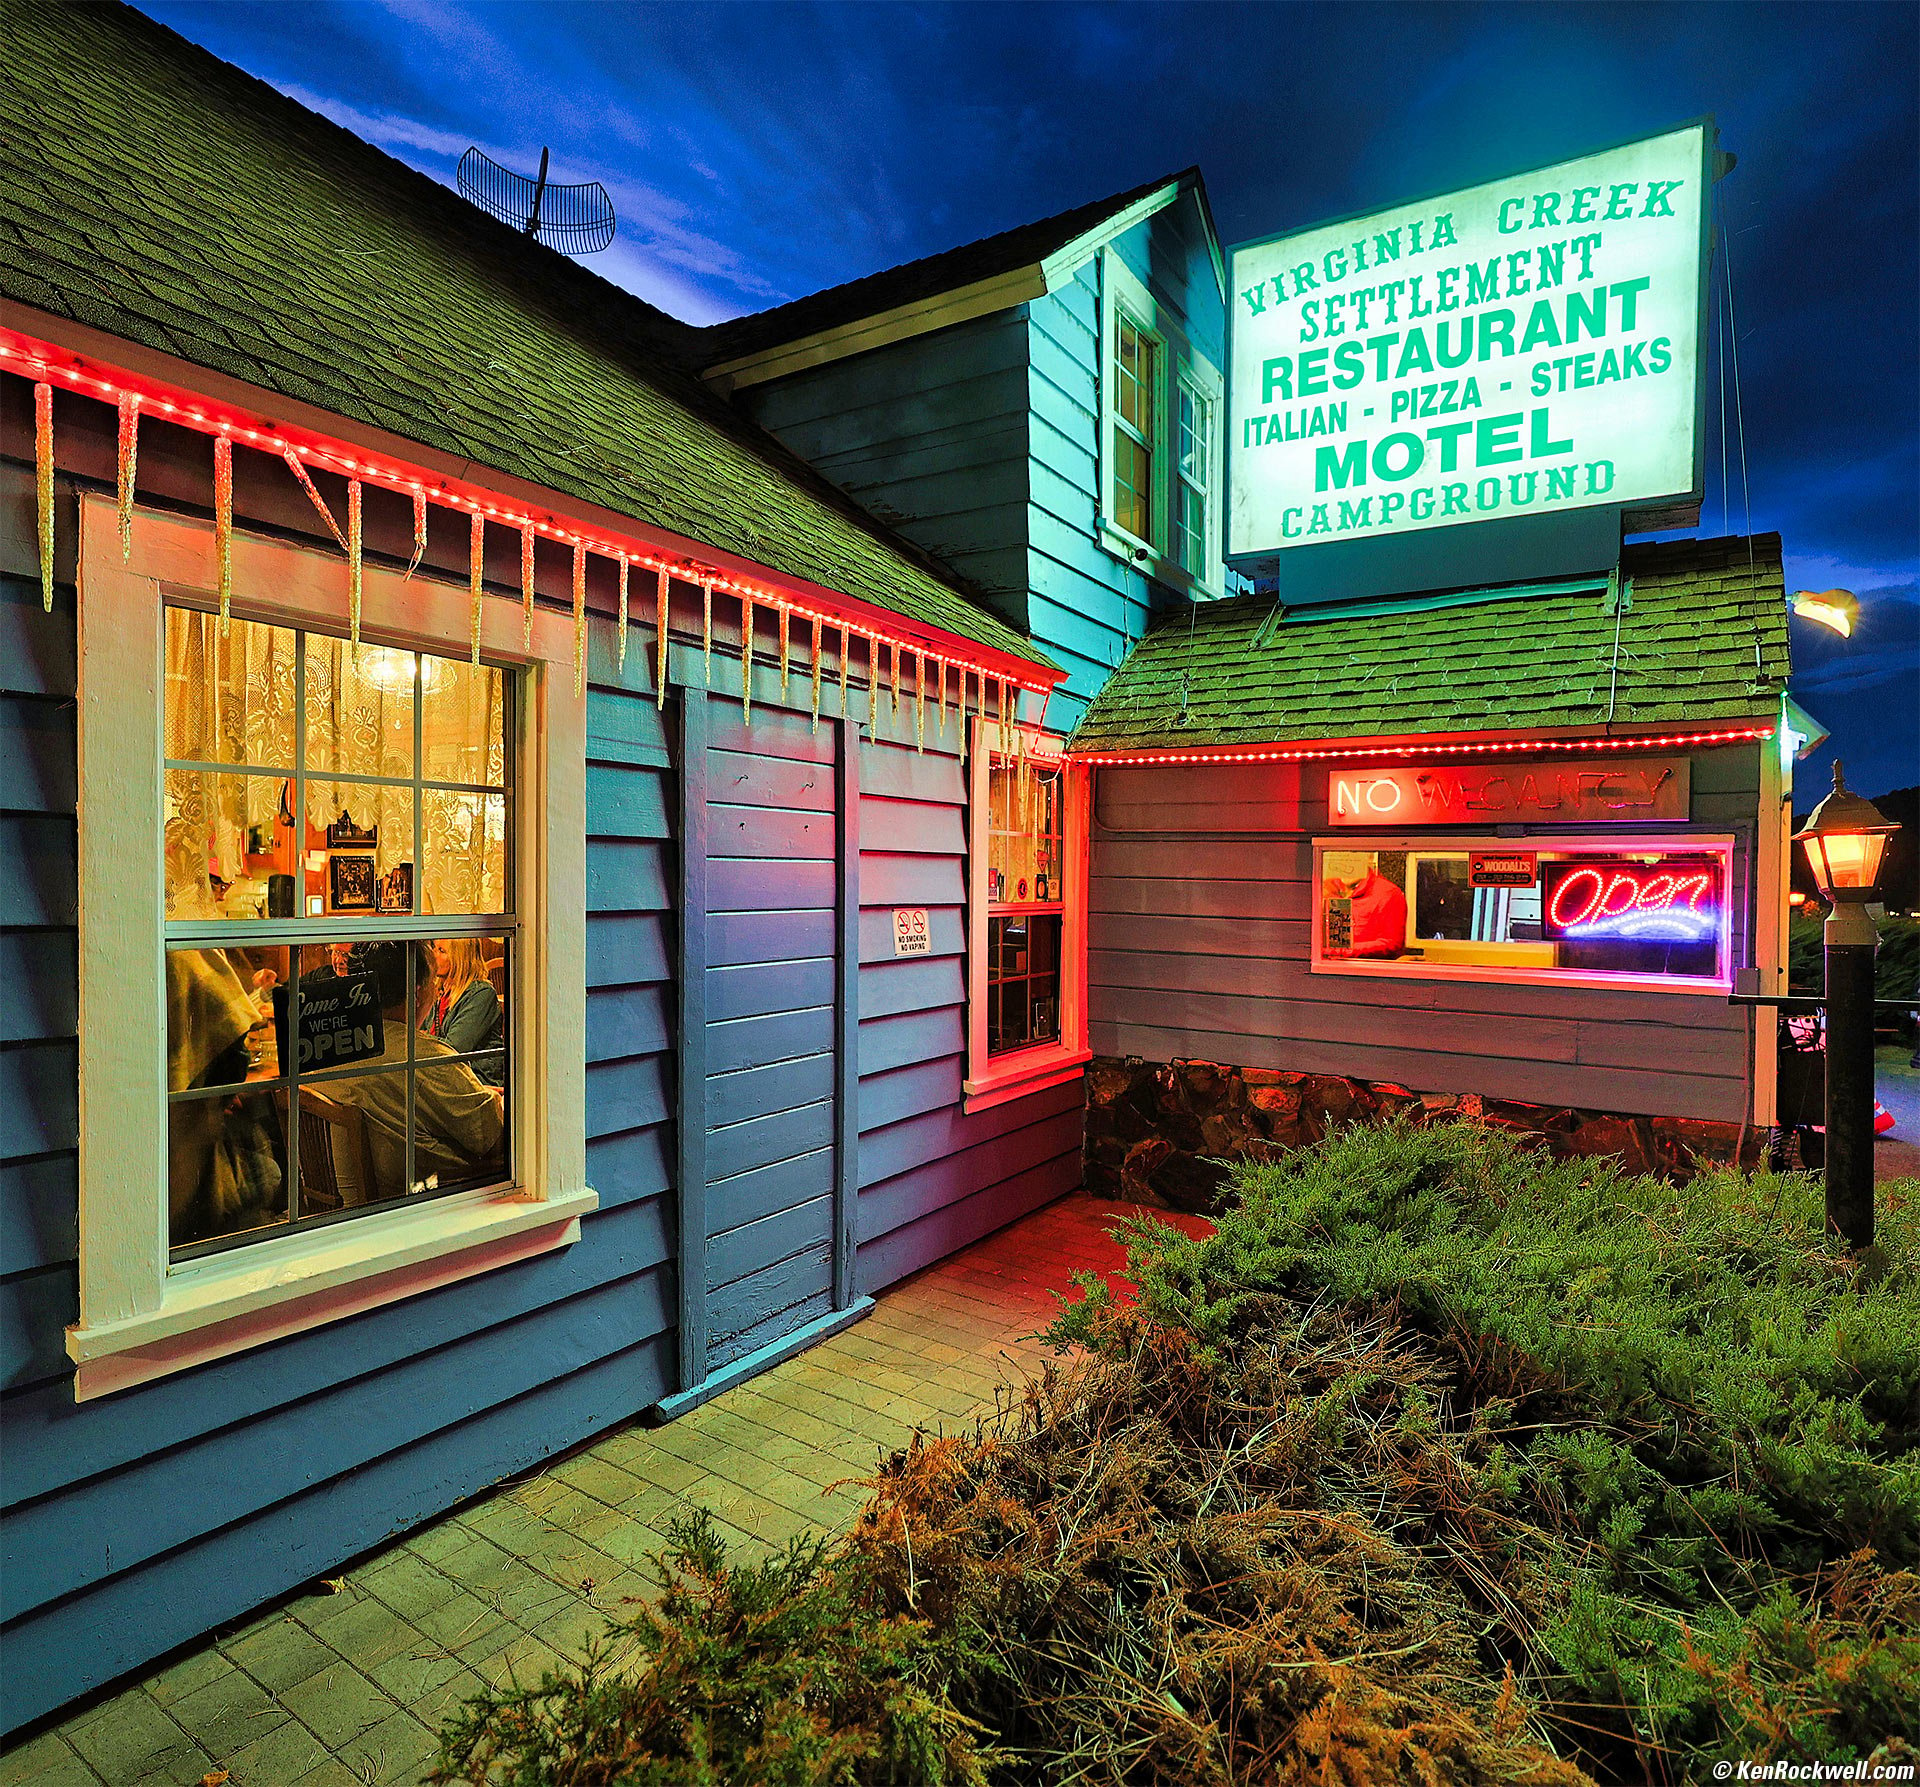
Virginia Creek Settlement, Bridgeport, California, 6:52 P.M. Canon EOS R6 II, RF 14-35mm f/4 L IS USM at 14mm, f/4 at 1/80 at Auto ISO 2,500, -1 stop exposure compensation (LV 5.7), Skylum Luminar Neo. More tech details. bigger or fit-to-screen.
I cropped this to a square, roughly equivalent to a ZEISS BIOGON 38mm f/4.5 T✻ on the HASSELBLAD 903 SWC in 6×6 format.
I shot this hand-held in my EOS R6 II's multiframe HDR mode so the backlit sign at the upper right didn't blow out. That worked, but the single HDR JPG from the camera was flat as most HDR is from-camera. Skylum Luminar Neo made it trivial to amp it back up to exciting, as well as Erase the flagpole on the right. As usual I also added deliberate vignetting to make the image more dynamic. Here's what I had out of the camera:
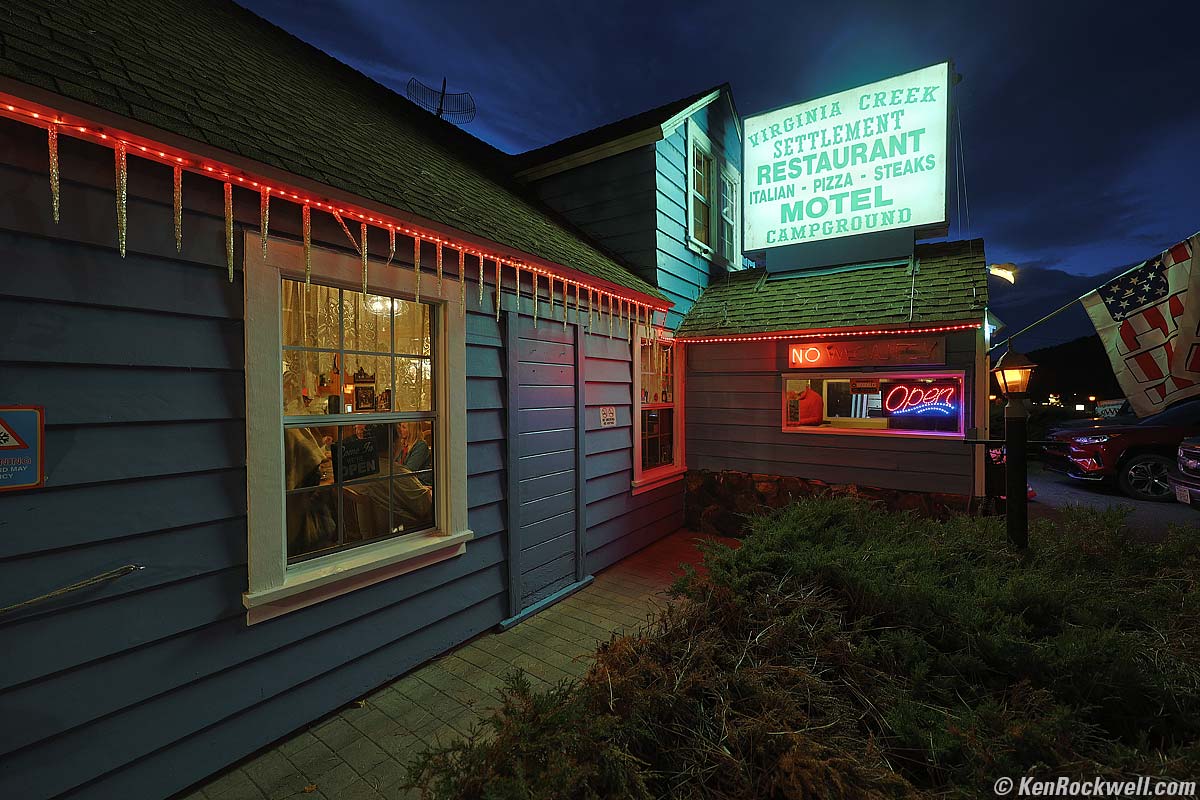
As shot. bigger.
14 October 2023, Saturday top
12, 13, 14 & 15 October 2023 How I Created These Pictures
Today we got up at 4:45 AM and headed out at 5:45 AM, arriving at Mono Lake South Tufa just before dawn at 6:38 AM. I didn't get anything that extraordinary, but had loads of fun making videos in any case. We were back at our cars at 8AM.
We headed to the parking lot behind The Moblie Station overlooking Mono Lake for the partial solar eclipse, which started at 8:15 AM and was darkest at 9:22AM:
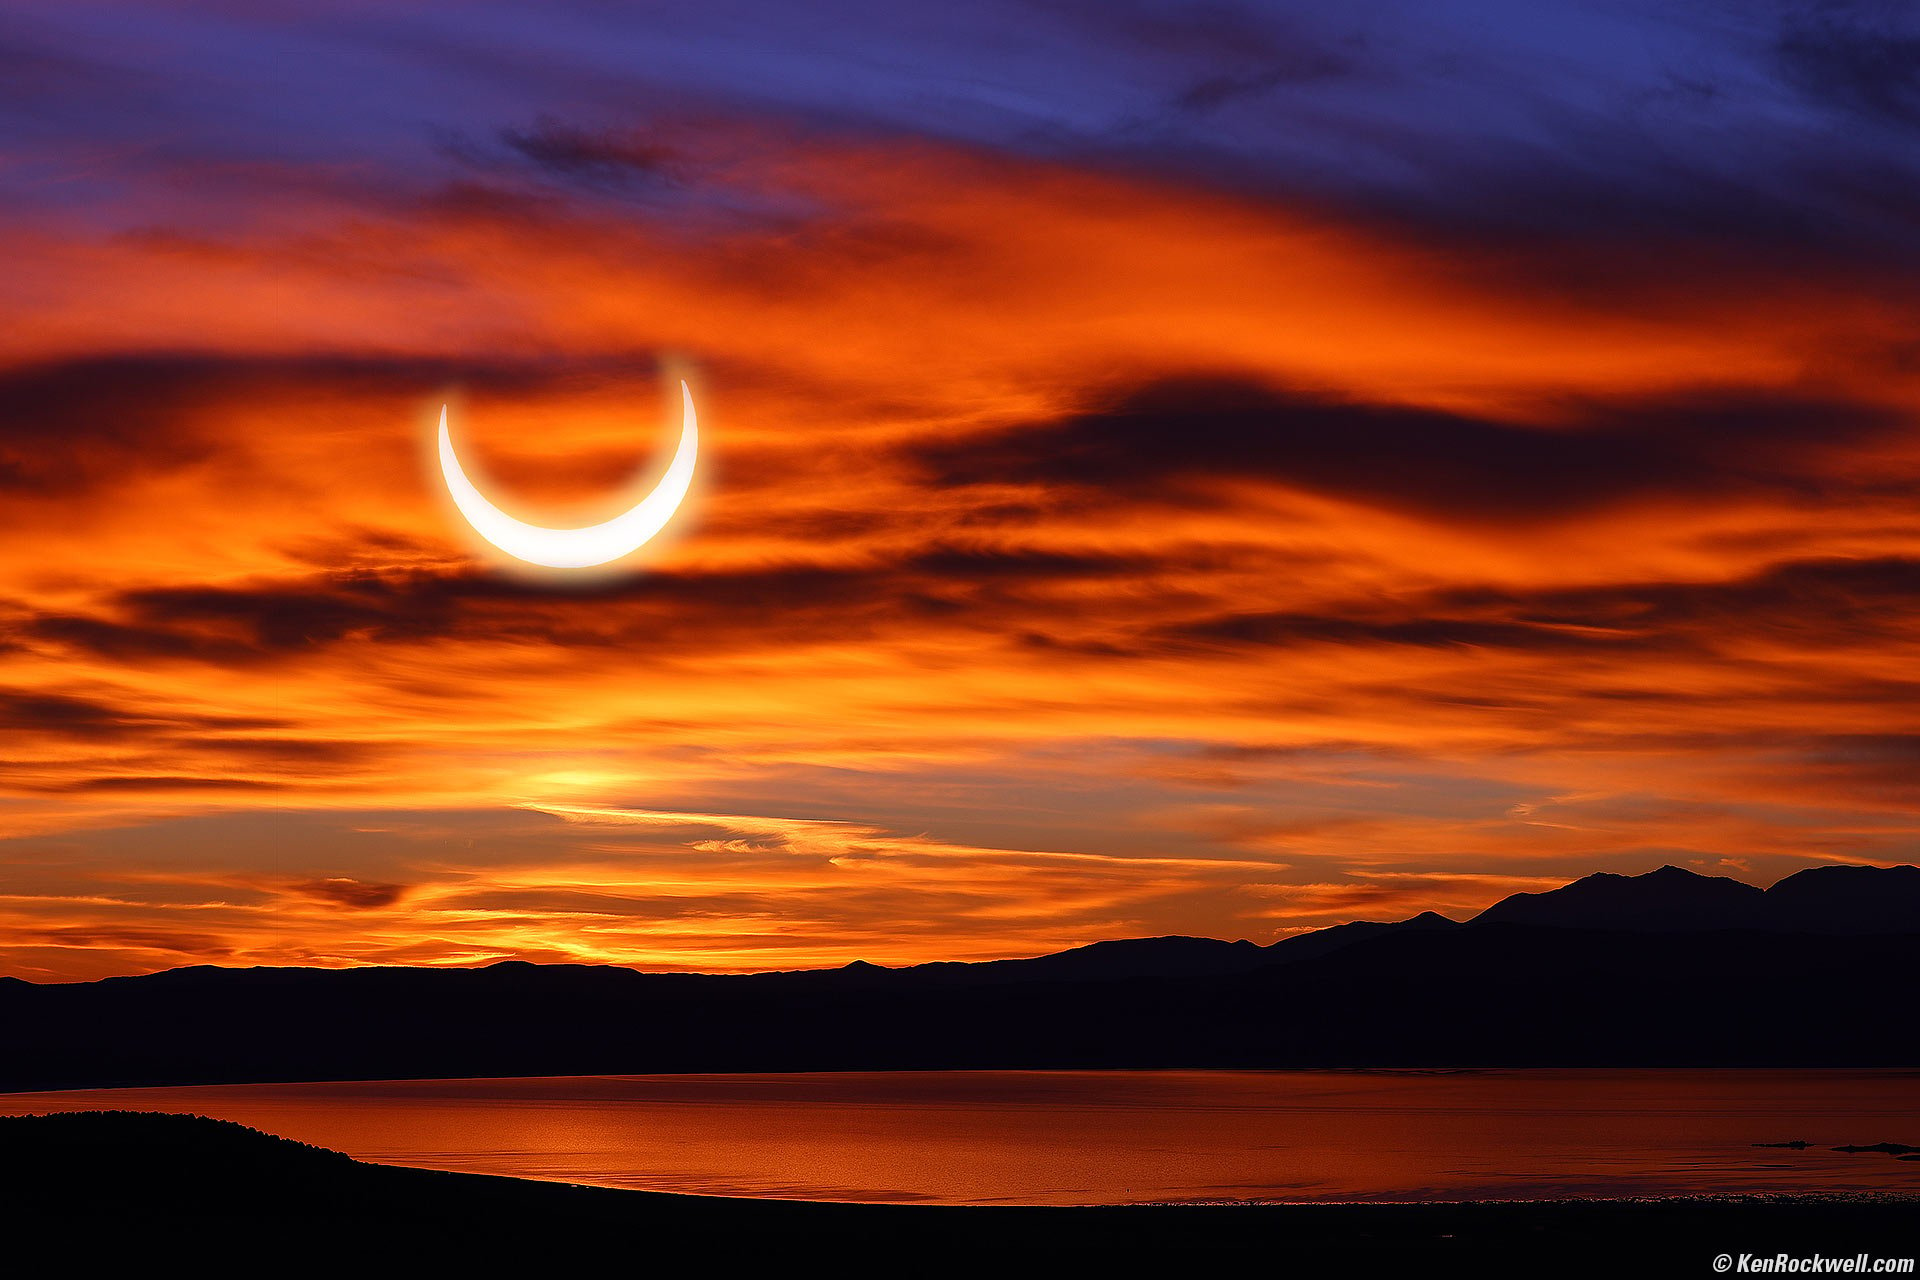
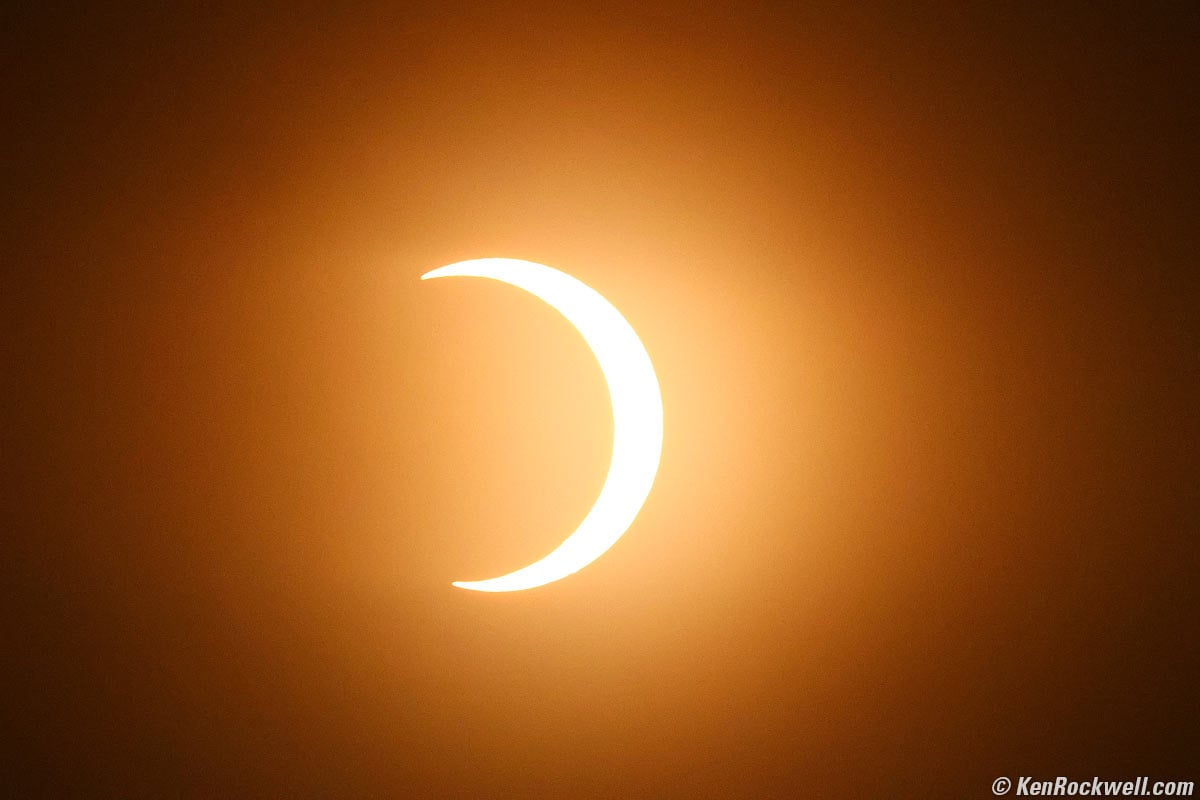
Devil's Dawn, Mono Lake, California, 9:25 A.M. Canon EOS R6 II and EF 100-400mm L II IS USM on EF to RF Ring adapter.
This is a composite image with the crescent of the eclipsed sun shot today from the parking lot behind The Mobile Station — dropped on top of a shot of the glorious sunrise from Conway Summit yesterday morning. I had planned to do this even before I shot the eclipse, since I realized the eclipse would be up in the sky at 9:22 AM and not make for much of an image by itself.
Both were shot with my Canon EOS R6 II and EF 100-400mm L II IS USM with EF to RF Ring adapter.
The shot of the eclipsed sun's crescent was made through a borrowed solar filter and with additional stacked EF TC 1.4× II and EF TC 2× II extenders. My EF 100-400mm L II IS USM was set to 400mm, an effective focal length of 1,120mm. The exposure was T16 (wide open) at 1/30 at ISO 25,600 (LV 5.0). If I was picking picking solar filters I would have picked a thirteen-stop less dense one to let me shoot at ISO 100 and 1/1,000, but beggars can't be choosers.
Here's the rig with two extenders and an adapter between my R6 II and EF 100-400mm L II IS USM, sitting on my tripod system:
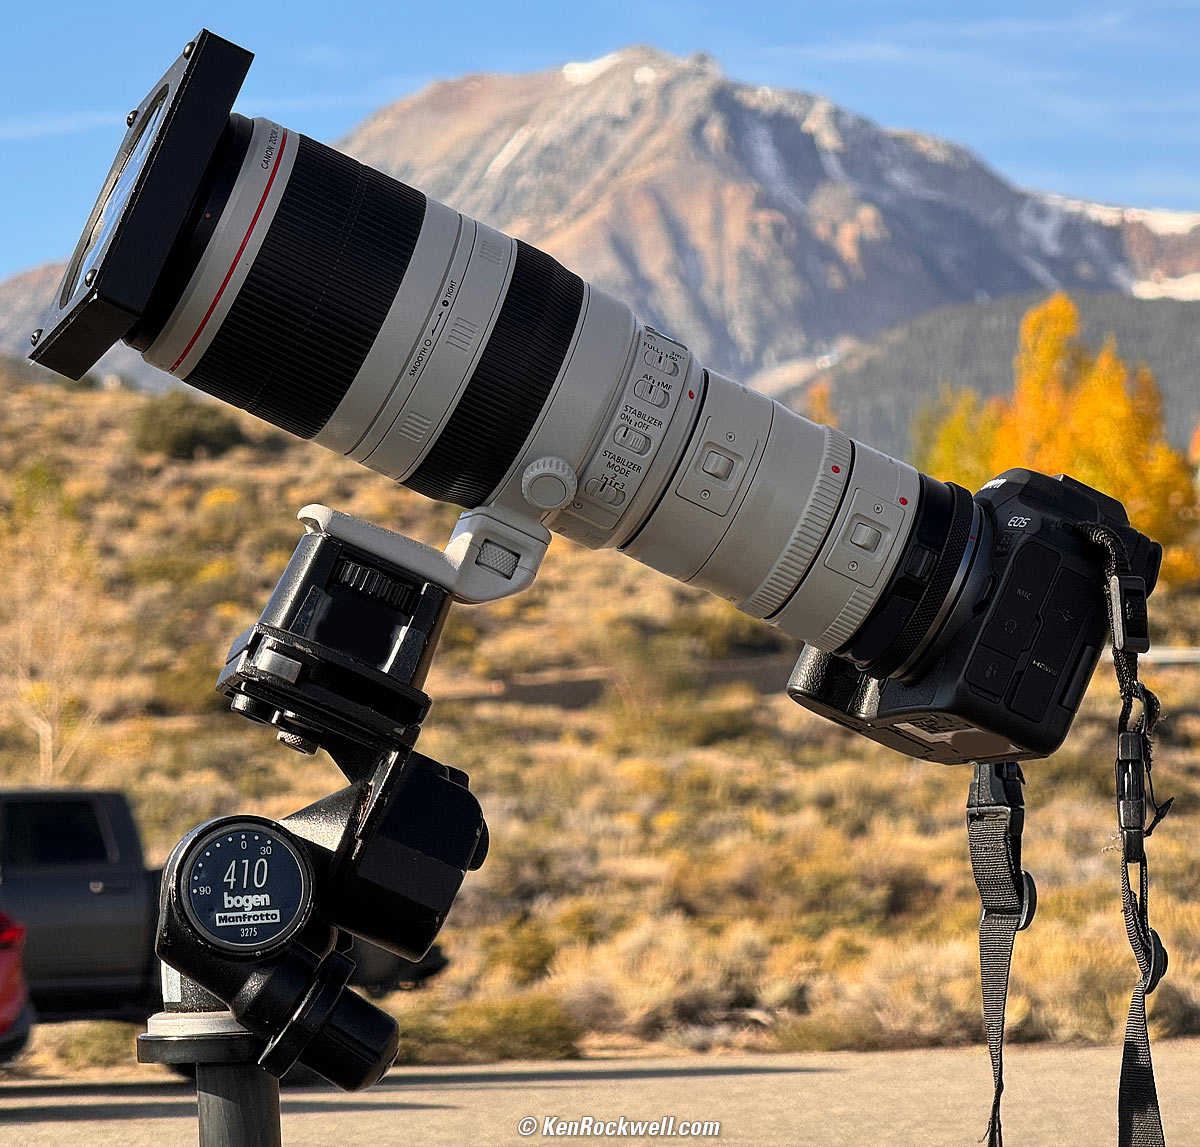
Borrowed Solar Filter on EF 100-400mm L II IS USM on EF TC 2× II extender on EF TC 1.4× II extender on EF to RF Ring adapter on EOS R6 II on Nikon AH-5 Tripod Adapter on Manfrotto 410 (née Bogen 3275) Geared Head on my original 1995 Gitzo M1228 Mountaineer Carbon-Fibre Tripod. bigger.
The sunrise background shot was made yesterday at 6:57 AM with my EF 100-400mm L II IS USM at 100mm at f/7.1 at 1/250 at ISO 100 with -0.7 stops exposure compensation (LV 13.6). I used the sunrise background exactly as shot because I wanted it a bit dark so the crescent would stand out.
I used Photoshop CS6 (from 2012) to composite the two images. To make it Satanic I invoked The Devil's Horns by rotating the crescent layer to be almost like two horns poking upwards. The actual crescent shot was pointed to the left. I didn't make them perfectly level to make it a little more subtle and thus more powerful.
To do this in Photoshop CS6 (Mac), open both images. To give yourself working room when you move layers around, increase the canvas size of the background image to about 10,000 × 10,000 pixels (Image > Canvas Size). Now select the entire crescent image (⌘ + A on Mac) and copy it (⌘+ C on Mac). Swap to the background image (⌘ + ~) and paste it (⌘ + P).
Now your Photoshop document has a new layer: the crescent image on top of the background. The crescent was huge, filling half the frame with the crescent, so I reduced its size to taste as seen above.
To move and rotate the top crescent image, be sure it's selected in your Layers Pallet (Window > Layers) and then right-click it and select "Convert to Smart Object," which lets us keep moving it around without losing any pixels if we want to enlarge it later.
Keep the crescent's layer selected, then click Edit > Transform > Scale. Grab a corner, then hold the shift key as you resize the image. Let go of the corner and now you can drag it around to taste. Keep the Shift key pressed as you resize (scale) it, or otherwise it's easy to get it out of round if you change its size unequally in each dimension.
Once you've got it in about the right place, press Return to lock it in. Feel free to reduce the canvas size back to the original (Image > Trim).
To rotate the crescent, select its layer and Edit > Transform > Rotate. Grab a corner and drag to taste. Press Return to lock it down.
Now make a layer mask to hide most of the crescent image other than the crescent itself. Select the crescent layer again, then click Layer > Layer Mask > Reveal All. You'll see a little white rectangle appear next to the Crescent image in your Layers Pallet. Click that white rectangle (the layer mask) and now use a paint brush (just press "B") and make it black (press "D" for default white/black colors) and then "X" (eXchange) to swap black for white, making the brush paint in black to hide parts of the crescent layer. Hold Shift+ CTL+Option and move the mouse around to select the hardness (try a low percentage) and the size of the brush.
If all is well, paint with this brush and parts of the crescent image will go away and show the background behind it. Press X to swap the brush to white, which lets you paint back the crescent image if you make a mistake. Paint the mask to get the look you want.
I created the glow around the crescent by using a soft brush to paint the layer mask, making the light orange background of the crescent image only show as a glow around the crescent. A soft brush makes it look like evil is naturally piercing the soft veil of the clouds.
Feel free to use the same Edit > Transform tools to fine-tune size, location and rotation. All this and the masks are editable at any time in the future if you save it as a PSD fie.
Sorry about how complex this is; I've been using Photoshop for decades and decades and do this in my sleep intuitively; I forgot how many different steps are involved. Come on over and I can show you in person.
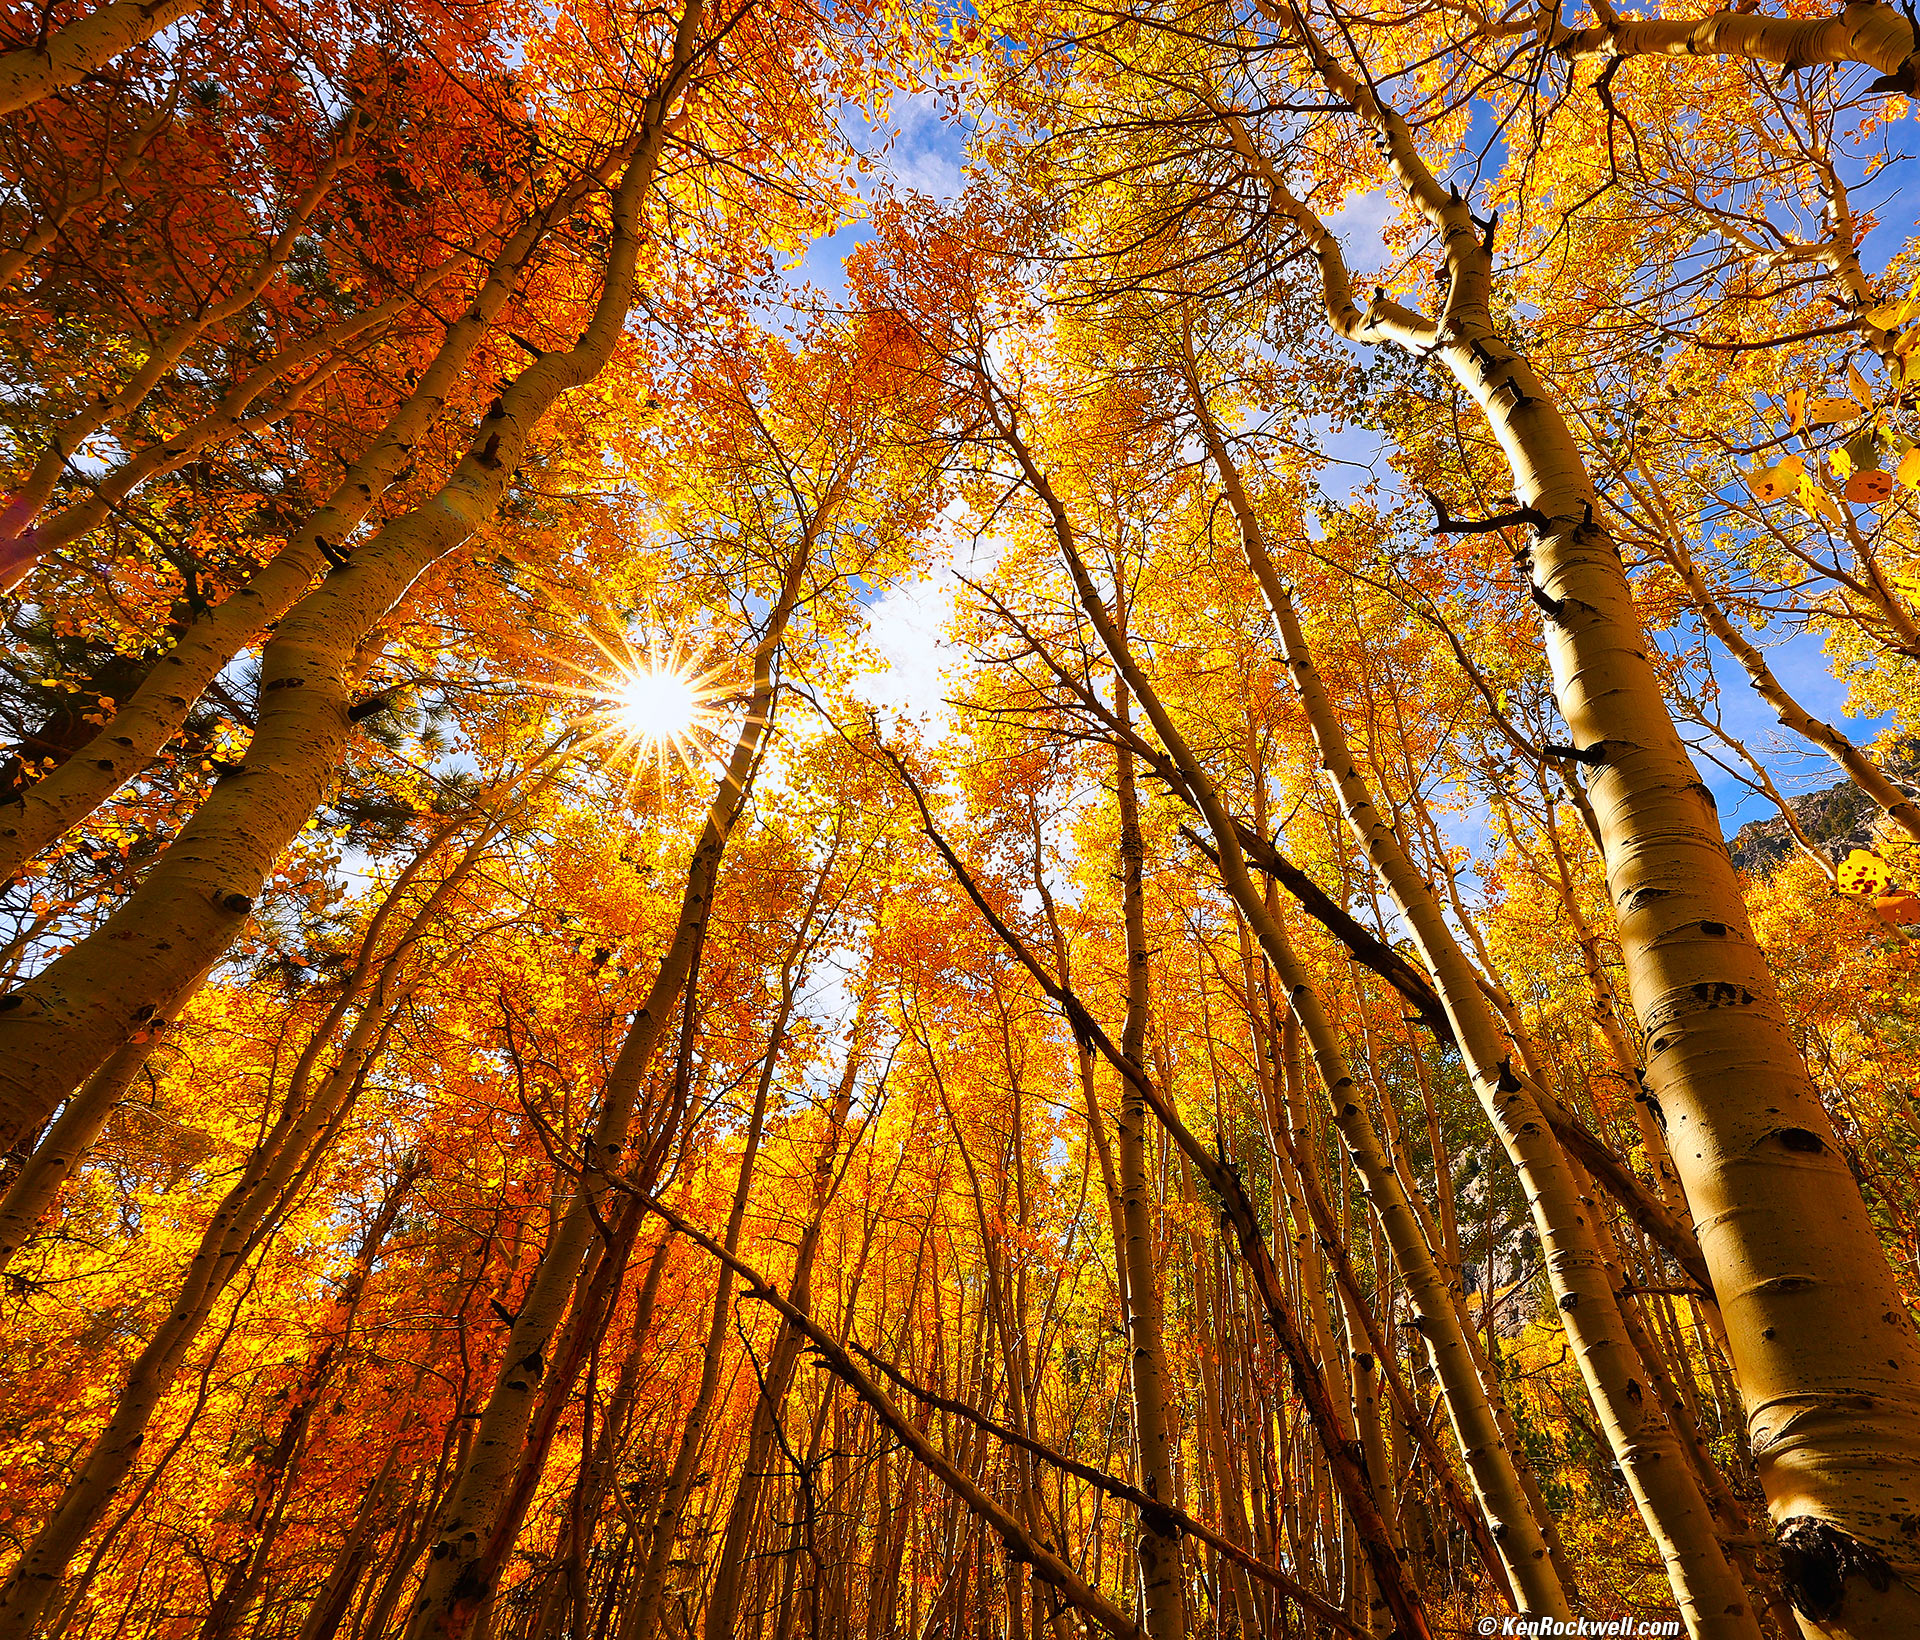
Silver Lake, California, 11:45 A.M. Canon EOS R6 II, RF 14-35mm f/4 L IS USM at 14mm, f22 at 1/30 at Auto ISO 100 (LV 14), Skylum Luminar Neo. More tech details. bigger or fit-to-screen.
This was an easy shot. I used f/22 to get the sunstar, and Skylum Luminar Neo made it easy to amp up the colors, darken the sky, add vignetting and erase the cars parked along the right to make this much more exciting.

Roof, Redwood Motel, Bridgeport, California, 3:29 P.M. Canon EOS R6 II, RF 24-240mm IS USM at 240mm, f/11 at 1/320 at Auto ISO 100 (LV 15.4), split-toned the print. More tech details. bigger or fit-to-screen.
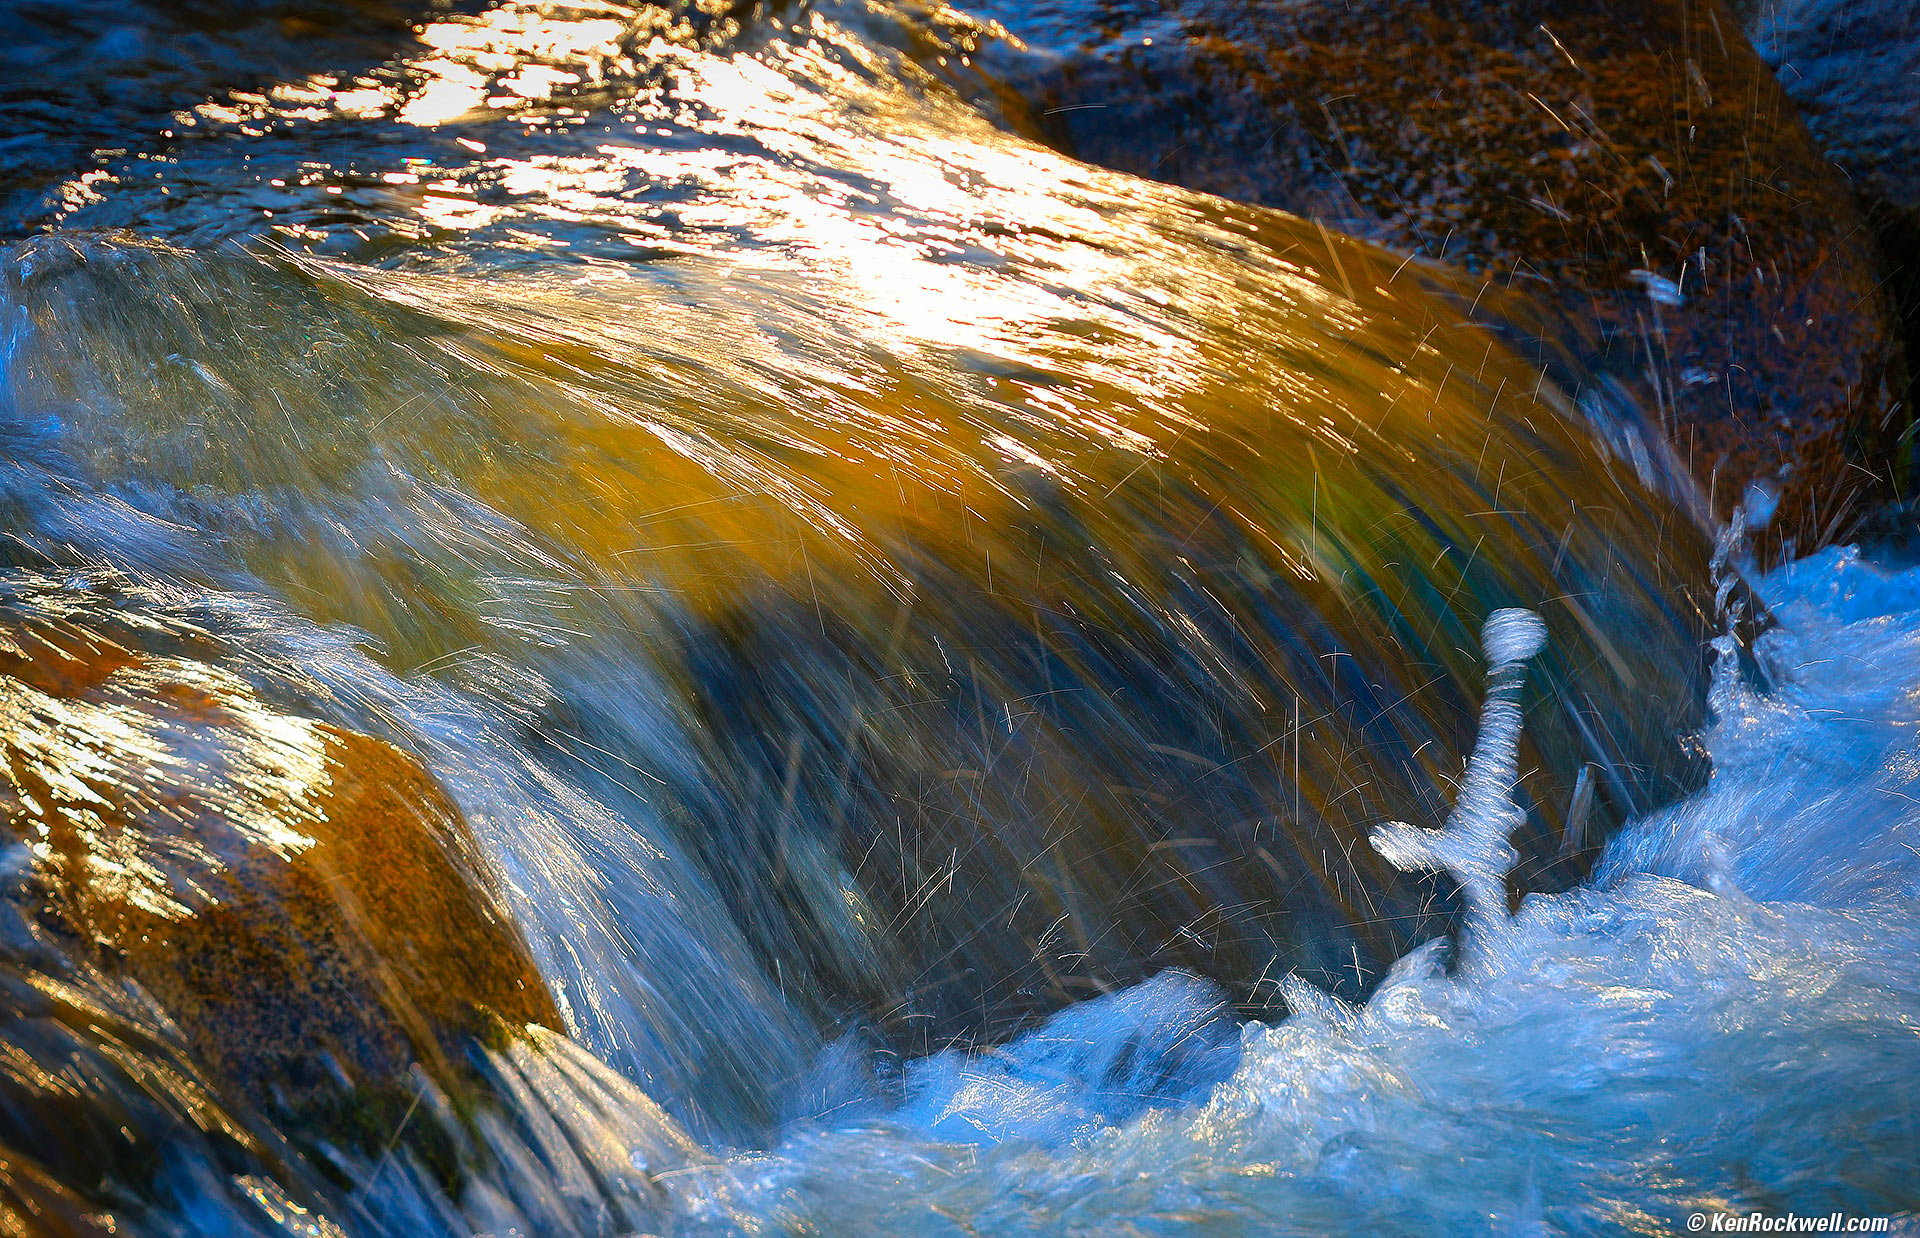
Light and Motion, Little Walker River, California, 4:31 P.M. Canon EOS R6 II, RF 24-240mm IS USM at 168mm, f/10 at 1/30 at Auto ISO 100, -0.7 stops exposure compensation (LV 11.6), Skylum Luminar Neo. More tech details. bigger or fit-to-screen.
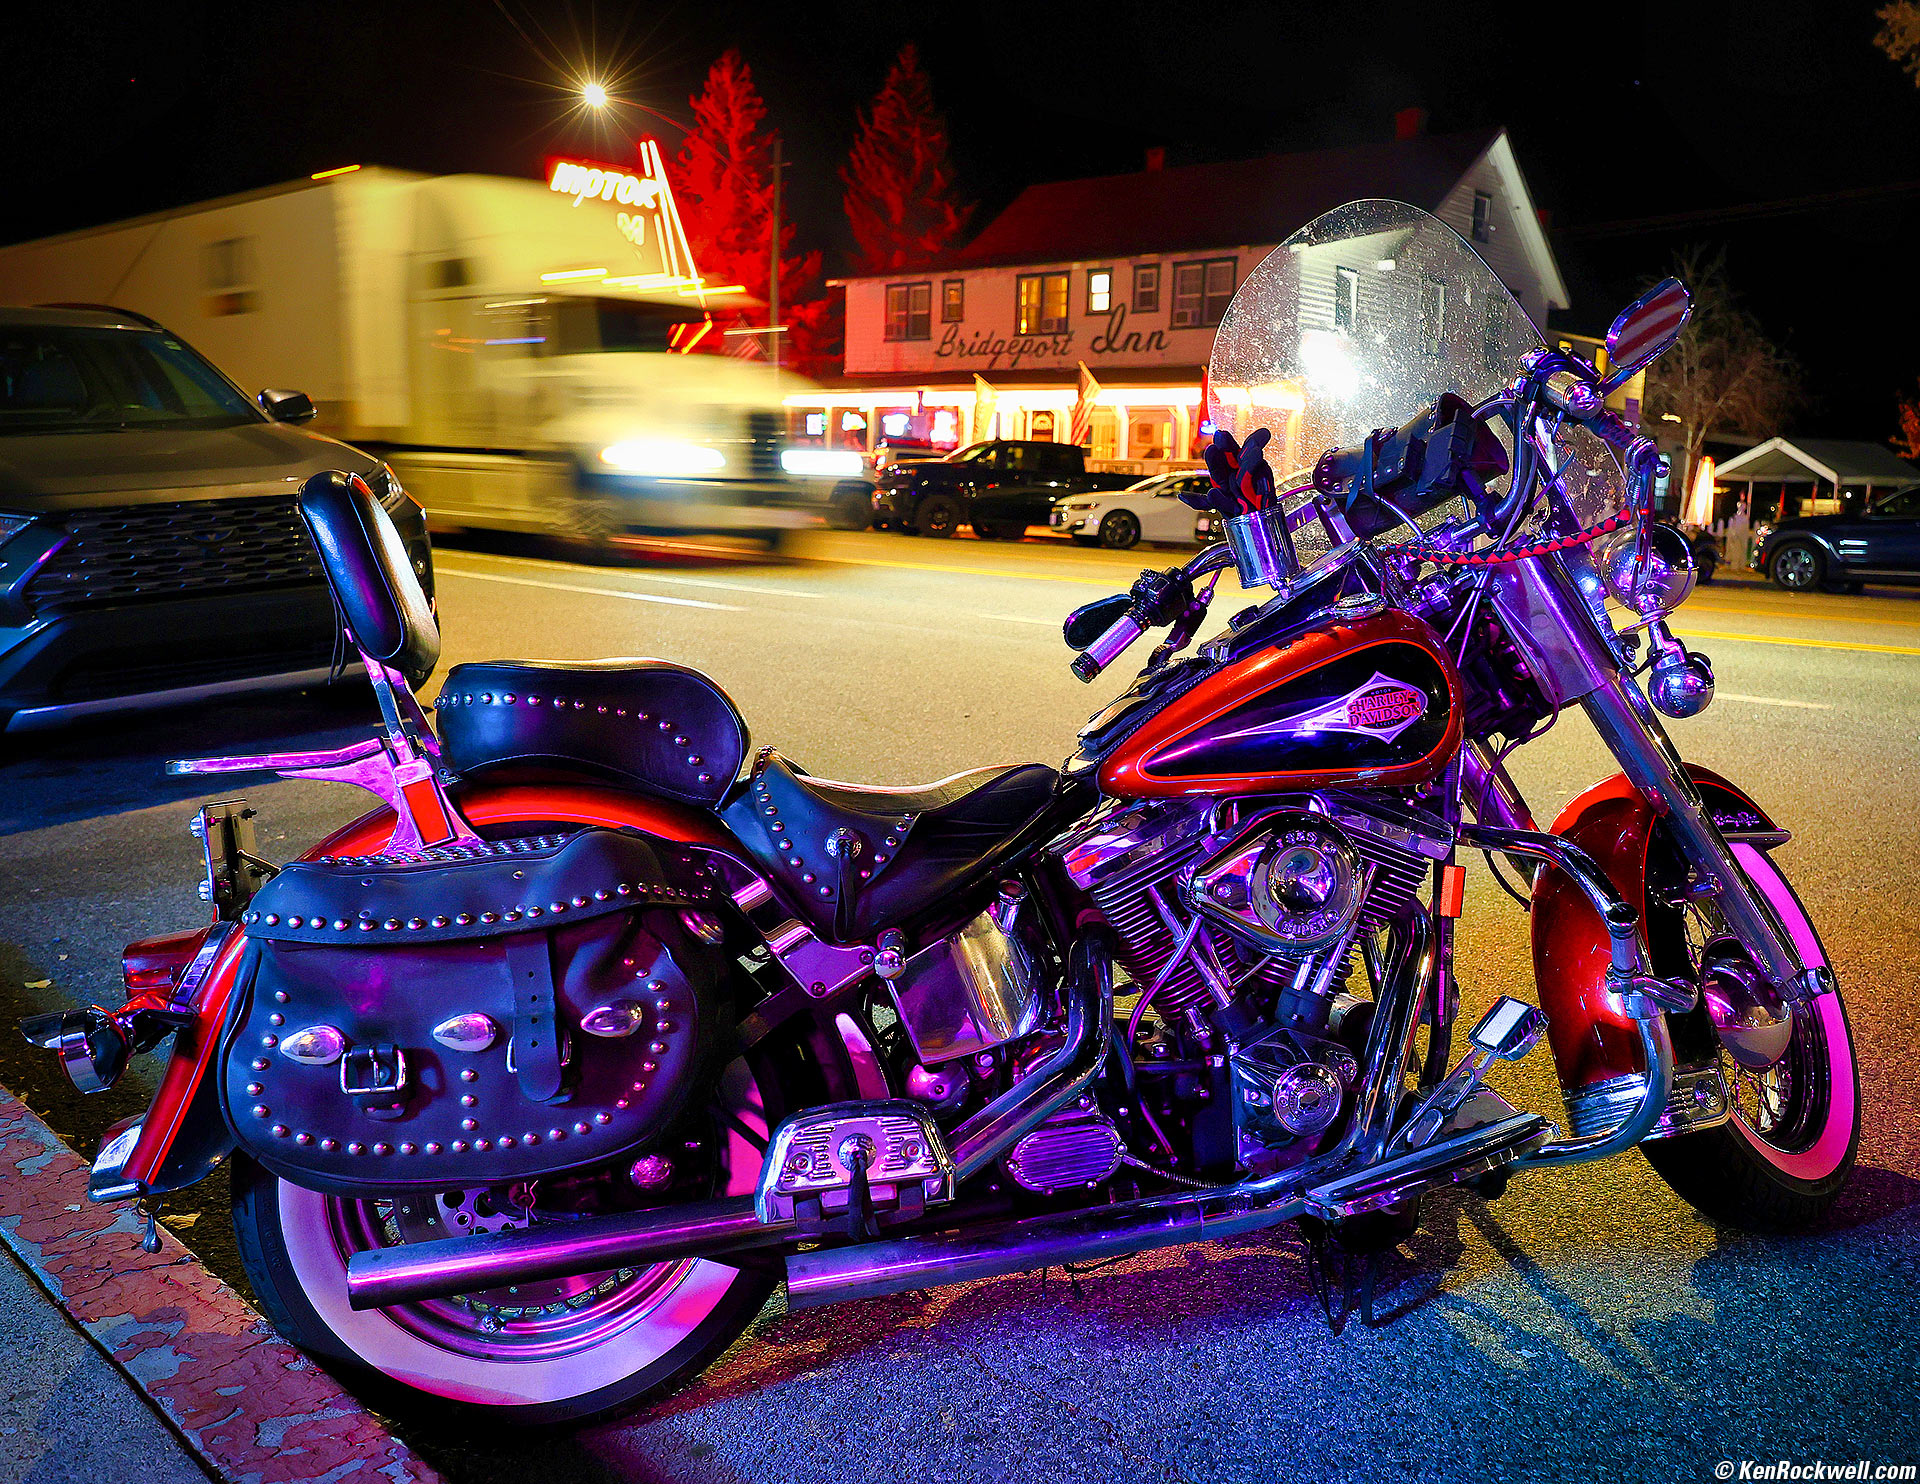
Harley-Davidson and Passing Truck, Bridgeport, California, 7:51 P.M. Canon EOS R6 II, RF 14-35mm f/4 L IS USM at 25mm, f/4 at 1/8 at Auto ISO 2,000, -0.7 stops exposure compensation (LV 2⅔), Skylum Luminar Neo. More tech details. bigger or fit-to-screen.
I used Skylum Luminar Neo to add a ton of life and color. I debadged the car and its license plate (Erase tool), lightened the dark bike (Enhance and Super Contrast tools), as well as added vignetting to focus your attention the bike.
The bike is lit by the BEER and OPEN signs in the window of Rhino's Bar, so while it looked cool to our eyes, on camera it was dark. Here's the original JPG image:
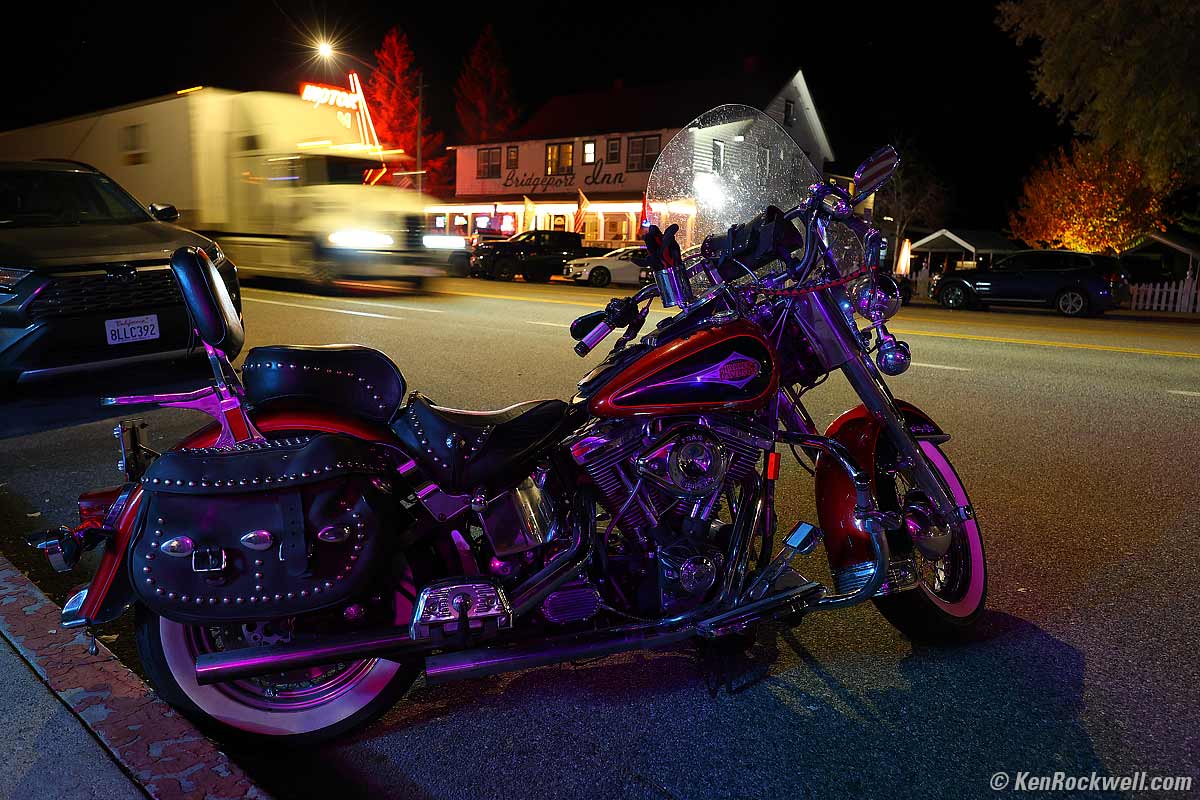
As shot. bigger.
After dinner we drove out along Twin Lakes Road as scoped out yesterday afternoon to shoot the Milky Way.
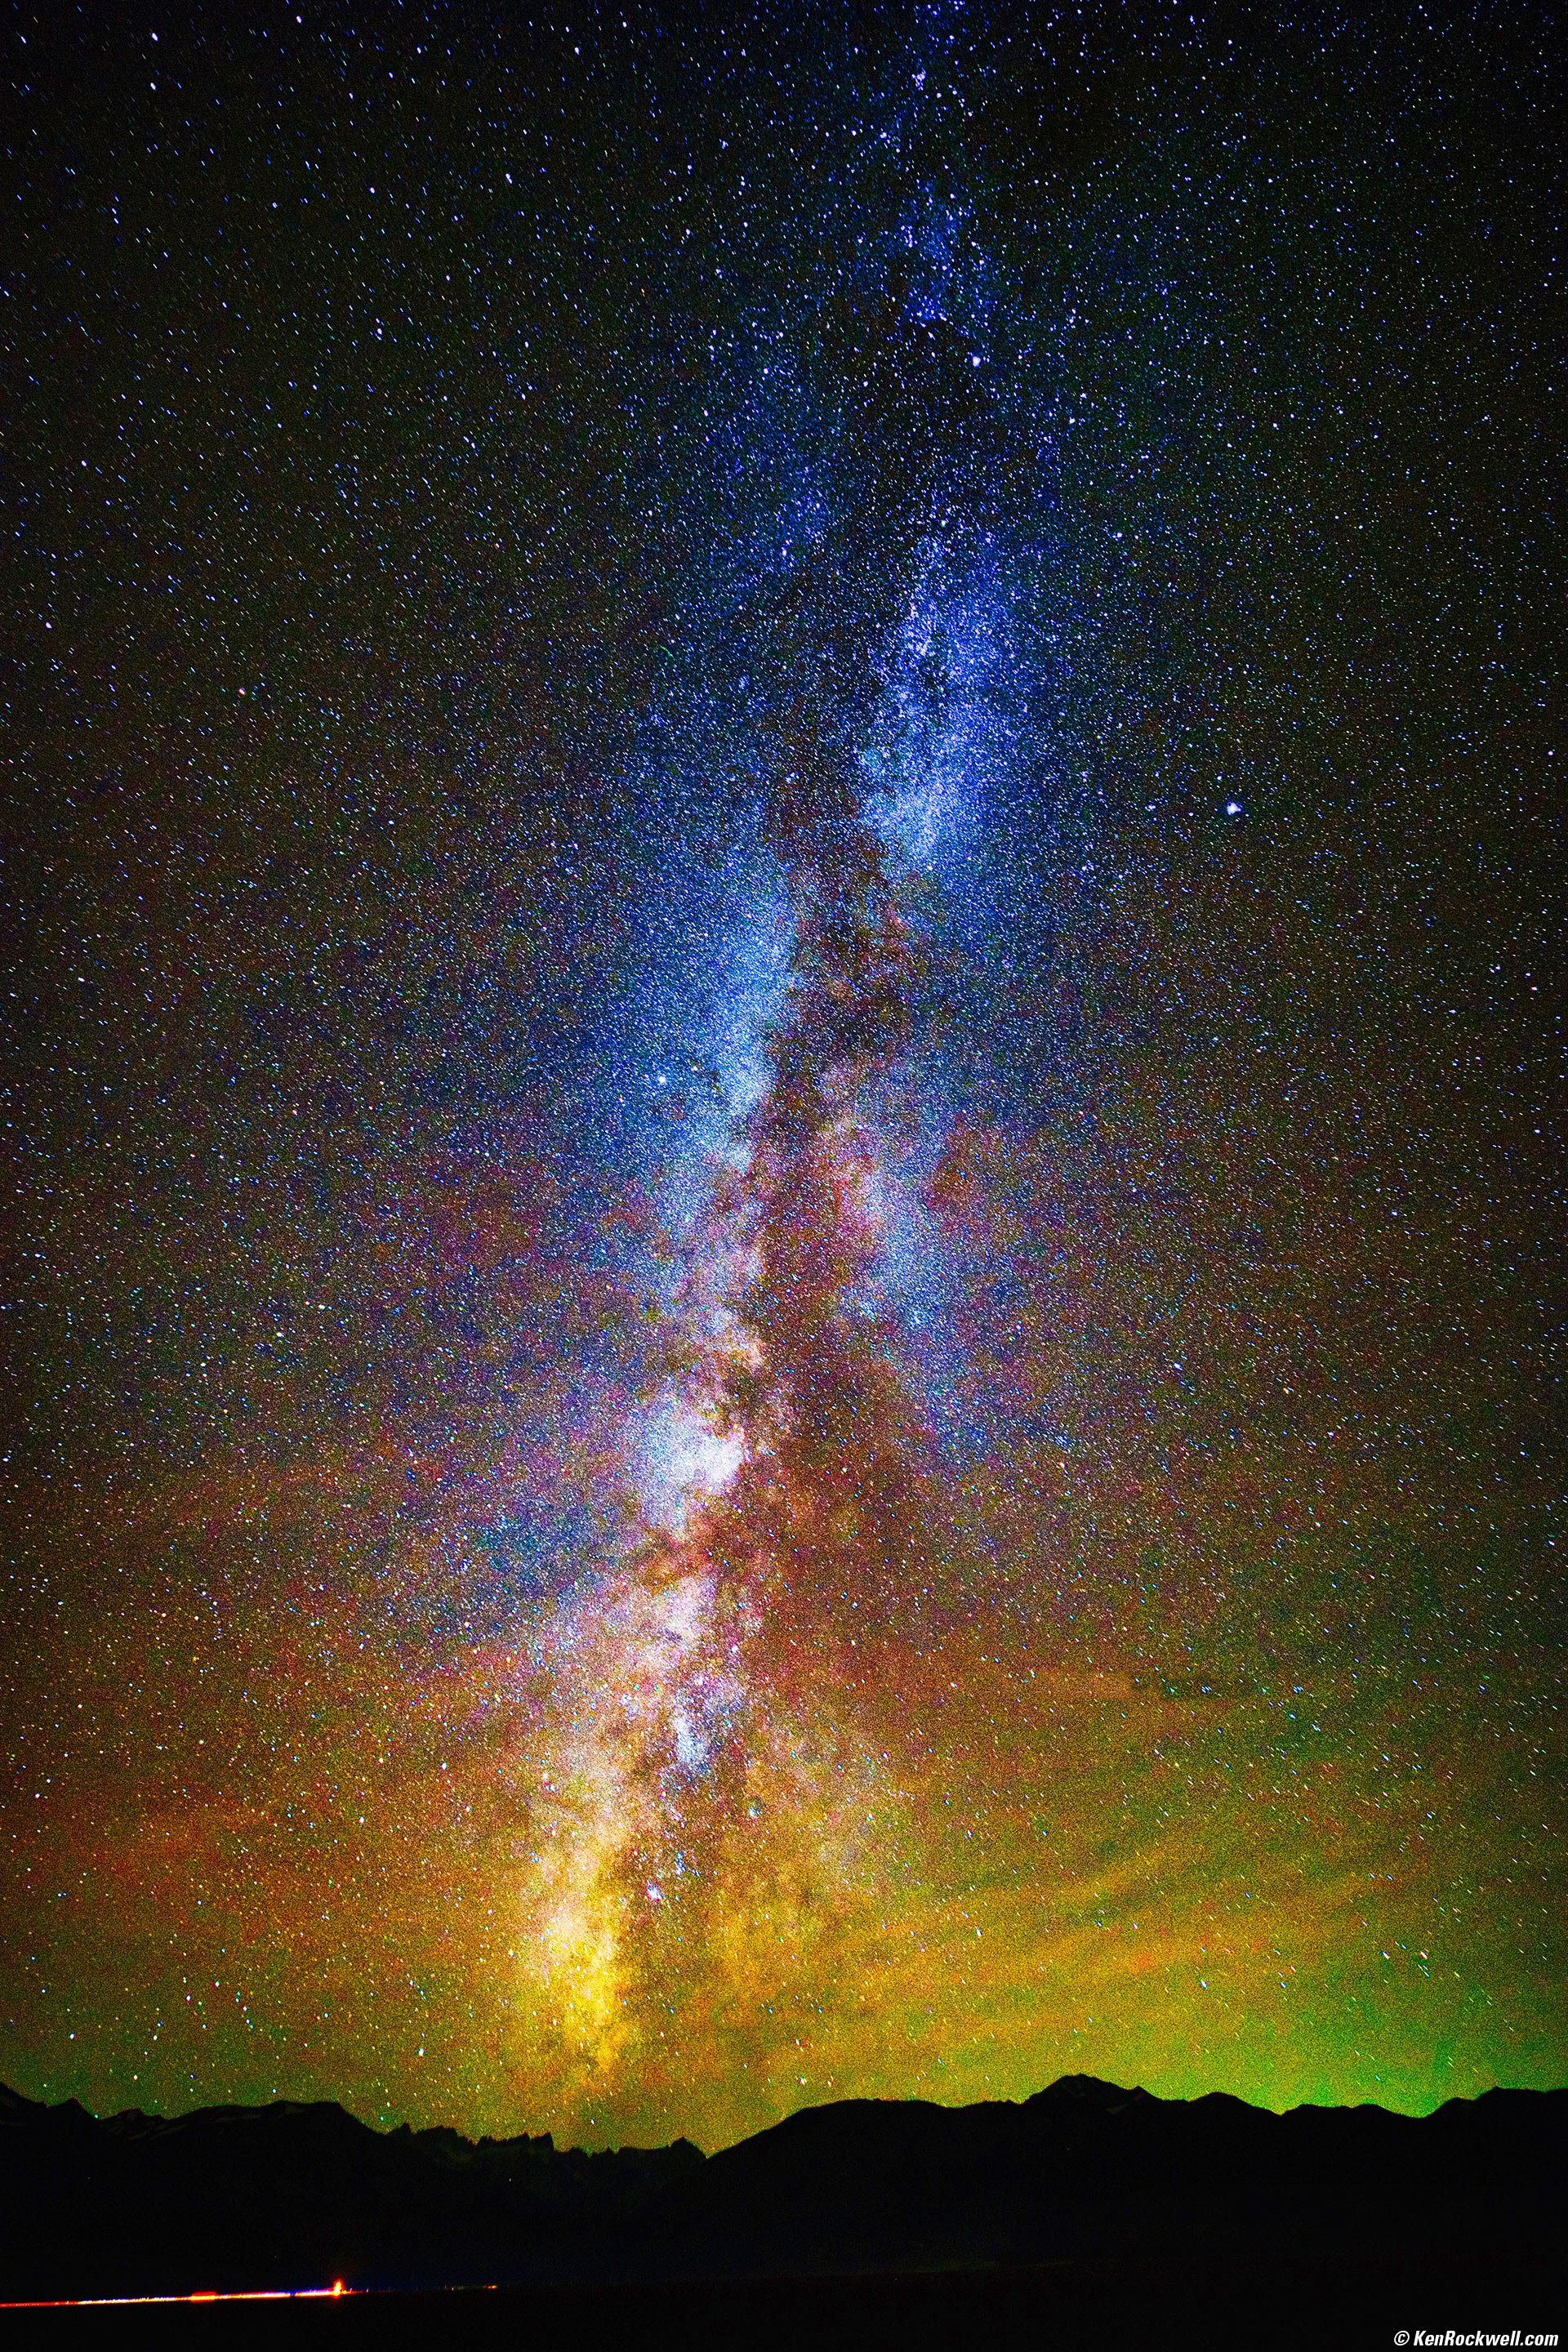
Here's a shot from my iPhone 15 Pro Max:
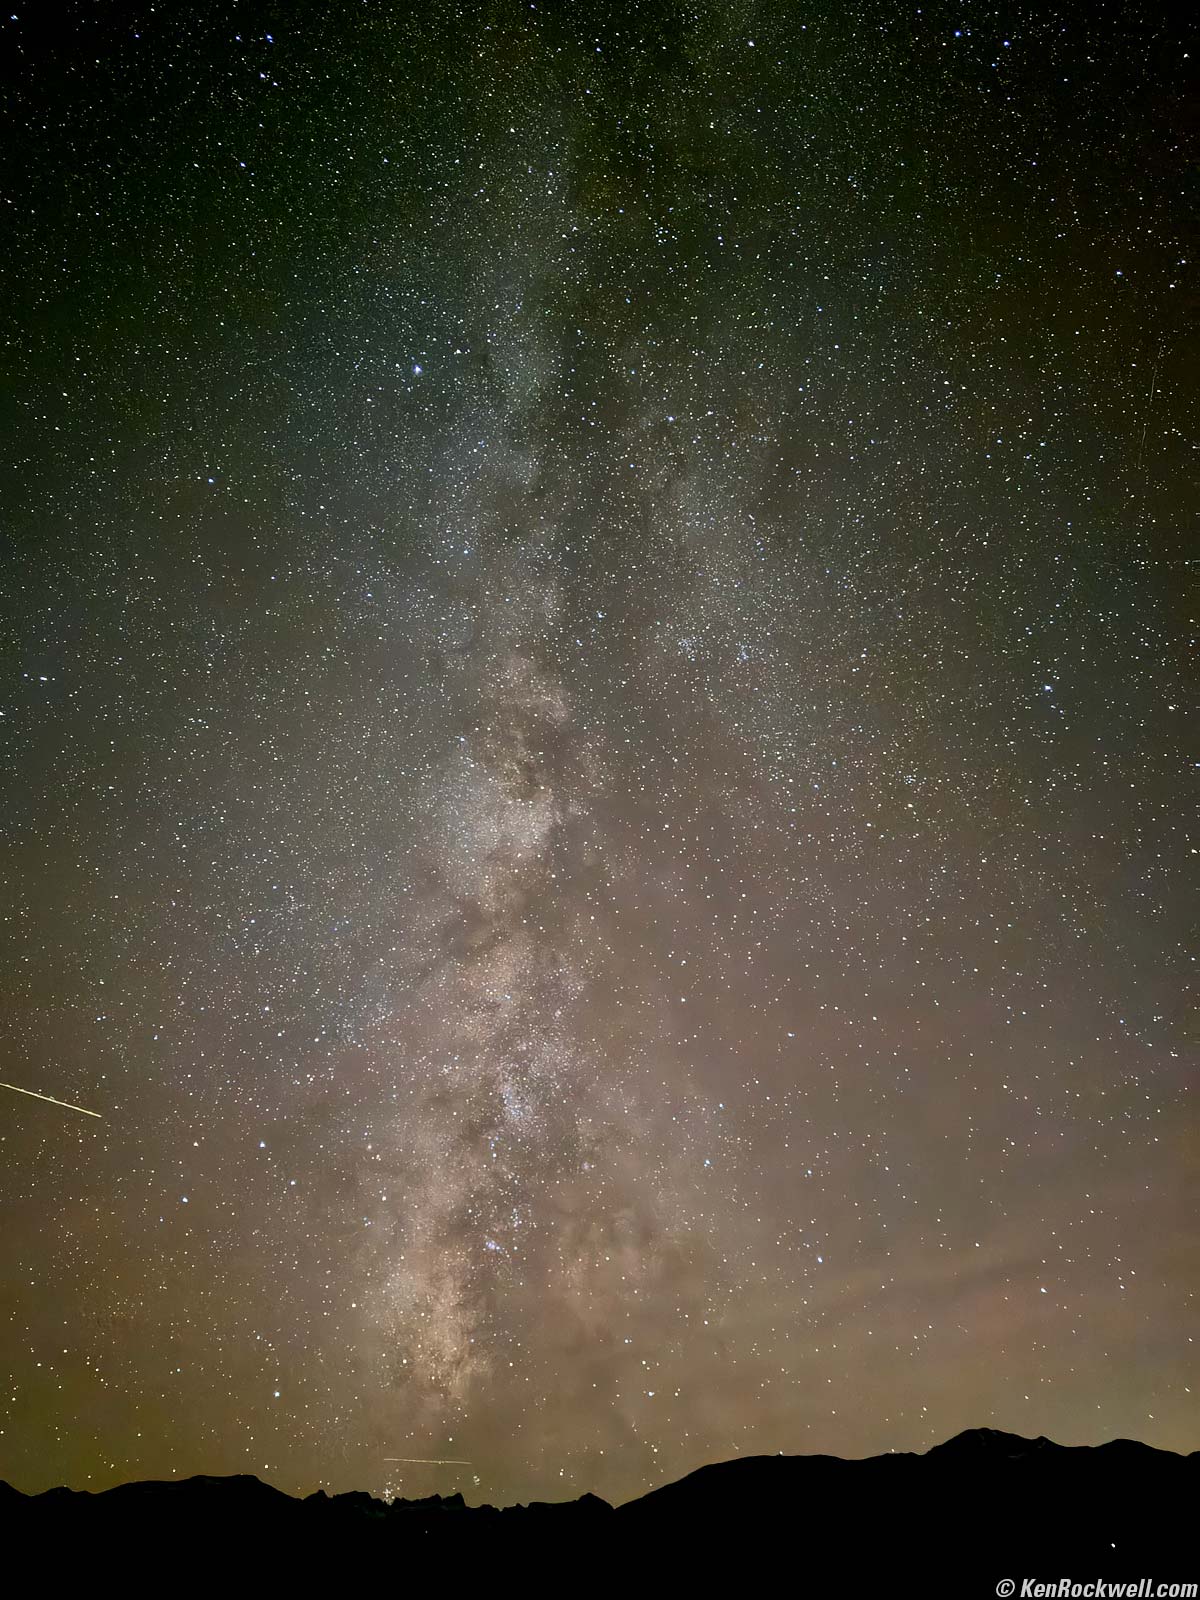
The Milky Way, Bridgeport, California, 8:30 P.M. Apple iPhone 15 Pro Max 1× (6.89mm actual or 24mm eq.) camera at f/1.8 for 10 seconds at Auto ISO 3,200 (LV -6⅔ — that's minus 6⅔!!!), Skylum Luminar Neo. More tech details. bigger or fit-to-screen.
I put my iPhone on a tripod and invoked the Night (time exposure) mode by making sure the flash was off (tap the flash button on the top left until it shows off). With the flash off you can simply point-and-shoot the Milky Way, but by using a tripod it will let me expose for 30 seconds rather than the default 3 seconds hand-held. Time exposures are shown with a yellow icon at the top left, if it's not yellow and showing something like "3s" then tap it to turn it on. Once it's on, tap the triangle in the top center to get to more settings (shown at the bottom). Tap the yellow moon (night mode) icon to see the exposure time slider, and slide it to its maximum.
The iPhone is super-smart and its accelerometers let it know if you're on a tripod or not, and offers different exposure time options: up to 10s handheld or 30s on a tripod, if it's dark enough.
For this shot I had it set to 30s, and that's how long it took to expose. The EXIF reports 10s, which I'll assume is how much actual exposure happened (night mode is numerous shorter exposures which are aligned and then added together).
As-shot it's a very dark image, which is how the Milky Way appears to our eyes. It's pitch black out there. iPhone does a fantastic job of making things look natural in any light, however I want this image to look bright as it does above, so again Skylum Luminar Neo made it easy to erase airplane tracks and embolden the image. I used both the Enhance slider as well as Curves inside Neo.
Here's the same shot with a wider lens on my Canon:
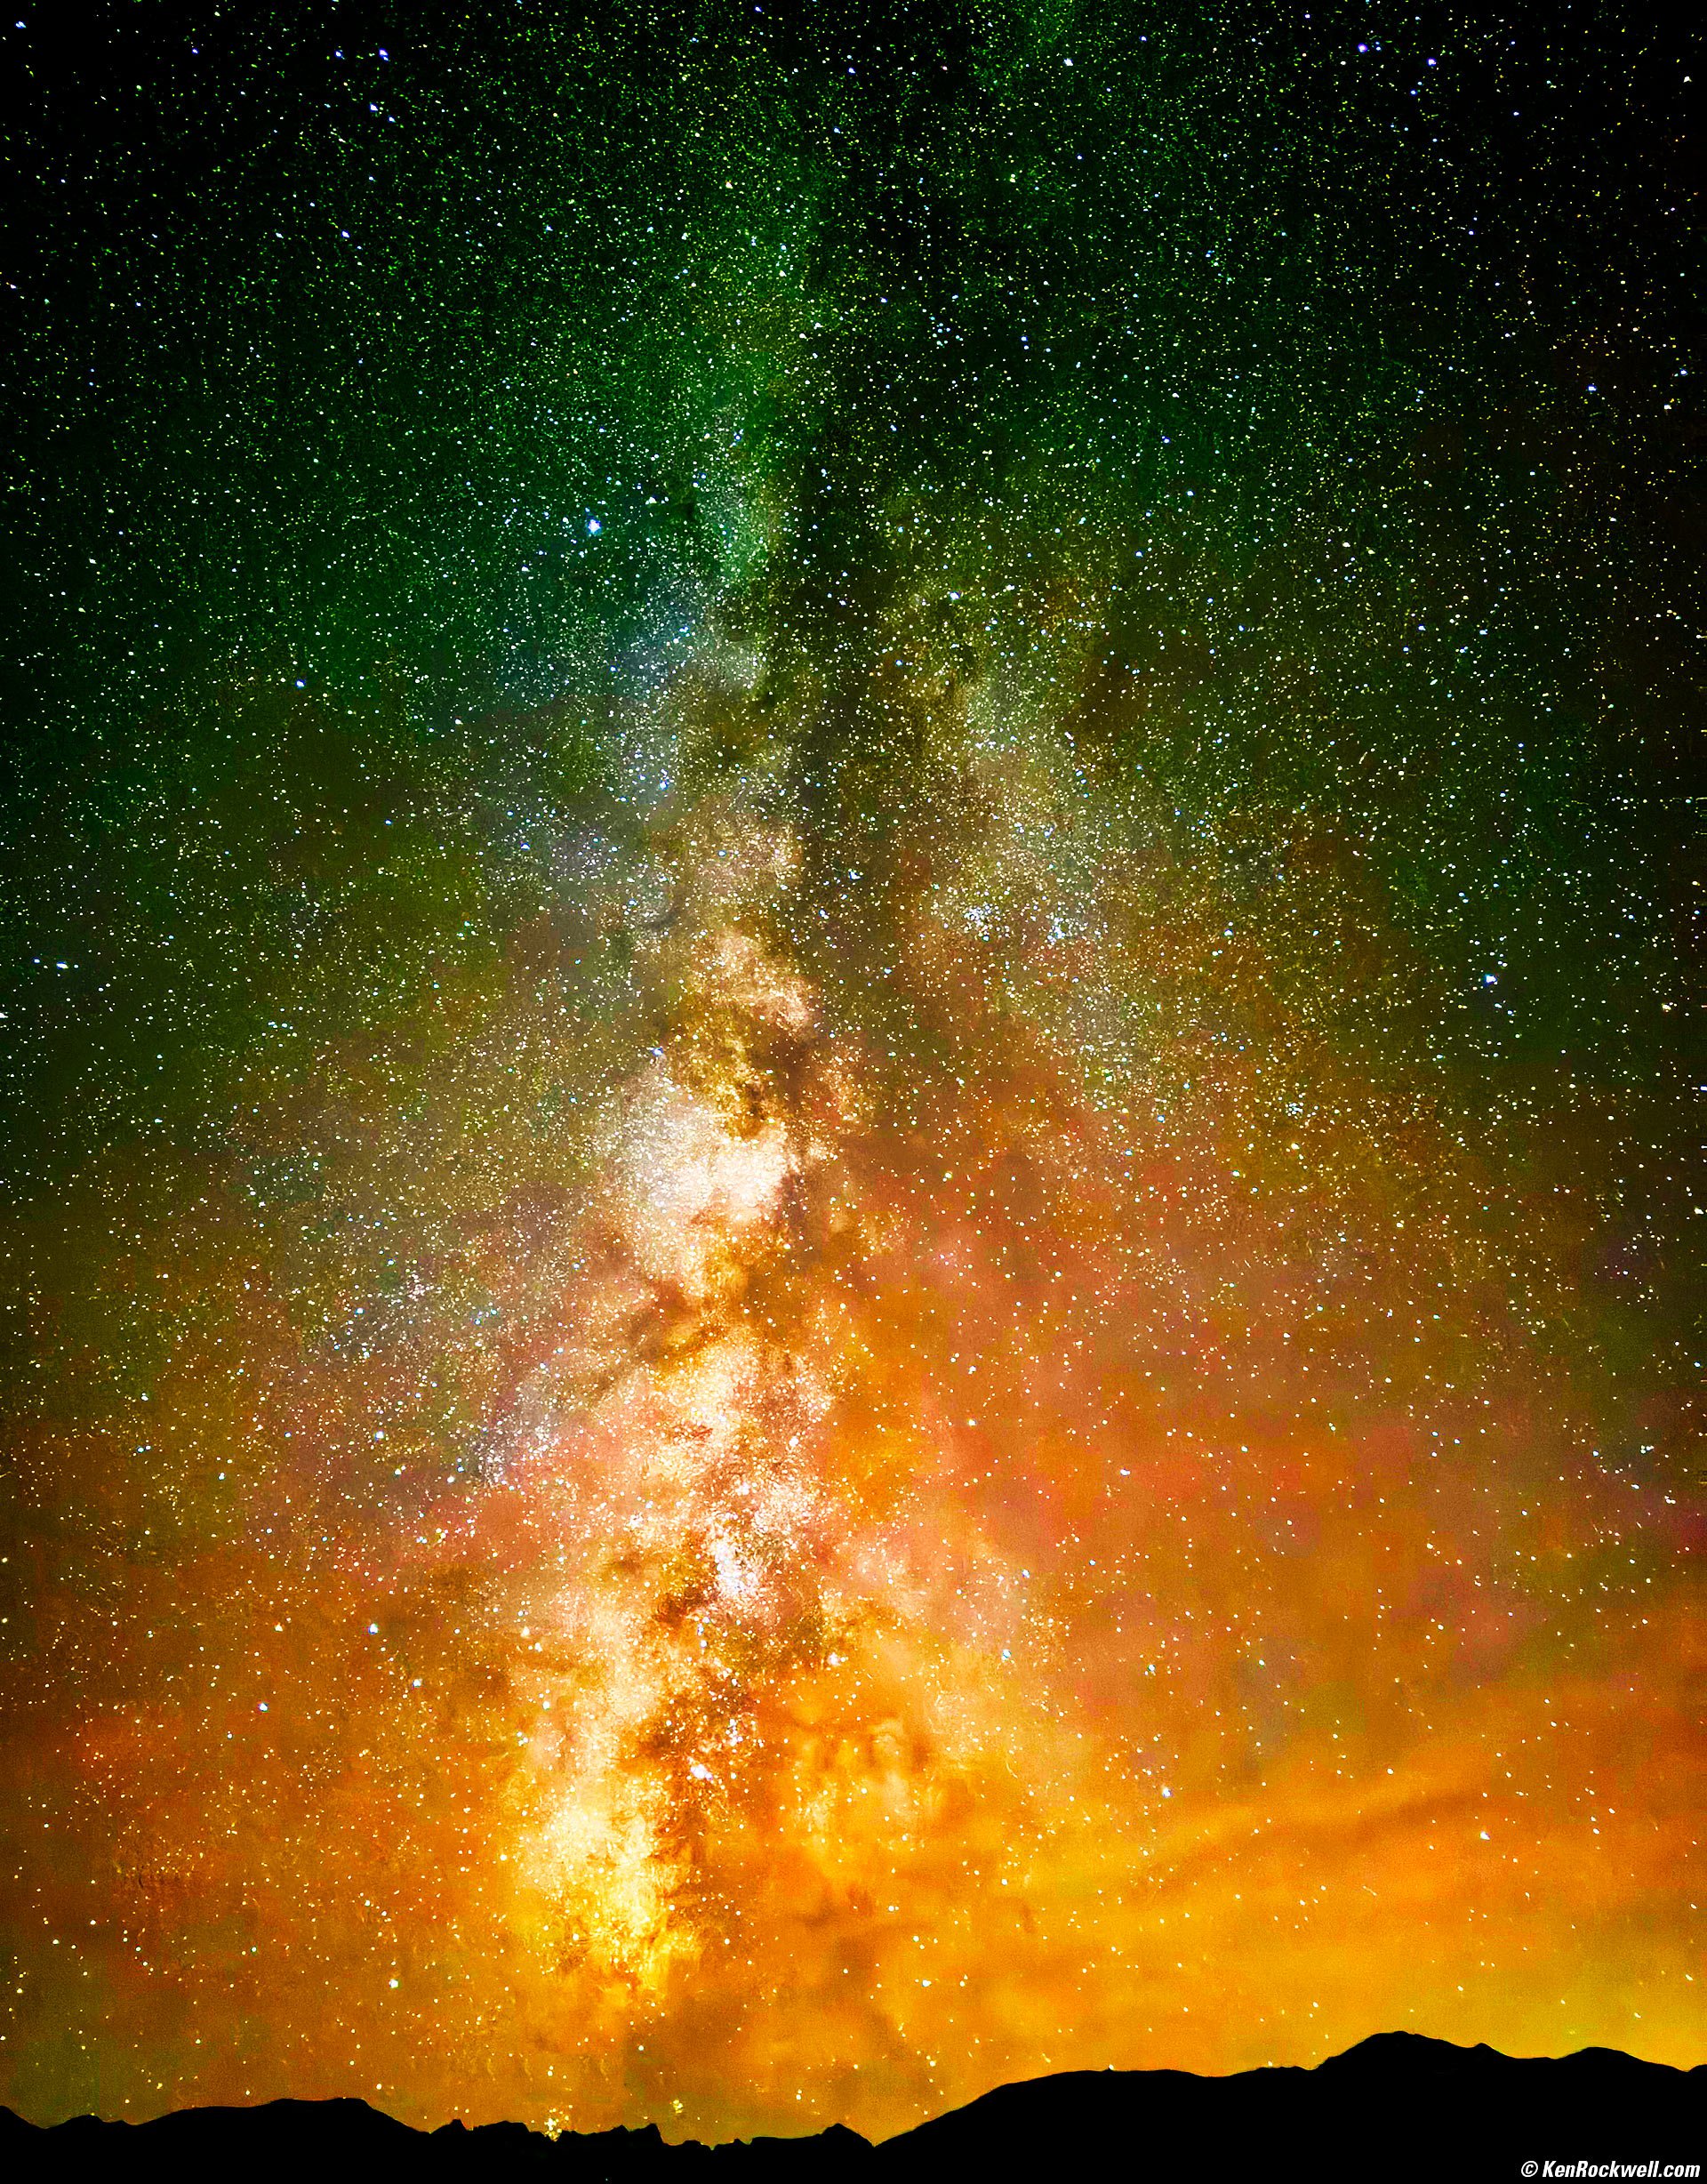
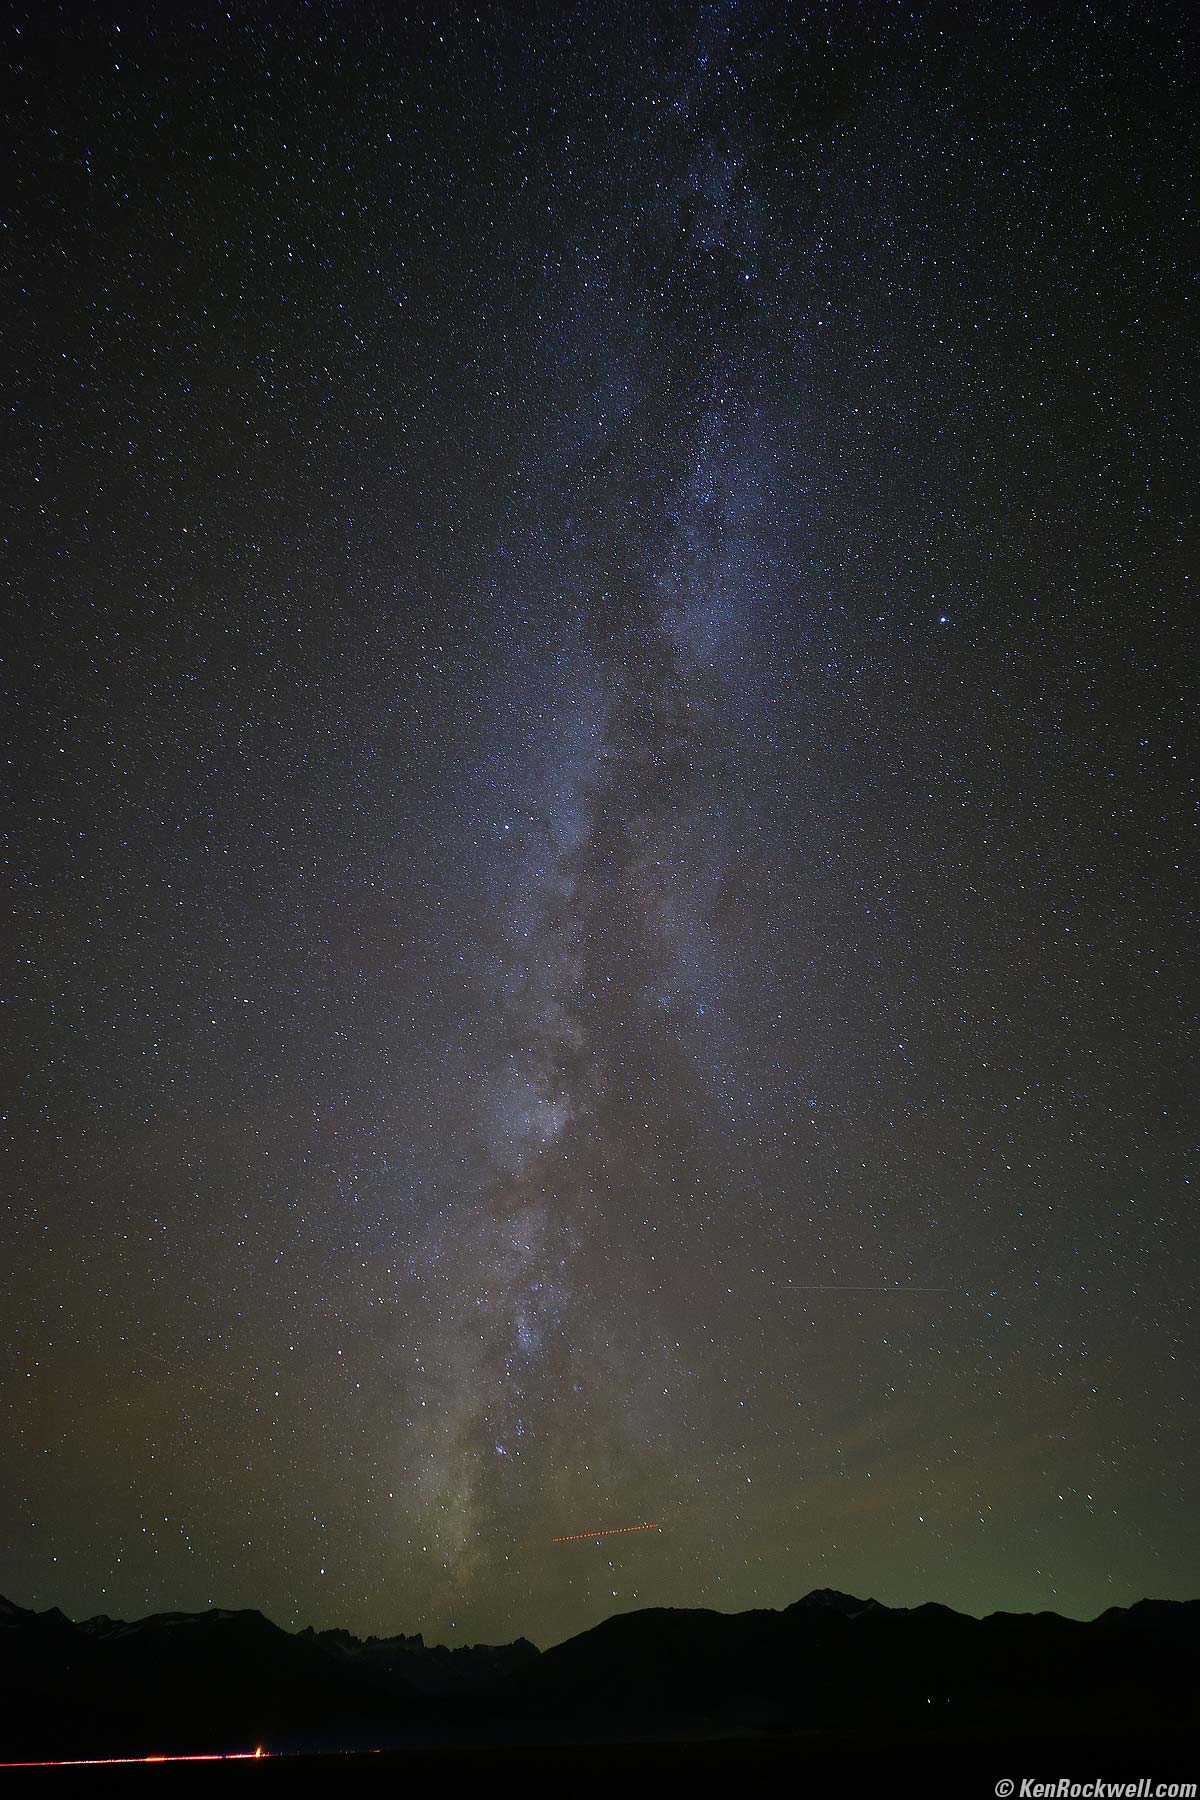
The Milky Way, Bridgeport, California, 8:43 P.M. Canon EOS R6 II, Pergear 14mm f/2.8 II wide-open at f/2.8 for 30 seconds at ISO 6,400 (LV -8 — that's minus 8!!!), Skylum Luminar Neo. More tech details. bigger or fit-to-screen.
The Canon has the benefit of sucking in more light for more detail, but did you notice how the traditional 30-second exposure of the Canon leads to star trails at the lower right from the earth's motion, but that the iPhone corrected for this when it aligned all the images it captured before it added them together magically in Night Mode? Brilliant!
Don't spend time comparing how bright each is; each is significantly lightened in Skylum Luminar Neo. For this Canon shot I used Neo's Enhance and Color and Curves and Erase tools and lots of fiddling; this is as much a painting as a straight photograph. I left the car trail in at the bottom left, reminding me of Genesis' And Then There Were Three album cover.
There are more colors in the Canon shot, again from the fact that the Canon shot captured a lot more light so it's better able to differentiate among hues. Also I shot the Canon in Tungsten 3200K white balance to better mirror our eyes' own low-light perception and keep the sky blue-black rather than orange.
More at How to Photograph the Milky Way.
Here are the two original images:
|
|
iPhone 15 Pro Max, as shot. bigger. |
Canon R6 II, as shot. bigger. |
As you may be able to see, the colors in the original images are very subtle, but they are there. I used Neo to amplify them to look stellar as I intended.
15 October 2023, Sunday top
12, 13, 14 & 15 October 2023 How I Created These Pictures
Today I slept-in until 6 A.M. We left the Redwood Motel at 7 A.M. and went to the Hot Springs:
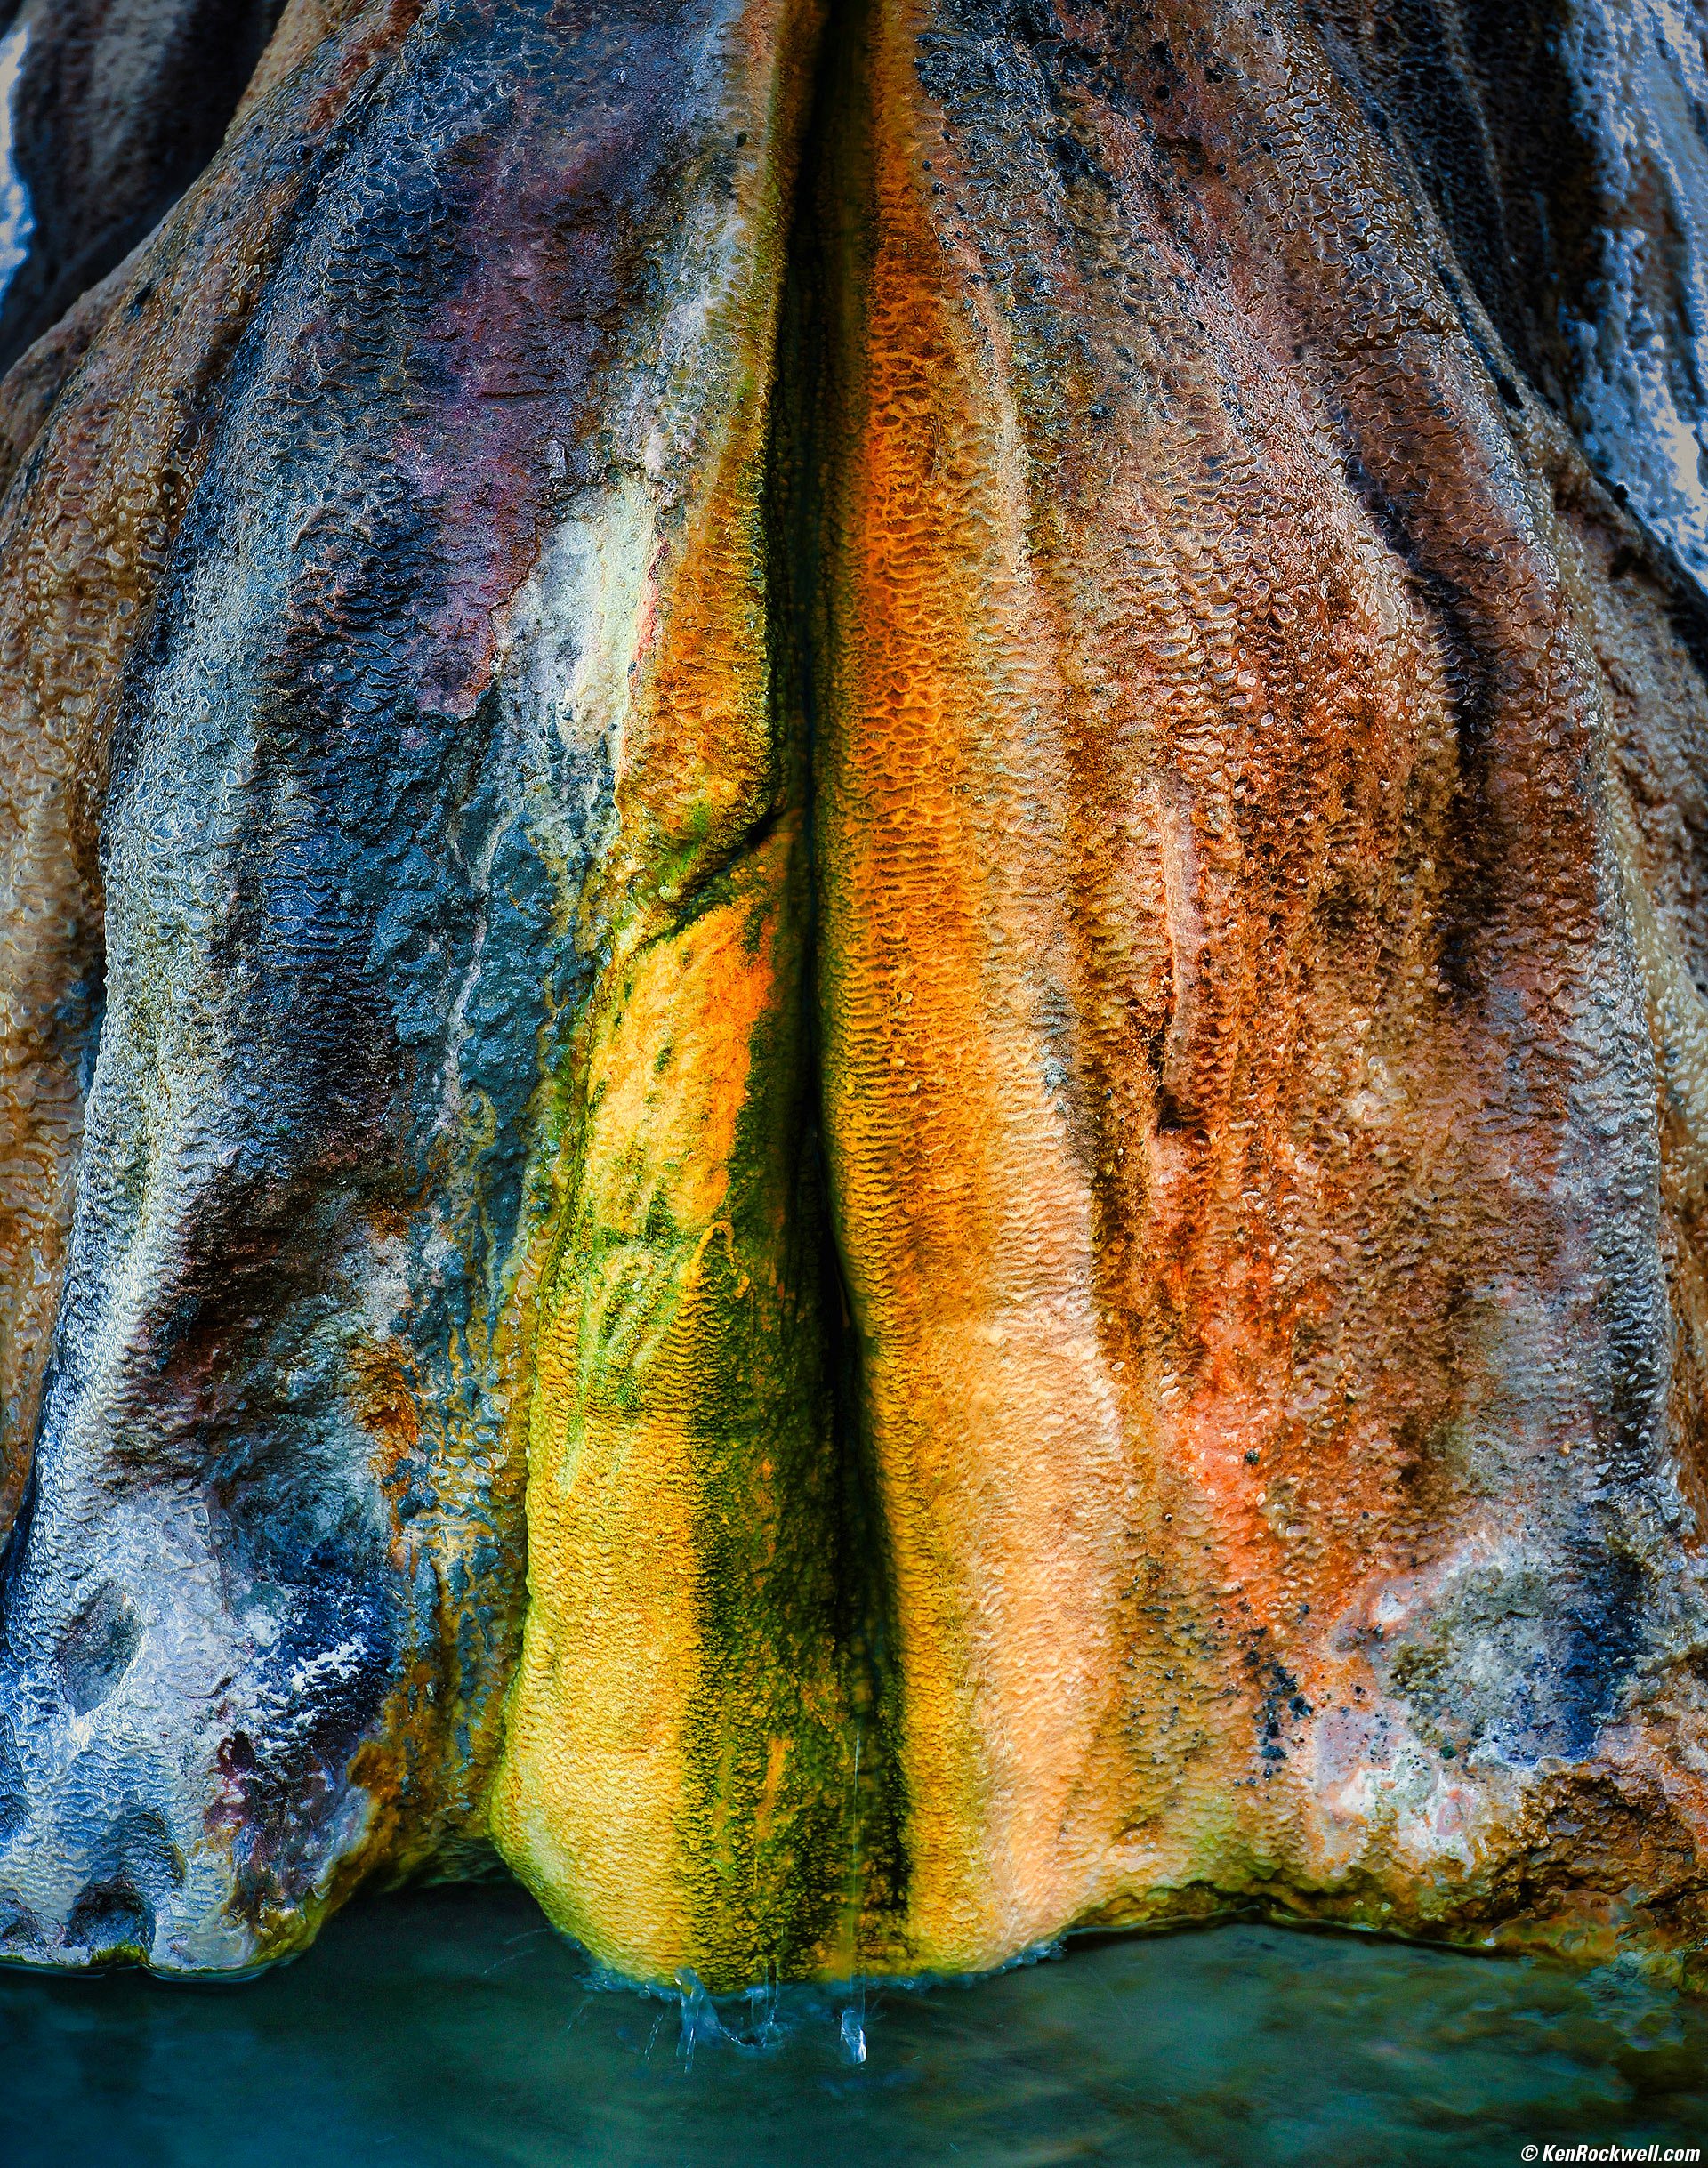
Dripping Hot Springs, Bridgeport, California, 7:25 A.M. Canon EOS R6 II, RF 24-240mm IS USM at 100mm, f/5.6 handheld at 1/25 at Auto ISO 100, -0.7 stops exposure compensation (LV 9.6), Skylum Luminar Neo. More tech details. bigger or fit-to-screen.
Did you notice how this shot overall looks the same as the Milky Way shots above? Cool, huh?
Skylum Luminar Neo made it fast and easy to get a vibrant image from a dull shot made in the shadows. I used Neo's Enhance, Color and Vignette tools to make this glow and focus your attention to the center and the drips. Here's how it came out of the camera:
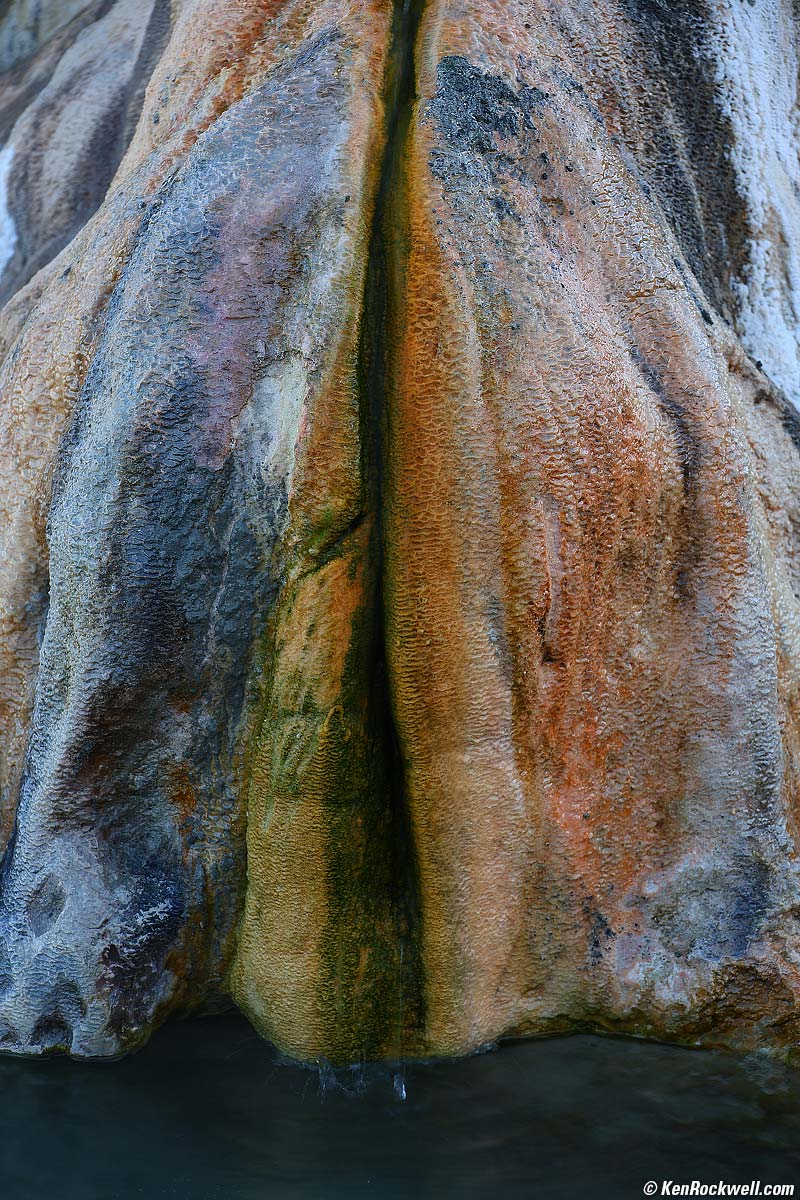
As shot. bigger.
Dull!
We headed back for breakfast with the group at 8:25 AM, then packed up and headed out from the motel at 10:30 AM.
The mountain air was super-blue, so I couldn't resist stopping for this shot of the Nicely's sign:
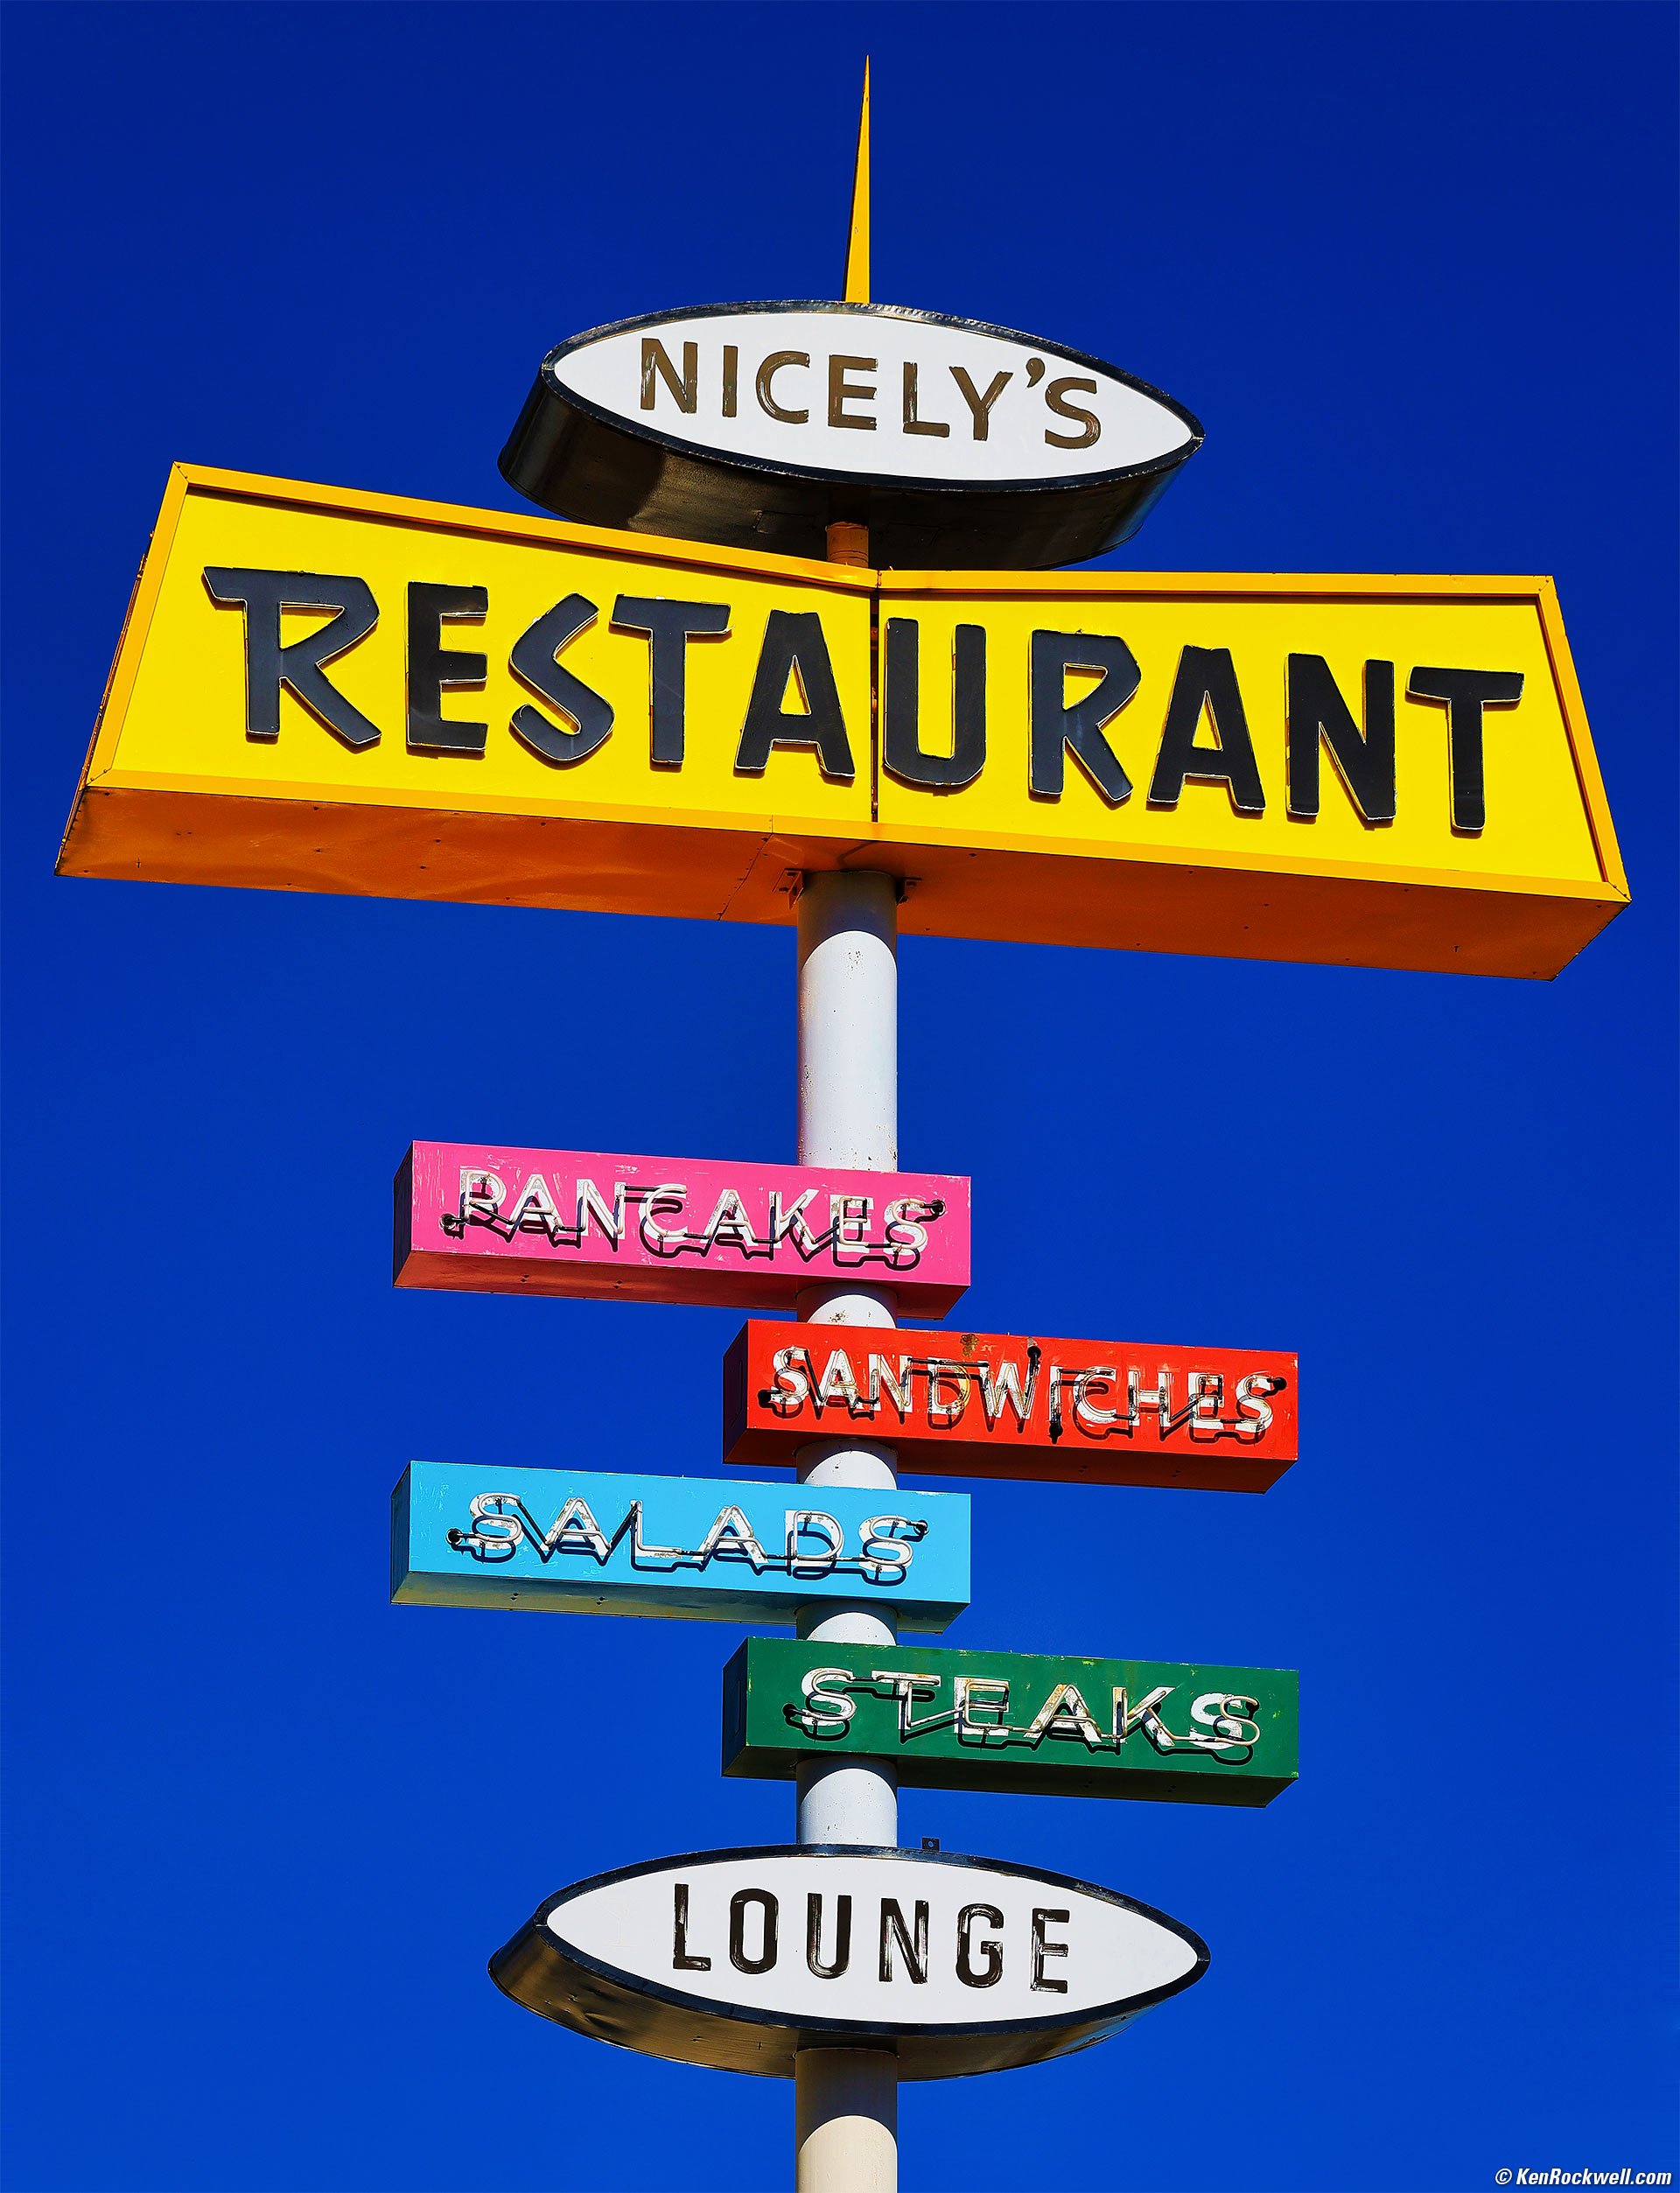
Nicely's Restaurant Sign, Lee Vining, California, 11:09 A.M. Canon EOS R6 II, RF 24-240mm IS USM at 105mm, f/10 at 1/400 at Auto ISO 100, -0.7 stops exposure compensation (LV 15¼), Skylum Luminar Neo. More tech details. bigger or fit-to-screen.
Neo made it easy to darken the sky even more and add just a little more to the image. It also made it trivial to remove some distractions from the side with Neo's Erase tool. Easy peasy!
We continued to head home. I dropped off Dave at his house at 5:50 PM, I left his house at 6PM and got to my house at 8:30 PM — ten straight hours of driving.
Whew! That's it; thanks for reading!
< < Back to top
© Ken Rockwell. All rights reserved. Tous droits réservés. Alle Rechte vorbehalten. Alla rättigheter förbehållna. Toate drepturile rezervate. Ken Rockwell® is a registered trademark.